(6)学習結果の保存(Keras)
Keras2でMNIST目次
Kerasプログラミングの全体図
- (6)学習結果の保存(Keras) ⇐ いまココ
以下をコピペするだけです。
#6 学習結果の保存(Keras)
### save model and weights
json_string = model.to_json()
open('apple_orange_model.json', 'w').write(json_string)
model.save_weights('apple_orange_weights.h5')
そのままです。学習モデルをjson形式で保存し、そのモデルに対応した学習結果のパラメータをh5形式で保存します。
次のpredict.pyで、新しい画像の予測(分類)を行う際に、このモデルとパラメータを読み込む予定です。
開発環境
Windows 8.1
Anaconda
Python 3.5
Tensorflow 1.4
Keras 2.0.9
Keras2.0のインストール方法はwindowsにkeras2.0をインストールをご覧下さい。
このページは、(5)結果の出力(Keras)の続きであり、今回は、結果の出力を行っていきます。
手順
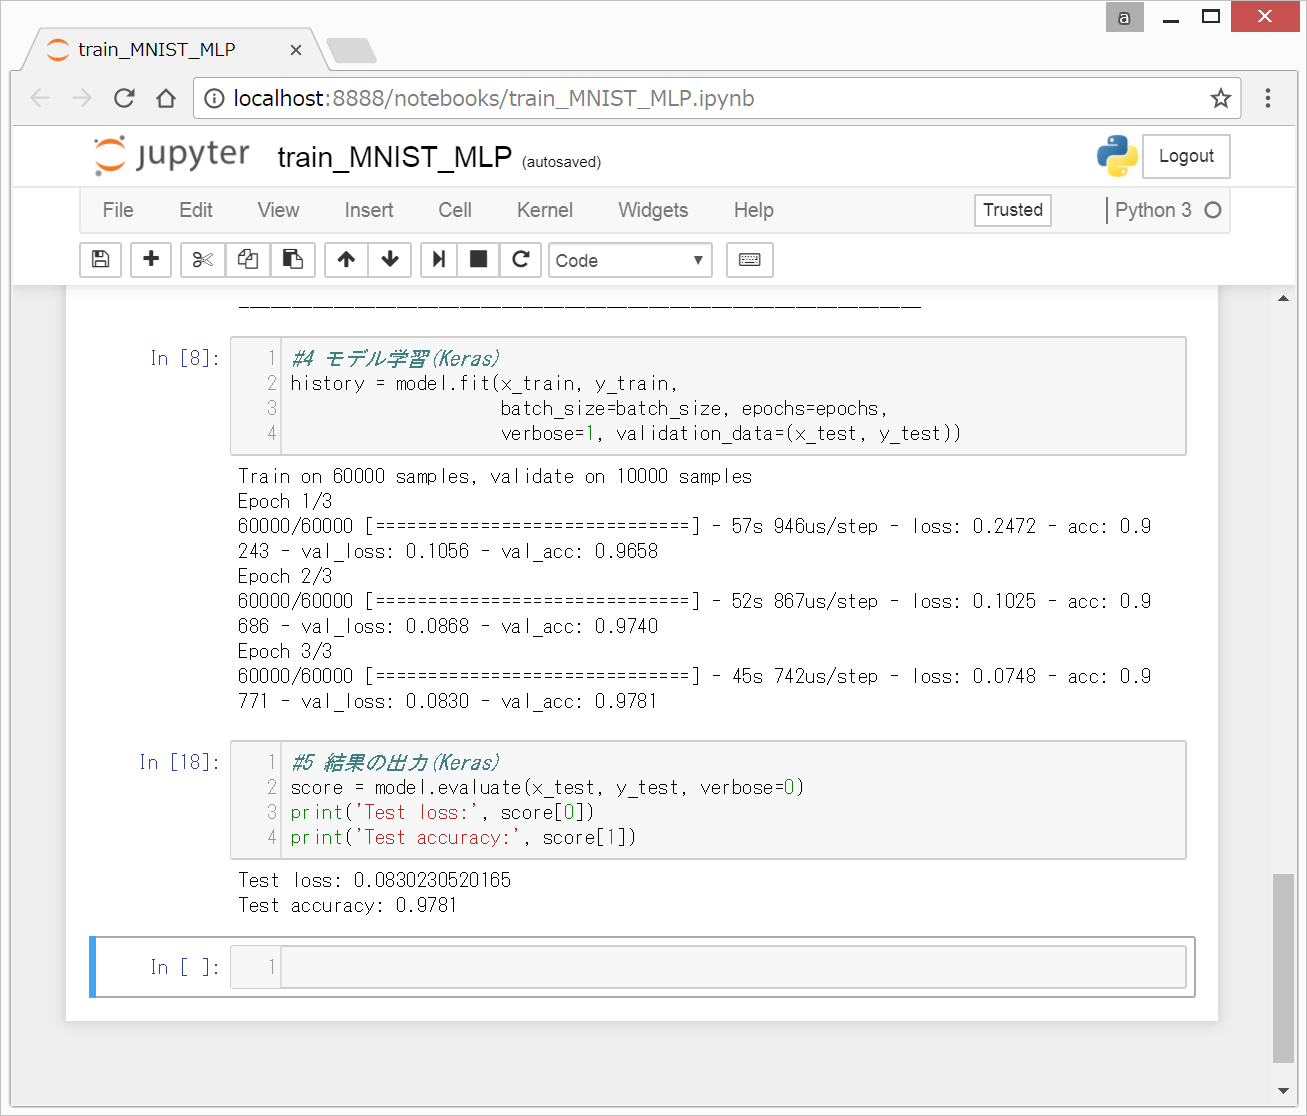
0. 前回終了時の画面
(5)結果の出力(Keras)終了時の、以下のような状態から始めます。
1. 学習結果の保存
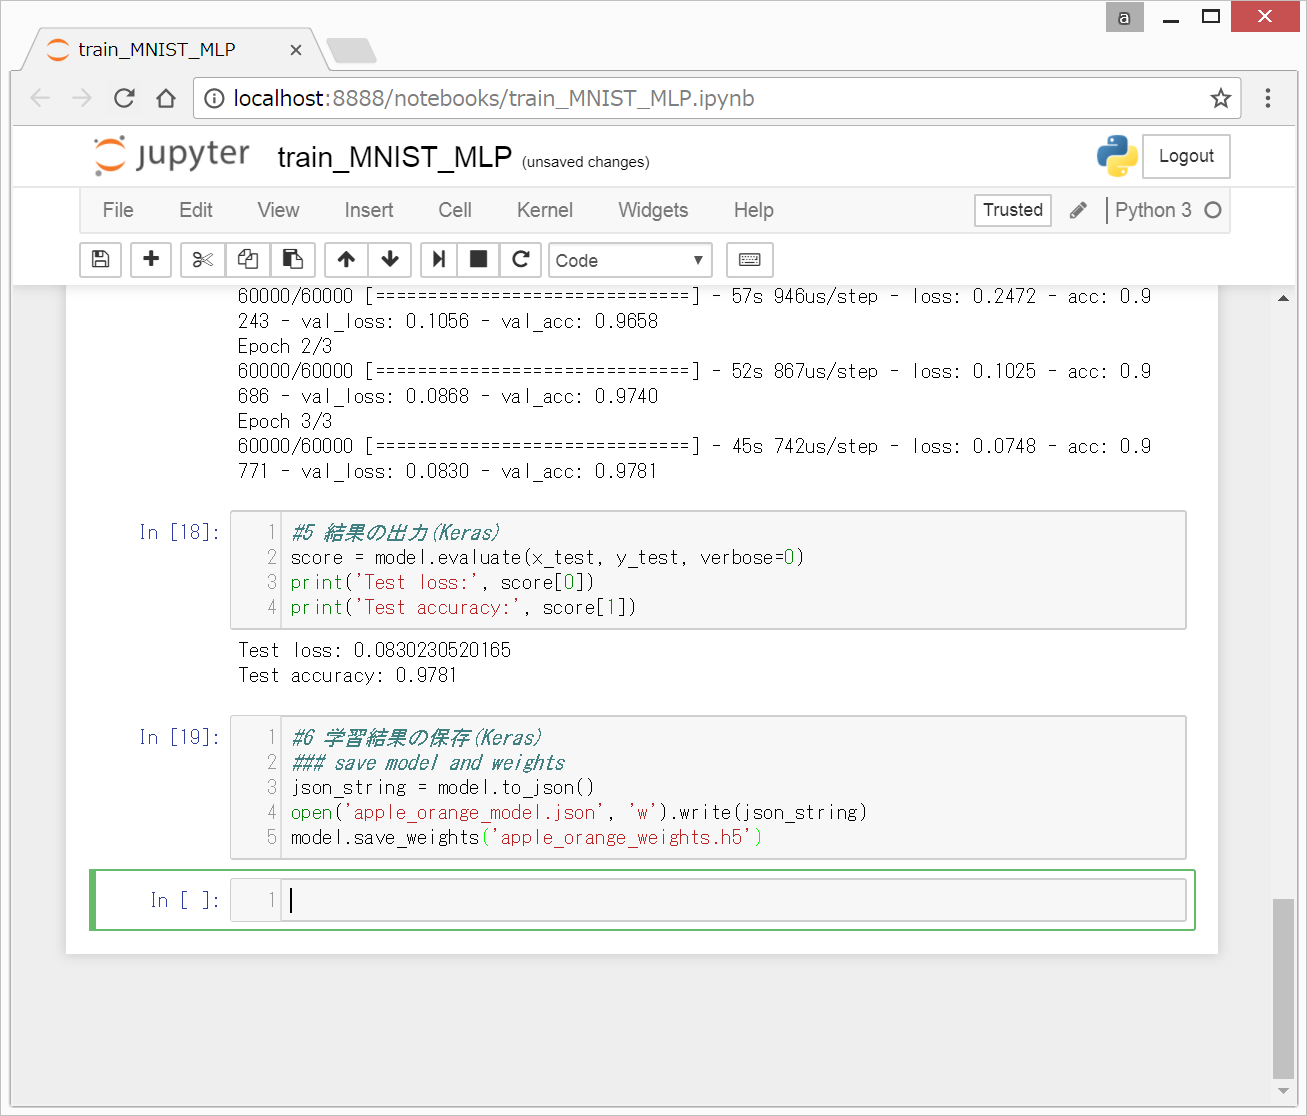
以下のコードを入力して、Shift + Enterを押します。
#6 学習結果の保存(Keras)
### save model and weights
json_string = model.to_json()
open('apple_orange_model.json', 'w').write(json_string)
model.save_weights('apple_orange_weights.h5')
以下のような画面になります。
Jupyter Notebook上では何も起こりませんが、
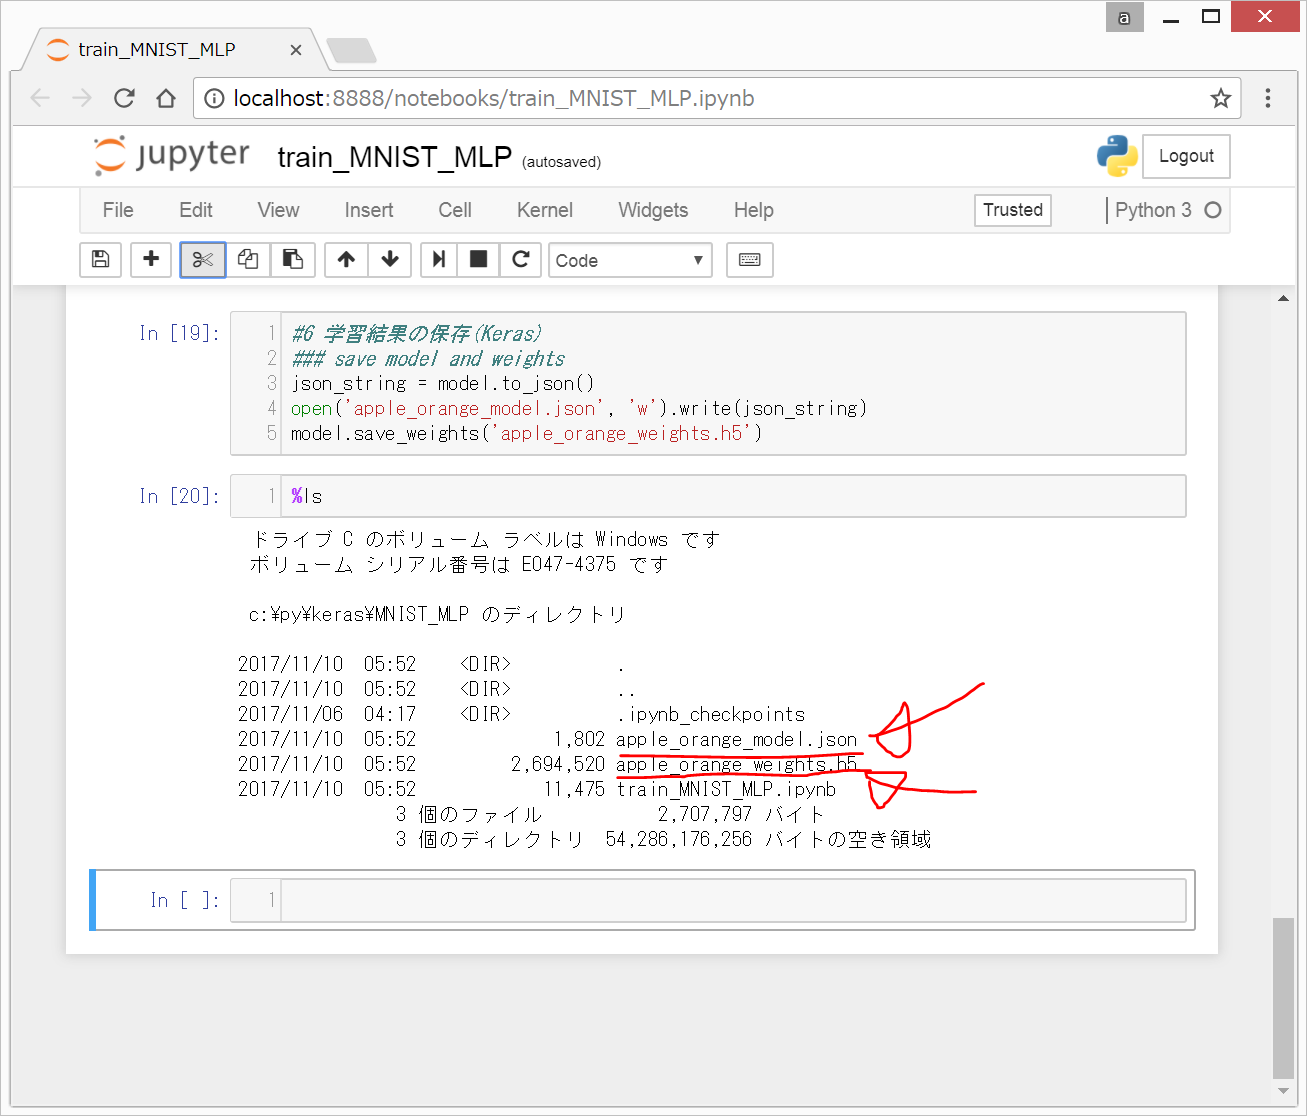
%ls
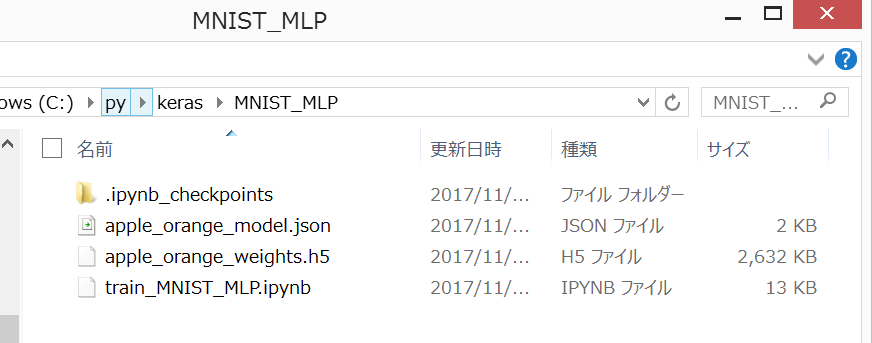
と入力して、Shift+Enterを押すと、以下のように表示されて、train_MNIST_MLP.ipynb(今、入力しているJupyter Notebookのファイル)と同じフォルダに、
"apple_orange_model.json" : モデルが記載されたjsonファイル
"apple_orange_weights.h5" : モデルのweight(学習結果)が記載されたバイナリデータ
の2つのファイルが作成されていることが分かります。
Kerasでの学習結果の出力の手順は上記でおしまいです。
初めての方は、次は、(7)推測(Keras)に進んでください。
参考文献
初めてKerasプログラミングをやるときの超おすすめ本。
<html>
<iframe style=“width:120px;height:240px;” marginwidth=“0” marginheight=“0” scrolling=“no” frameborder=“0” src=“rcm-fe.amazon-adsystem.com/e/cm?lt1=_blank&bc1=000000&IS2=1&bg1=FFFFFF&fc1=000000&lc1=0000FF&t=twosquirrel-22&o=9&p=8&l=as4&m=amazon&f=ifr&ref=as_ss_li_til&asins=4873117585&linkId=13a7db2c19cc5f40d6ab48906de8abd1”></iframe>
<iframe style=“width:120px;height:240px;” marginwidth=“0” marginheight=“0” scrolling=“no” frameborder=“0” src=“rcm-fe.amazon-adsystem.com/e/cm?lt1=_blank&bc1=000000&IS2=1&bg1=FFFFFF&fc1=000000&lc1=0000FF&t=twosquirrel-22&o=9&p=8&l=as4&m=amazon&f=ifr&ref=as_ss_li_til&asins=4839962510&linkId=d722909965b5eab4196d370757843f6f”></iframe>
</html>


