文書の過去の版を表示しています。
目次
09.emailとpasswordでパスワード制限
CodeSandbox上で、Vue.jsとFirebaseを用いて、EmailとPasswordによるパスワード制限機能のあるホームページを作りたいと思います。
方針をたてる
今回作成するGoogle認証アプリは、
- トップページに、「Emailとパスワードでログイン」フォームを表示
- Emailとと初期パスワードは、あらかじめ、管理者がFirebase上に登録しておく。
- ログインしたら、ログイン成功画面に移動
- ログイン後の画面に、ログアウトボタンを表示
となります。
- emailとパスワードは『Firebase』という場所に保存
するものとします。
今回は、https://qiita.com/sin_tanaka/items/ea149a33bd9e4b388241と、https://www.tohuandkonsome.site/entry/2018/11/19/182438#Eメールとパスワードでユーザー管理する
のソースコードを利用させていただこうと思います。
ソースコード
https://codesandbox.io/s/6xzm6wr2k3
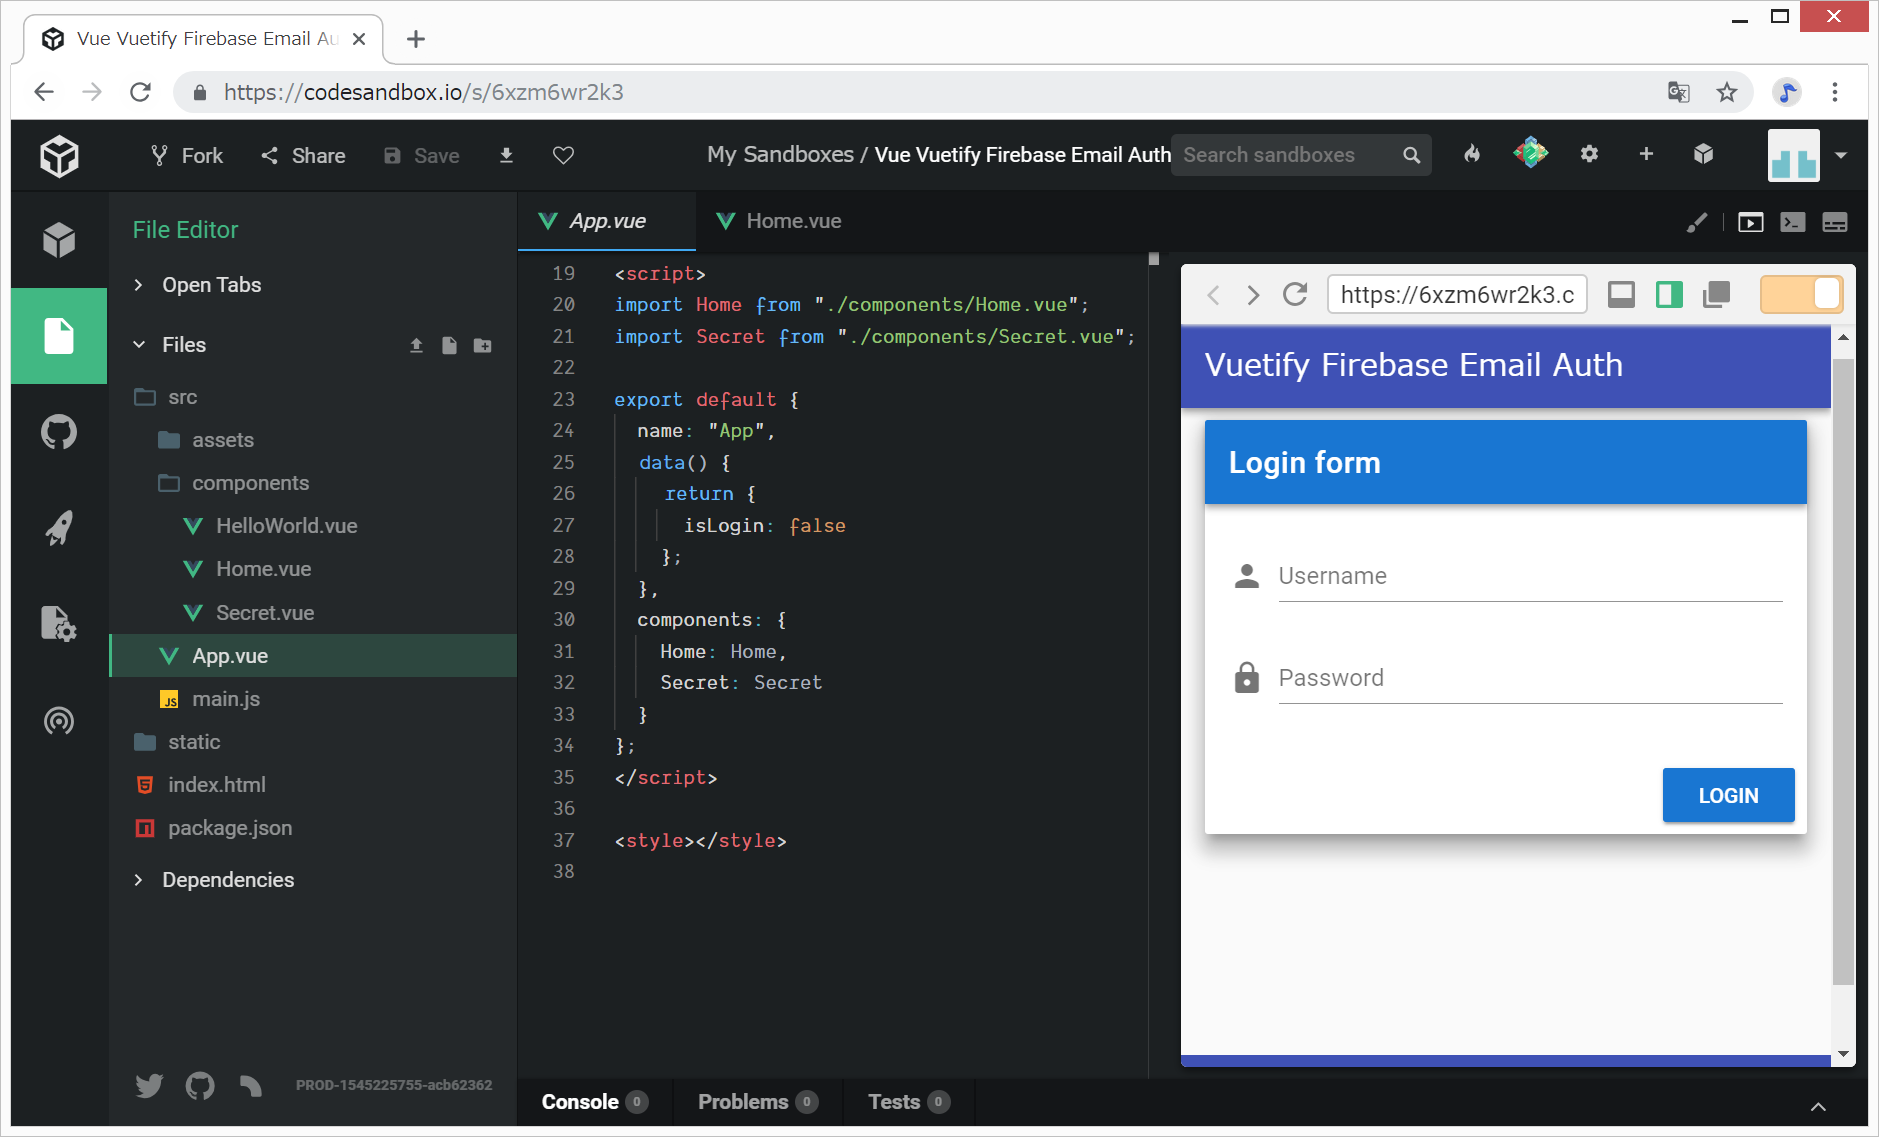
作ったもの
0.用意するもの(開発環境)
パソコン
Chrome(くろーむ、WEBブラウザの一つ)
GitHubアカウント作成済み(無料)
Googleアカウント作成済み(無料)
パソコンは、Windowsパソコンでも、Macでも、かまいませんが、私の場合はWindows 8.1 Proとなります。
今回利用するもの
CodeSandbox
Firebase
Vue 2.5.2
Vuetify
1.Firebaseで新規プロジェクト(新しいサーバ)を作成
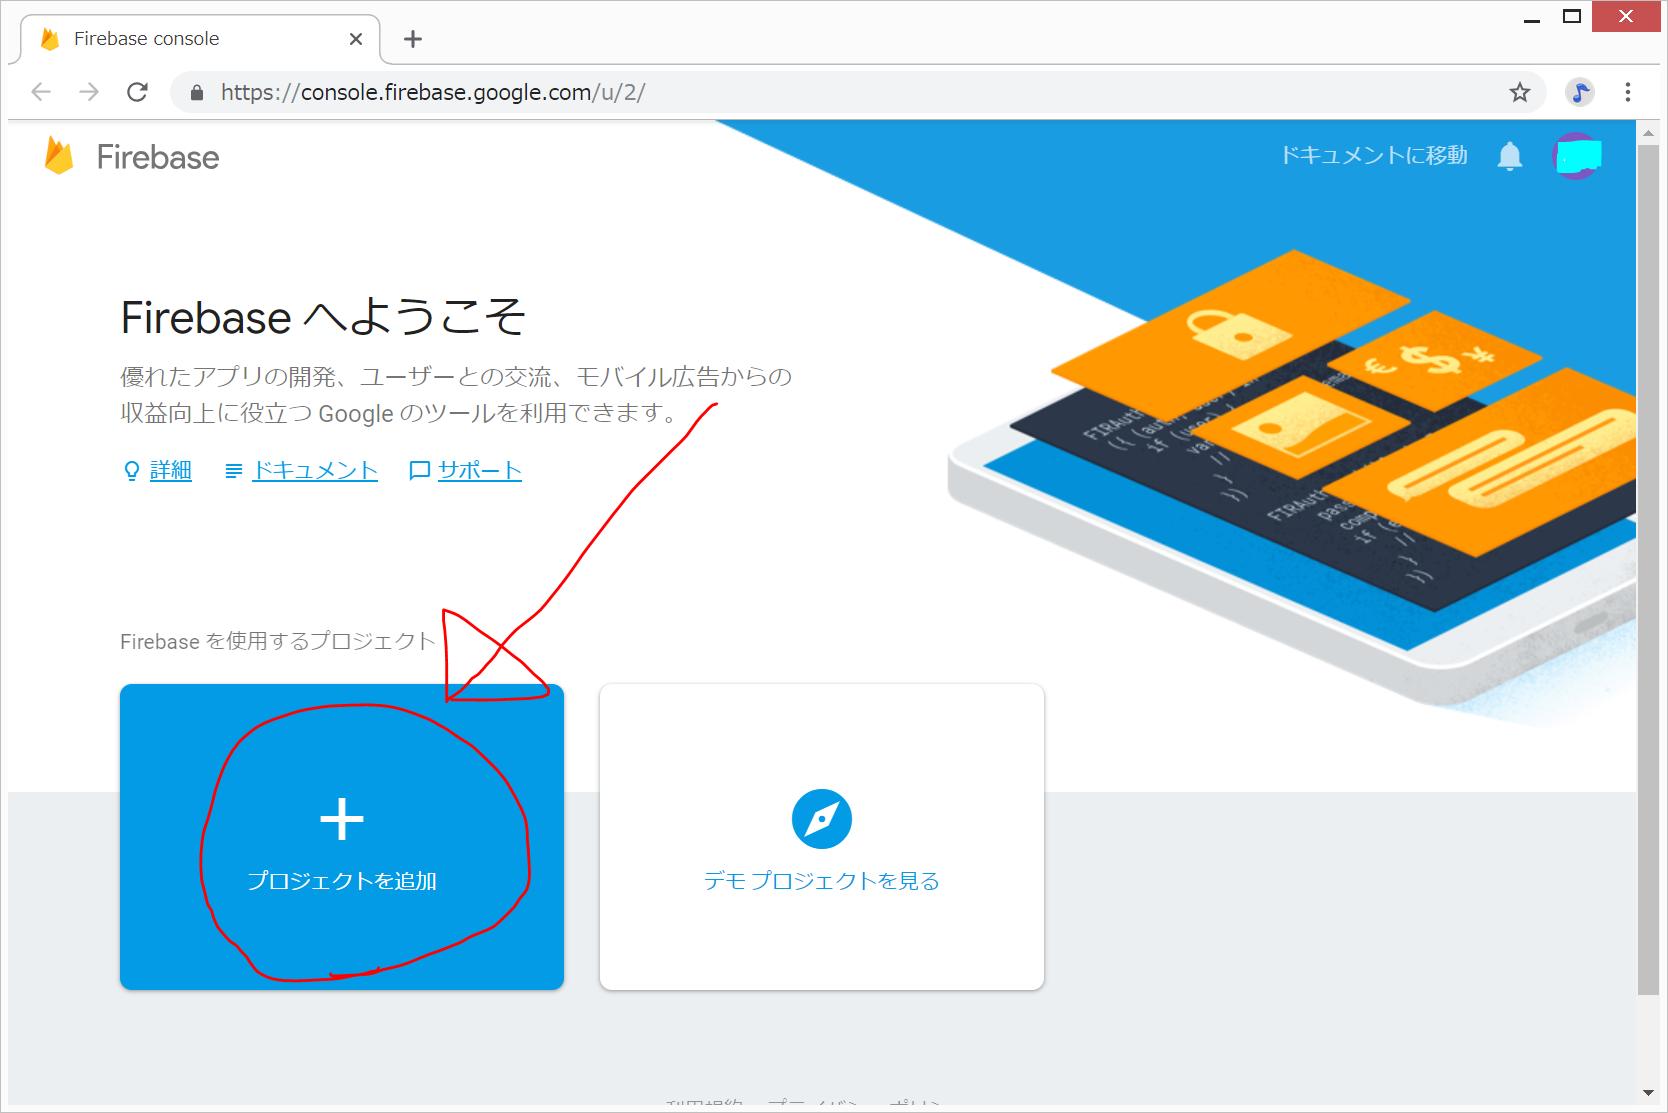
- https://console.firebase.google.com にGoogleアカウントでログインし、新規プロジェクト作成
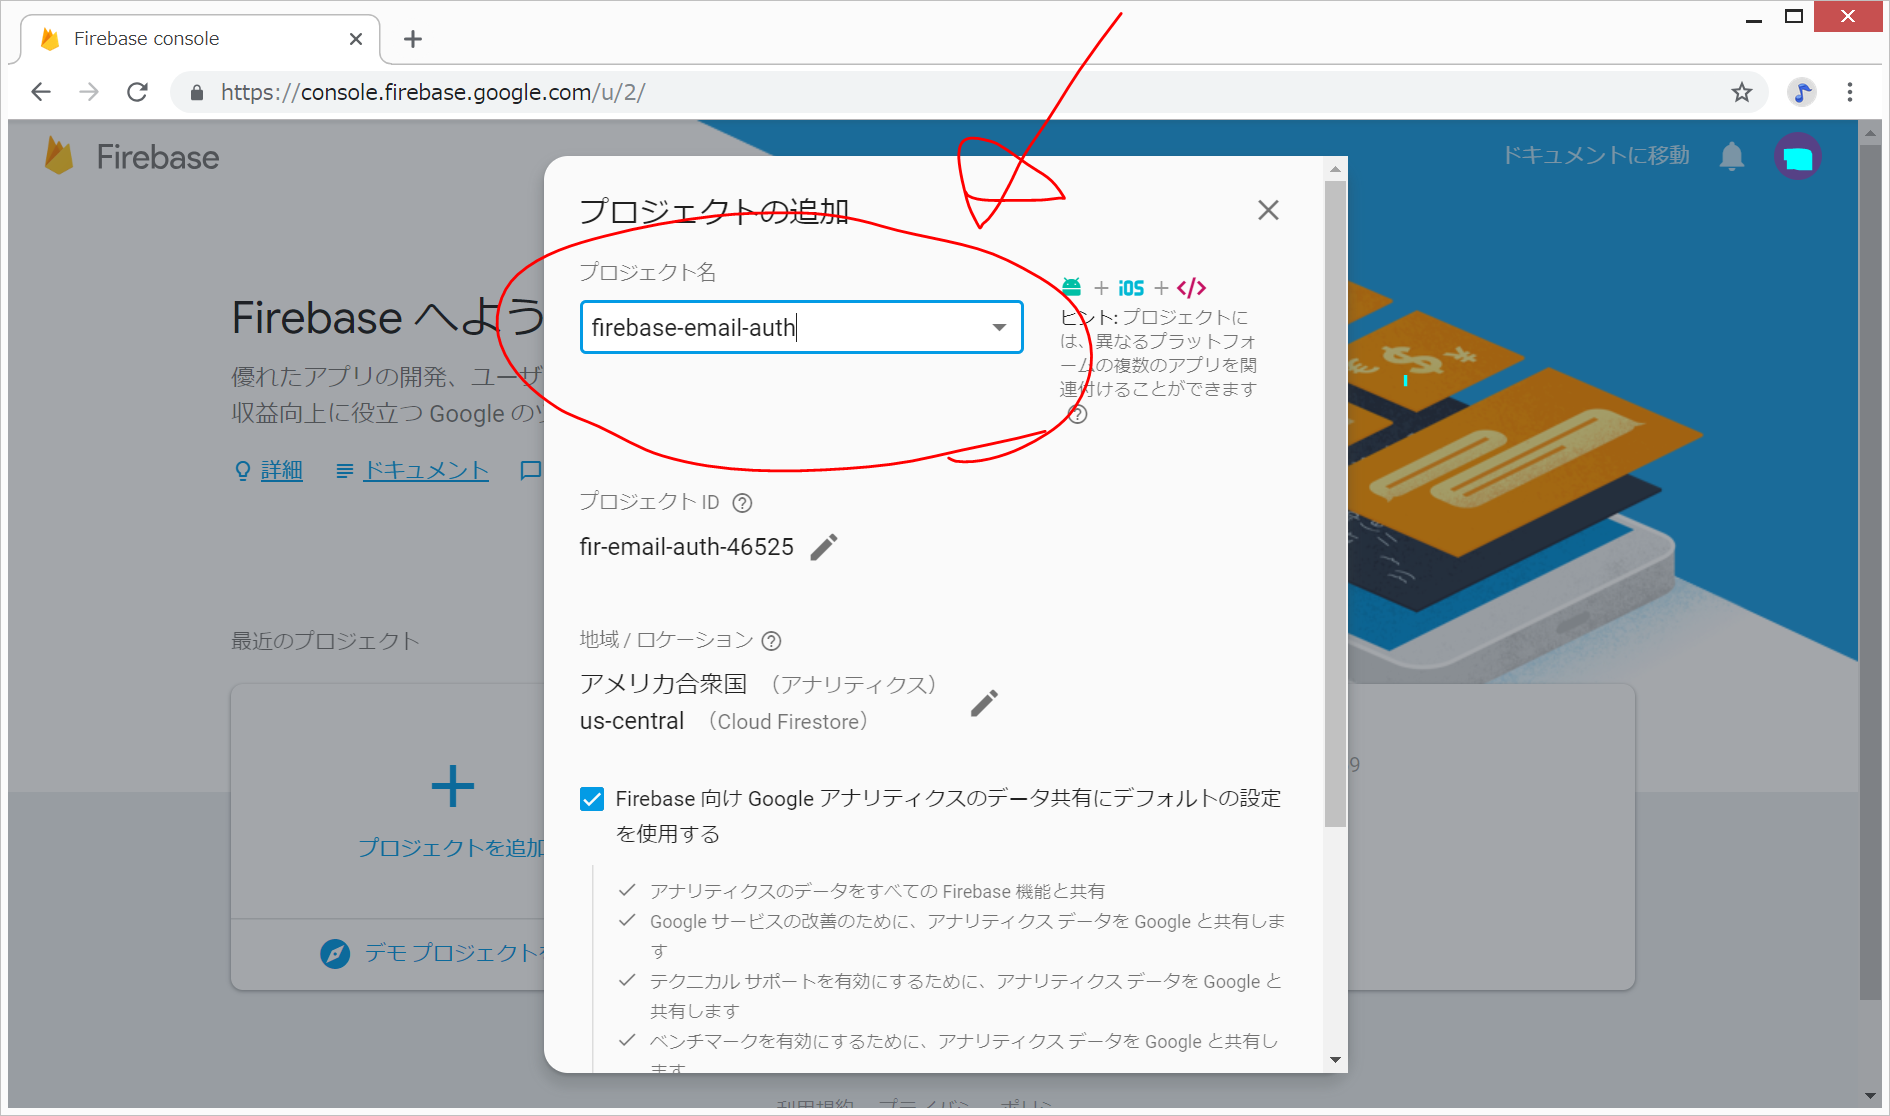
- 今回は、「firebase-email-auth」という名前で新規プロジェクトを作成しました。
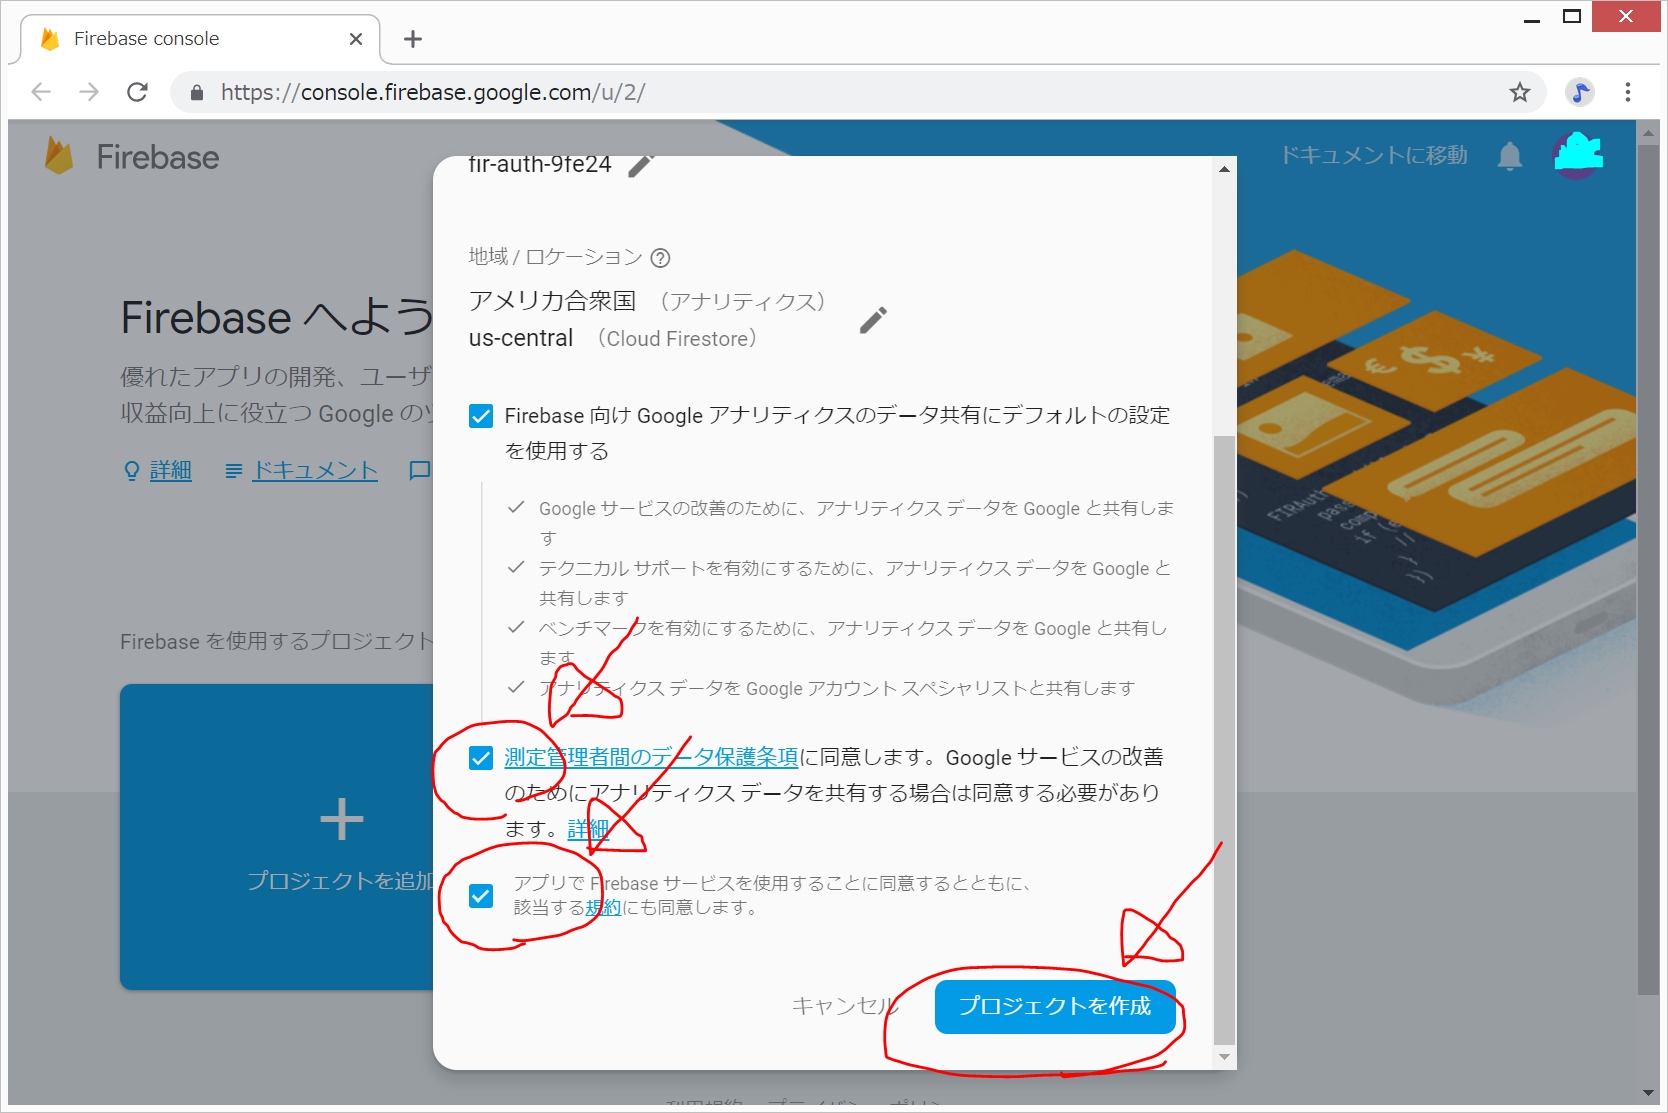
- 測定管理者間のデータ保護条項と規約の左側のチェックボックスをONにして、右下の「プロジェクトを作成」をクリック。
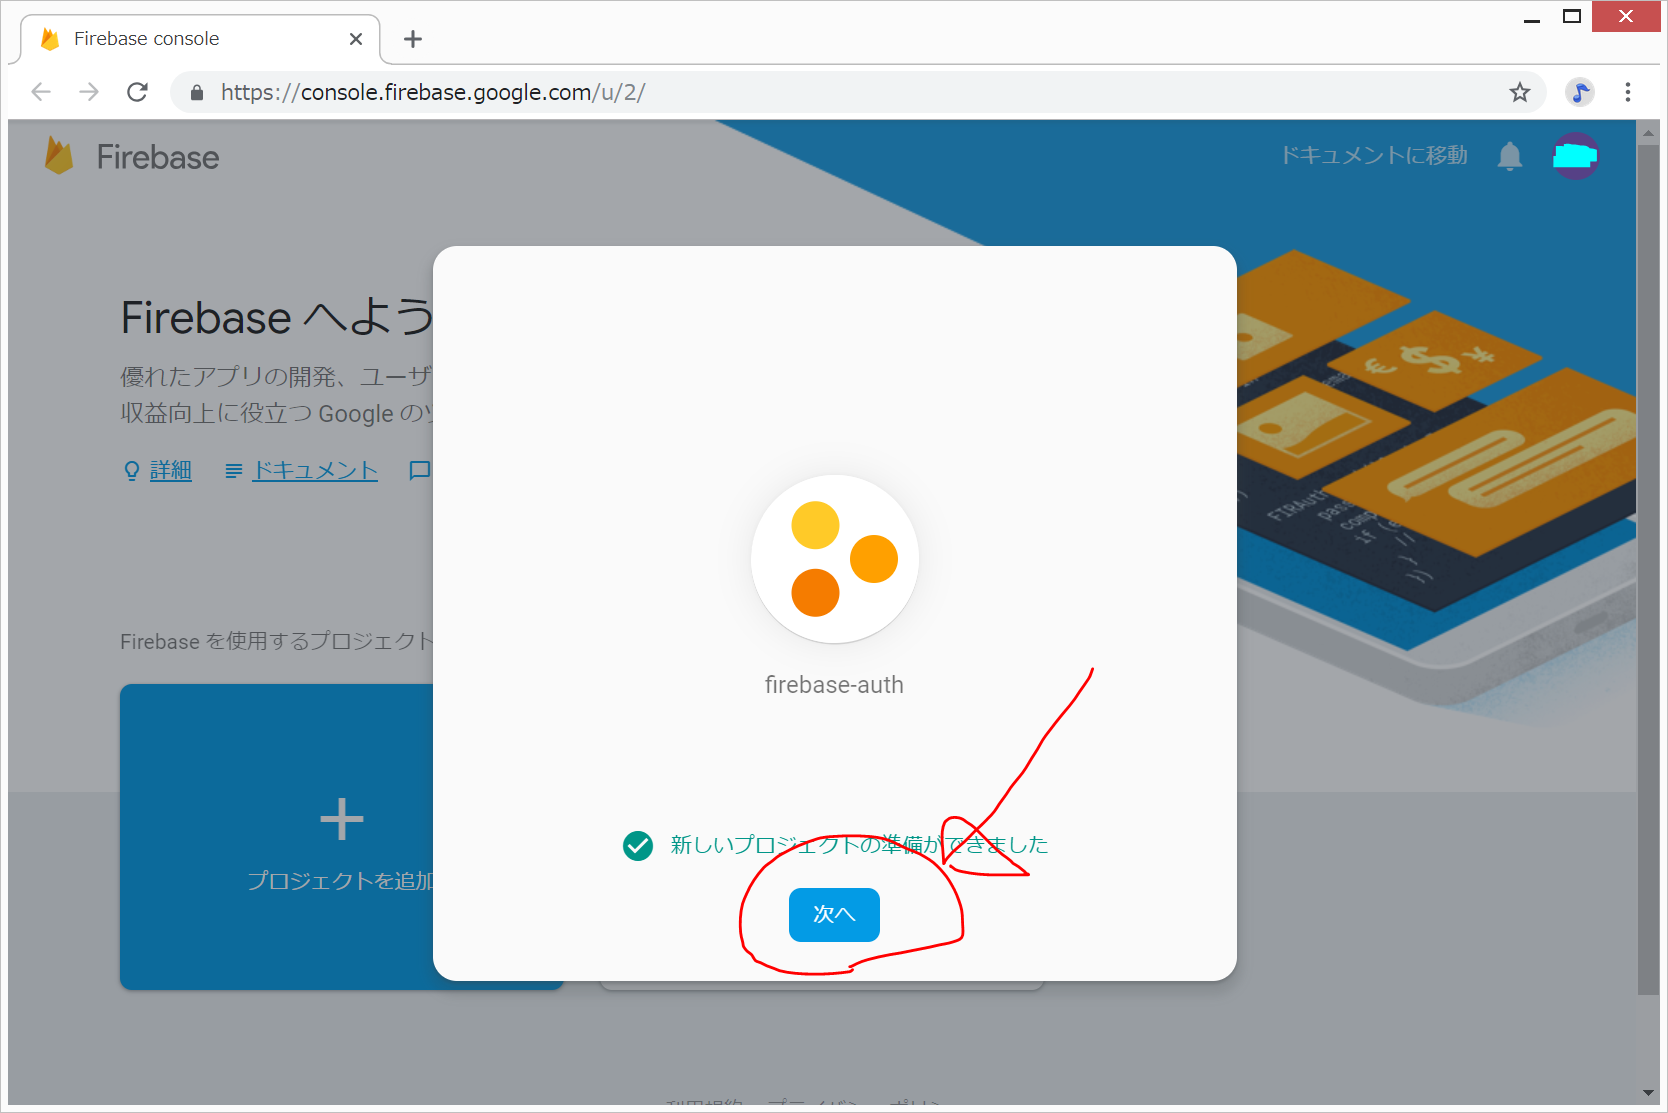
- 少し待つと、「新しいプロジェクトの準備ができました」と表示されるので、次へ をクリック。
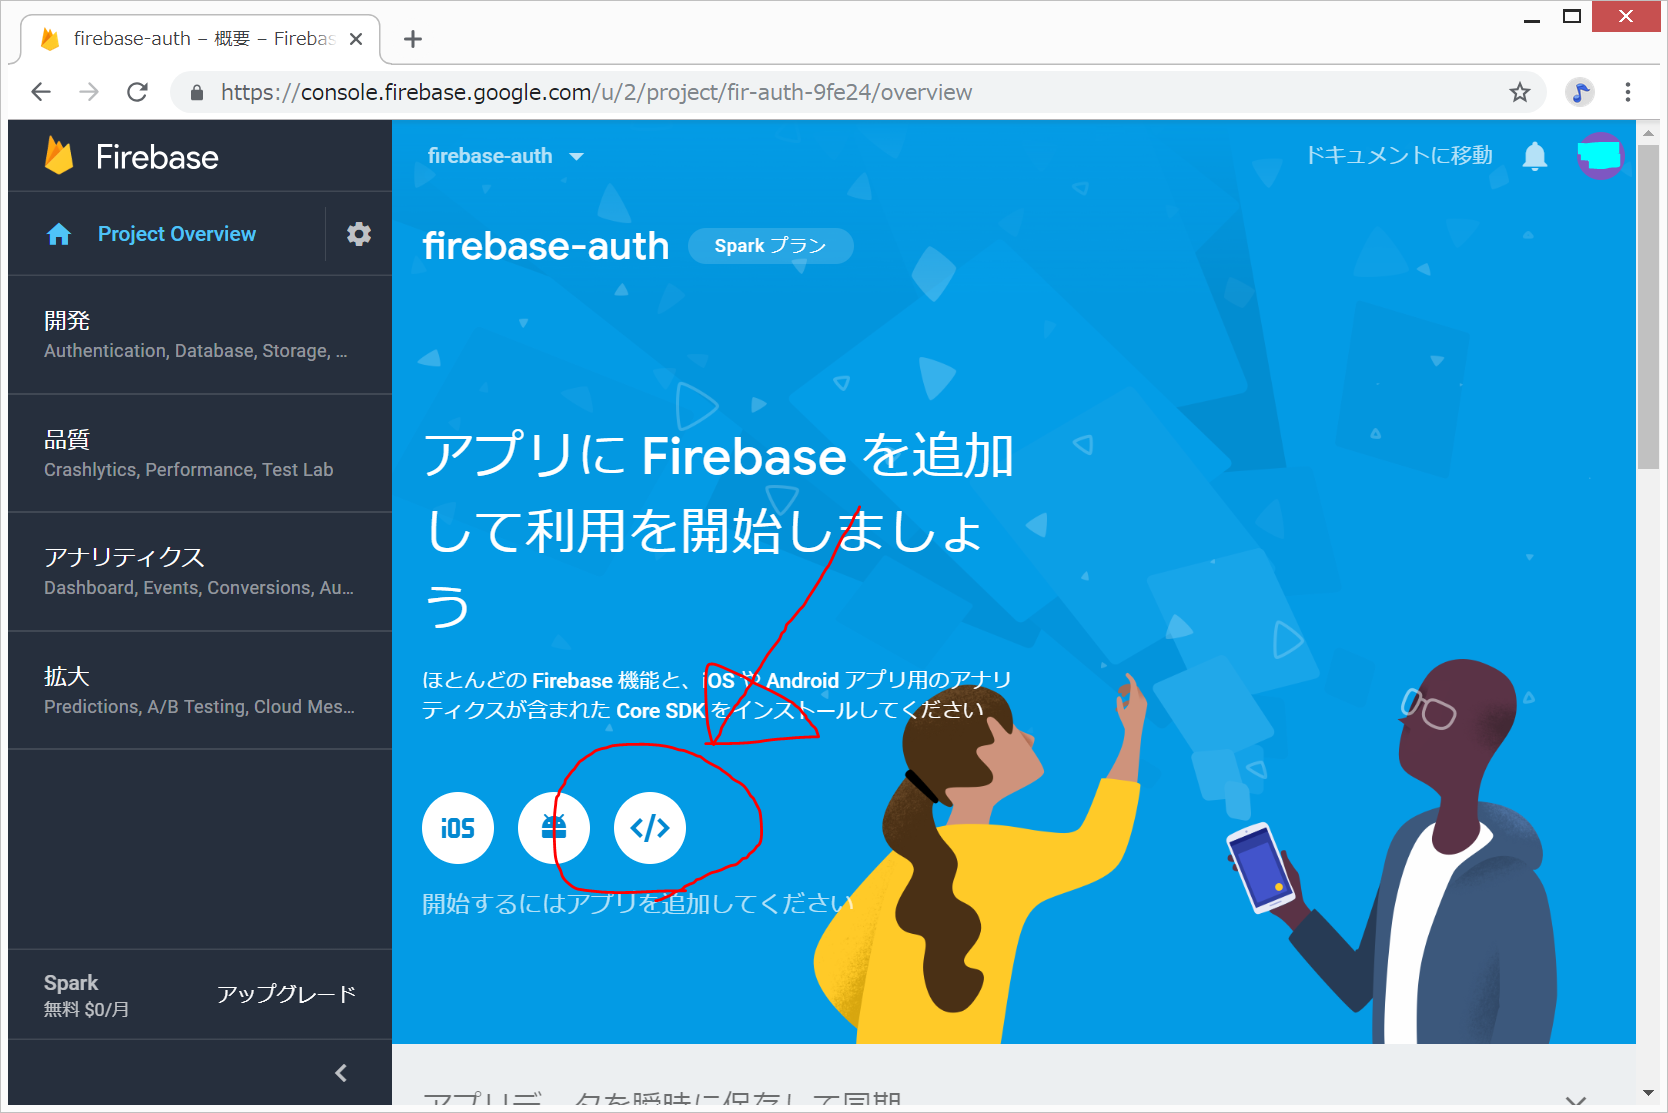
- 以下のようなプロジェクトトップ画面になるので、下図のように、「</>」をクリック。
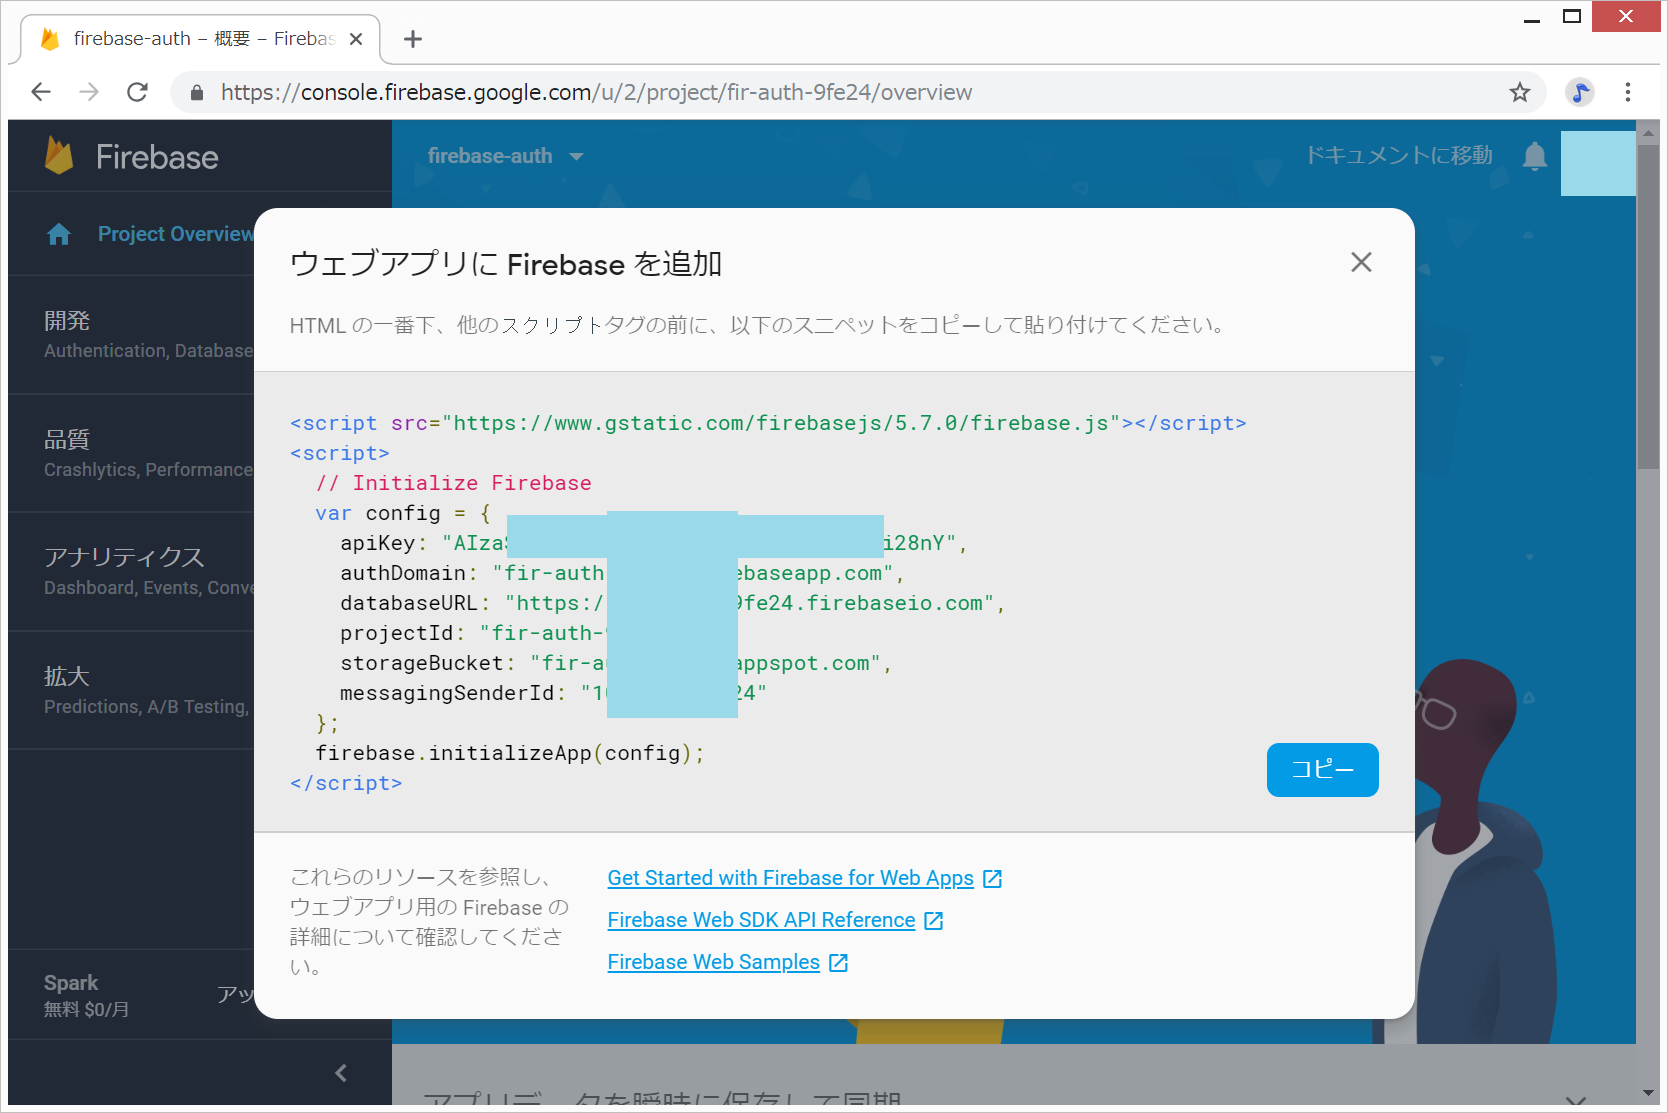
- 「ウェブアプリにFirebaseを追加」の画面が出てくるので、グレーで表示された部分の中身をメモ帳などにコピーしておきます。これは、後で、CodeSandboxで、ペーストします。
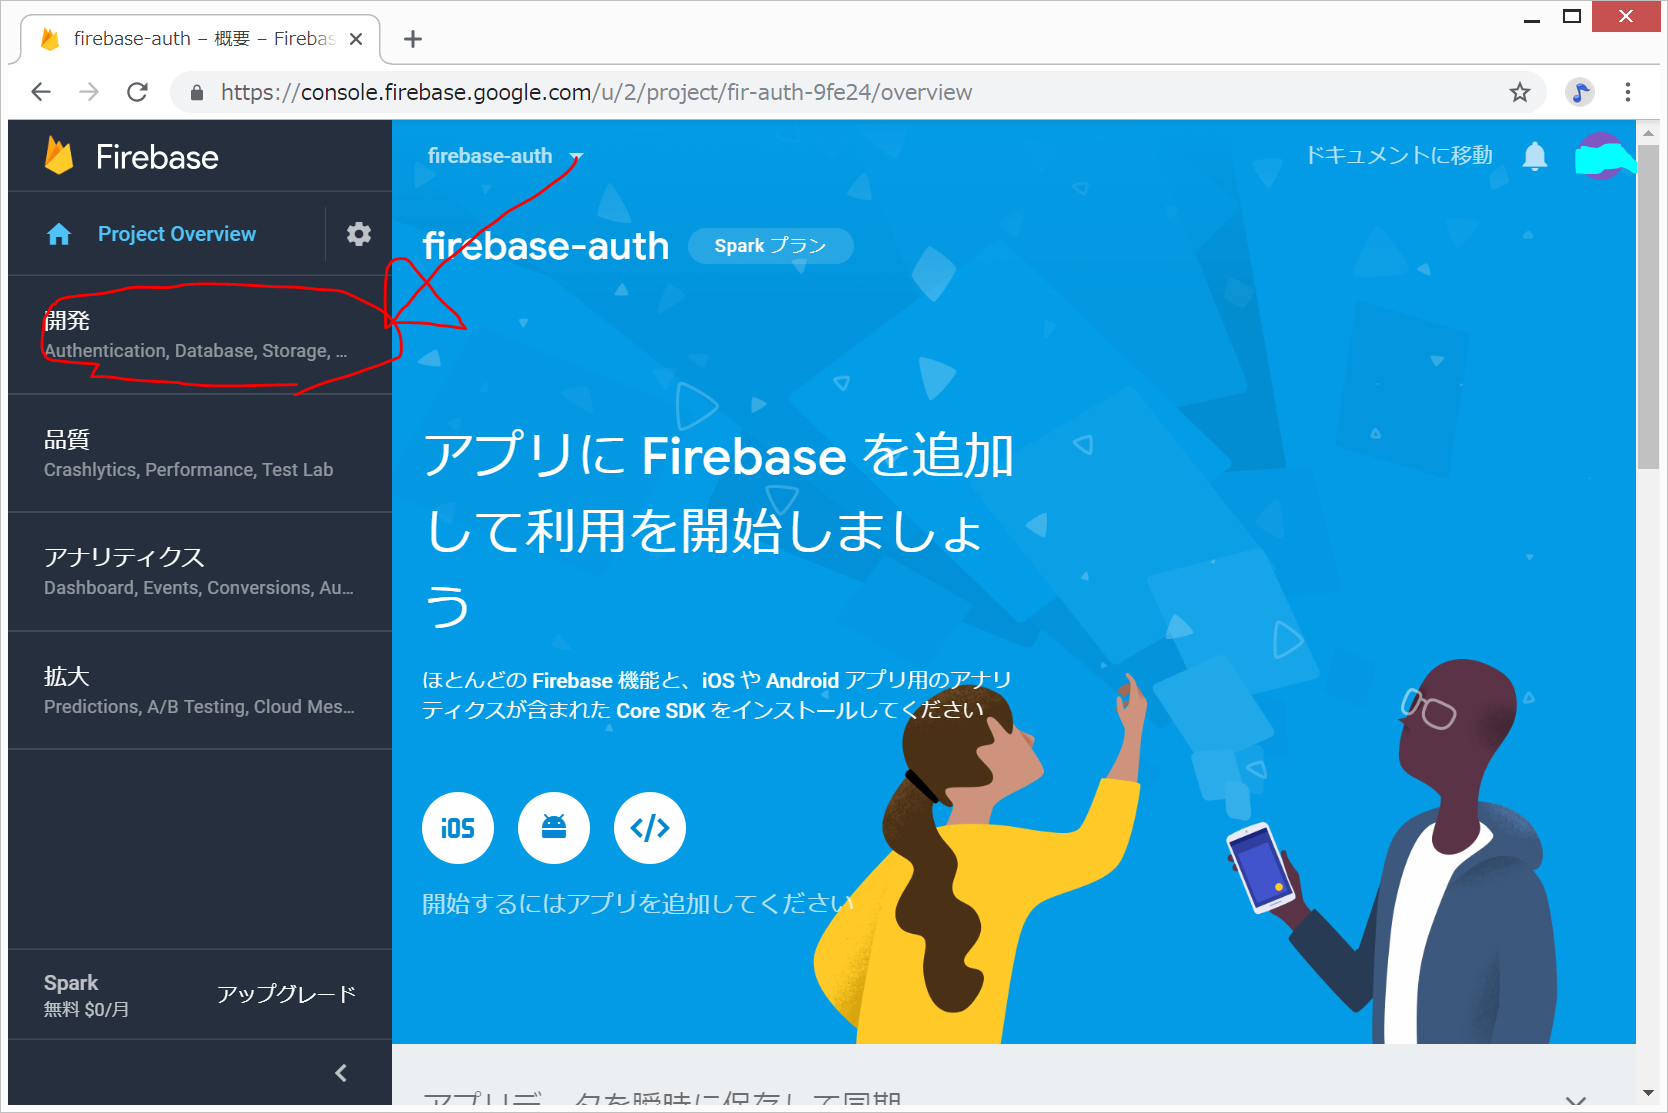
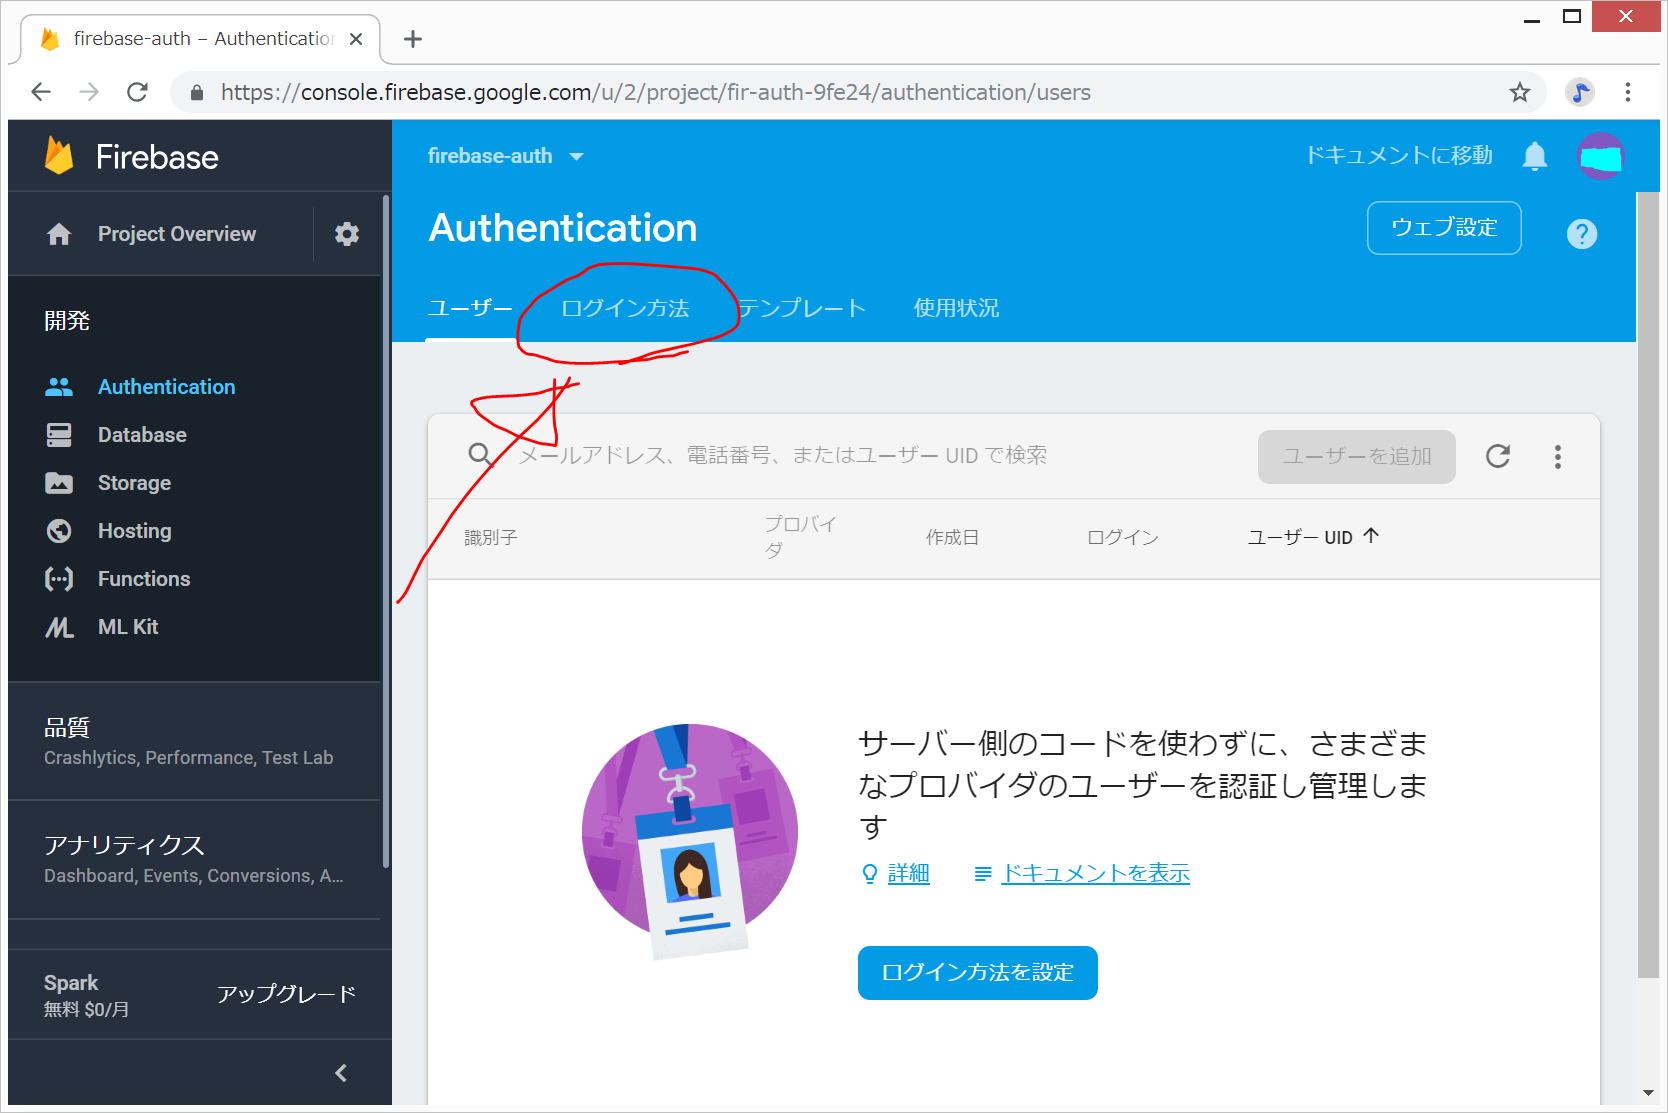
- プロジェクトトップ画面で、画面左側の列の「開発」をクリック
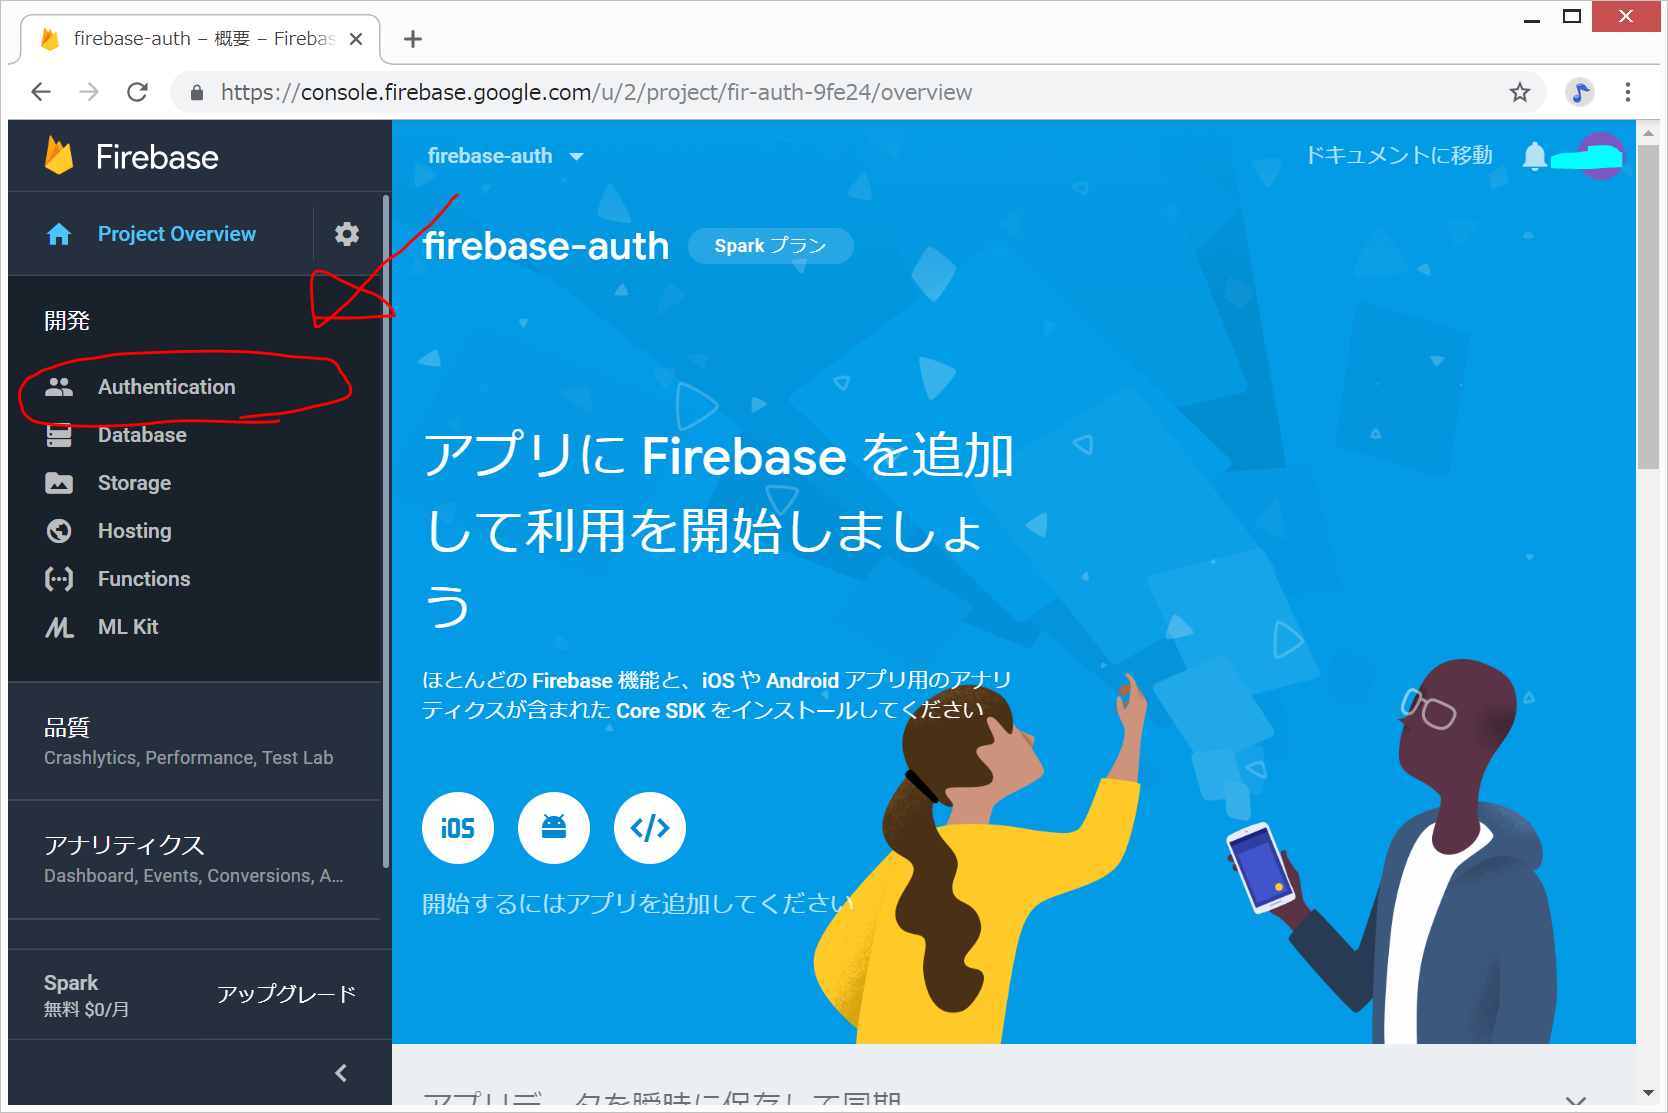
- Authentication をクリック
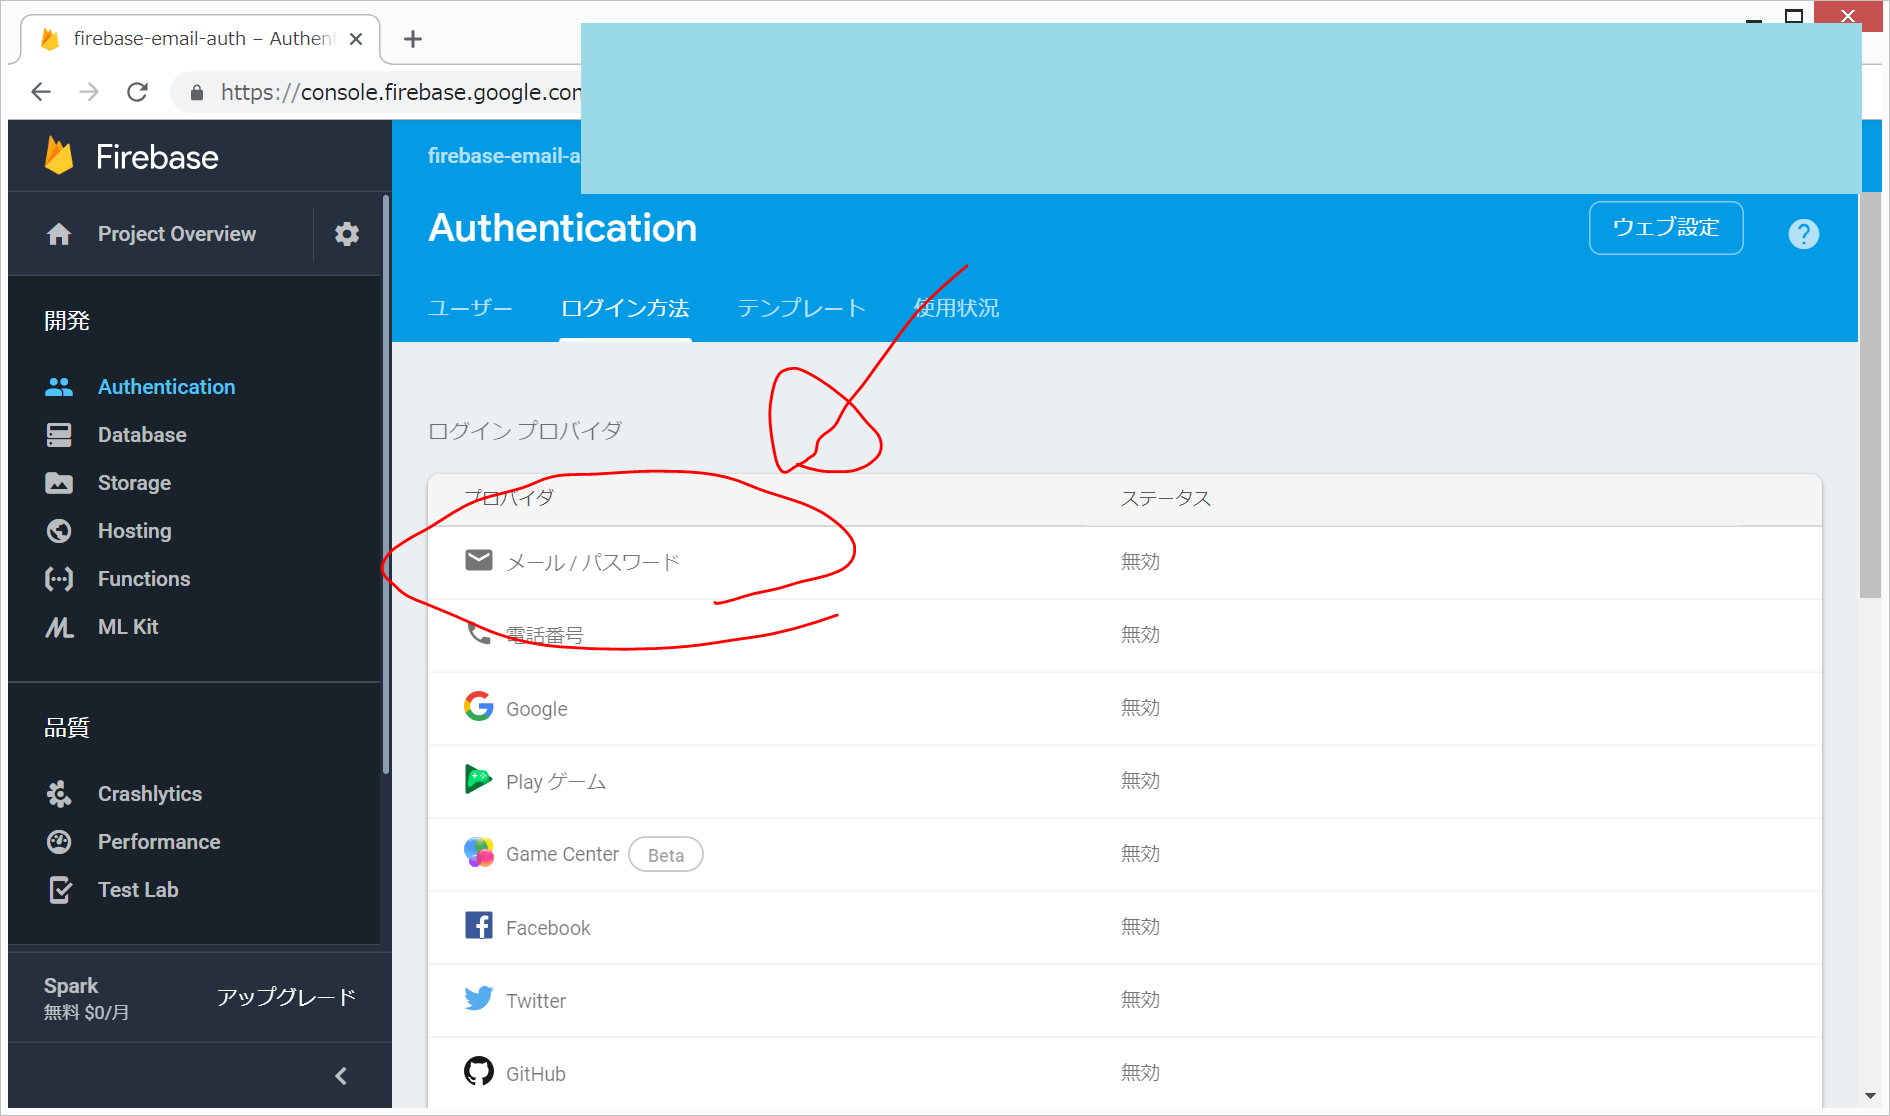
- ログイン方法 をクリック
- メール/パスワード をクリック
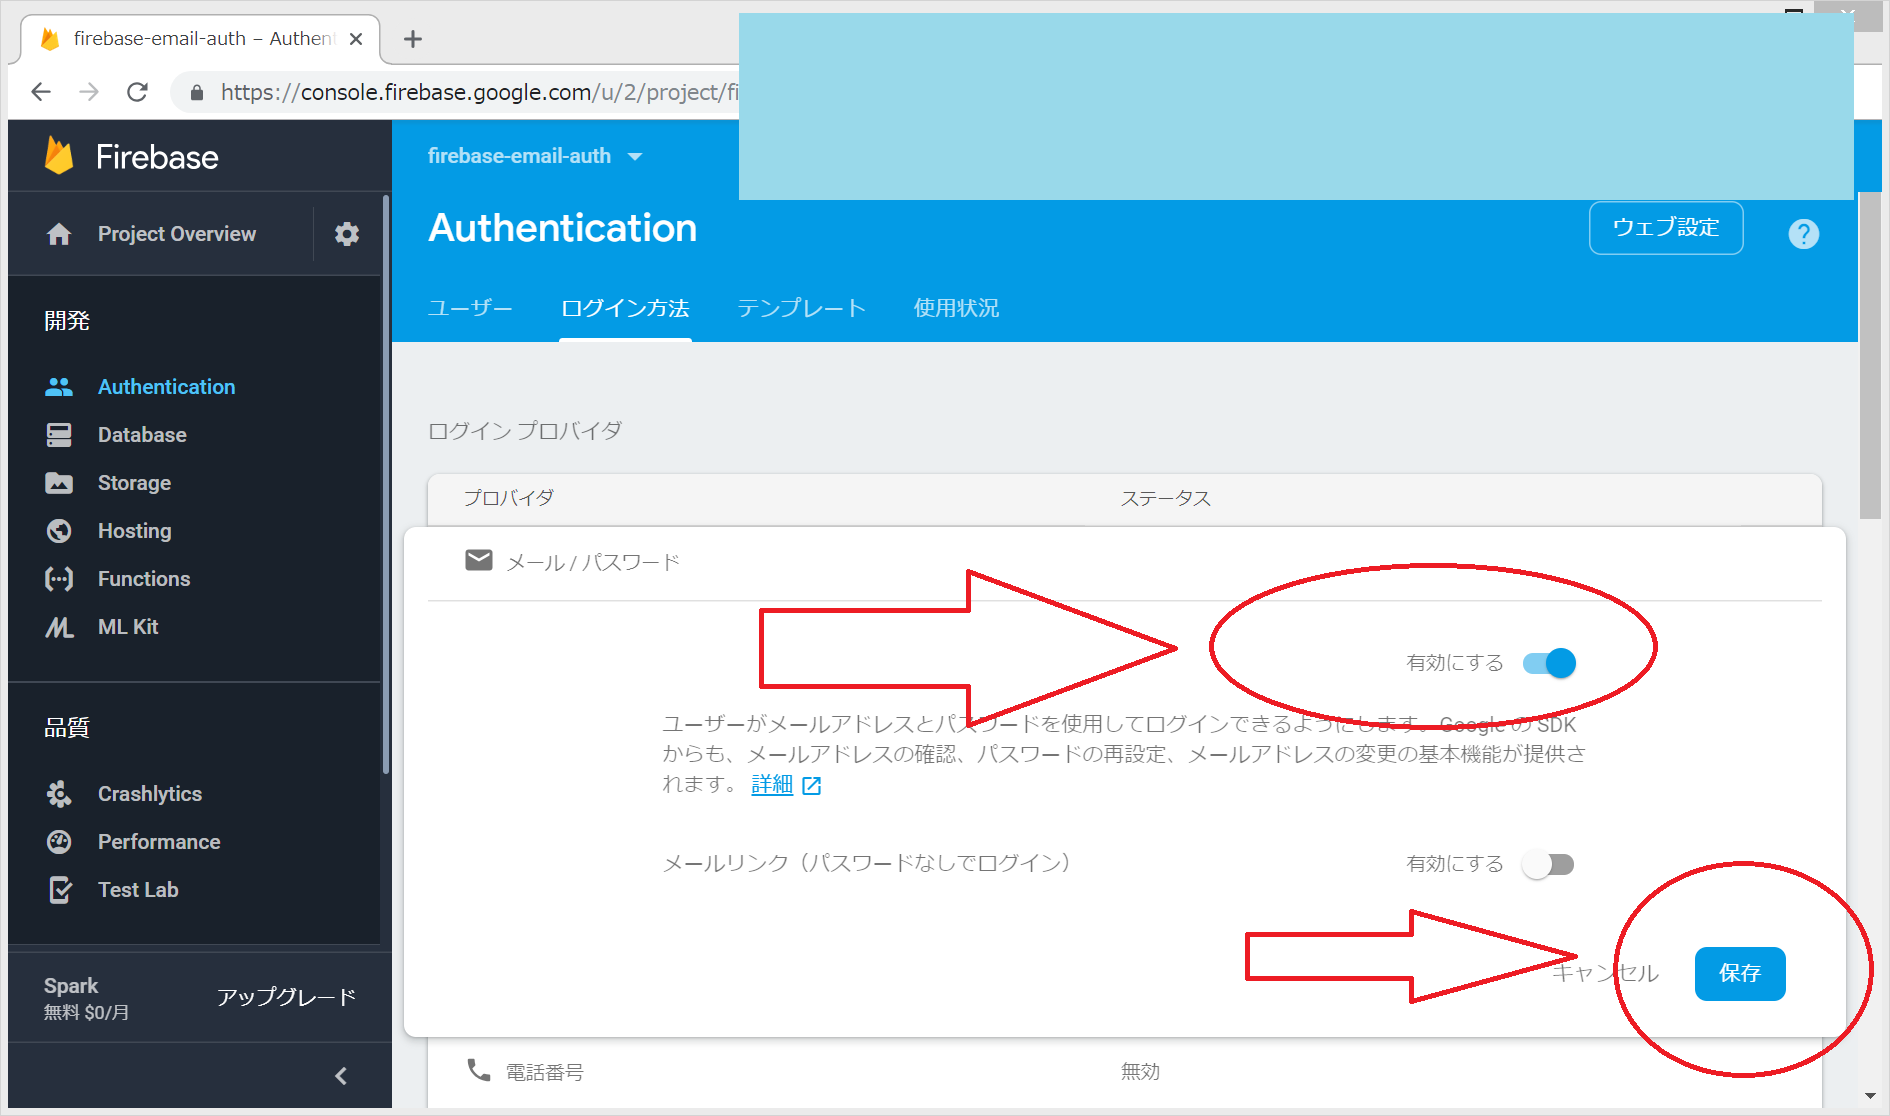
- 「有効にする」をON(青色)にして、保存 をクリック
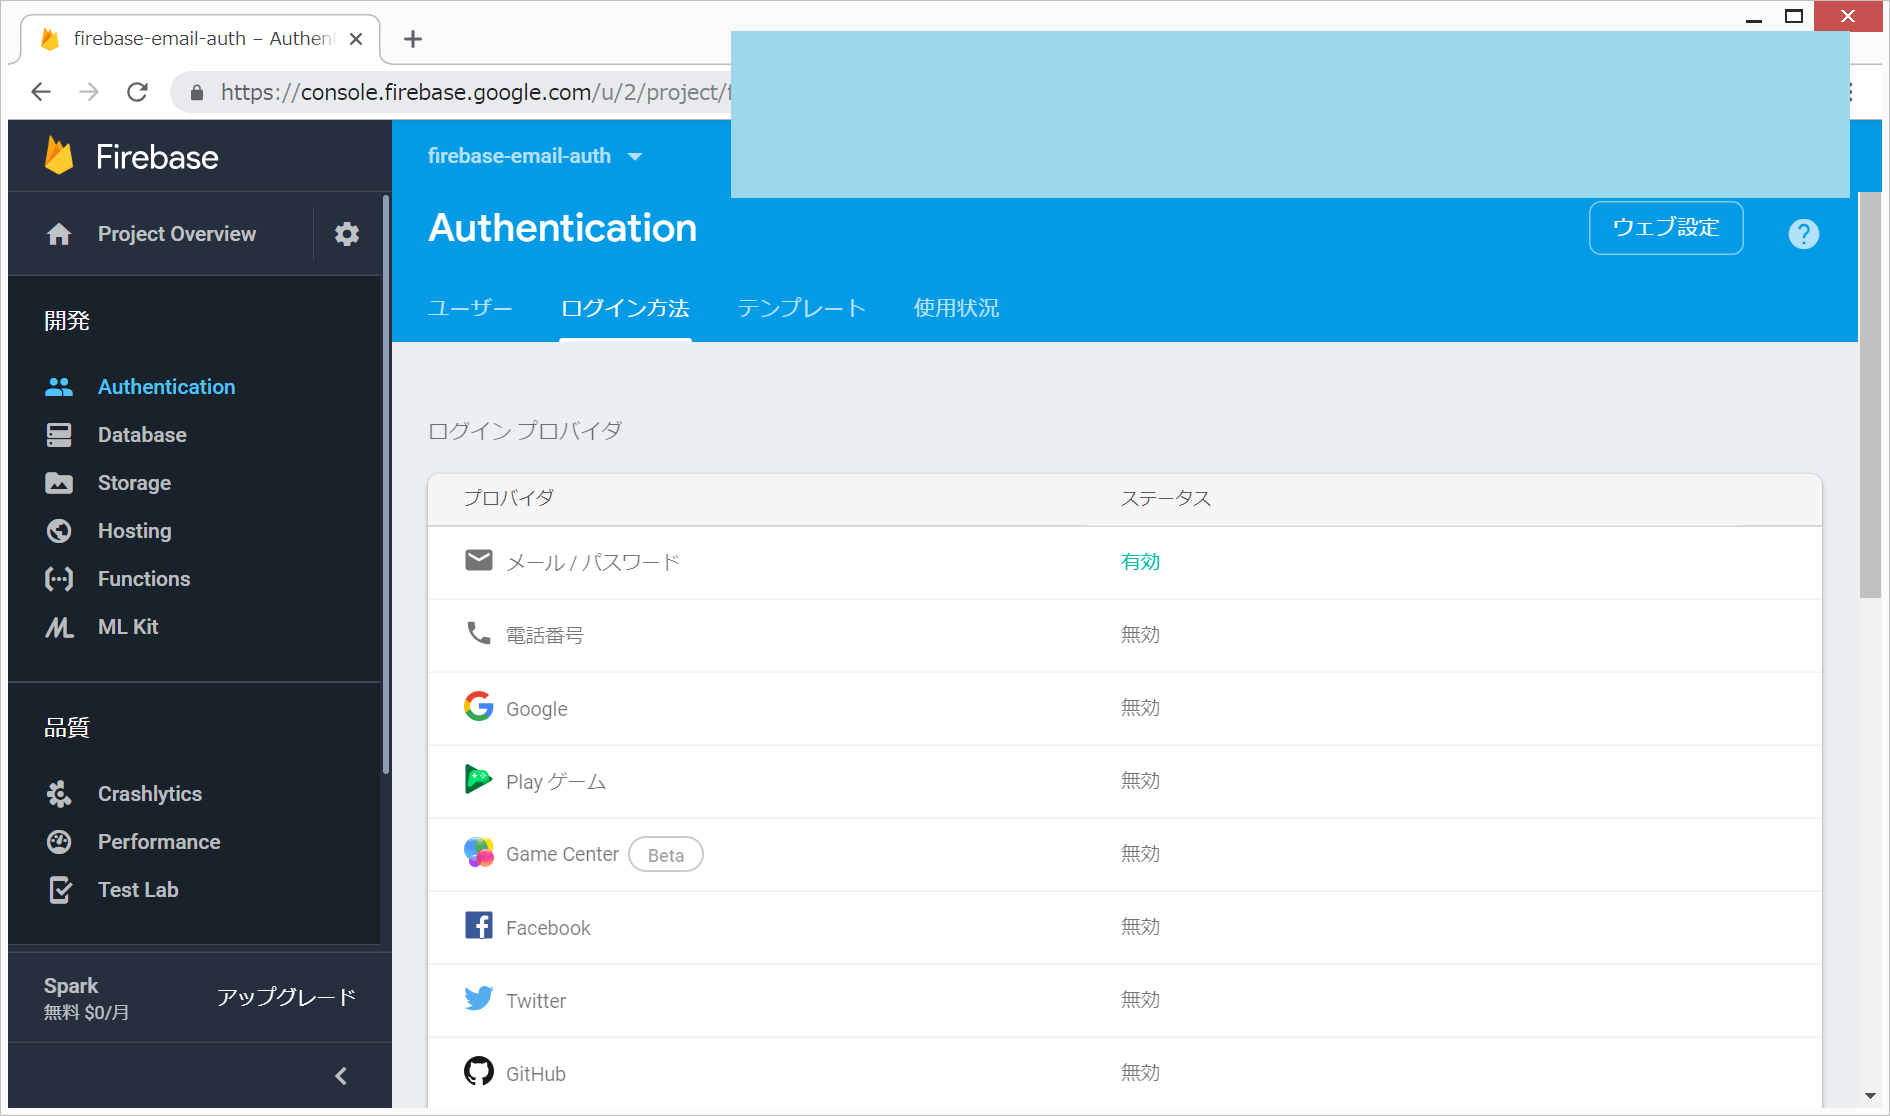
- 以下のような状態になっています。
2.Firebaseにログイン用メールアドレスとパスワードを入力
今回は、
email: user@example.com
パスワード: 111111
の人にログインできるようにしたいと思います。
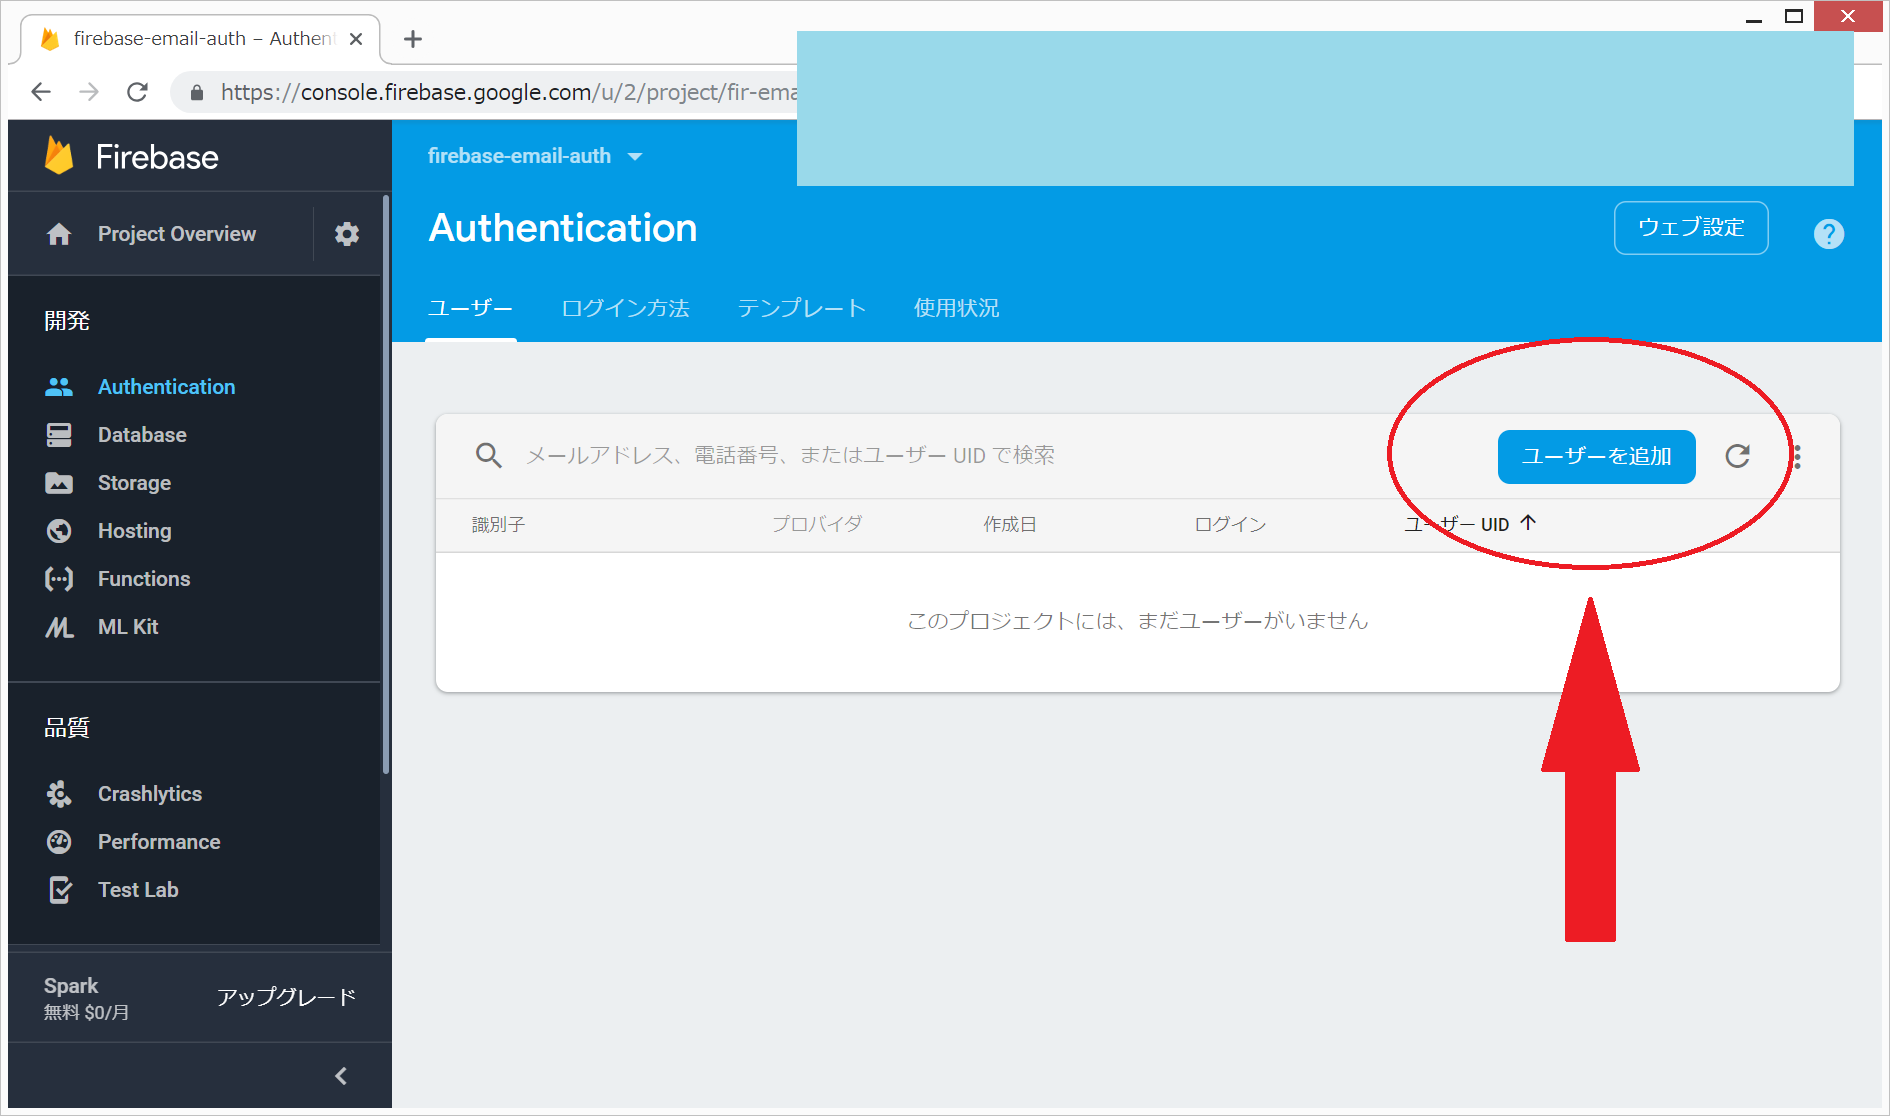
- Firebaseアプリの、「開発」>「Authentication」>「ユーザー」で、「ユーザーを追加」をクリック
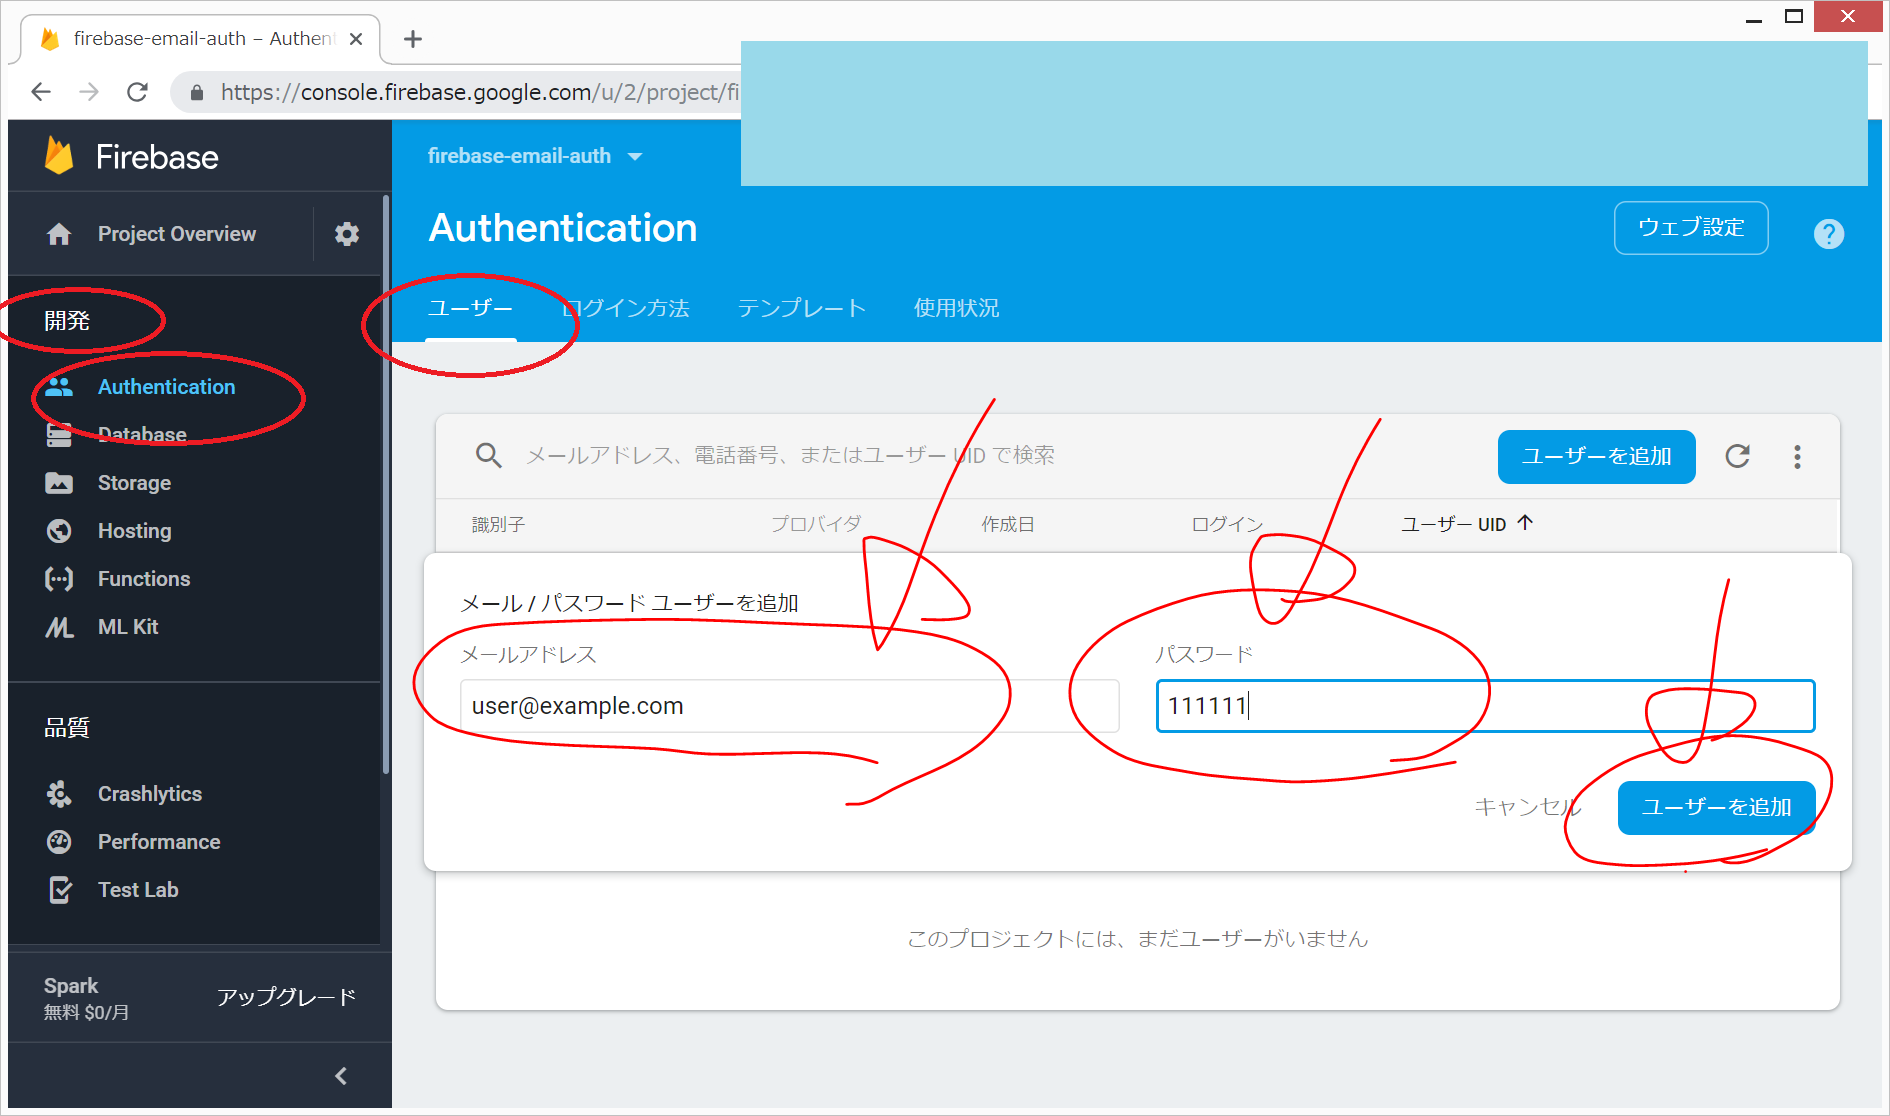
- emailとパスワードを、以下のように入力して、「ユーザーを追加」をクリック
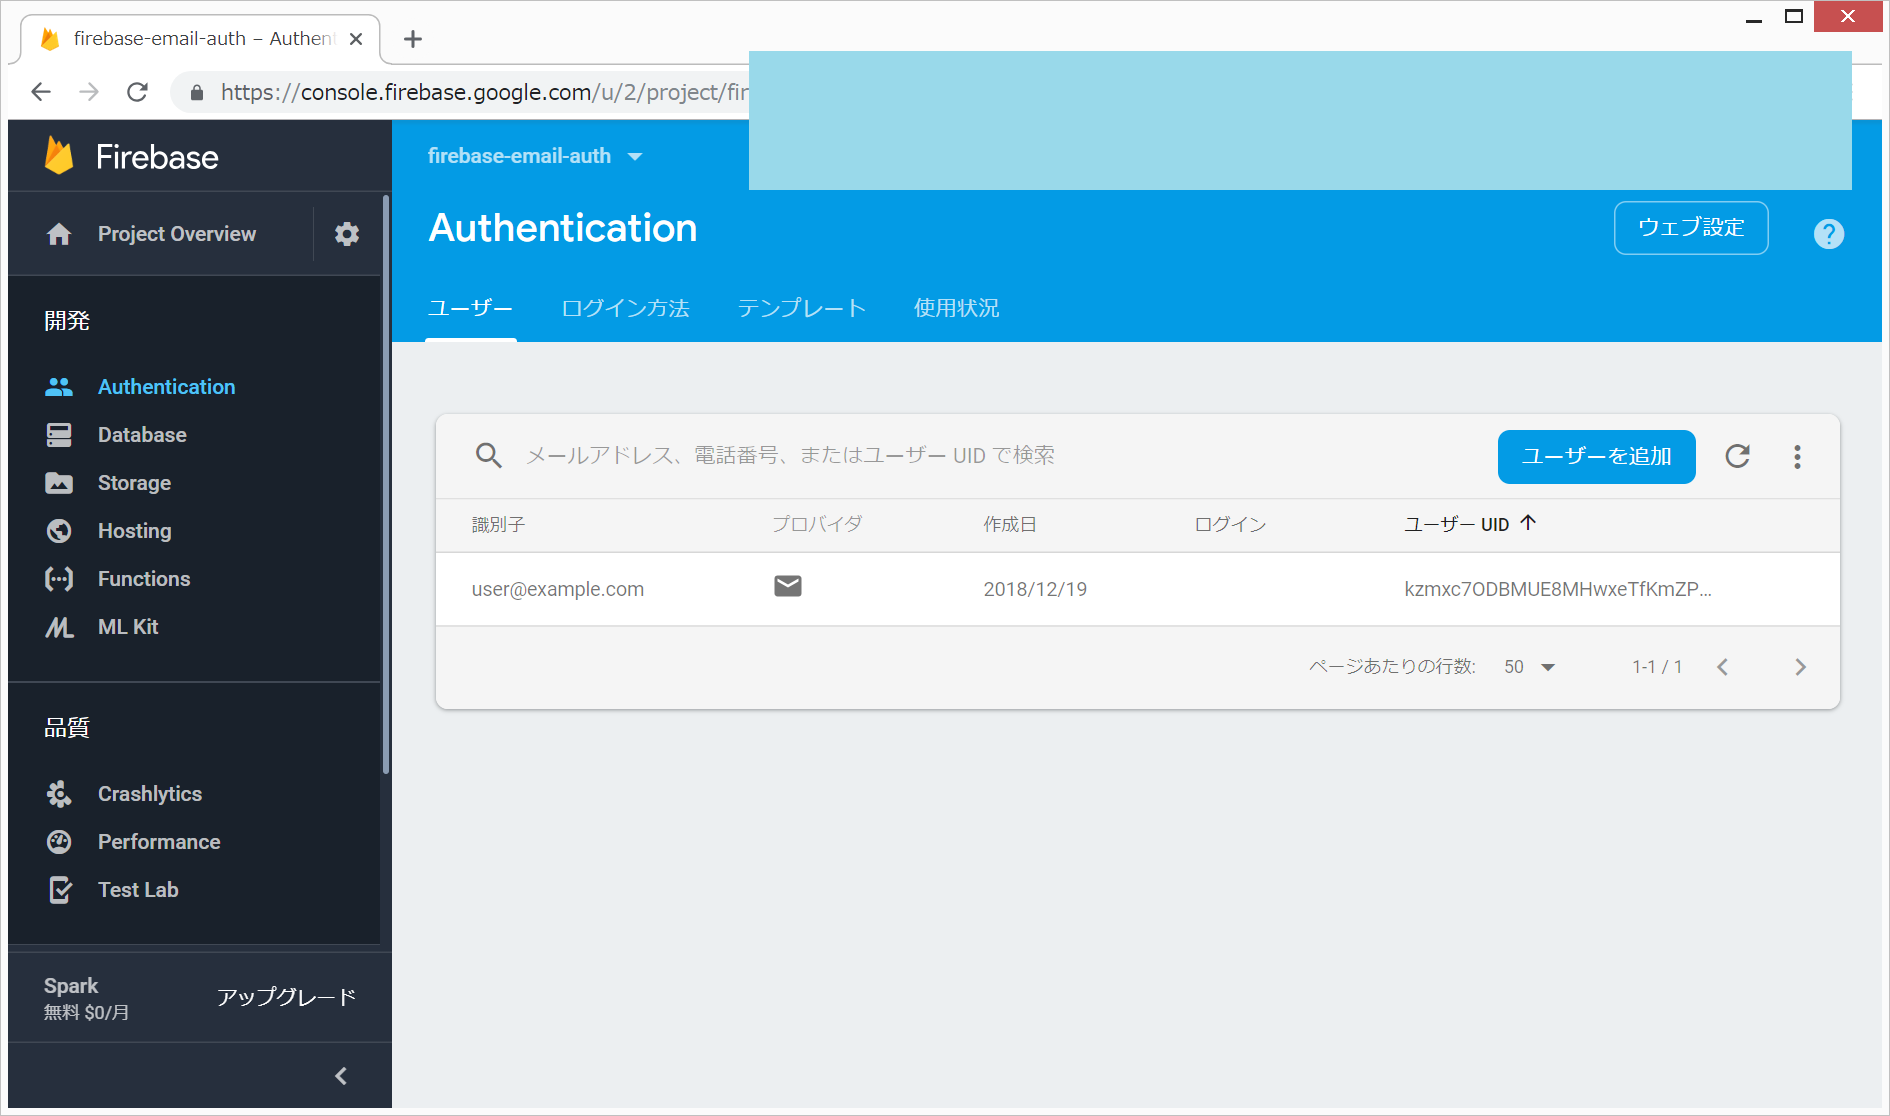
- 以下のような感じになります。
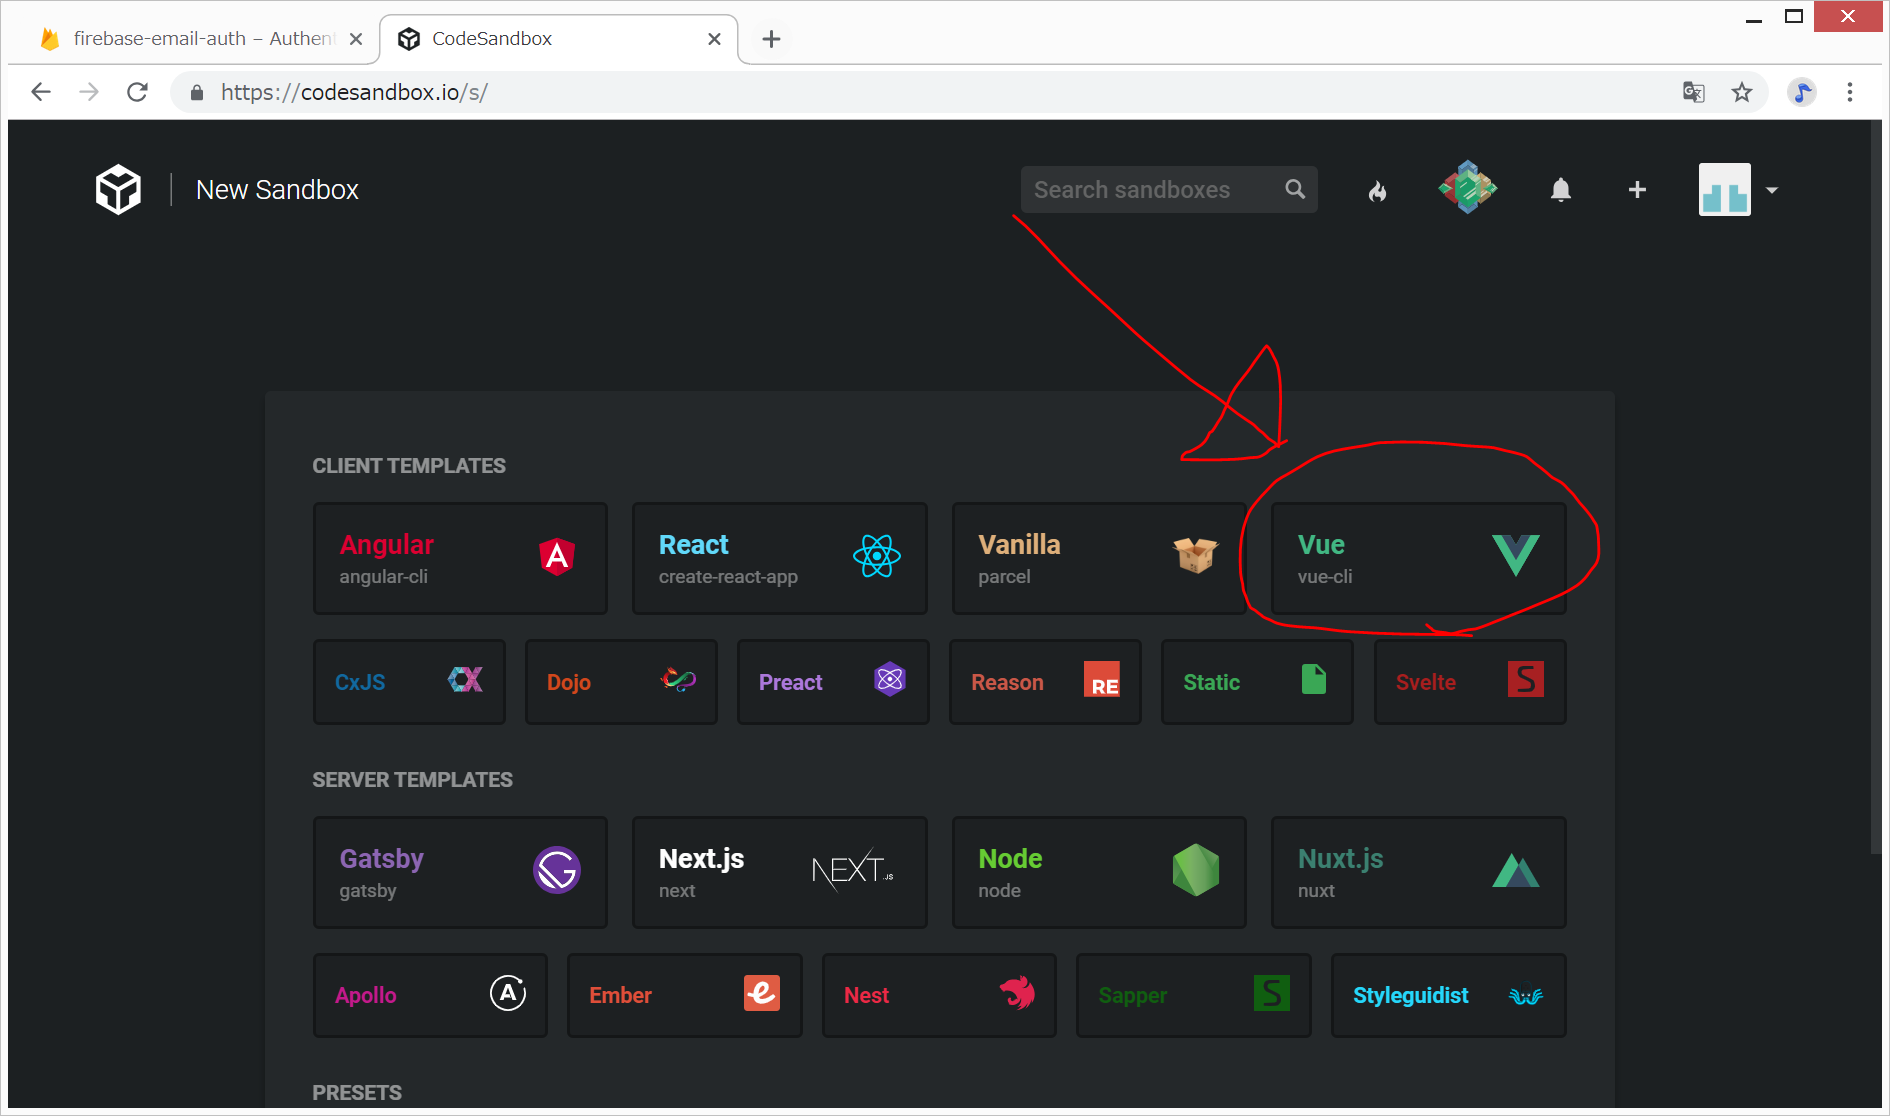
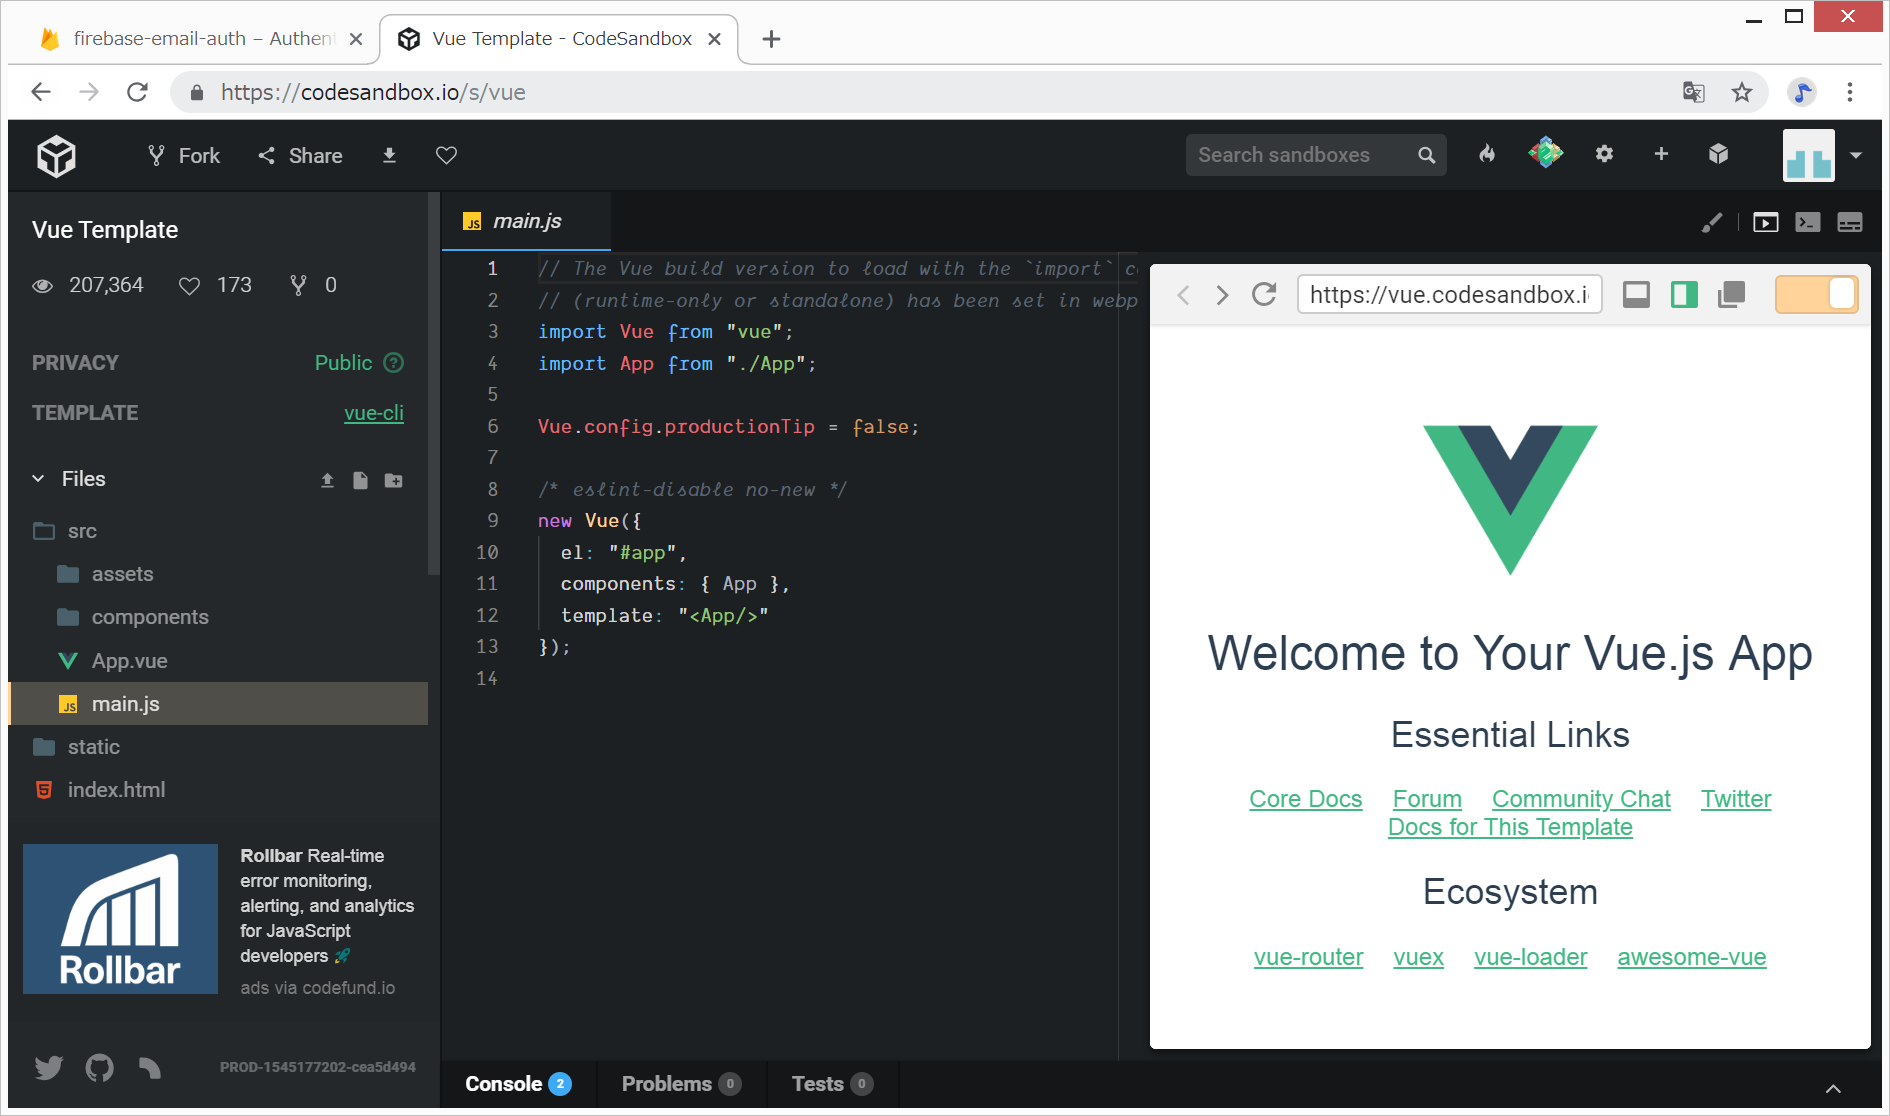
3. CodeSandboxでVue.jsアプリを作成
4. Vuetifyのインストールとindex.htmlの編集
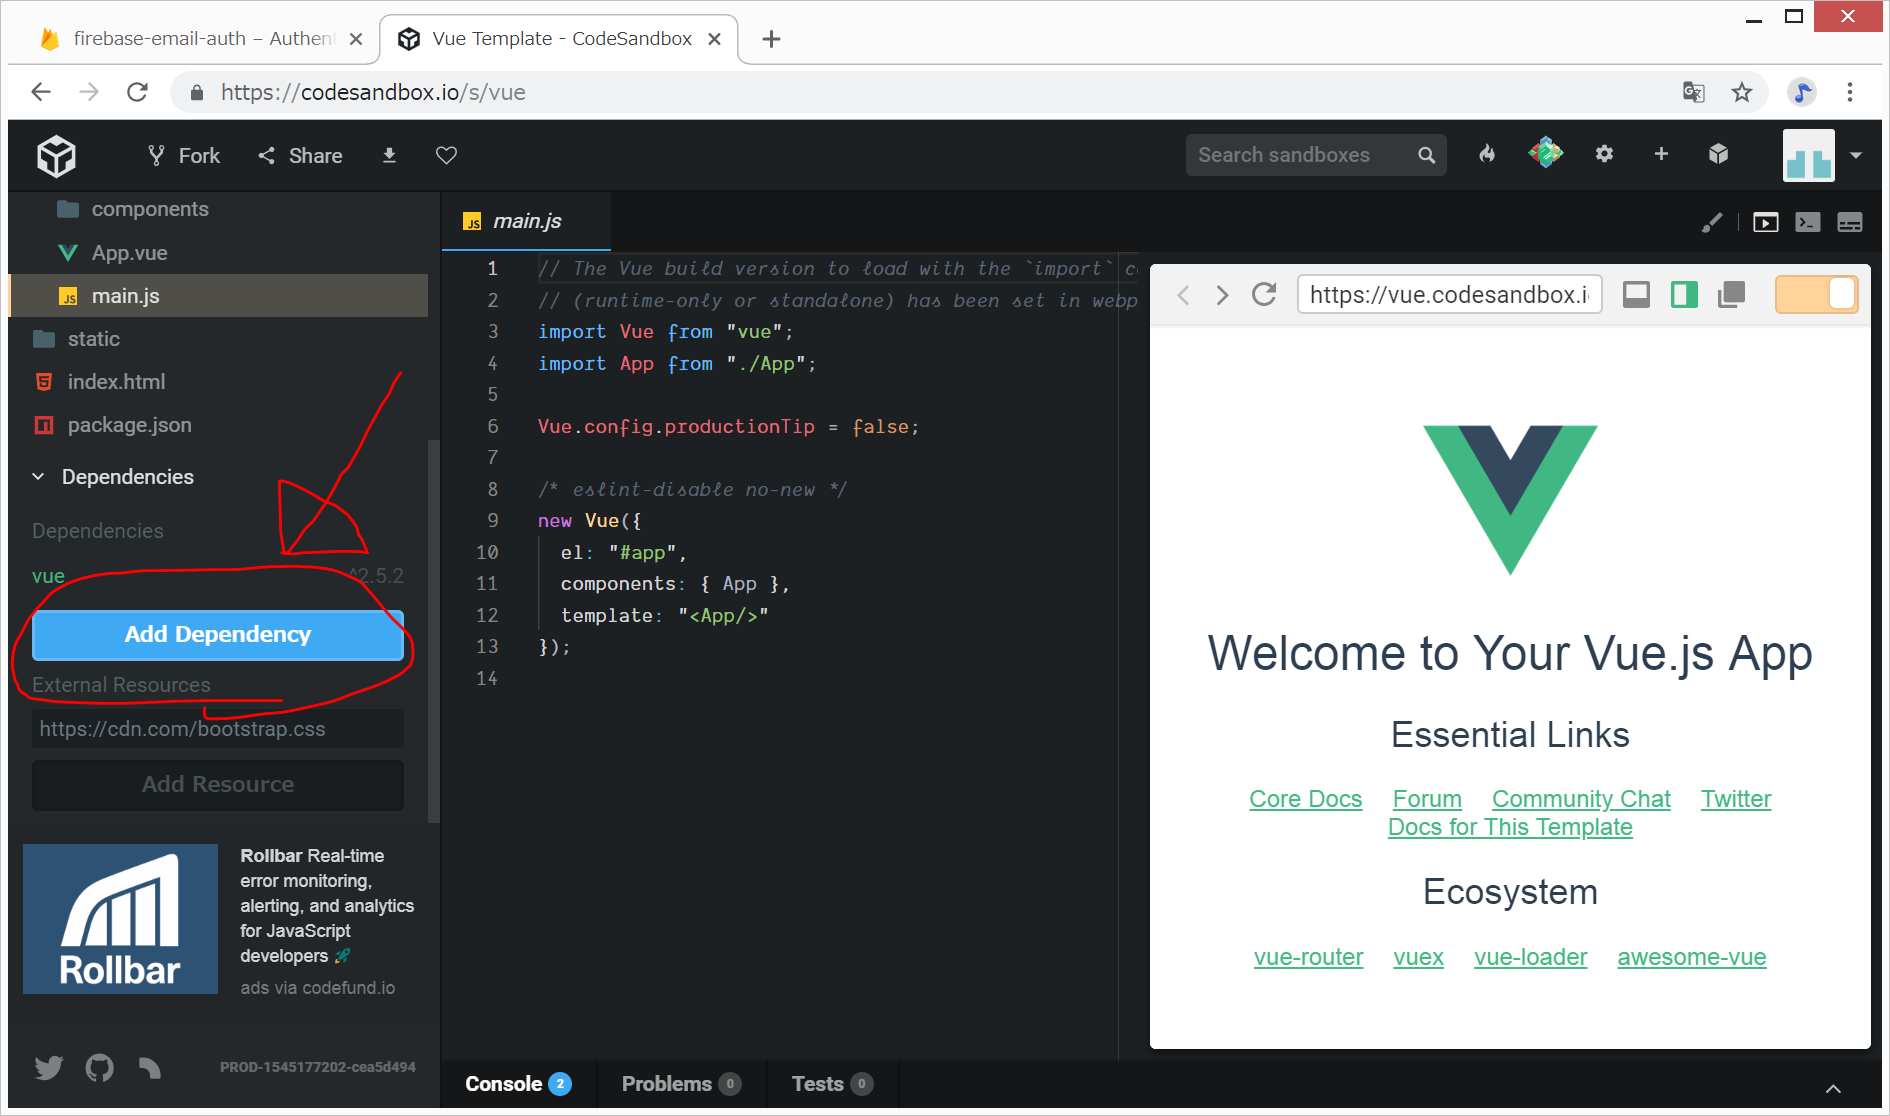
- CSSフレームワークとして、Vuetifyを用いるために、以下のように、Add Dependencyをクリック
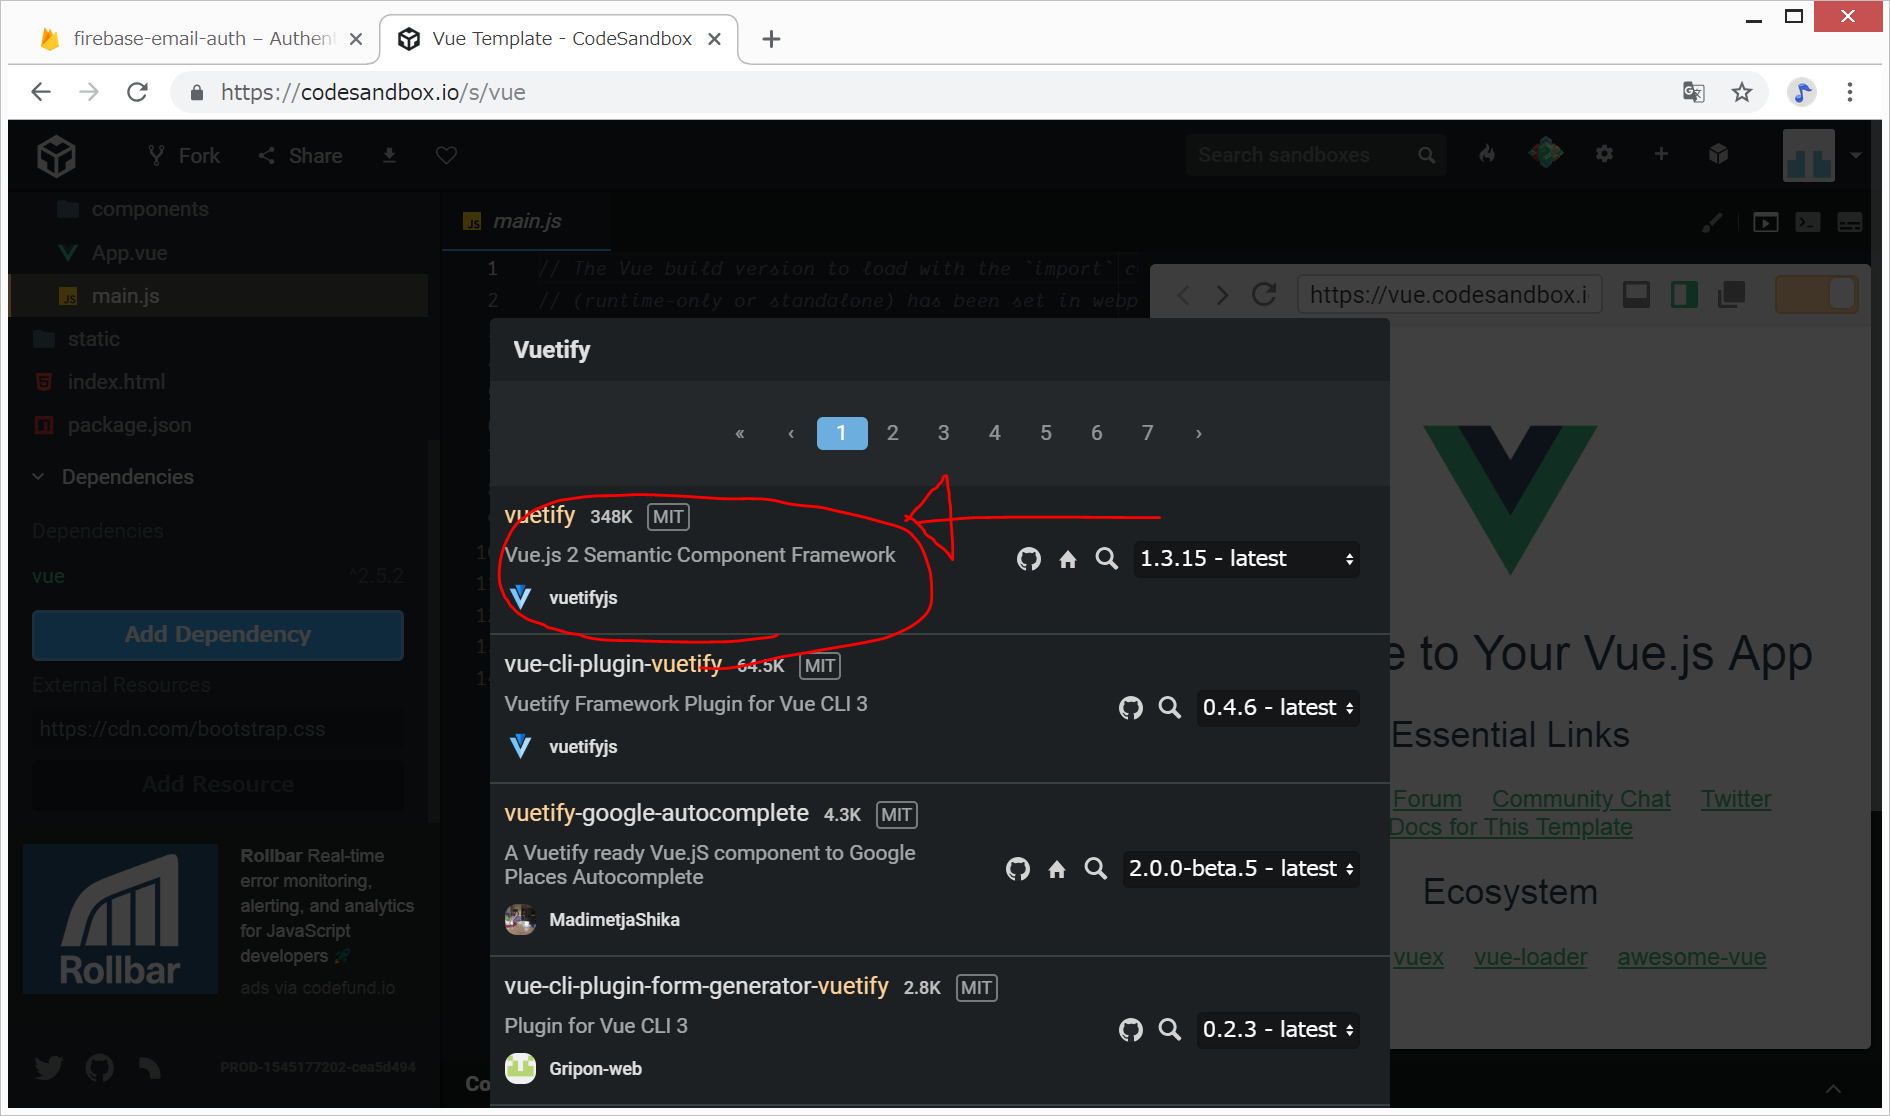
- Vuetify と入力して、Vuetifyをクリックして、インストール
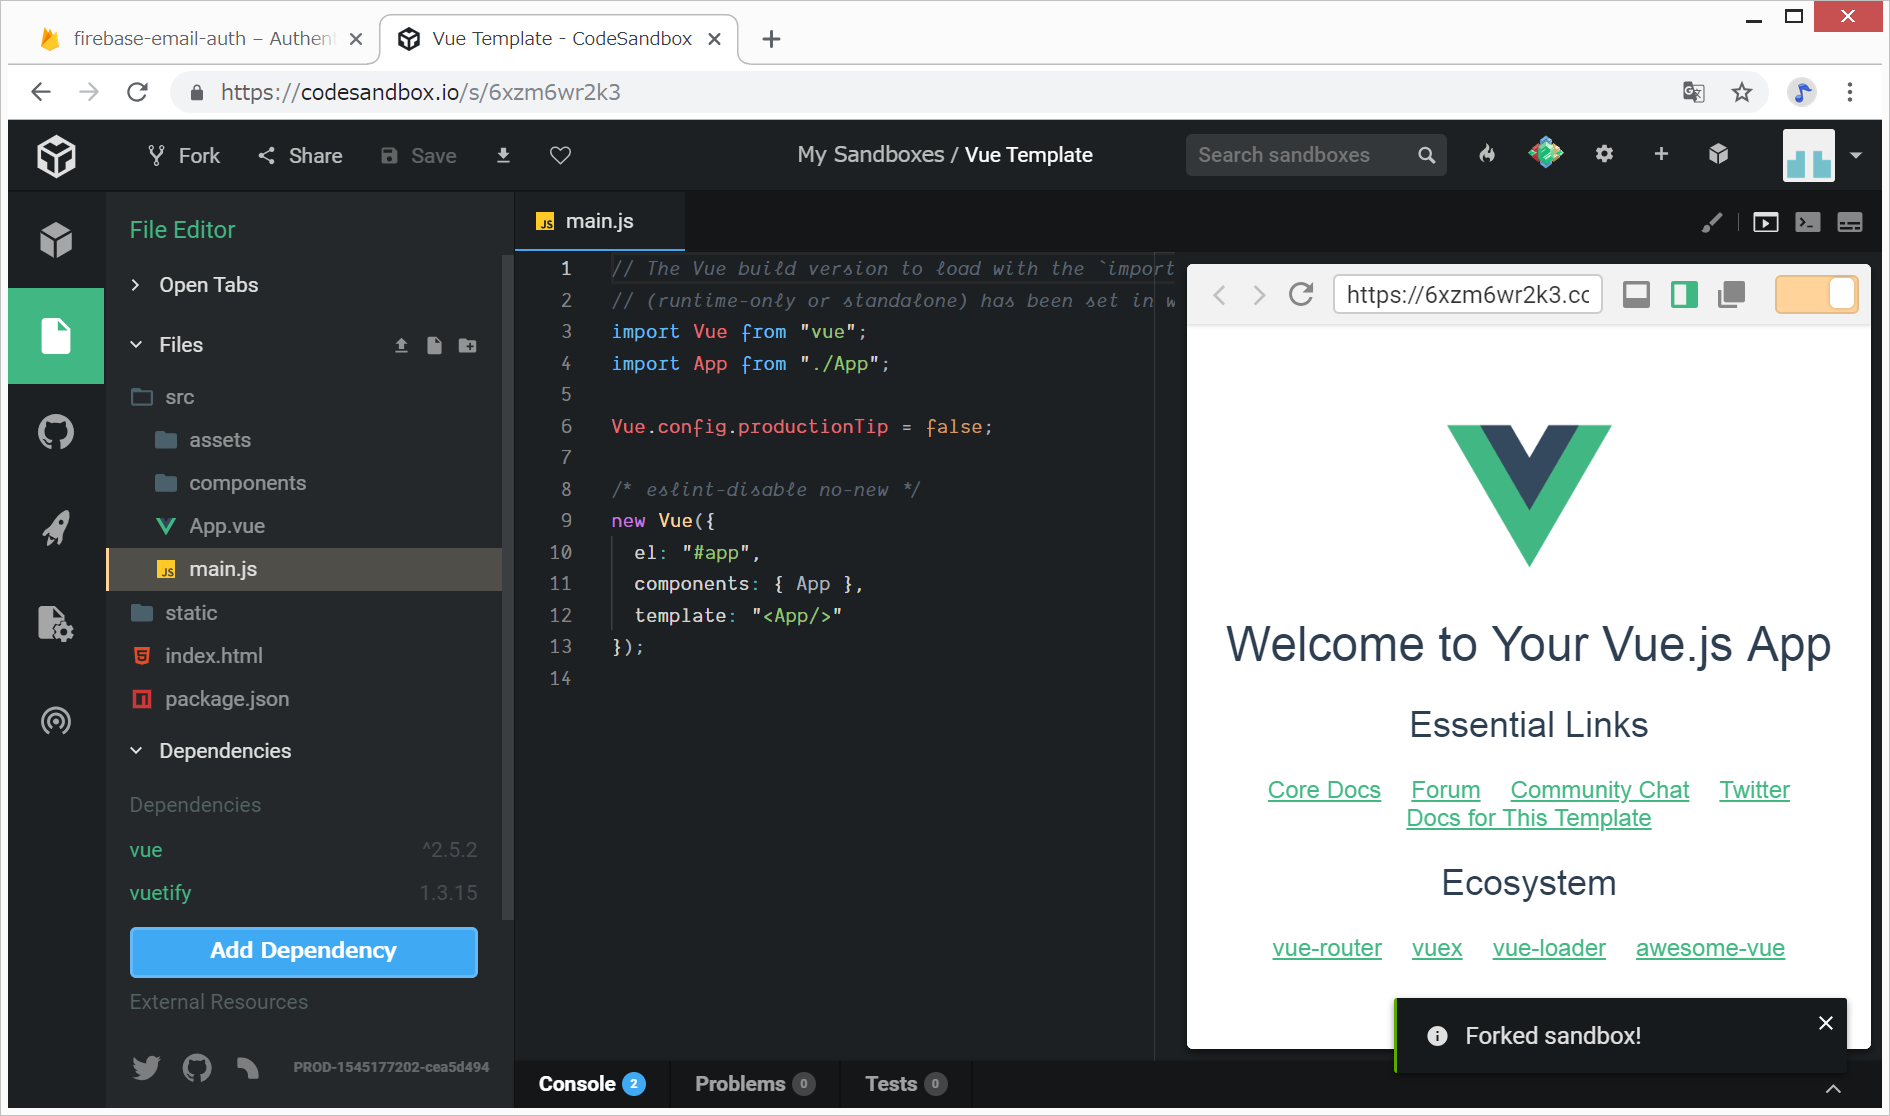
- 以下のようになります
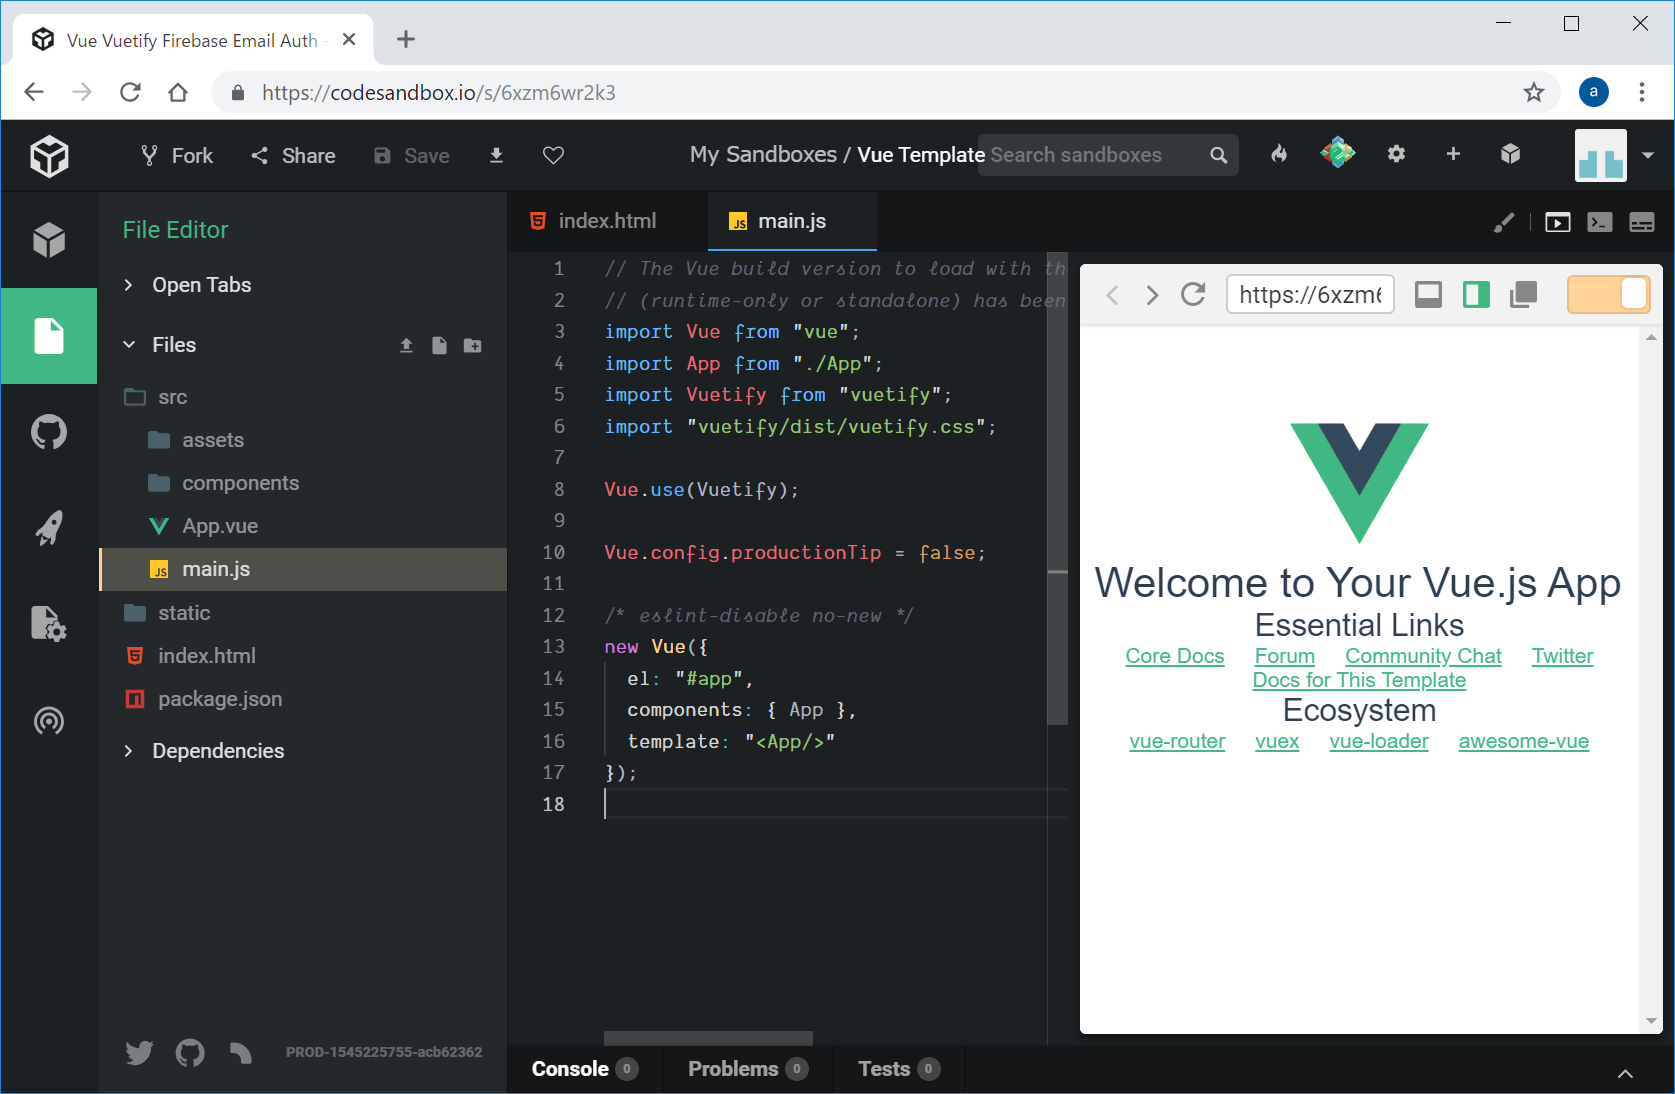
- 次に、vuetifyとfirebaseを利用できるようにするために、index.htmlとsrc/main.jsを編集します。
この時点では、特に外見に変化はありません。
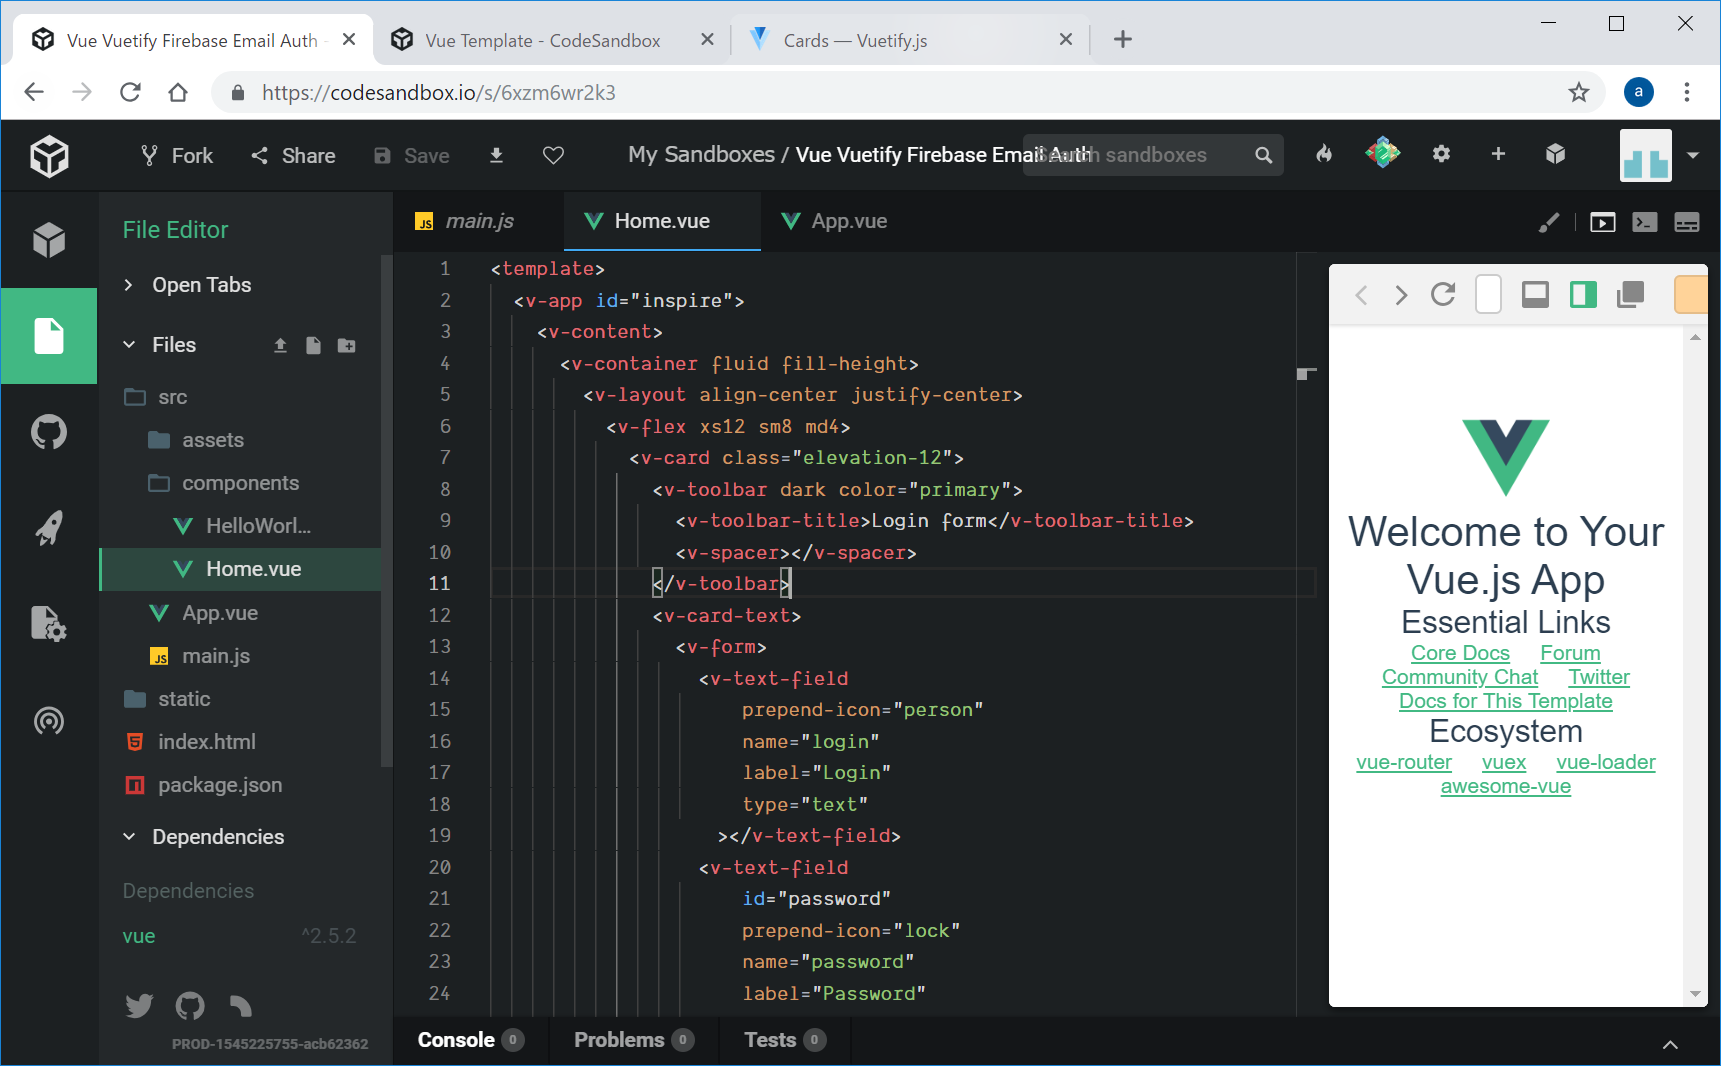
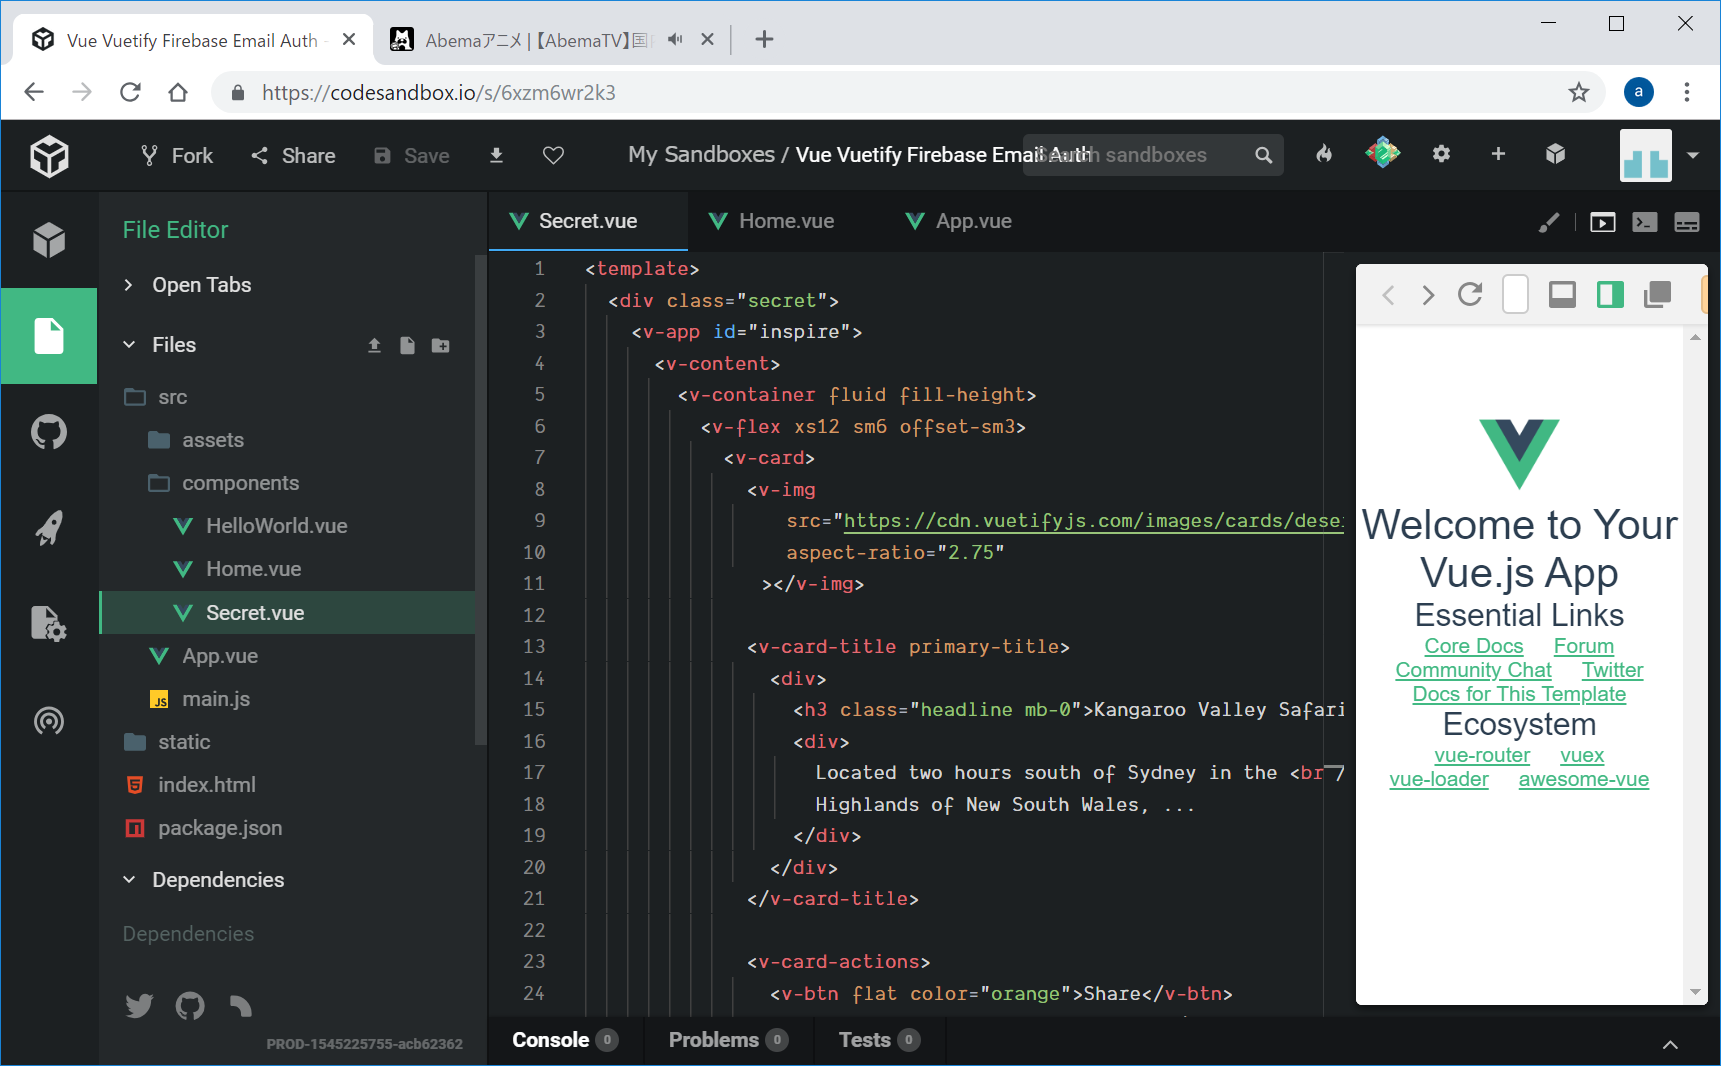
5. src/components/Home.vueとSecret.vueの作成
6. src/App.vueの編集
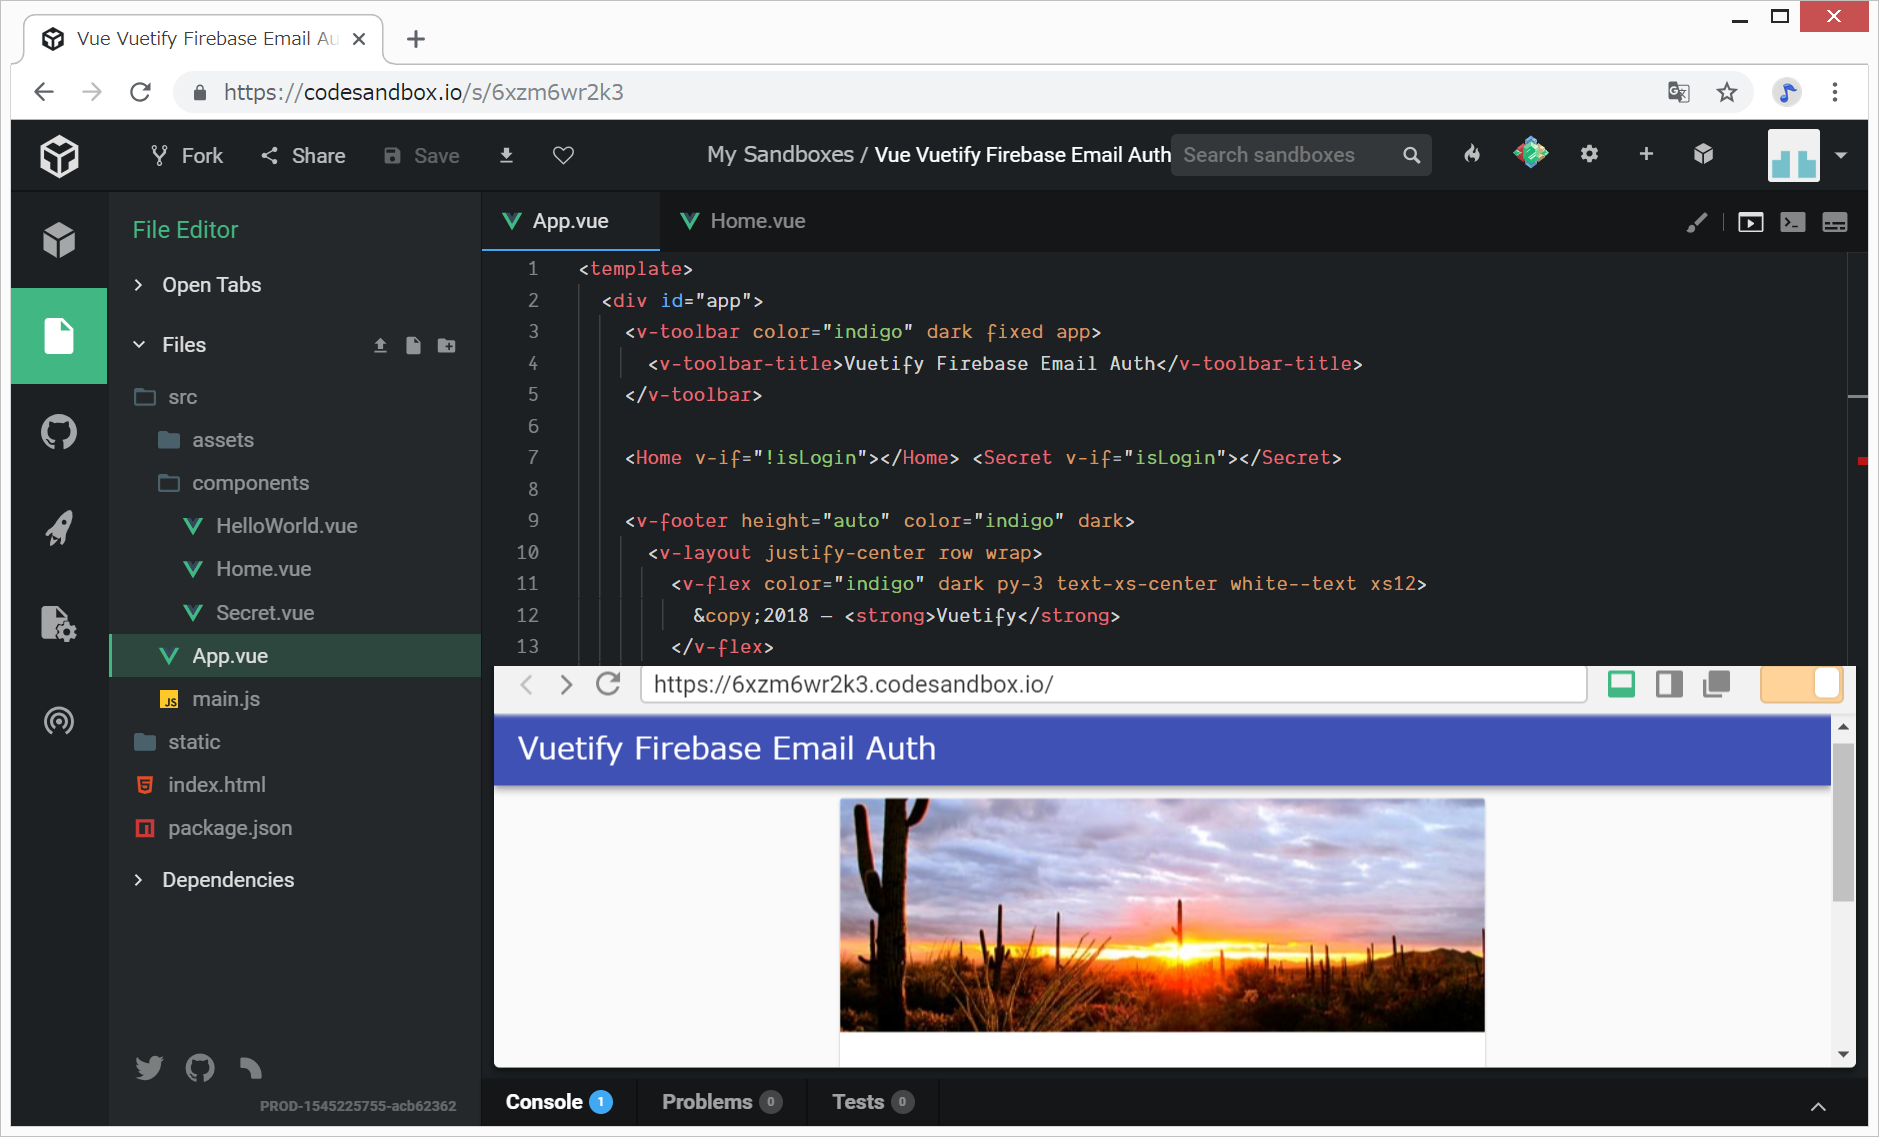
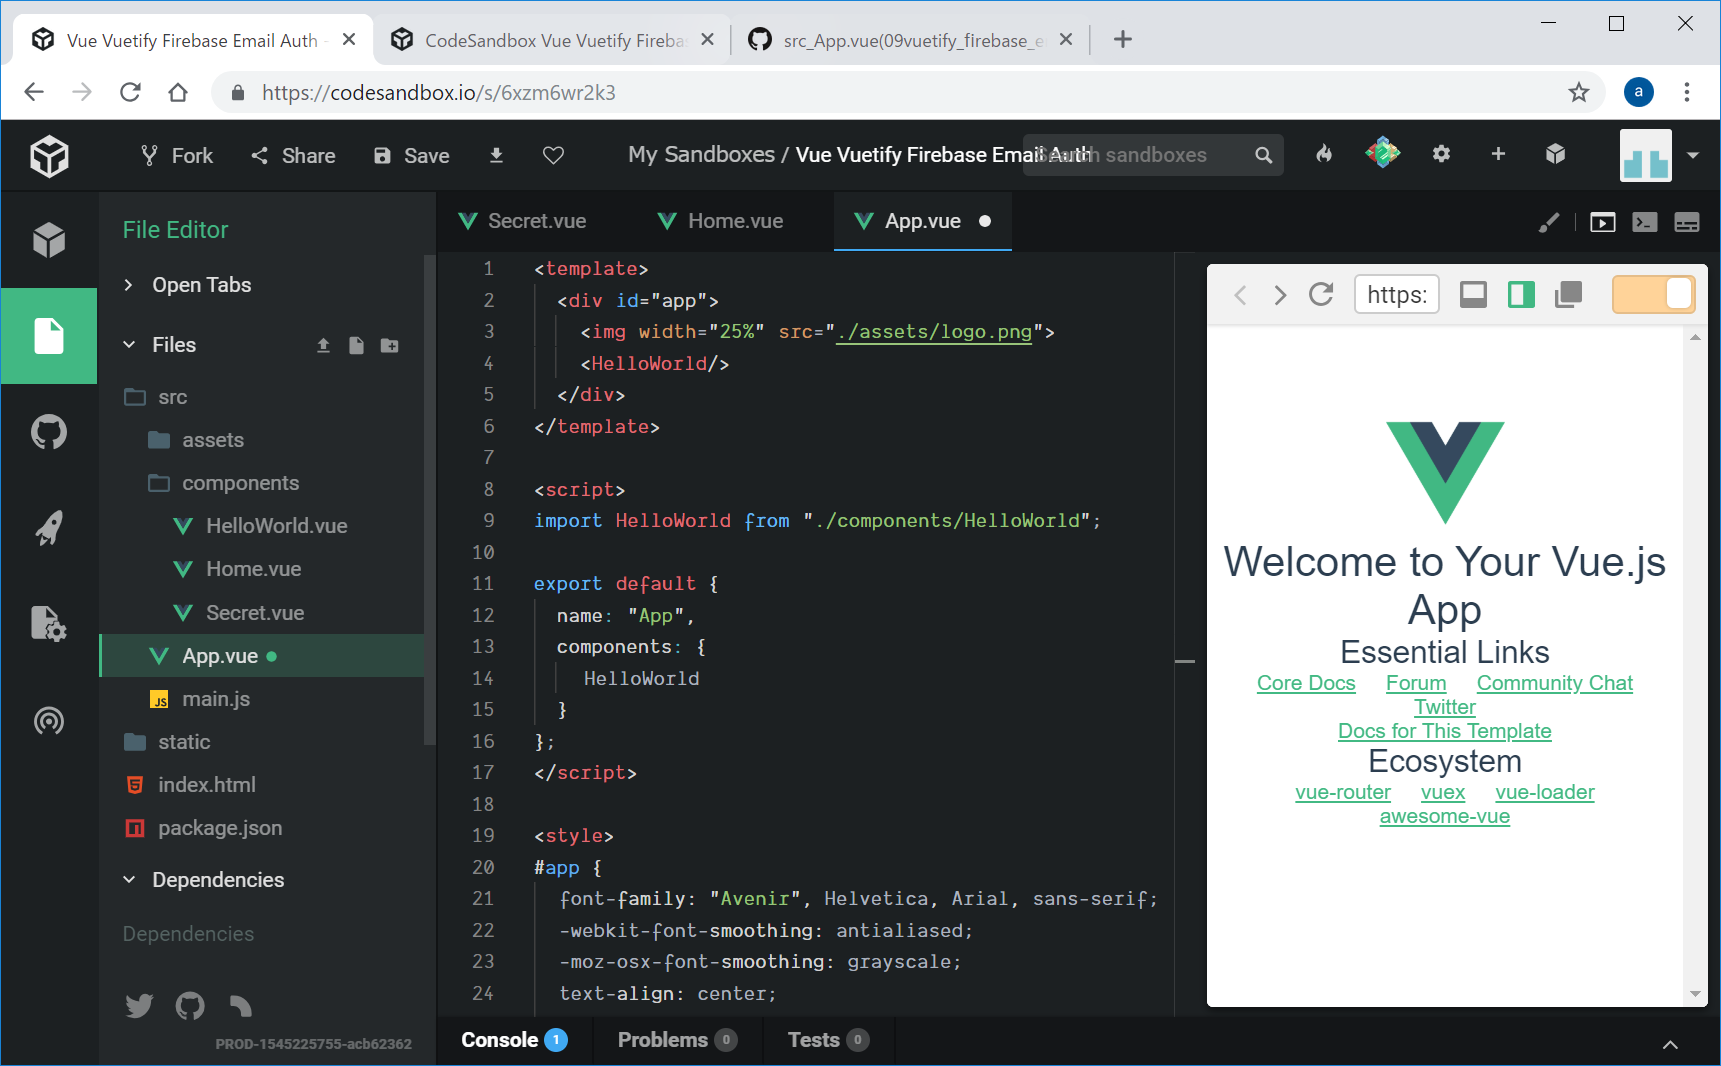
src/App.vueを以下のように変更して、「ヘッダーとフッター」と、中身としてHome.vueを表示します。
(変更前)
(変更後)
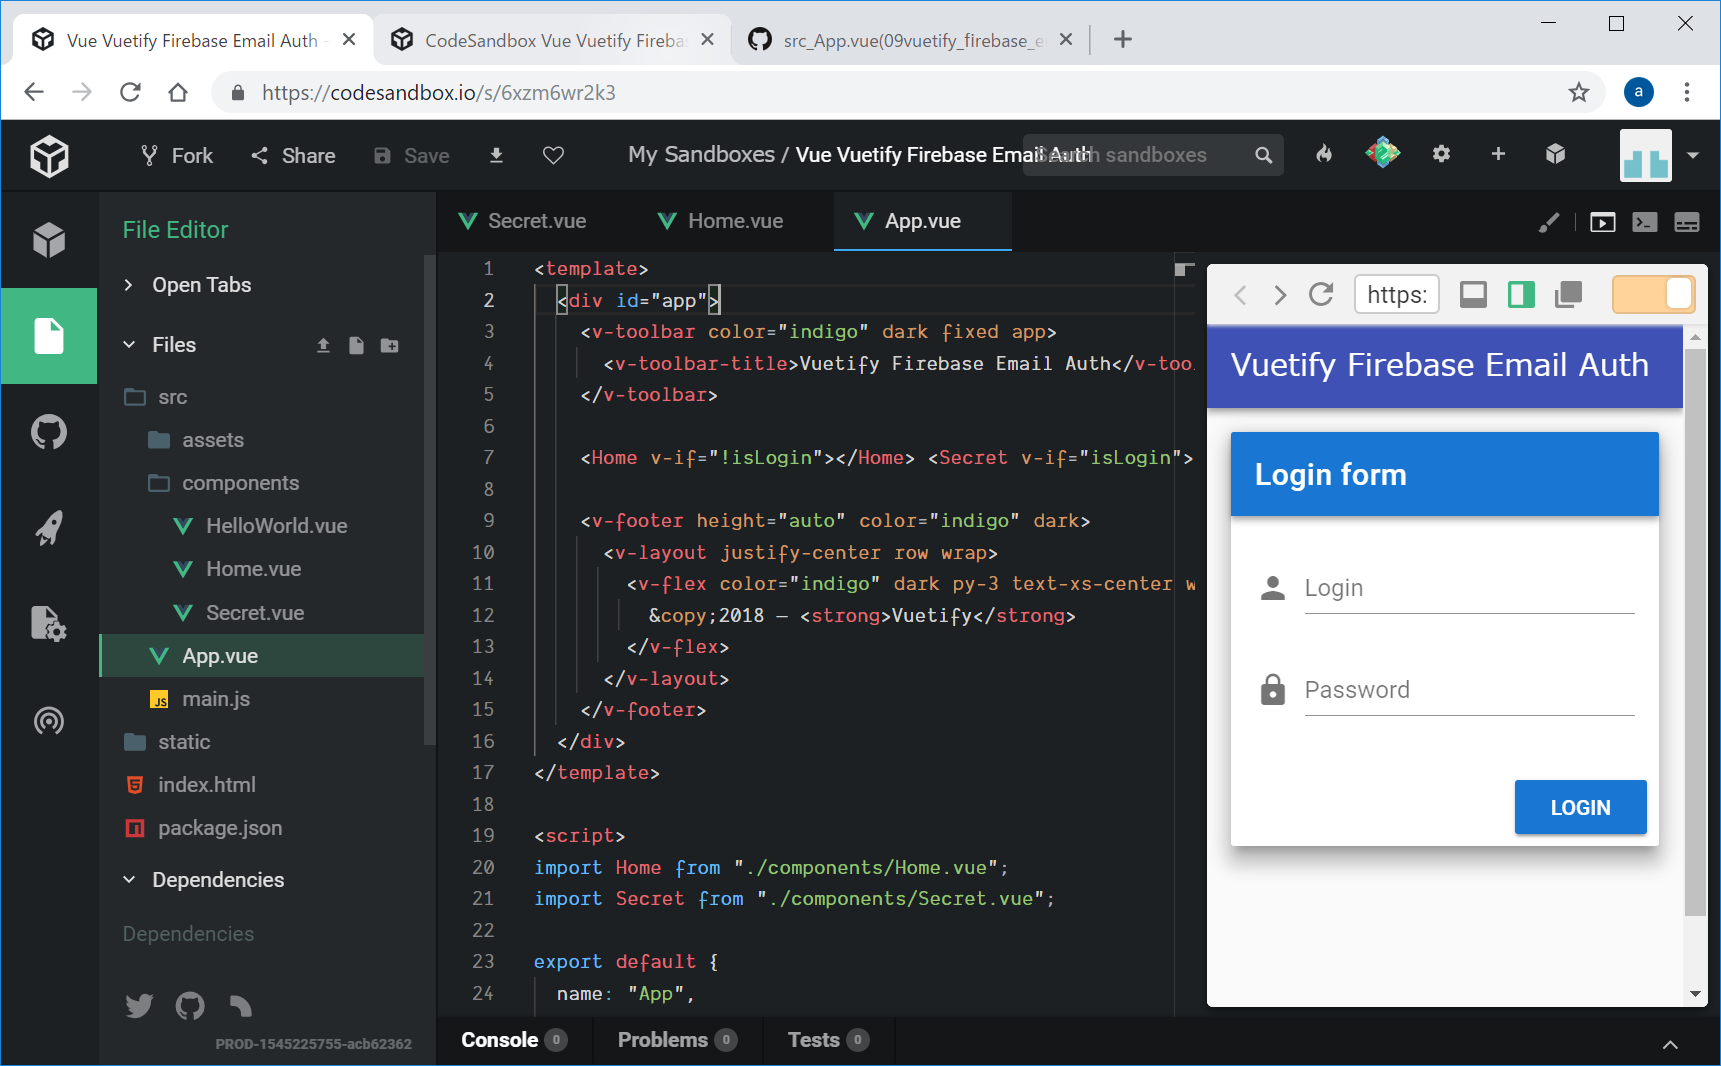
ログインしていないので、Home.vueのログイン画面が表示されます。
7. Emailログインの実装
Googleログインより、Email-Passwordログインの方が、難しい。
参考:https://qiita.com/sin_tanaka/items/ea149a33bd9e4b388241
src/components/Home.vueを編集
先に、<template></template>内のbuttonのところを変更します。
v-text-fieldのところに、それぞれ、v-model=“username”と、v-model=“password”を追加します。
また、v-btnのところに、@click=“emailLogin”を追加します。
(変更前1)
              <v-card-text>
                <v-form>
                  <v-text-field
                    prepend-icon="person"
                    name="login"
                    label="Login"
                    type="text"
                  ></v-text-field>
                  <v-text-field
                    id="password"
                    prepend-icon="lock"
                    name="password"
                    label="Password"
                    type="password"
                  ></v-text-field>
                </v-form>
              </v-card-text>

              <v-card-actions>
                <v-spacer></v-spacer>
                <v-btn color="primary">Login</v-btn>
              </v-card-actions>
(変更後1)
              <v-card-text>
                <v-form>
                  <v-text-field
                    prepend-icon="person"
                    name="username"
                    label="Username"
                    type="text"
                    v-model="username"
                  ></v-text-field>
                  <v-text-field
                    id="password"
                    prepend-icon="lock"
                    name="password"
                    label="Password"
                    type="password"
                    v-model="password"
                  ></v-text-field>
                </v-form>
              </v-card-text>

              <v-card-actions>
                <v-spacer></v-spacer>
                <v-btn color="primary" @click="emailLogin">Login</v-btn>
              </v-card-actions>
次に、<script></script>のところにdata()関数と、emailLogin()関数を定義。
(変更前2)
  data: function () {
    return {}
  },
(変更後2)
  data() {
    return {
      username: "",
      password: ""
    };
  },
  methods: {
    emailLogin: function() {
      firebase
        .auth()
        .signInWithEmailAndPassword(this.username, this.password)
        .then(
          user => {
            alert("Success!");
            this.$router.push("/");
          },
          err => {
            alert(err.message);
          }
        );
    }
  }
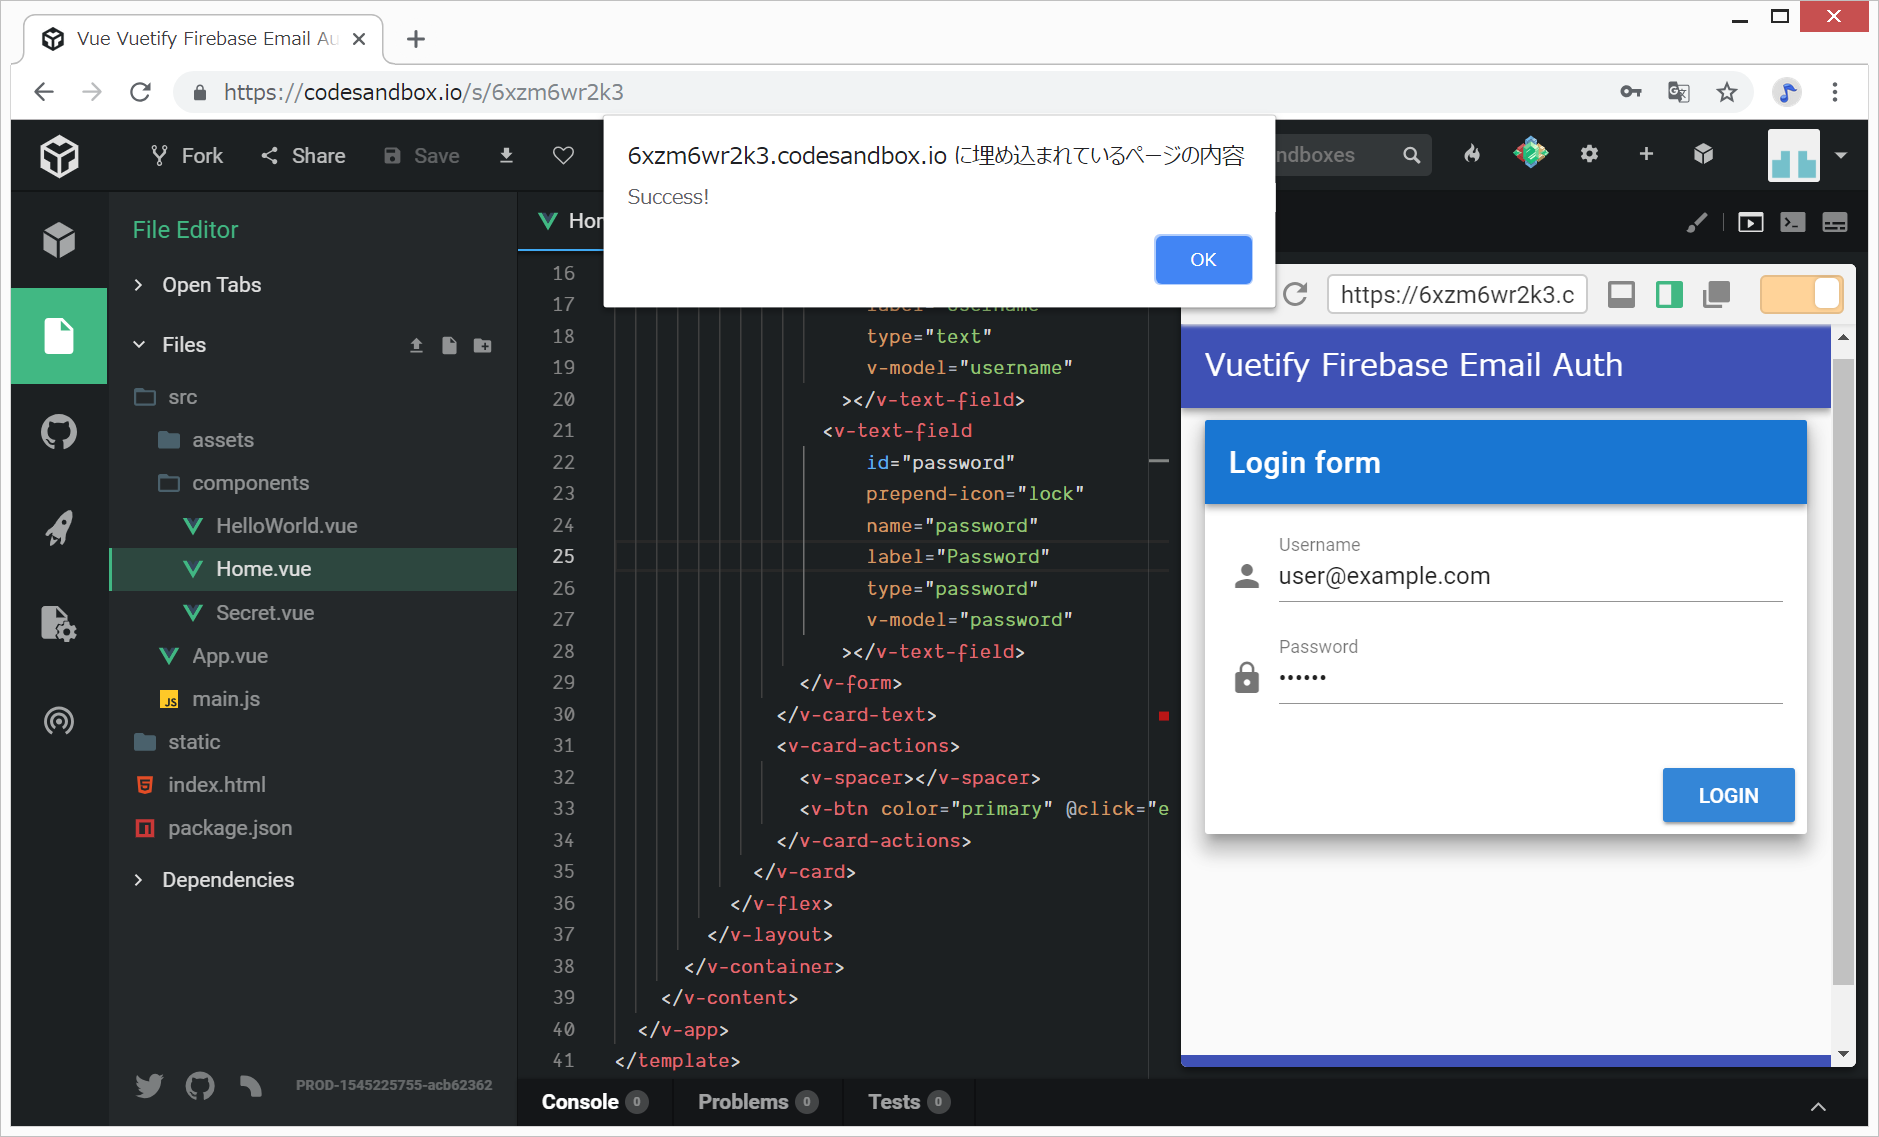
この時点で、user@example.com, 111111 と入力してLoginボタンをクリックすると、Success!というアラートが表示される。
8. ログイン状態のチェック
サイト上でログイン状態をチェックします。
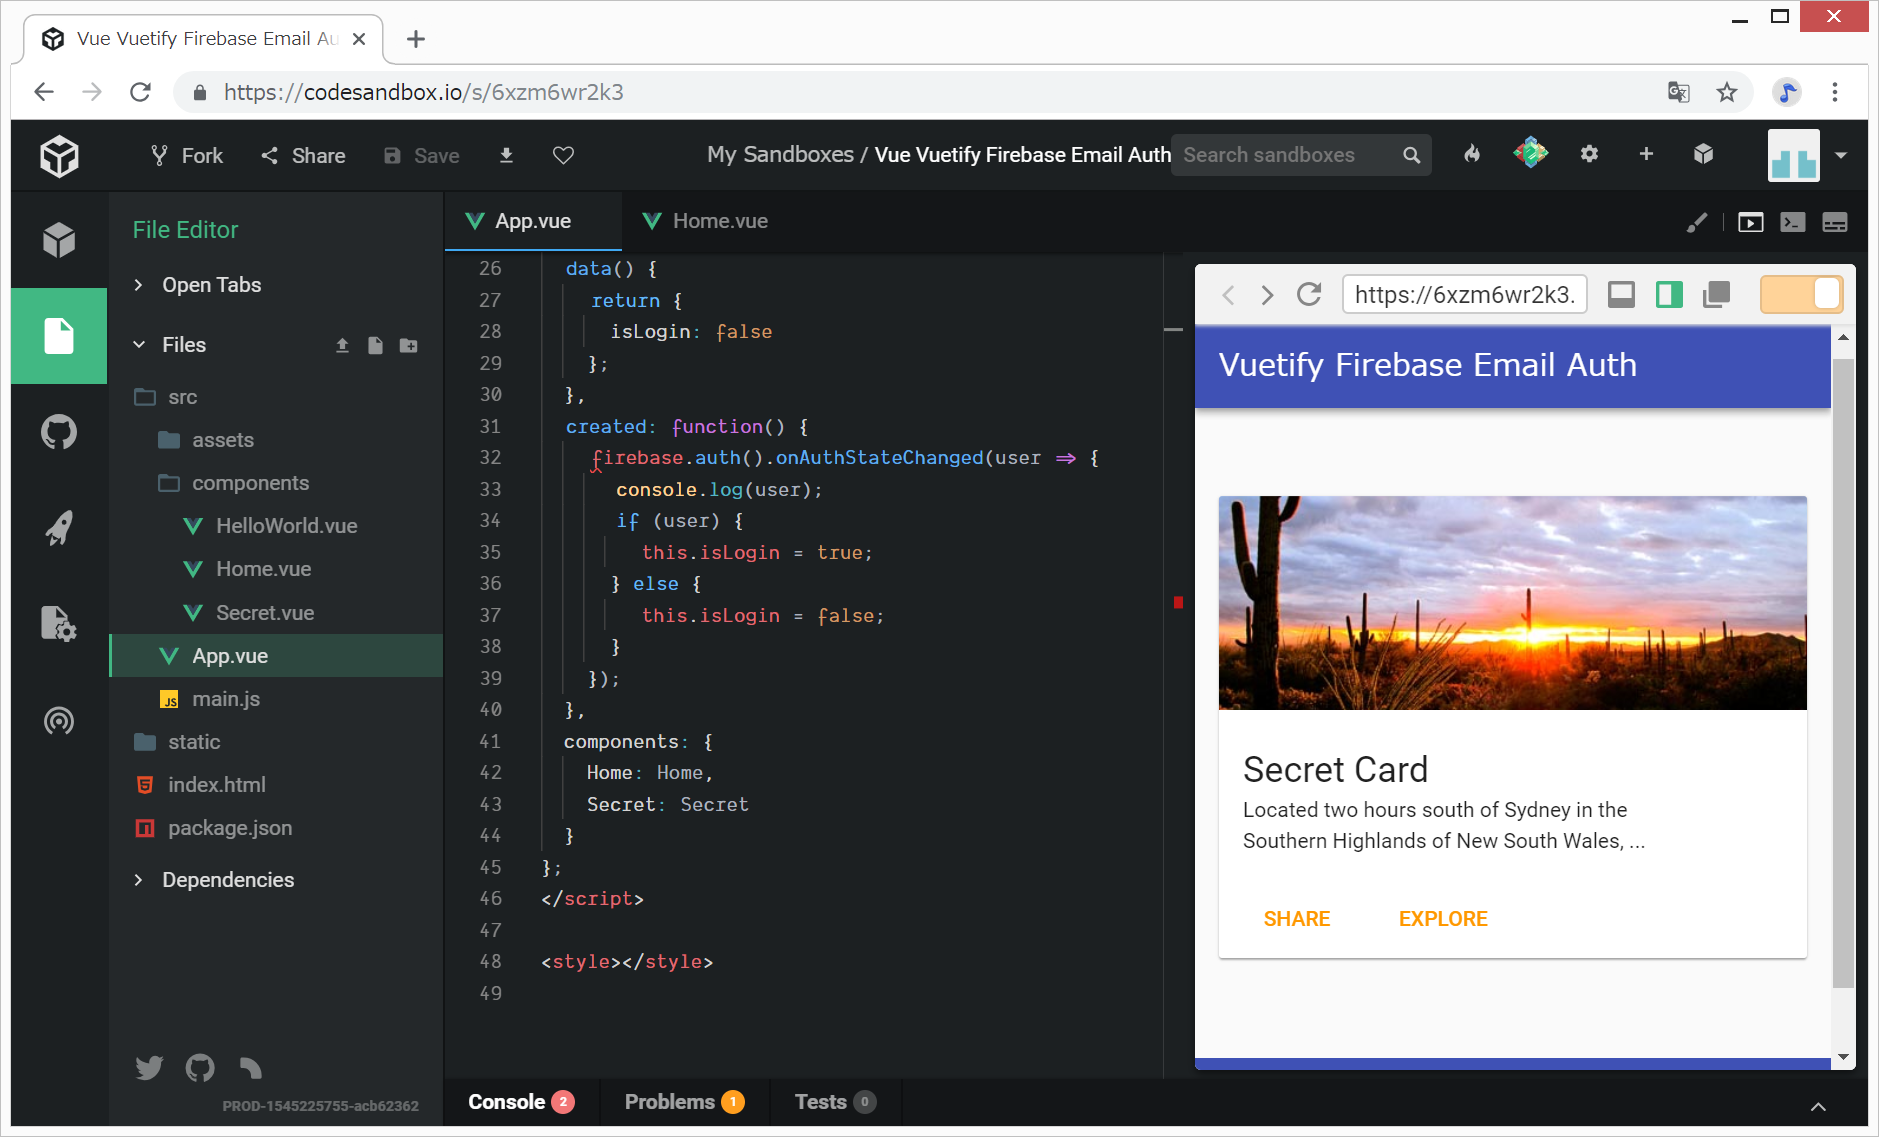
App.vue内でログイン状態をチェックして、isLoginに格納します。
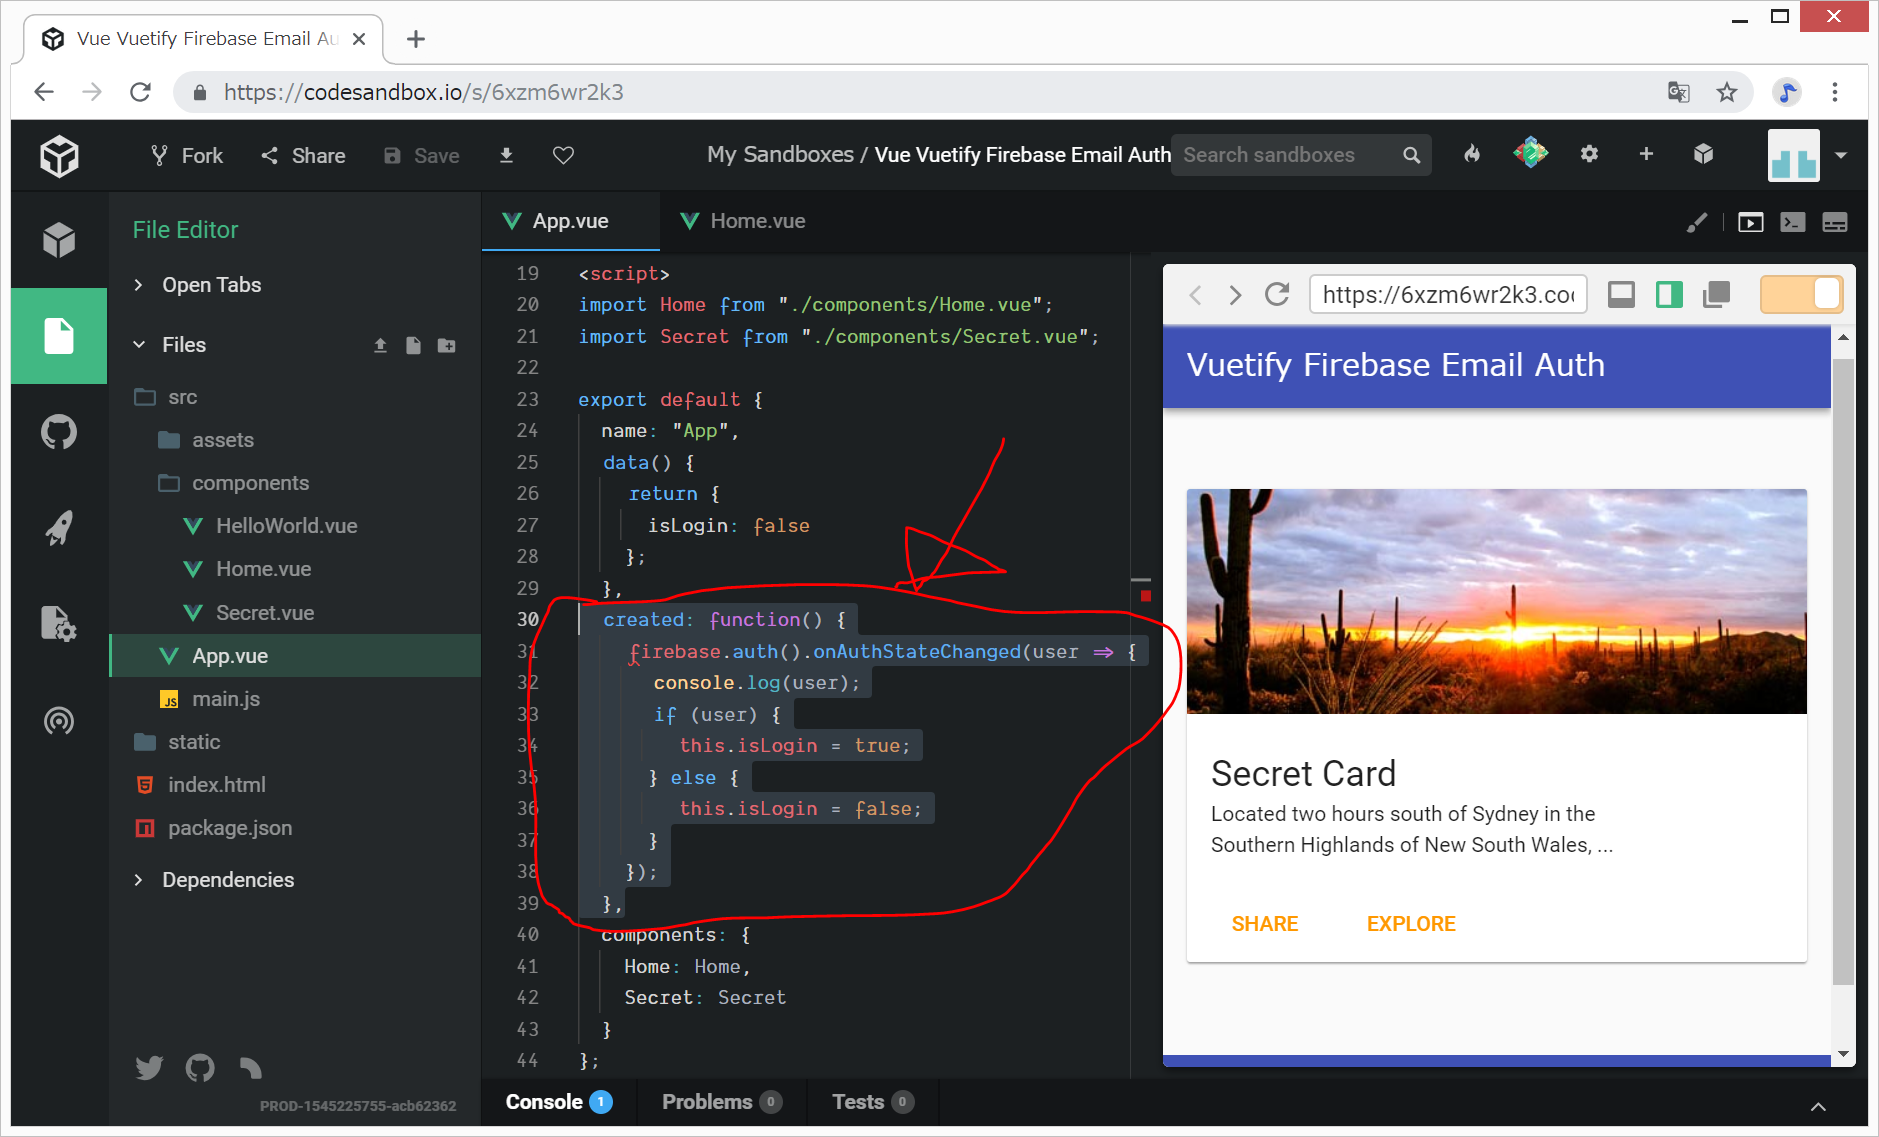
src/App.vueの<script></script>内に、data関数の後ろに、created関数を定義します。created関数は、Vue.jsがそのcomponentを作成したタイミングで実行されるとのことです。
  created: function() {
    firebase.auth().onAuthStateChanged(user => {
      console.log(user);
      if (user) {
        this.isLogin = true;
      } else {
        this.isLogin = false;
      }
    });
  },
先ほど、ログインしていますので、上記コード変更により、Secret.vueコンポーネントが表示されるようになりました。
9. コンポーネント間の情報の受け渡しとログアウトボタン
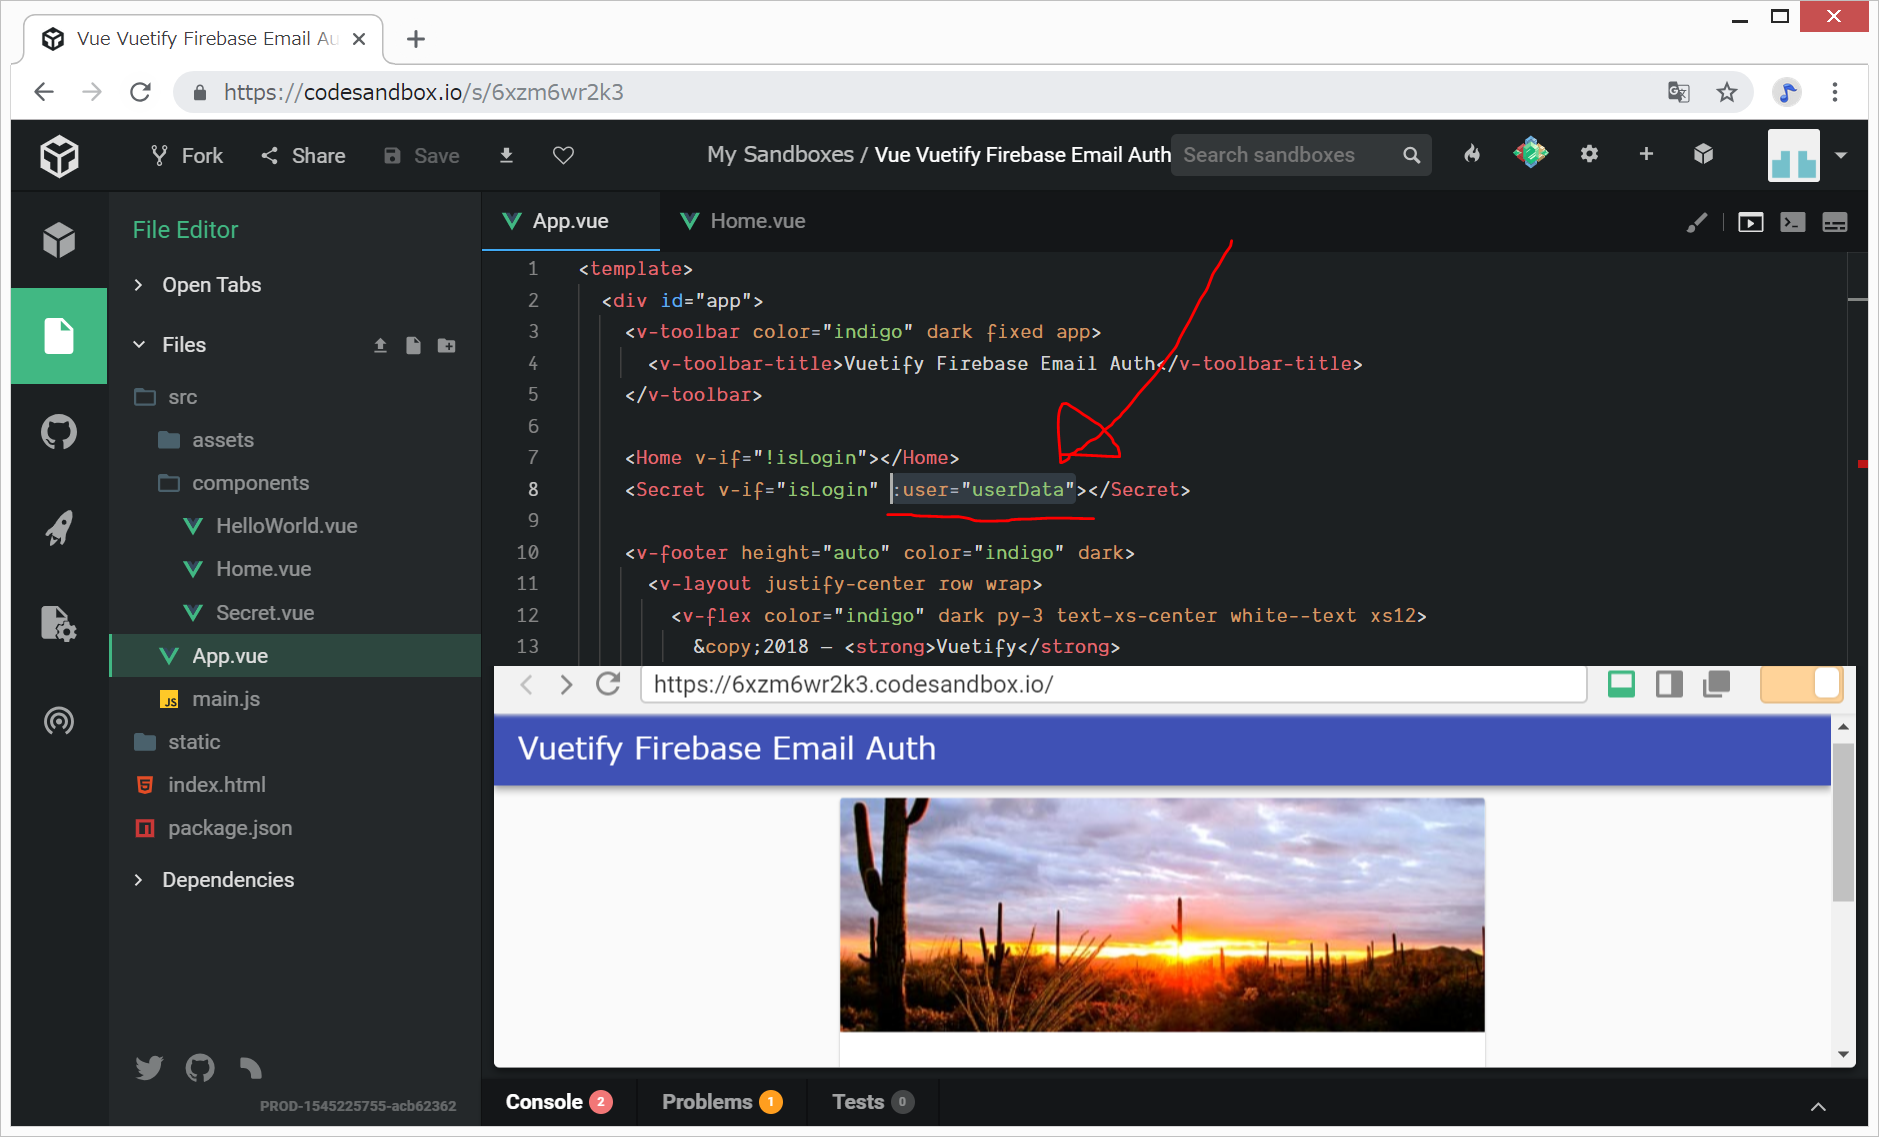
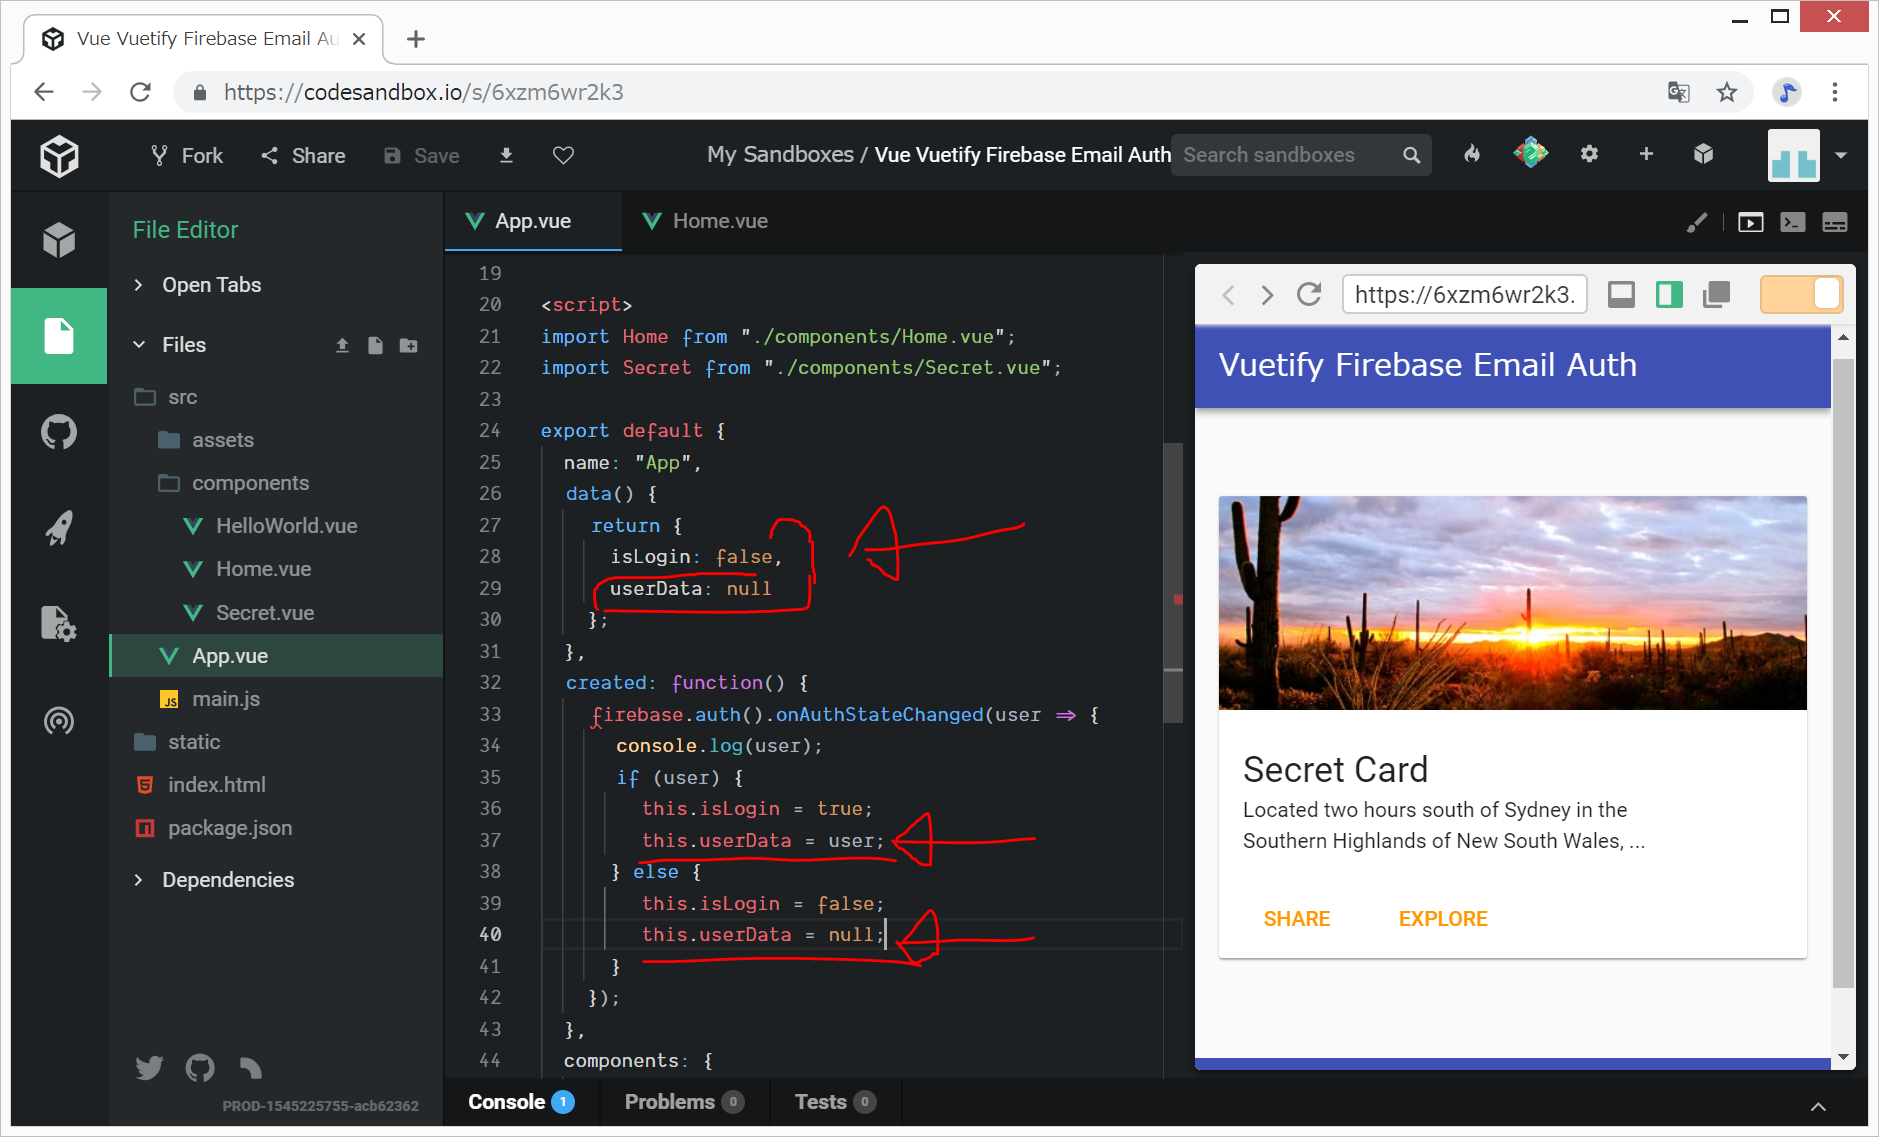
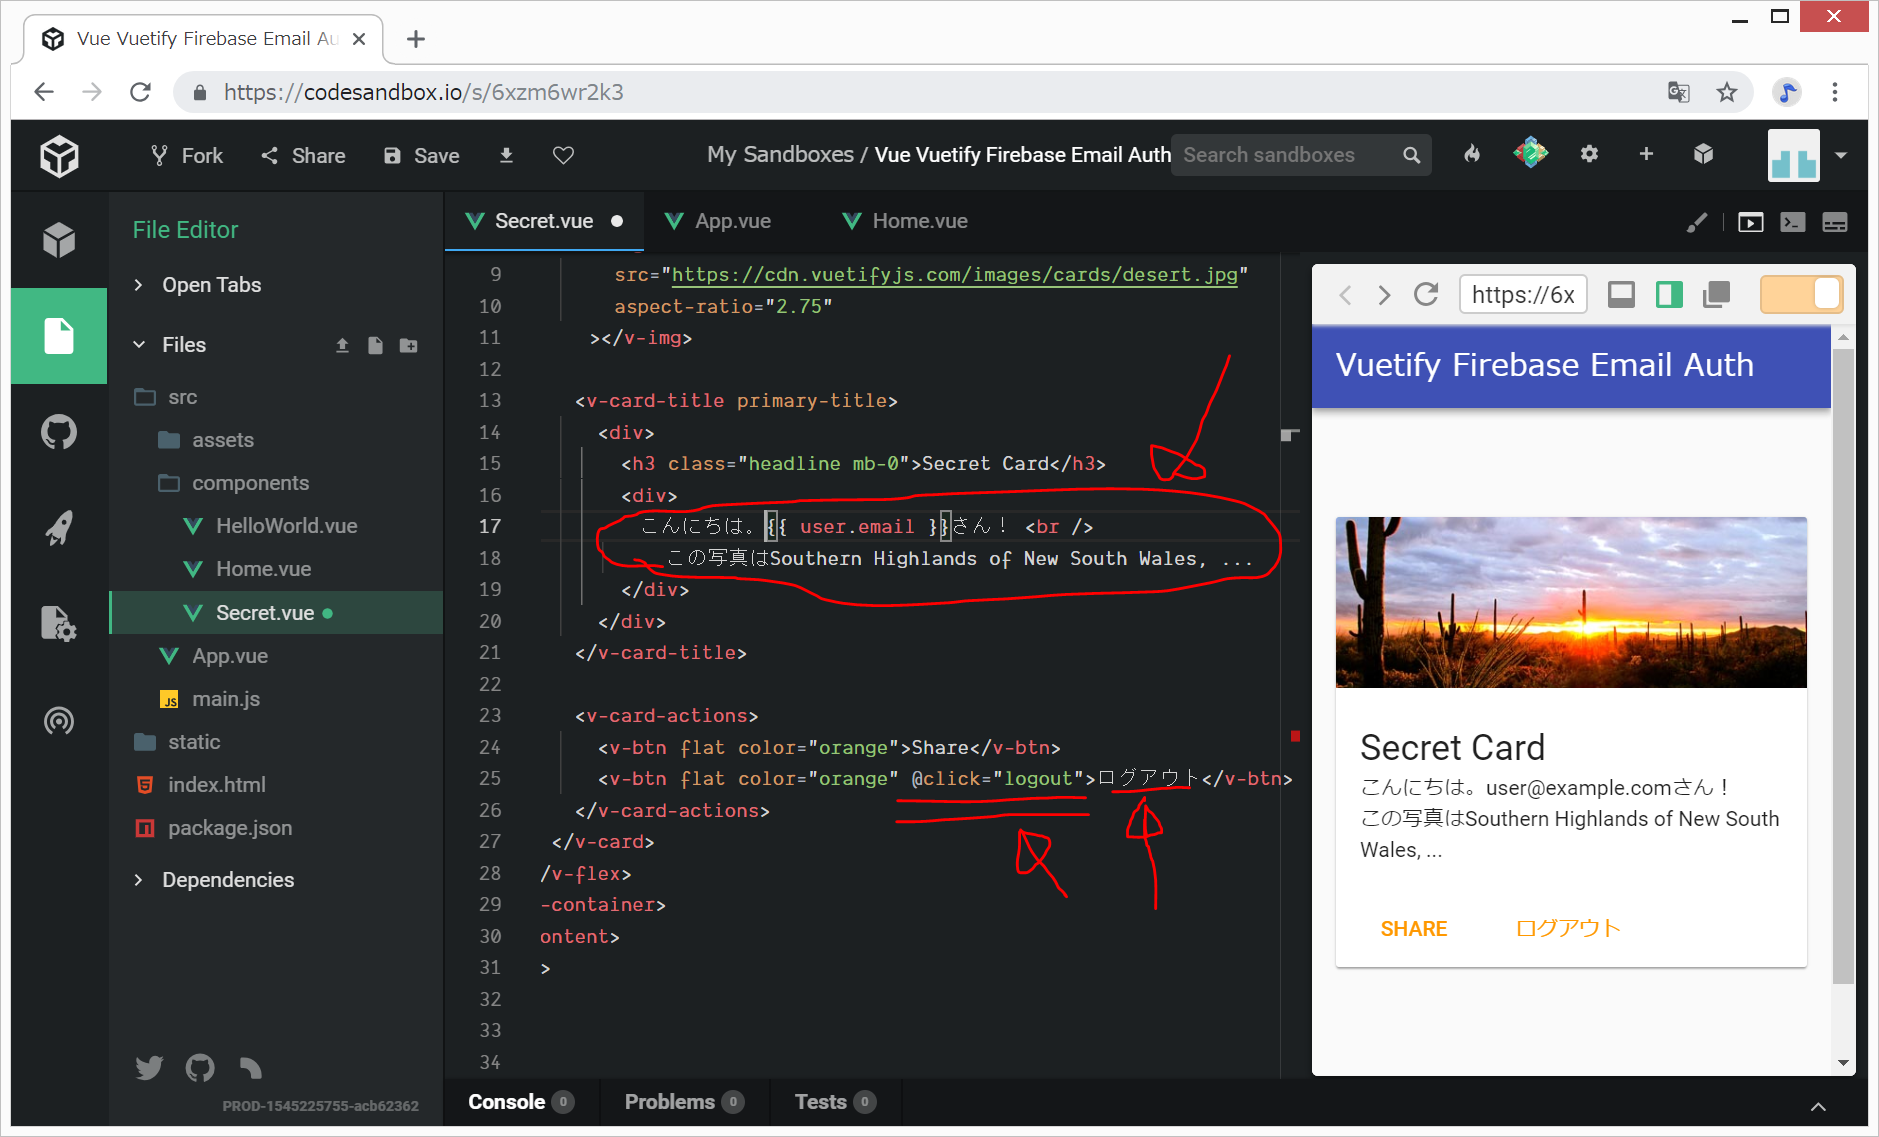
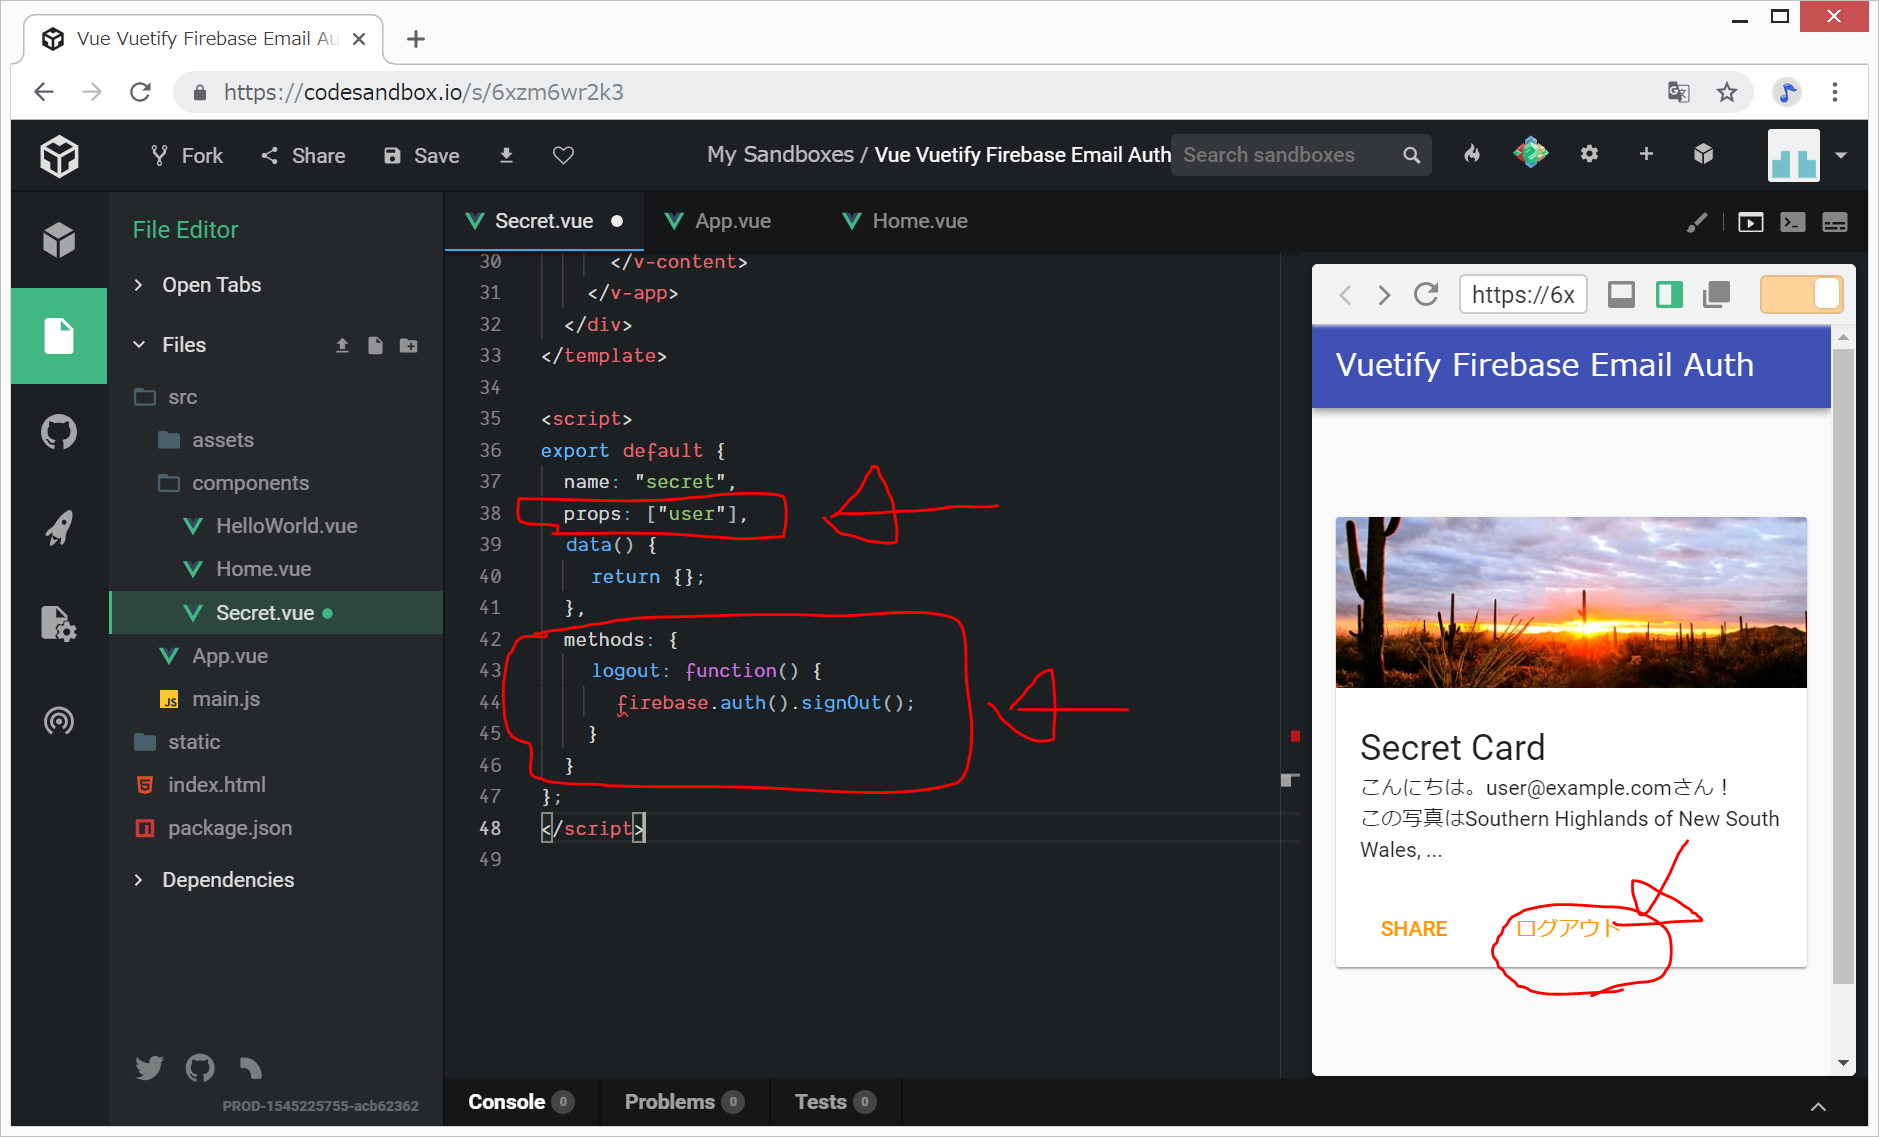
src/App.vueがFirebaseから受け取ったユーザー情報userを、src/components/Secret.vueに渡して、Secret.vue上で表示します。
src/App.vueの<template>の<Editor>の部分に、user=“userData”を追加します。
また、<script>のdata関数でuserDataを初期化し、created関数のところで、ログイン状態のときにuserDataにFirebaseからの情報userを格納します。
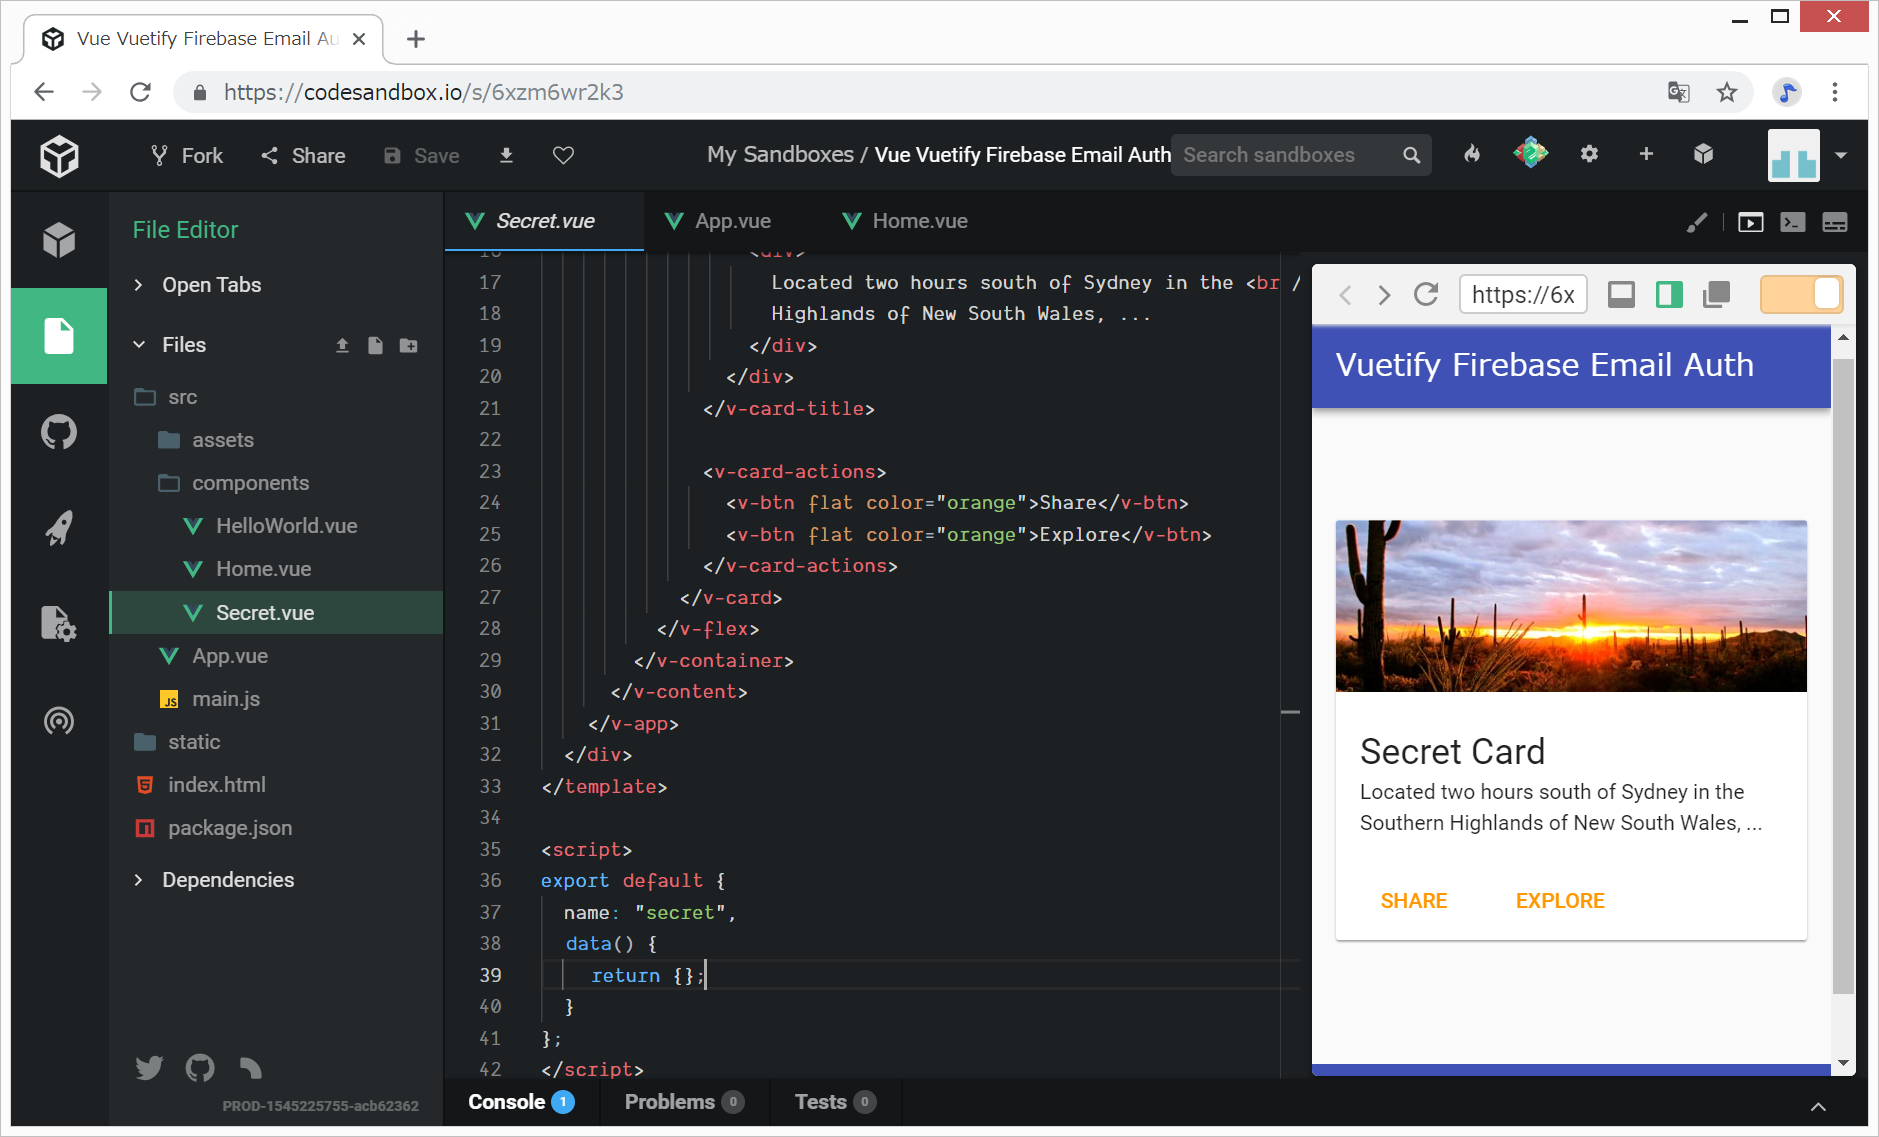
src/components/Secret.vue にて、src/App.vueからの情報userを受け取るために、<script>内でpros: [“user”]と記載します。
ログアウトボタンは、<script>内で、buttonを作成して@click=“logout”と記載し、<script>内でlogout()関数を定義します。
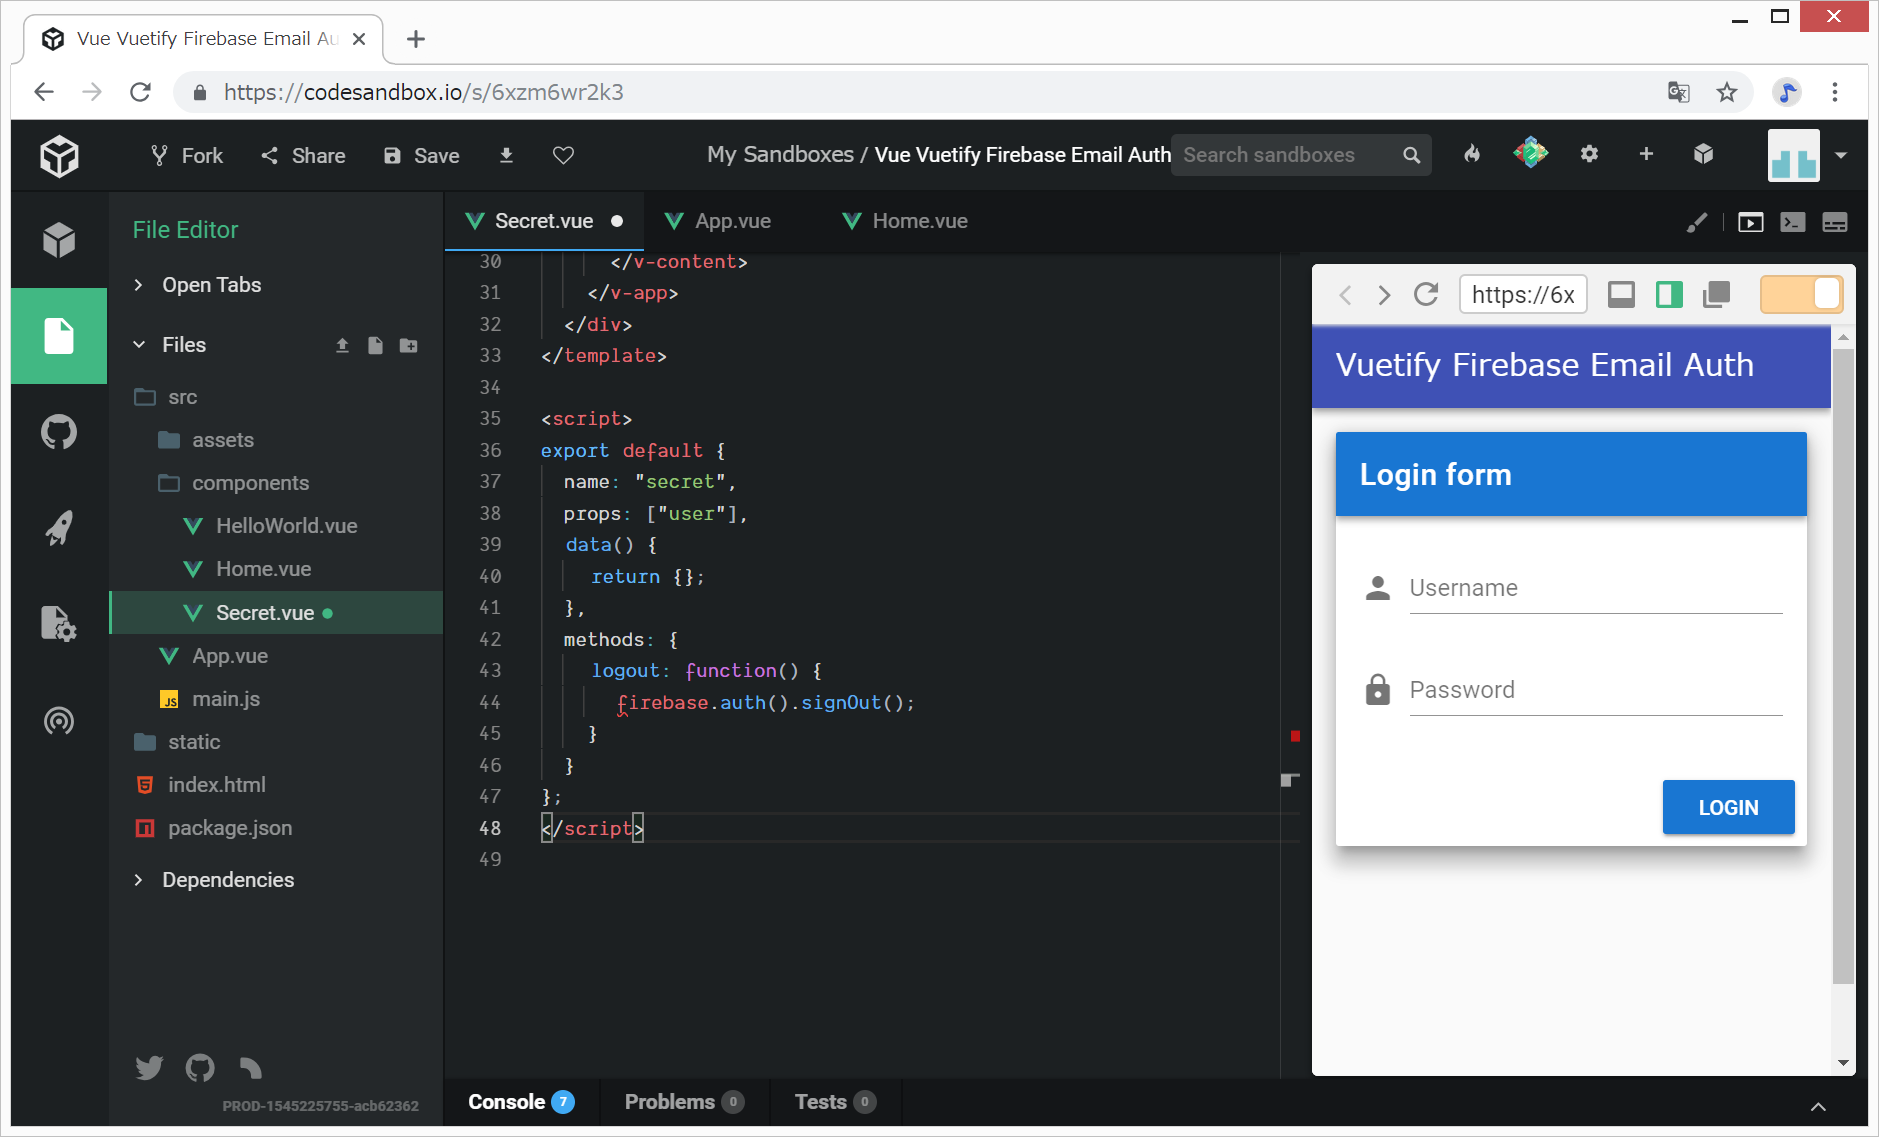
画面上の「ログアウト」ボタンを押すと、ログアウトされて、ログインフォームのページ(Home.vue)が表示されます。
完成です。お疲れさまでした。
さらに、
- ユーザーがパスワードを忘れてしまった場合のための、パスワード再発行手続き
- 誰もがemailとpasswordを登録すればログインできる(サインアップ)
などの実装を追加してもよいかもしれません。
ソースコード
今回参考にした本
以下の本が、写経していて楽しいし、説明もしっかりされていて、Vue.js入門書として非常におすすめです。
リンク

