Microsoftの機械学習アプリLobe(beta版)でリンゴとみかんを分類するWEBアプリ作成を試してみる(2)Windows10でPython3.6+TensorFlow1.15をセットアップ
前回は、lobeで、TensorFlow用のモデルをエクスポートしました。
このモデルを用いて、『リンゴとミカンを分類するWEBアプリ』を作成したいのですが、
- lobe/web-bootstrap を用いる (→未対応?)
- Flask を用いる
- TensorFlow.js を用いる(モデルをTensorFlow.js用に変更する)
の3つを思いつきましたが、とりあえず、 Flask を 用いてみたいと思います。
なお、 https://docs.lobe.ai/docs/export/export/ によりますと、lobeでのTensorFlow出力は
TensorFlow 1.15 SavedModel
となっていますので、まず、TensorFlow 1.15をWindowsにインストールしてみてみたいと思います。
また、エクスポートされた中身を見てみると、一部がこちらのようになっているため、
python 3.6
が必要のようです。
しかし、これがものすごく大変、、、いろいろ調べてみて、私の環境では、以下のやり方がベストと判断しました。やってみます。
- 1. Microsoftの機械学習アプリLobe(beta版)でリンゴとみかんを分類するWEBアプリ作成を試してみる 目次(全5回)
- 2. 開発環境
- 3. 今回構築した環境
- 4. Windows10にTensorFlow1.15インストールの流れ
- 5. VisualStudioCodeのインストール
- 6. Git for Windowsのインストール
- 7. vanilla Python3.6のインストール
- 8. pipenvのインストール
- 9. pipenv関連の環境変数を変更
- 10. pipenvで仮想環境を構築
- 11. ワークスペースを保存して設定を変更
- 12. autopep8,flake8,mypyのインストール
- 13. numpyとmatplotlibのインストール
- 14. test.pyを作成しpythonが実行できることを確認
- 15. TensorFlow1.15のインストール
- 16. Keras2.3.1のインストール
- 17. TensorFlowの動作確認
- 18. 参考:.gitignore
- 19. 今回のインストールについて参考にしたサイトのリンクのまとめ
- 20. 次の記事
Microsoftの機械学習アプリLobe(beta版)でリンゴとみかんを分類するWEBアプリ作成を試してみる 目次(全5回)
- (1)LobeのインストールからTensorFlowモデルのエクスポートまで
- (2)Windows10でPython3.6+TensorFlow1.15をセットアップ
- (3)Windows10ローカル環境でtf_example.pyを実行
- (4)Windows10ローカル環境でFlaskを用いて画像判定
- (5)FlaskアプリをHerokuにデプロイ
開発環境
Windows10 Pro今回構築した環境
VisualStudioCode 1.50
Git for Windows v2.29.2
python 3.6
pipenv 2020.8.13
TensorFlow 1.15.3
keras 2.3.1
Windows10にTensorFlow1.15インストールの流れ
2020年現在、TensorFlow1.15はPython3.7に対応しているそうです。
- VisualStudioCodeをインストール
- gitをインストール(参考リンク)
- vanilla Python3.6をインストール
- VisualStudioCodeのターミナル画面でコマンドプロンプトを開く
- pipenvのインストール
- システム環境変数の設定(参考リンク)
- 仮想環境を構築する。新規フォルダ「tf1-venv」を作成し,右クリックして「Codeで開く」
pipenv --python 3.6- VScodeの拡張機能Python(ms-python.python)をインストール
- [ユーザーホーム]\AppData\Roaming\Code\User\settings.jsonの設定(コマンドプロンプトになるようにする)
- ワークスペースを保存し、[ワークスペースフォルダ]\.vscode\settings.jsonの設定を行う
pipenv install autopep8 flake8 mypy --devpipenv install numpy matplotlib- test.pyを作成しサンプルコードをコピペ
- test.pyを実行してみる。具体的には、ターミナル画面で、
python test.py pipenv install tensorflow==1.15.3pipenv install keras==2.3.1- TensorFlowの動作確認
- Kerasの動作確認
長いですが、やってみます。
VisualStudioCodeのインストール
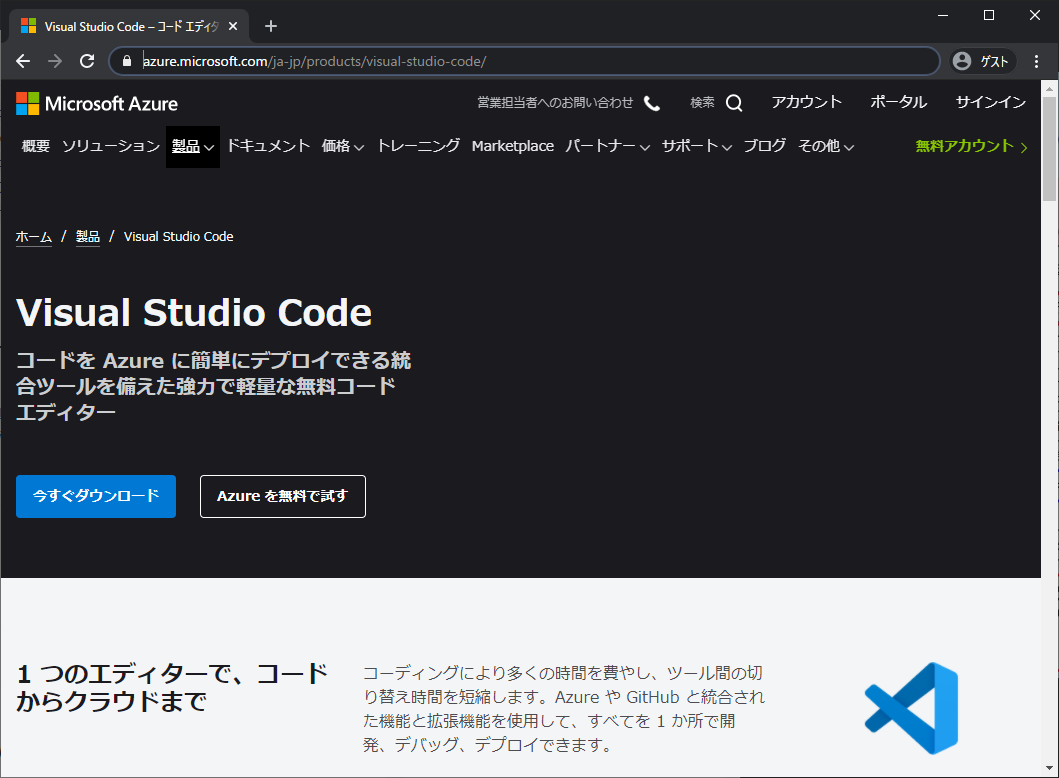
https://azure.microsoft.com/ja-jp/products/visual-studio-code/ からダウンロードしてインストールします。
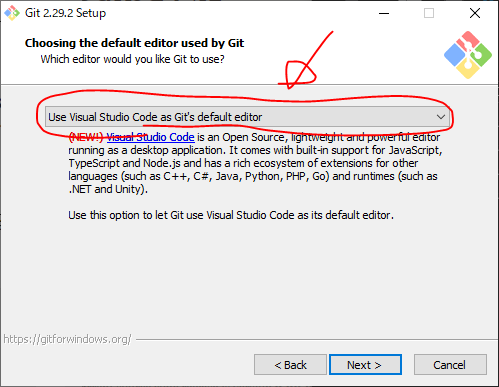
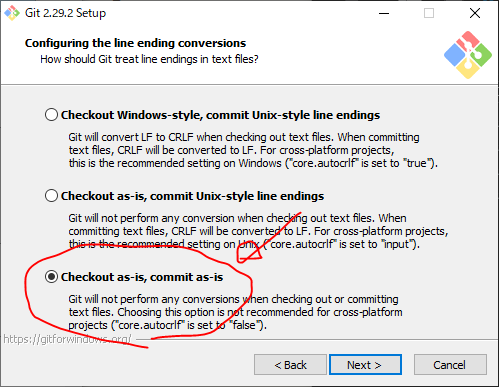
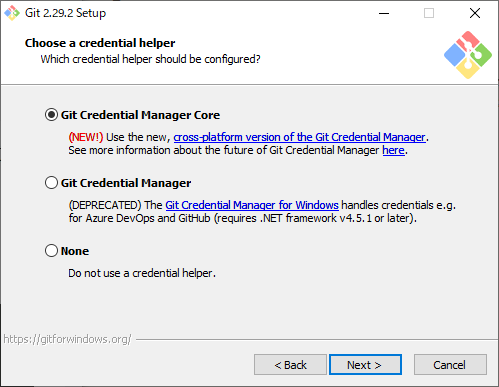
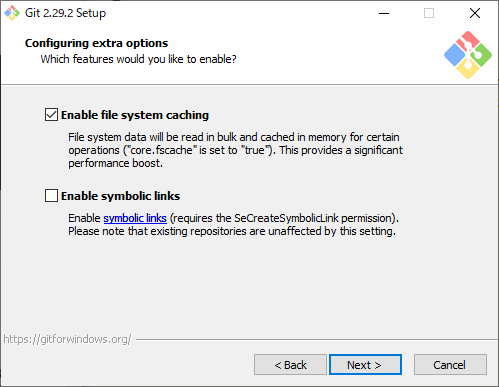
Git for Windowsのインストール
こちらのサイトの通りに、Git for Windowsをインストールします。
https://git-scm.com/download/win から、ダウンロードしてインストールします。
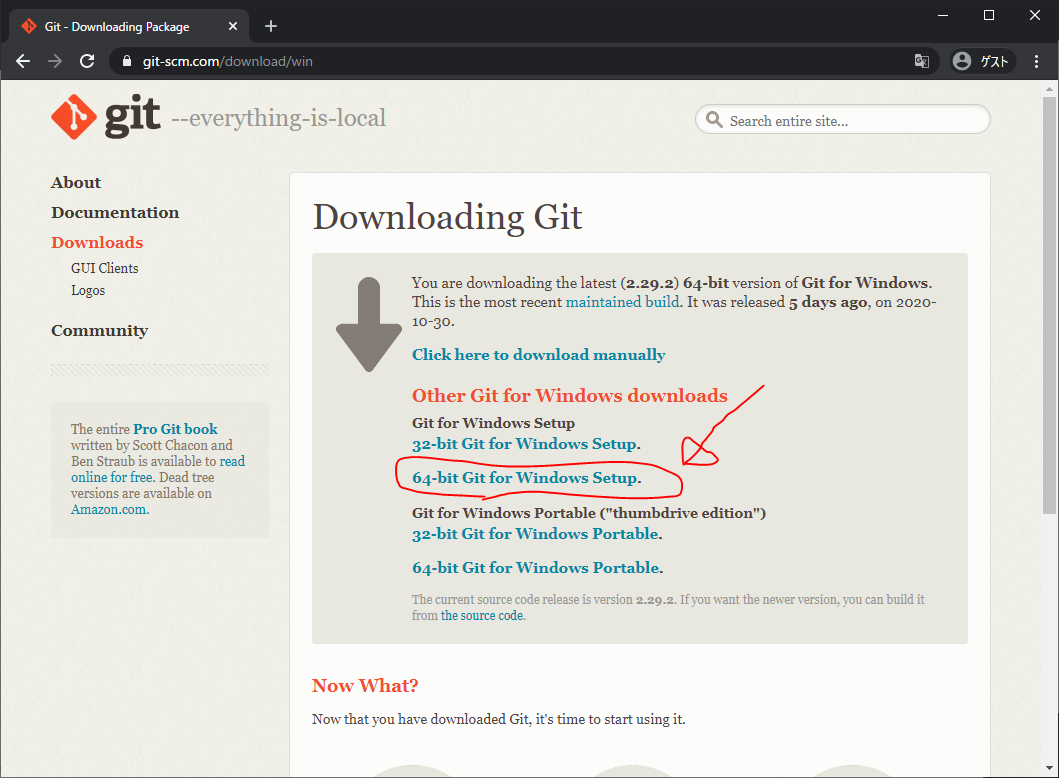
Git-2.29.2-64-bit.exe がダウンロードされますので、ダブルクリックしてから、 こちらのサイトの通りにインストールします。
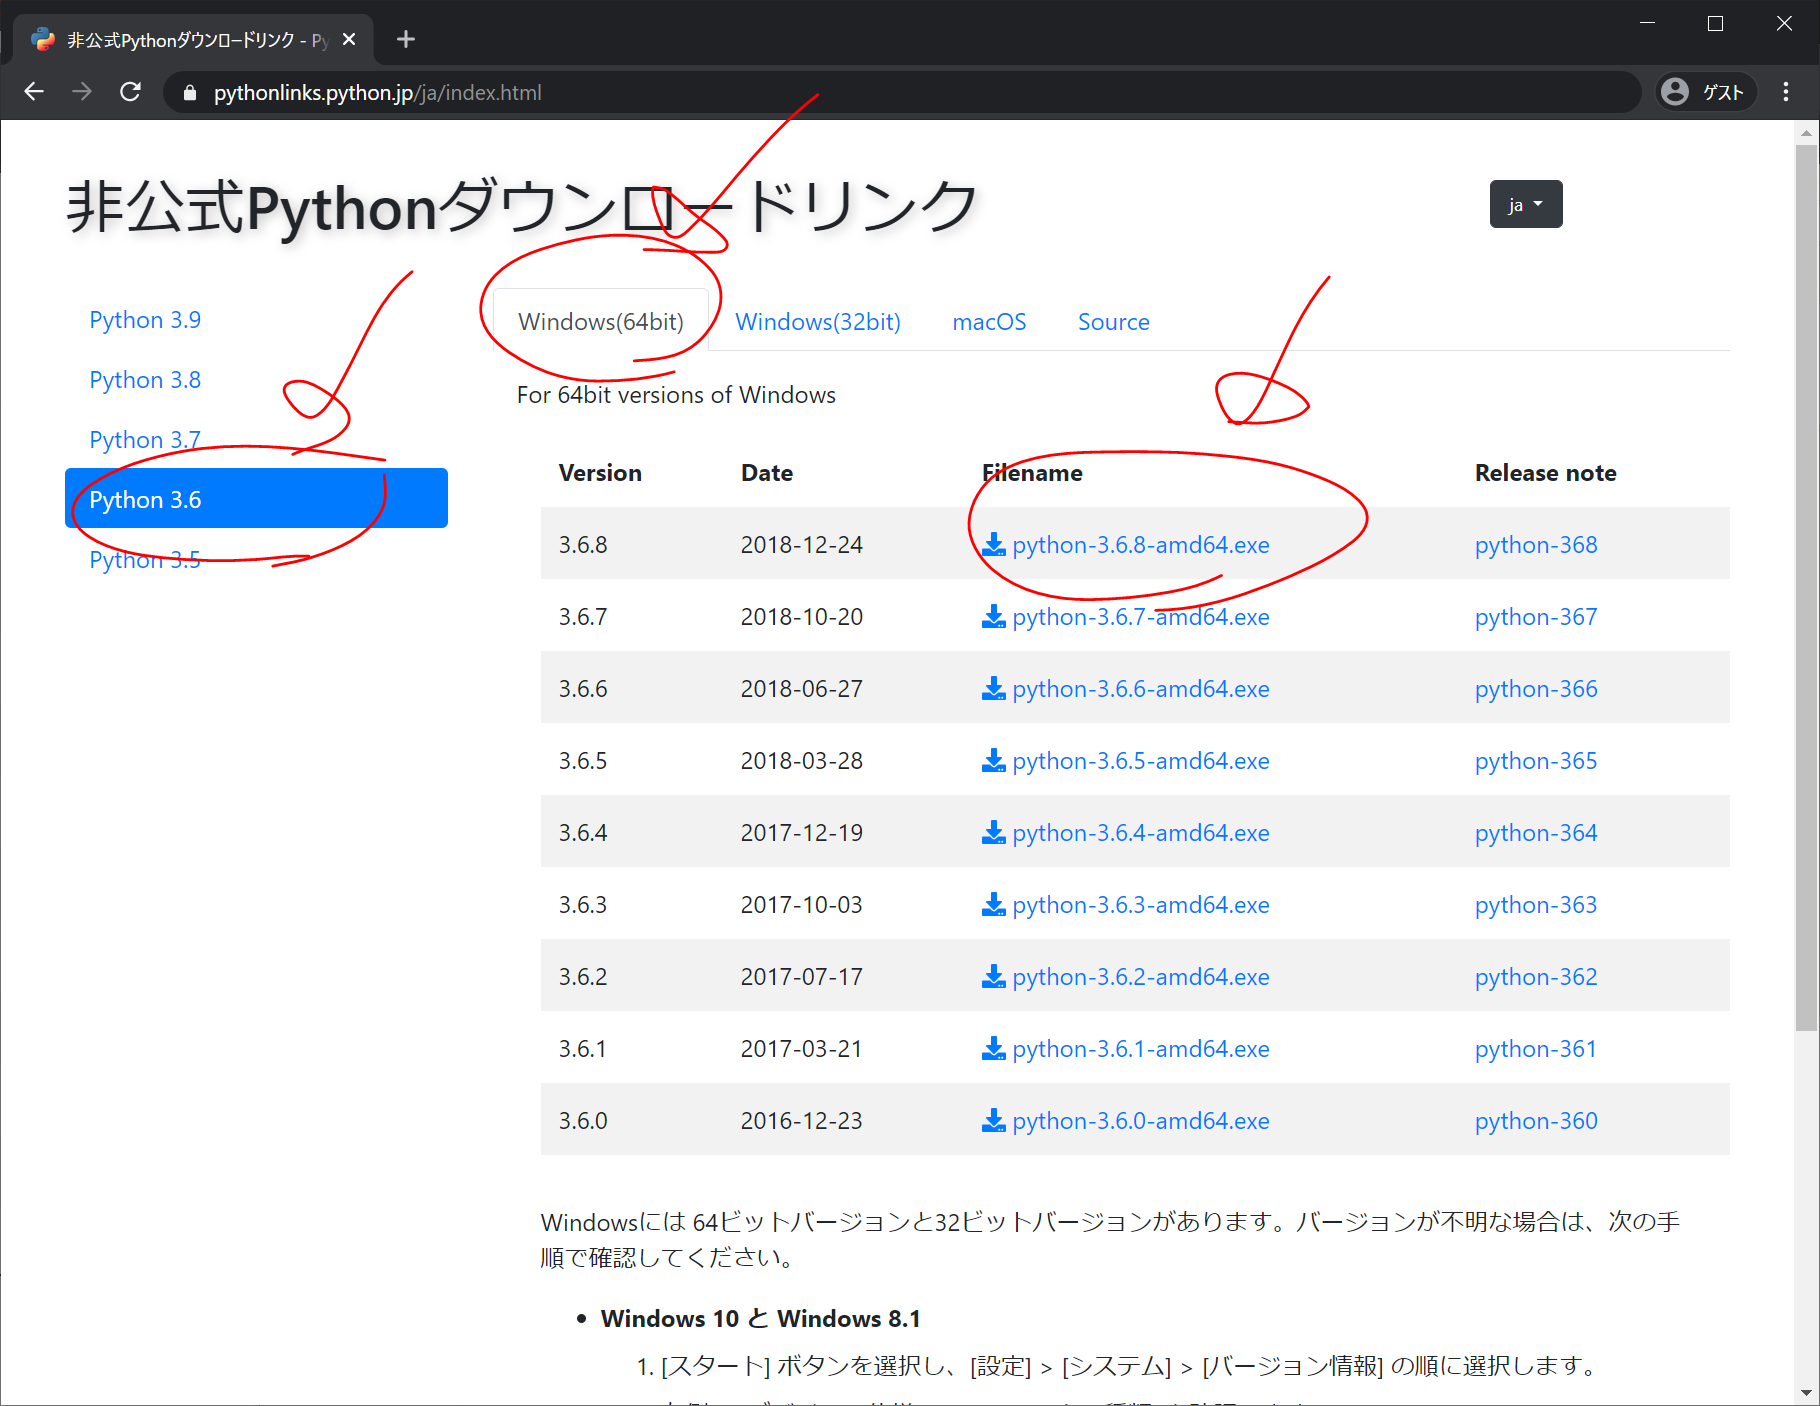
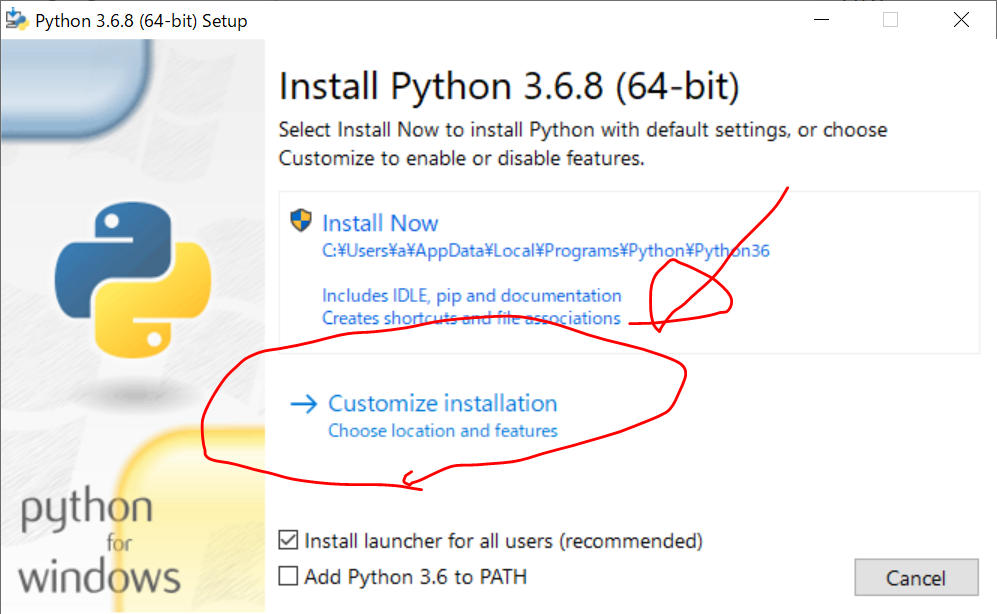
vanilla Python3.6のインストール
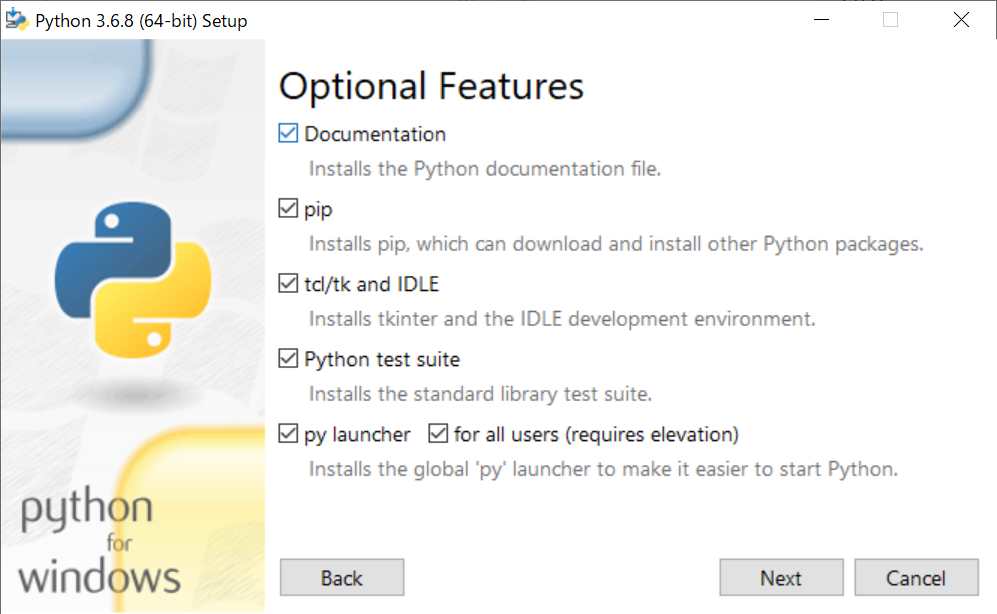
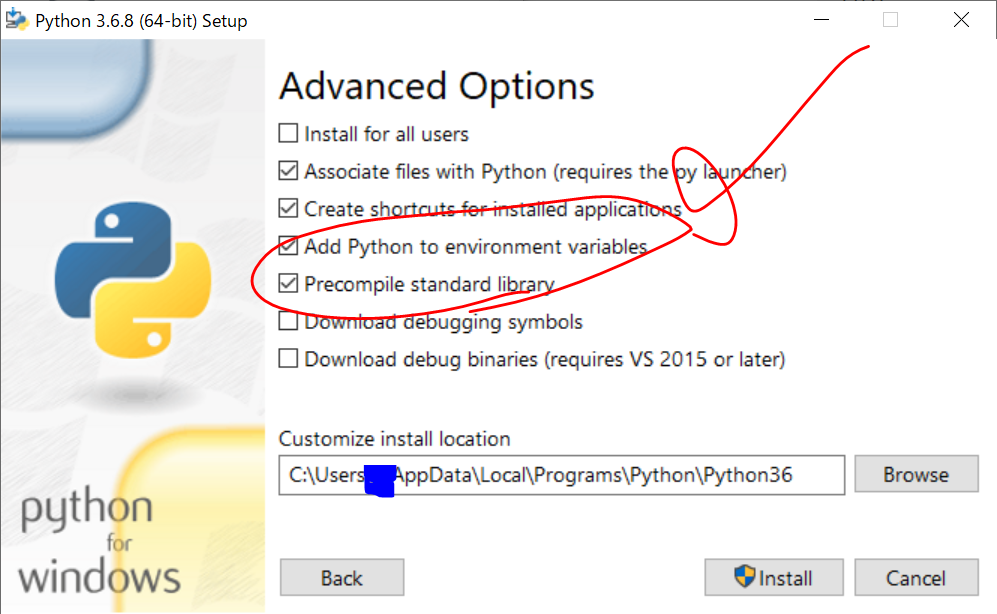
https://pythonlinks.python.jp/ja/index.html から、Python 3.6 > Windows(64bit) > python-3.6.8-amd64.exe をダウンロードして、インストールします。
『Windows + Python + PipEnv + Visual Studio Code でPython開発環境』( 2020年05月04日 )の通りに、インストールします。
pipenvのインストール
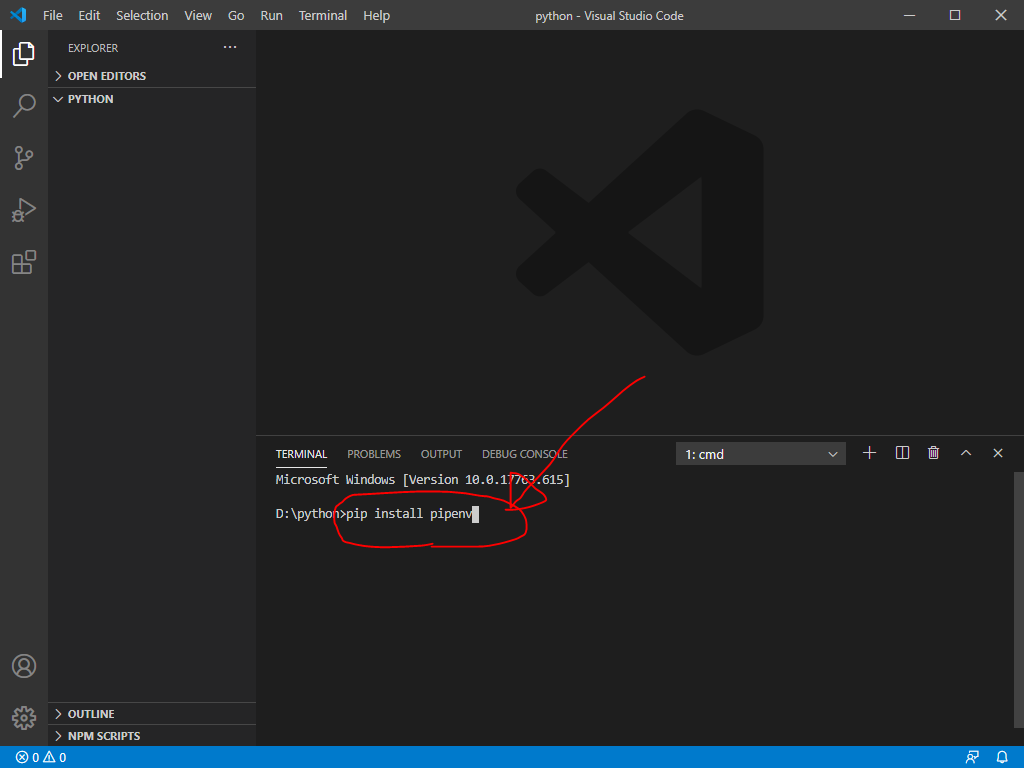
D:/ に、D:/python/ フォルダを作成し、VisualStudioCodeで開きます。
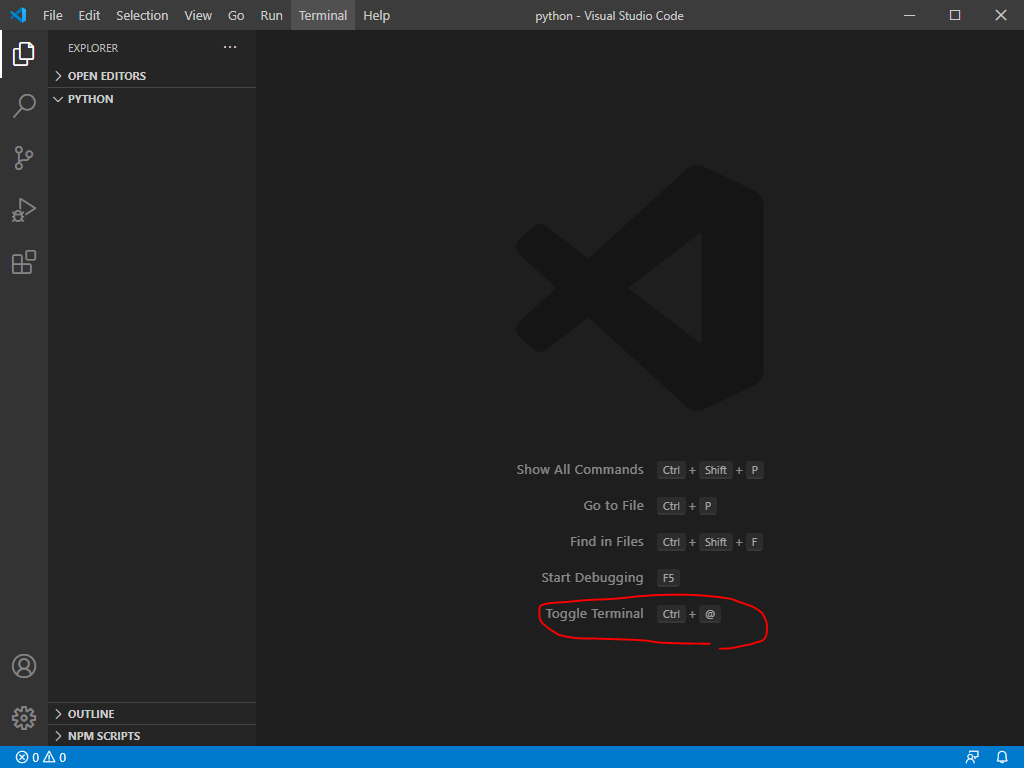
Ctrl + @ により、ターミナル画面を出します。
cmd(コマンドプロンプト)画面が出てくるので、
pip install pipenvを入力し、Enterを押します。


いったん、VisualStudioCodeを閉じます。
pipenv関連の環境変数を変更
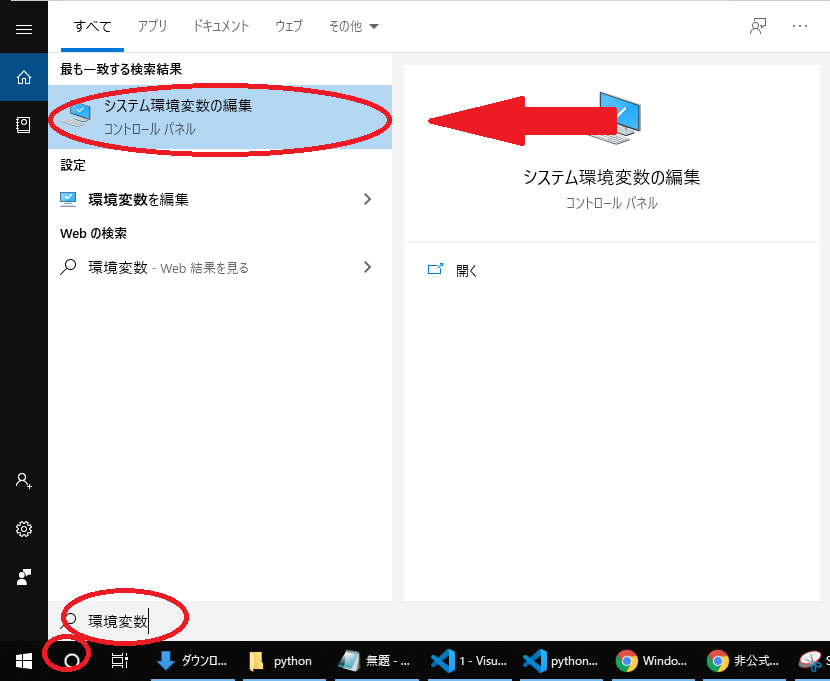
こちらのサイトに従い、pipenvを用いてディレクトリ(プロジェクト)毎に仮想環境を作るために、環境変数を変更します。
画面左下の『検索』をクリック →「環境変数」と入力→「システム環境変数の編集」をクリック
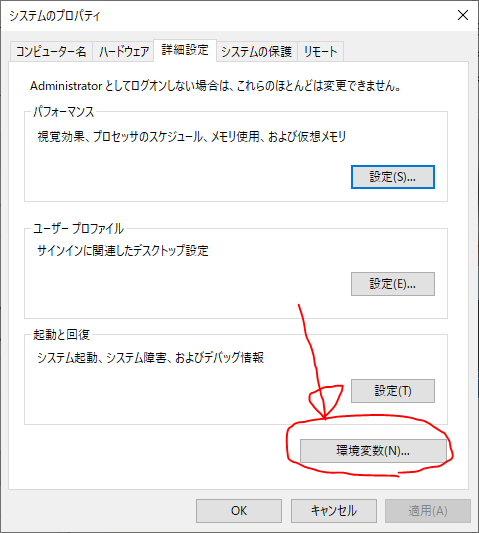
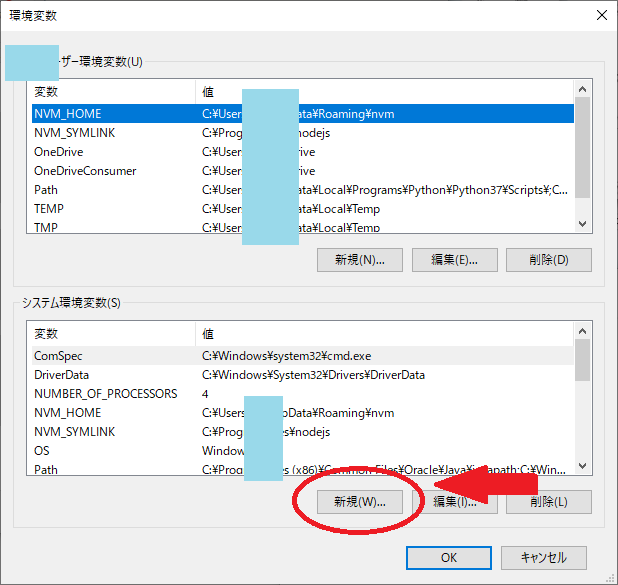
PIPENV_VENV_IN_PROJECT
true
と入力したのち、OK > OK > OK で閉じます。

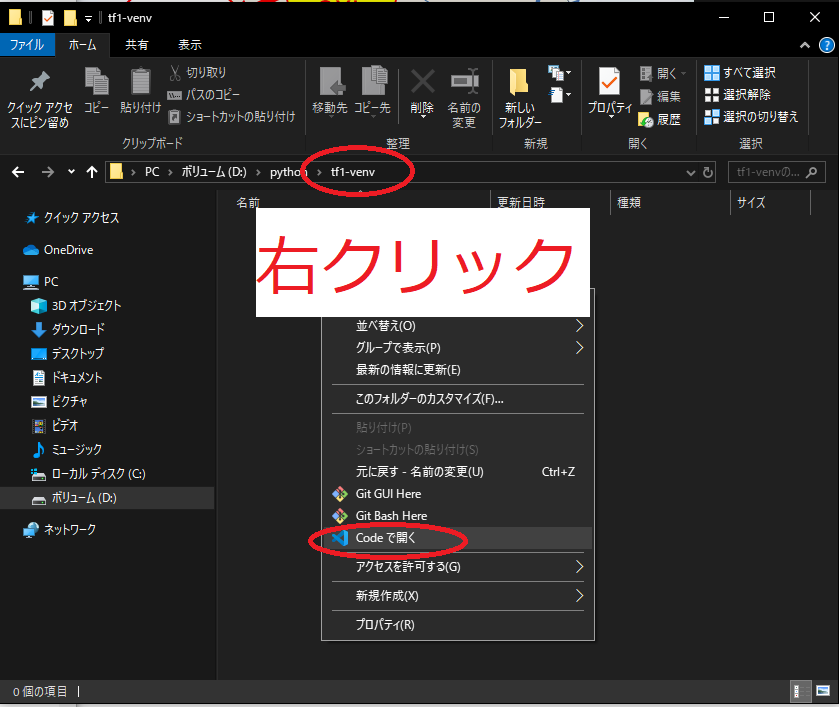
pipenvで仮想環境を構築
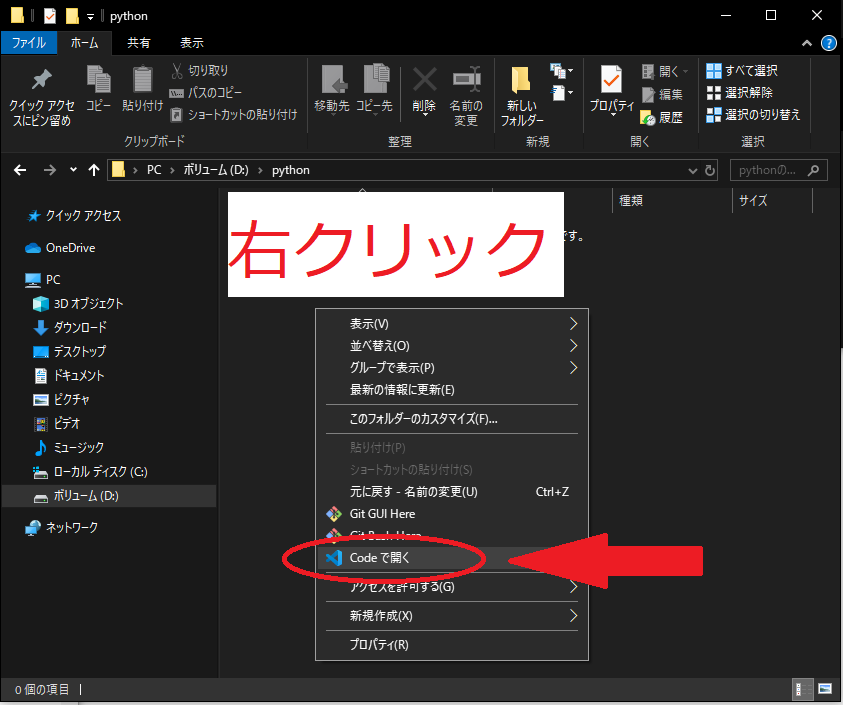
D:/python/ フォルダに、新規フォルダ「tf1-venv」を作成し、右クリックして「Codeで開く」を選択し、VisualStudioCodeで開きます。
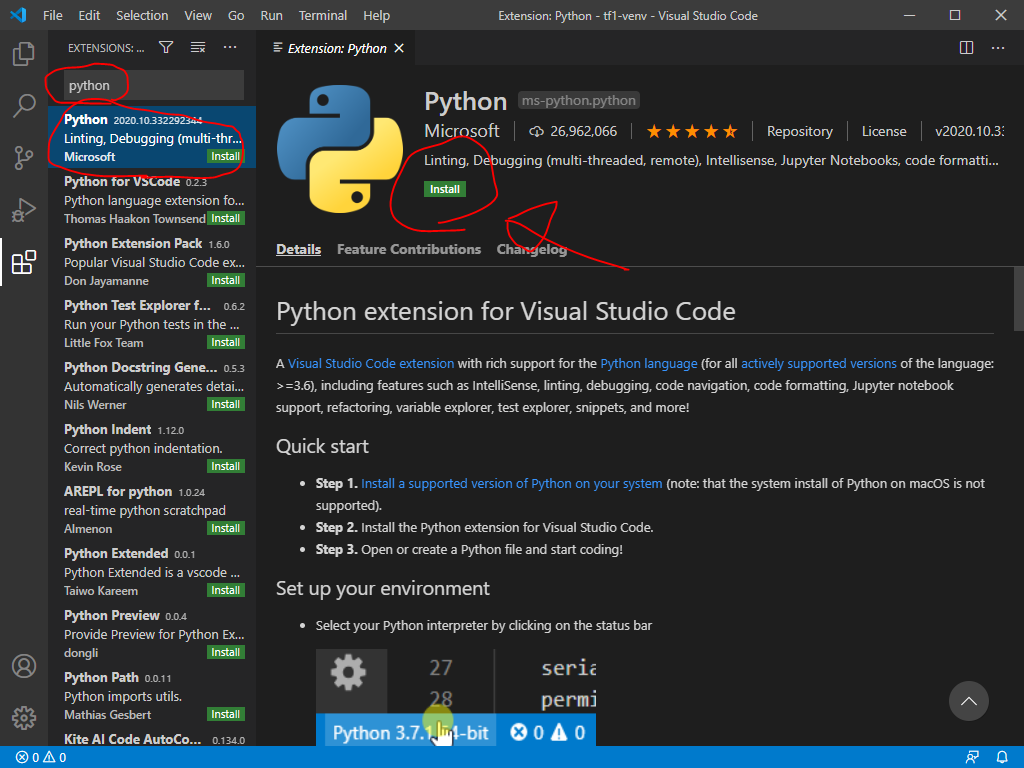
画面左側の上の方の四角形4つのボタンをクリックして、Extensionsを開き、
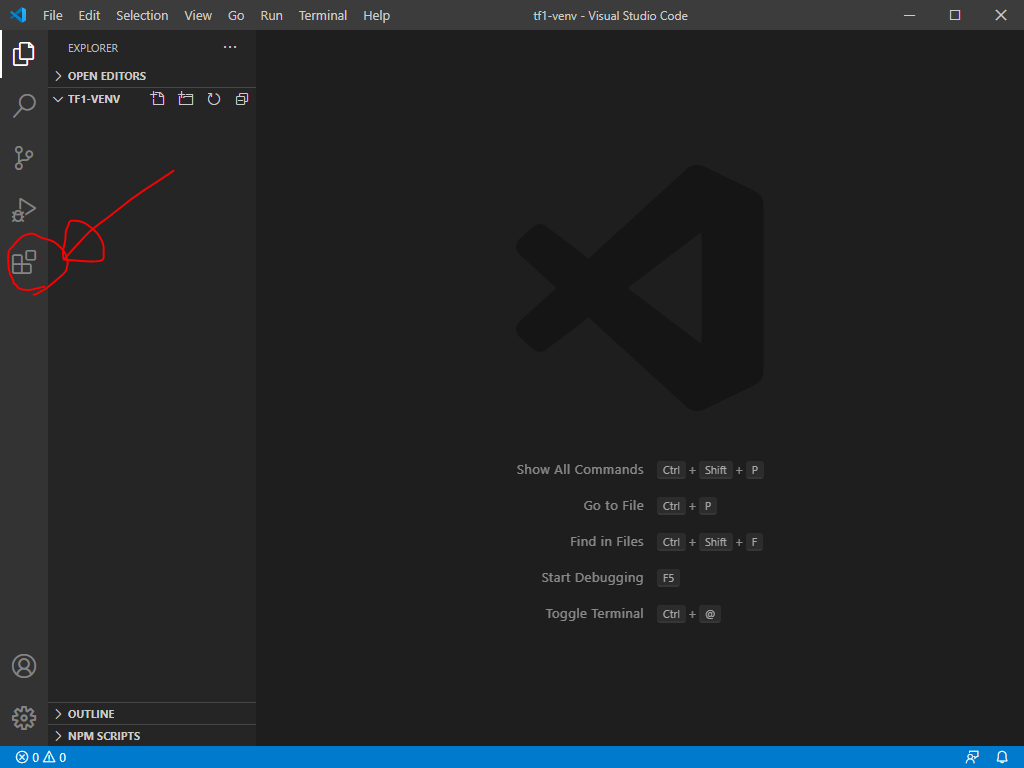
拡張機能 Python(ms-python.python)をインストールします。
Ctrl+@ でターミナル画面を出して、以下を入力して仮想環境を構築します。
pipenv --python 3.6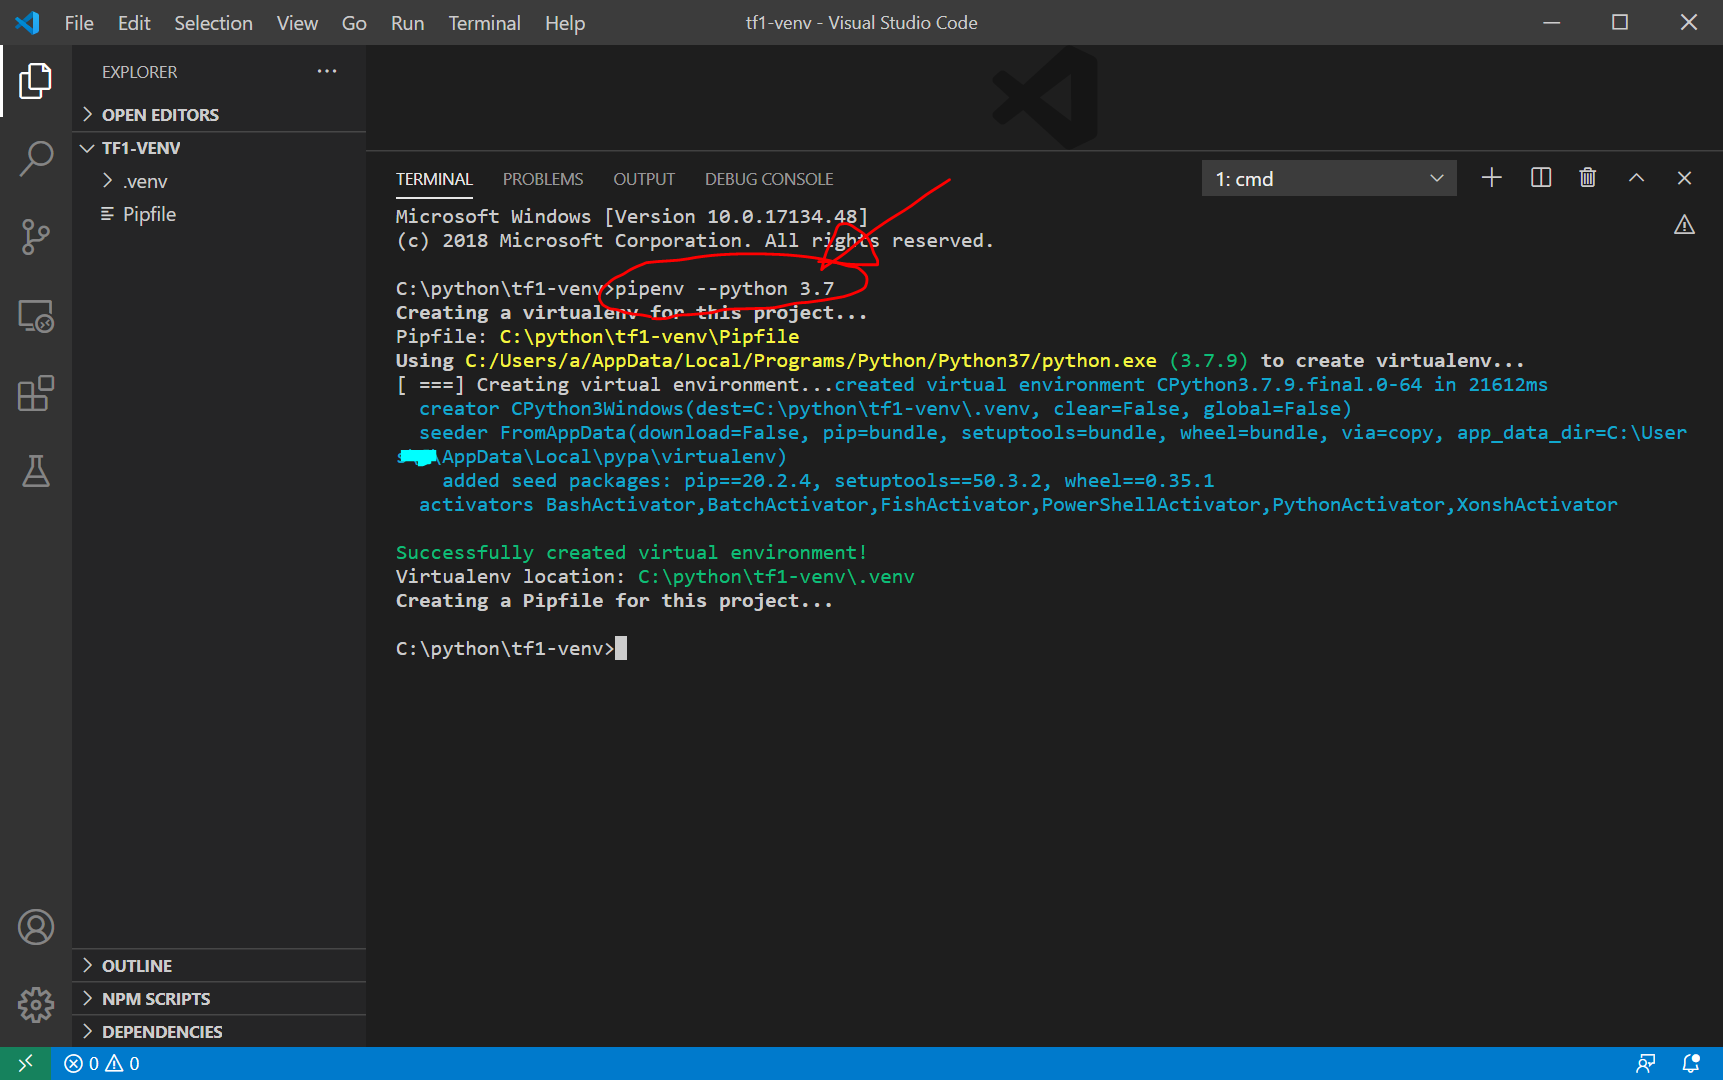
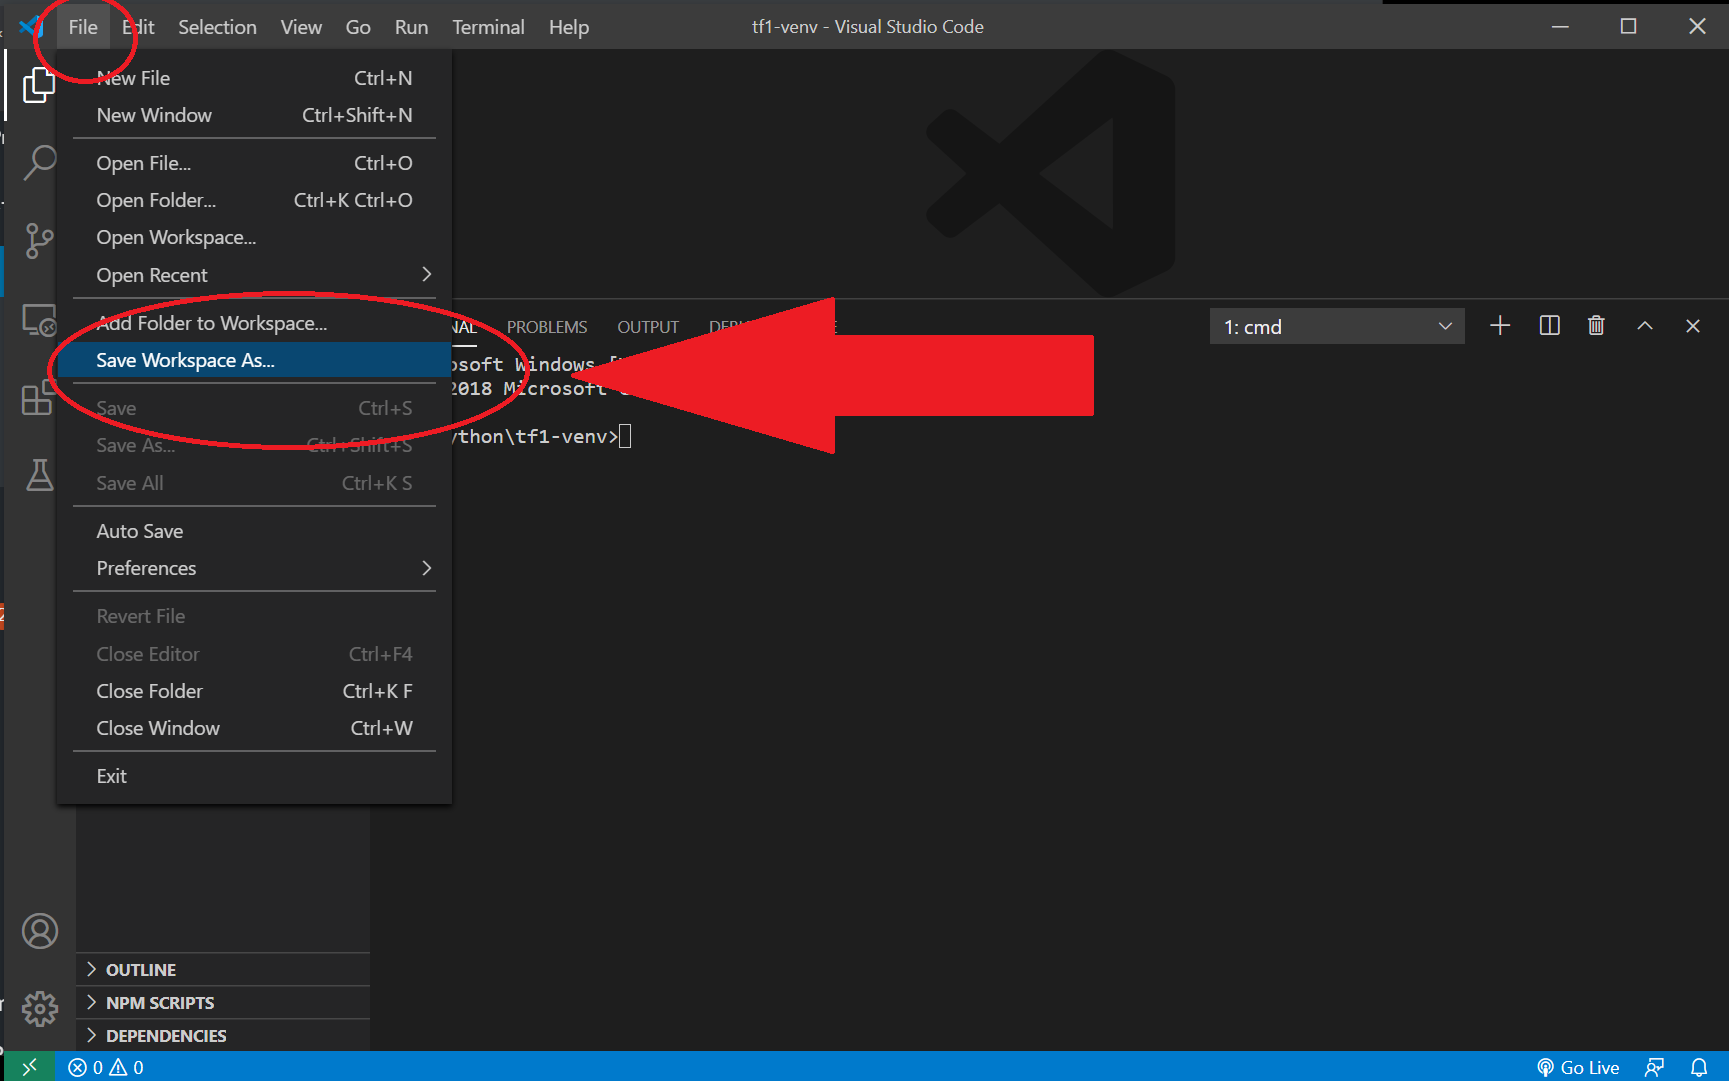
ワークスペースを保存して設定を変更
VSCodeの『ワークスペース』についてはこちらをご覧下さい。settings.jsonが見つけられず苦労しましたが、自分で作成するのですね。。。
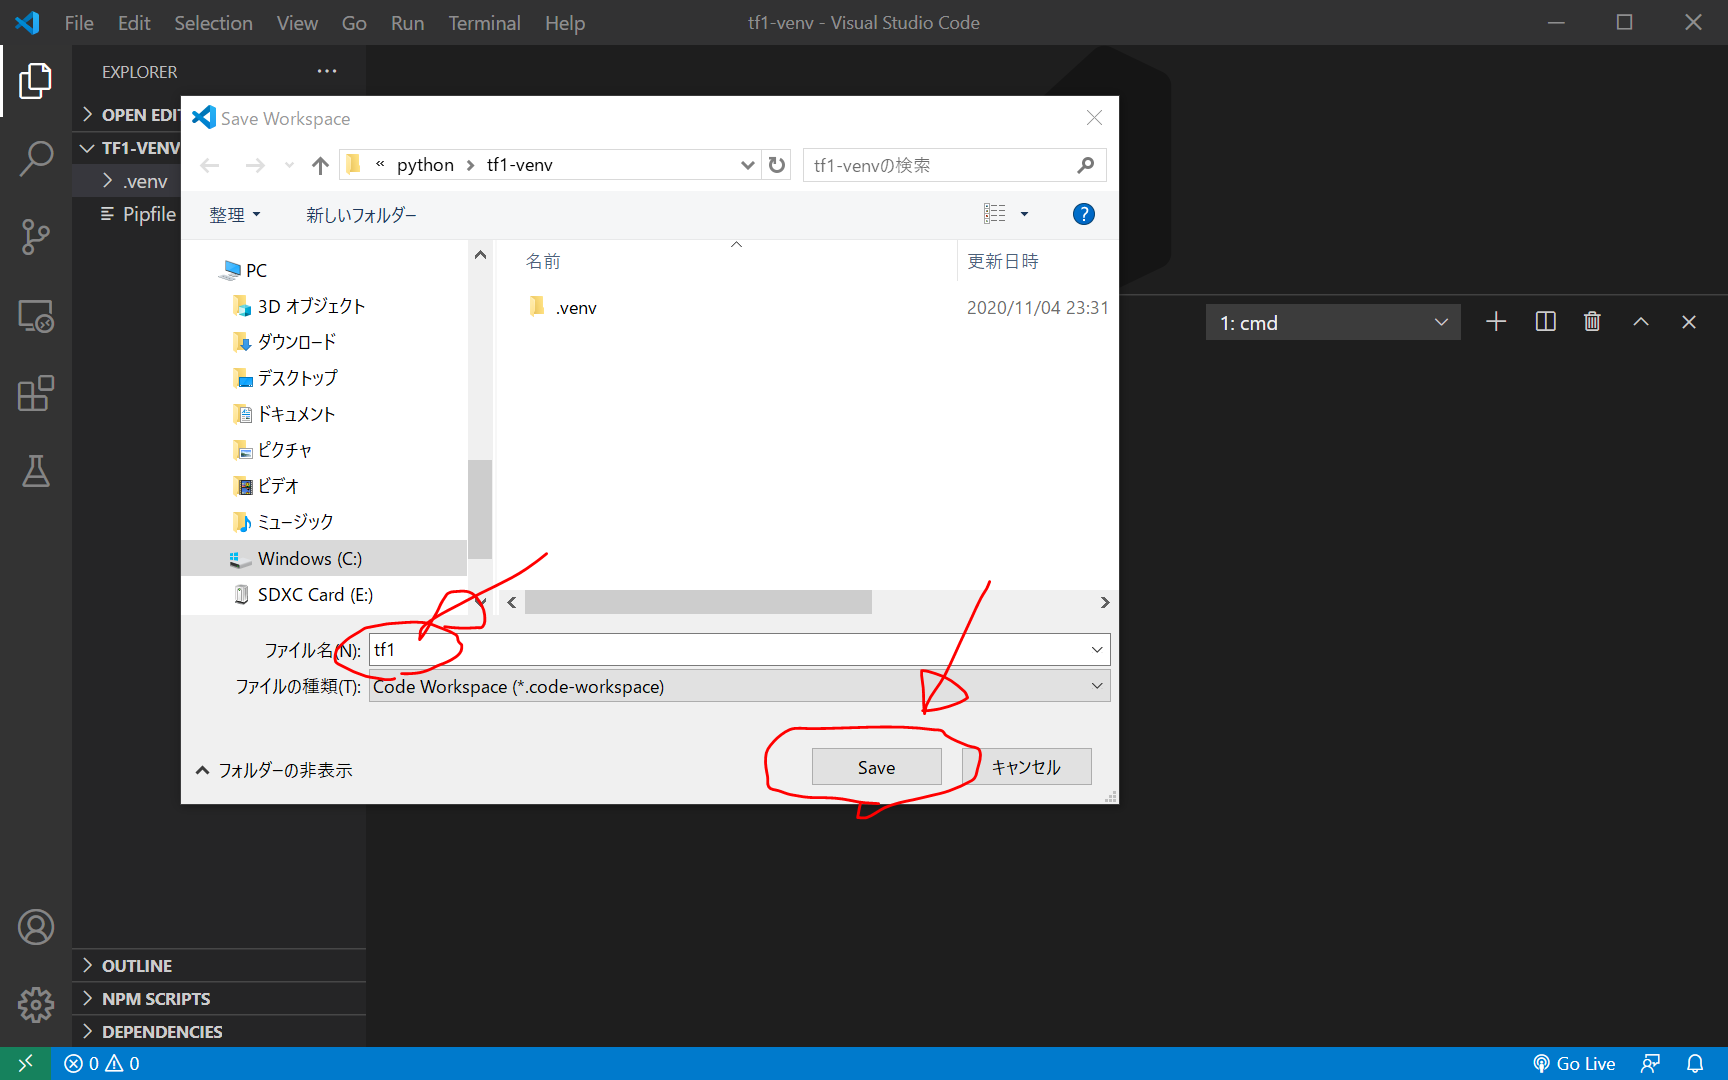
File > Save Workspace As… をクリック
名前は何でもよいですが、今回は tf1 という名前で保存しました。
私の環境では、この時点では、 .vscode/settings.json
はありませんでした。手動で.vscode/ フォルダと、settings.jsonを作成してもよいのですが、別の方法でやってみます。
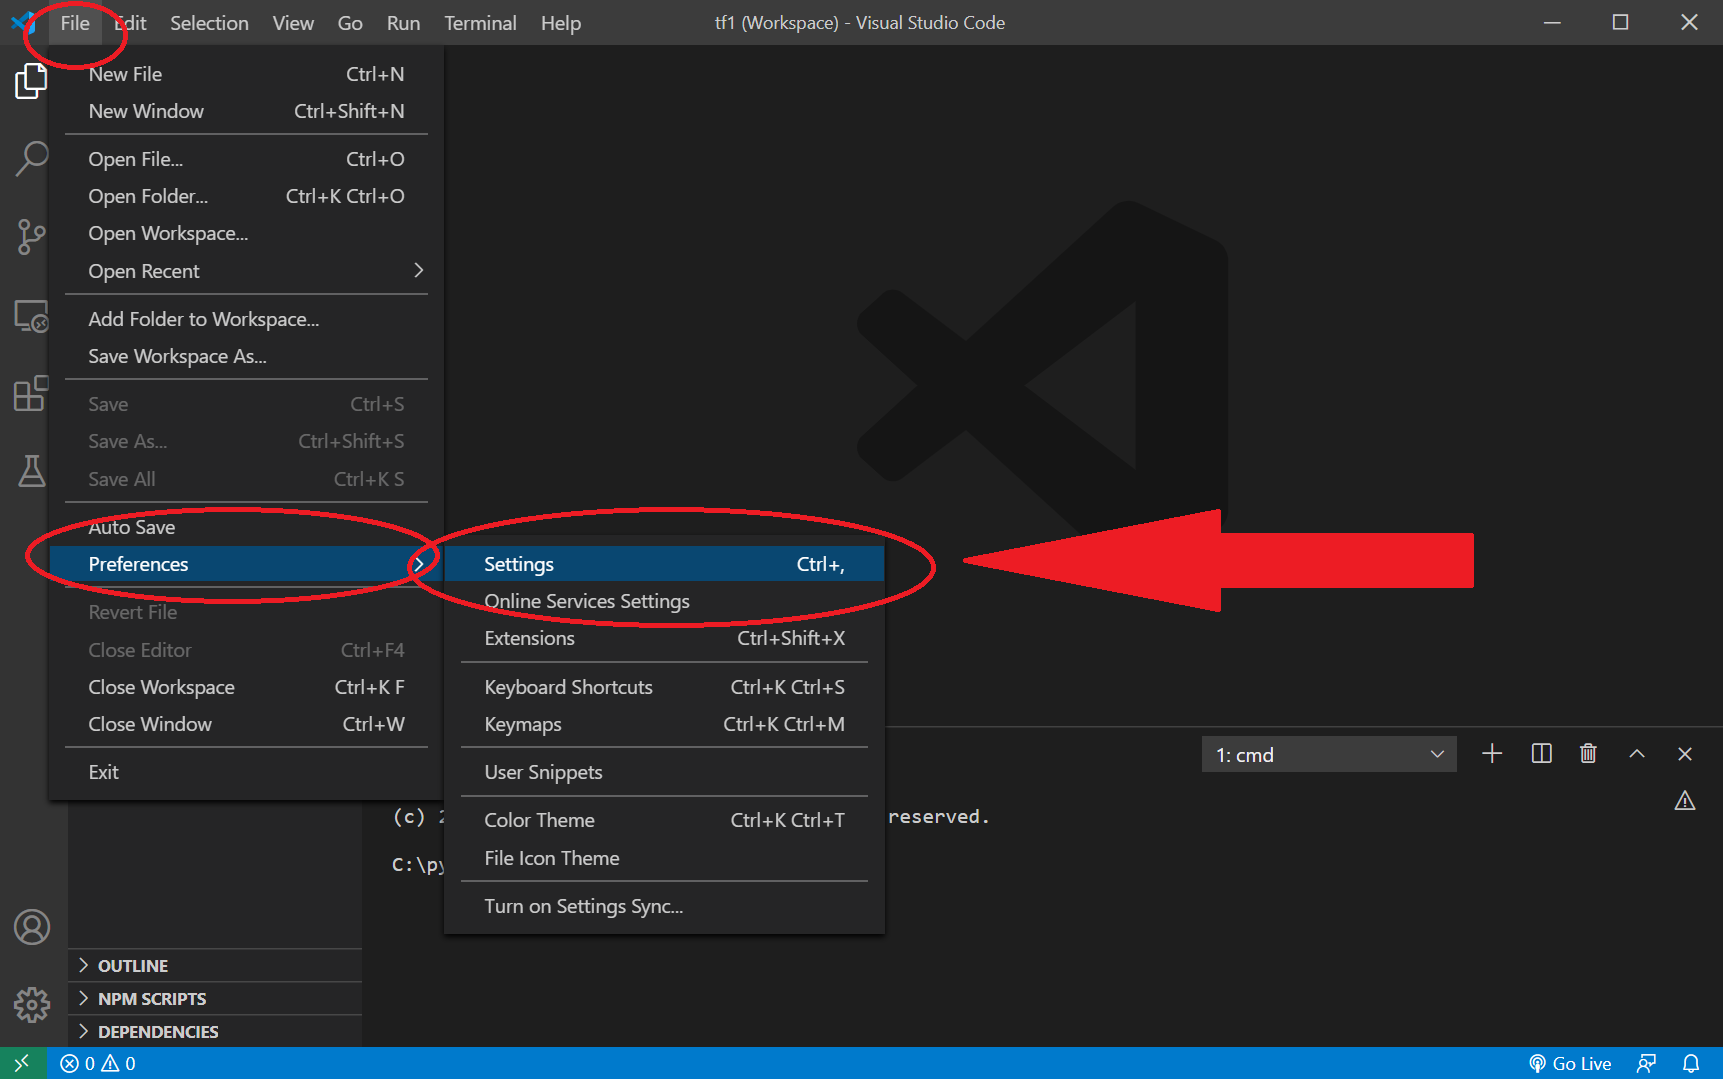
File > Preferences > Settings をクリック(Ctrl + , でもいけます。)
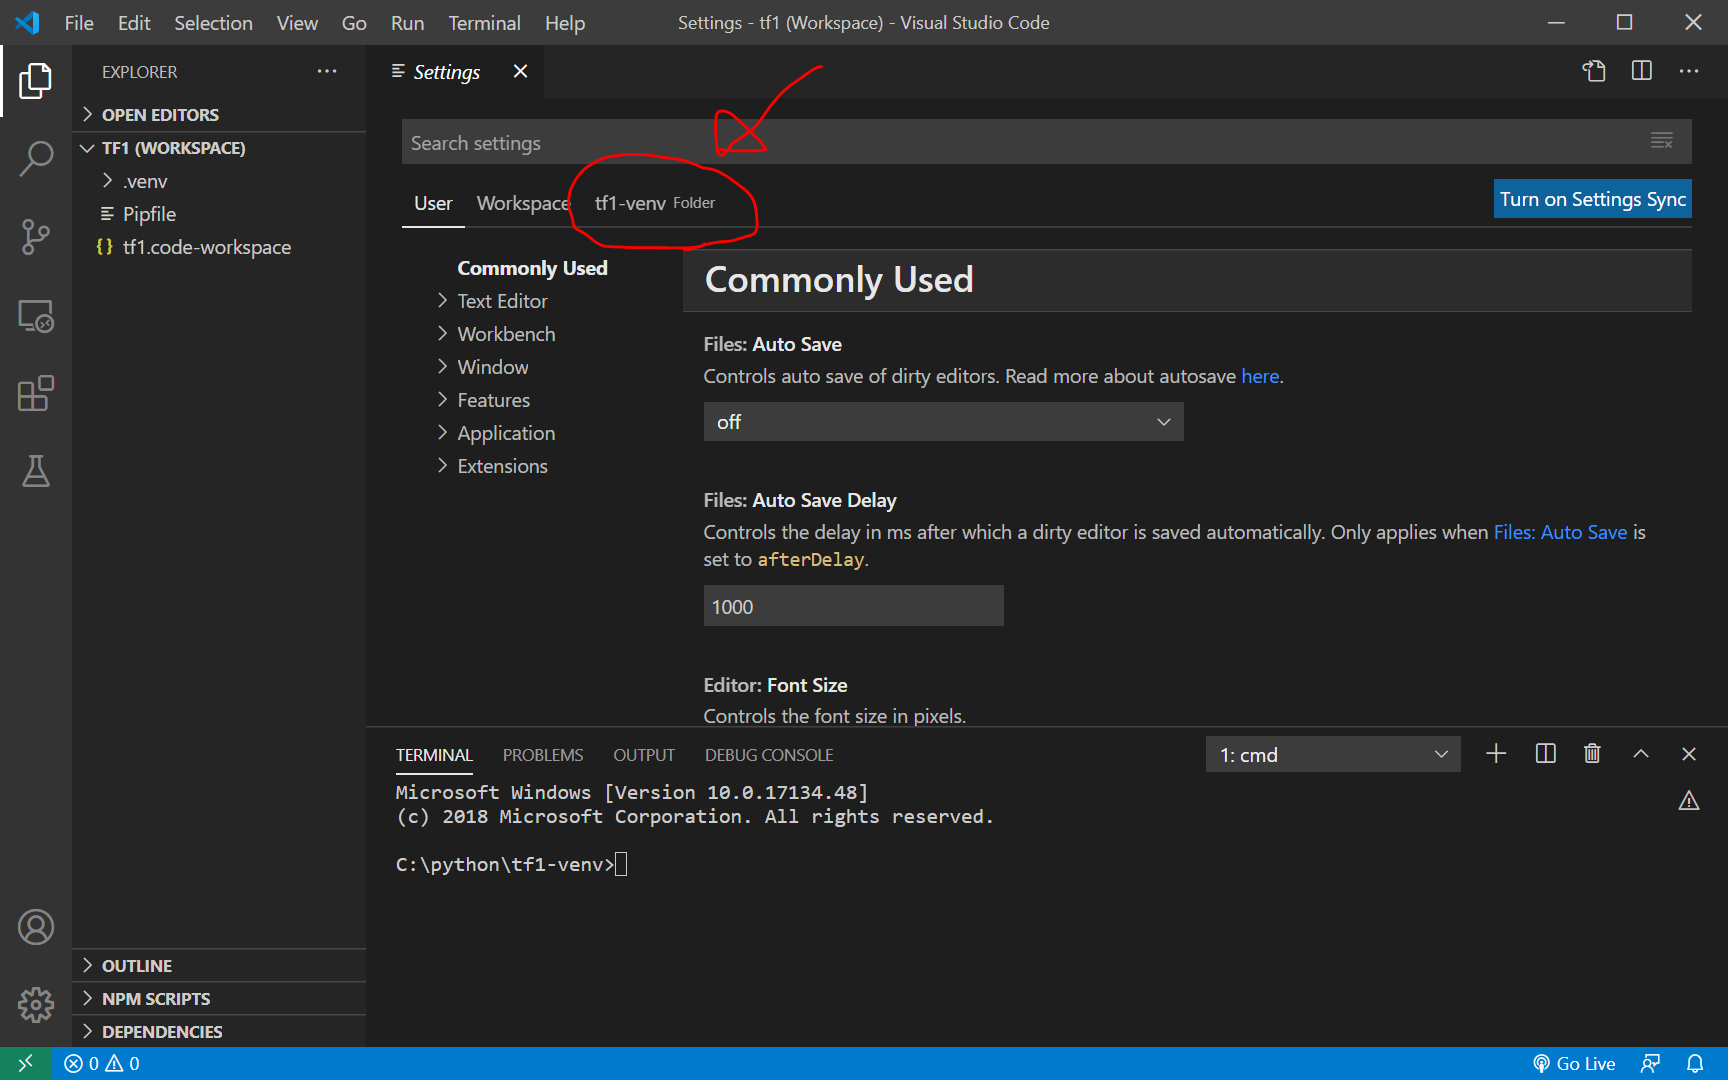
tf1-venv Folder タブをクリック
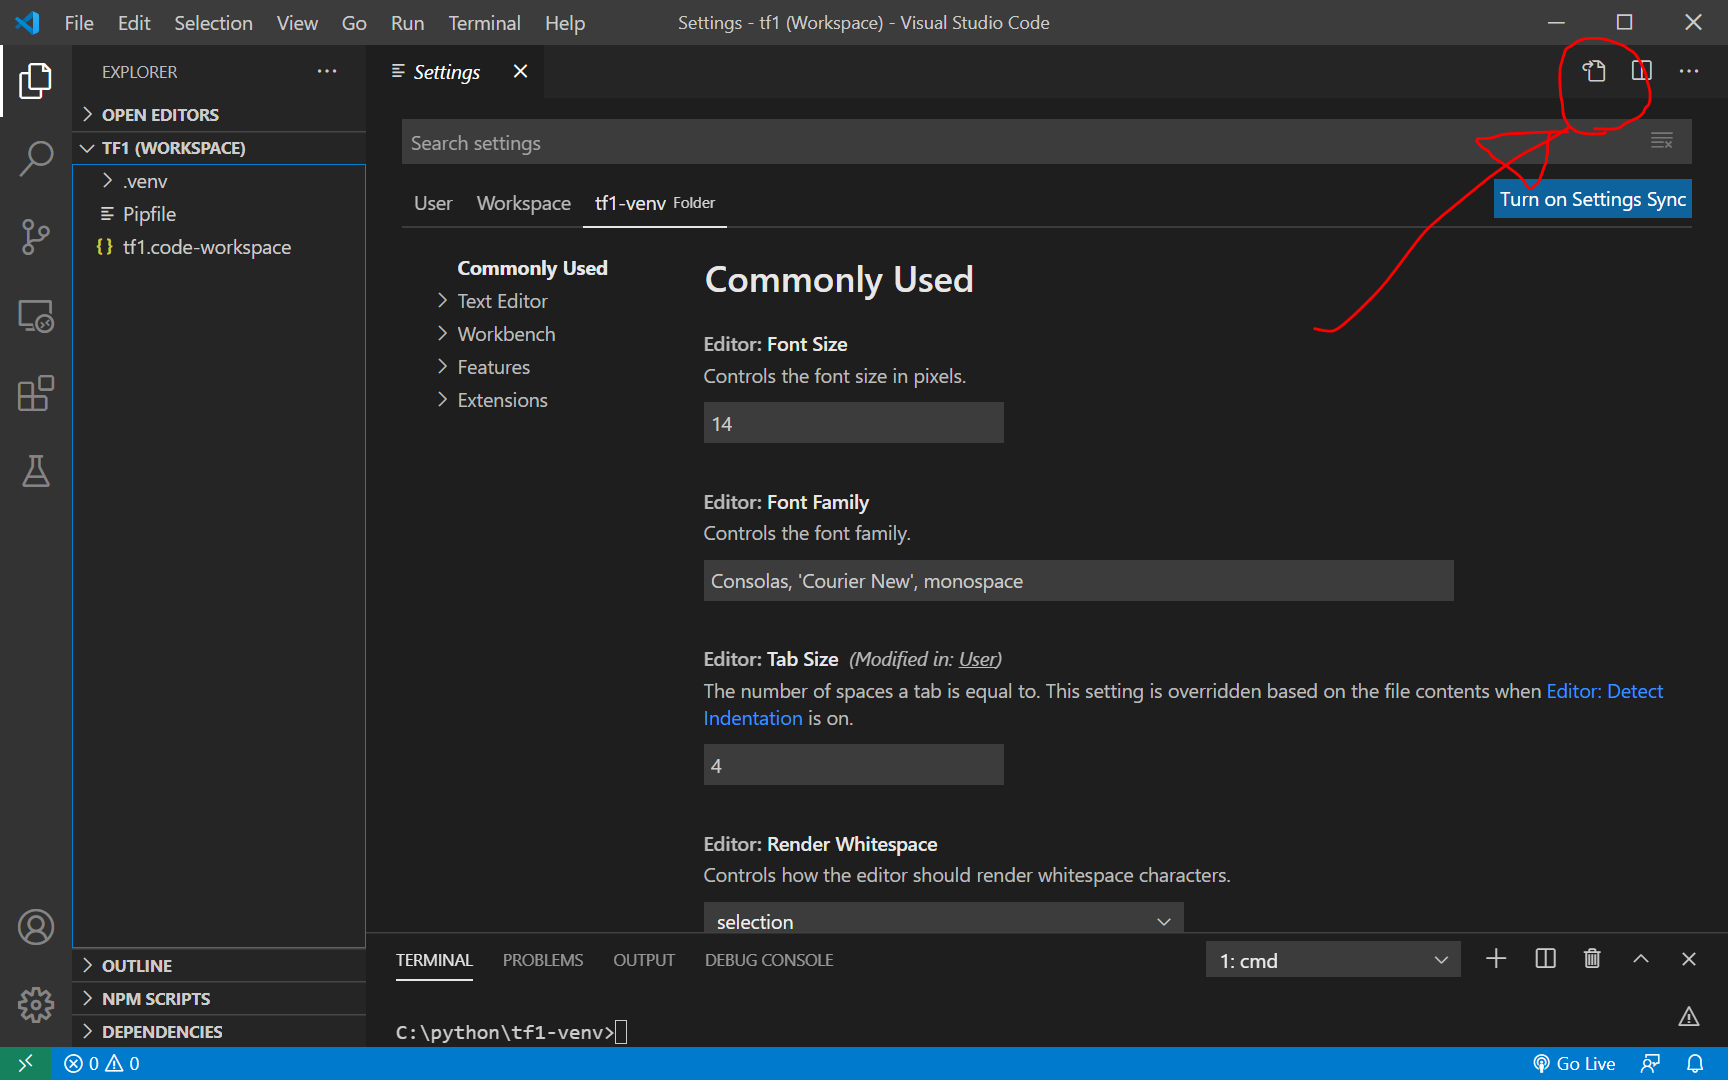
画面右上の、ファイルのようなアイコンをクリックします。
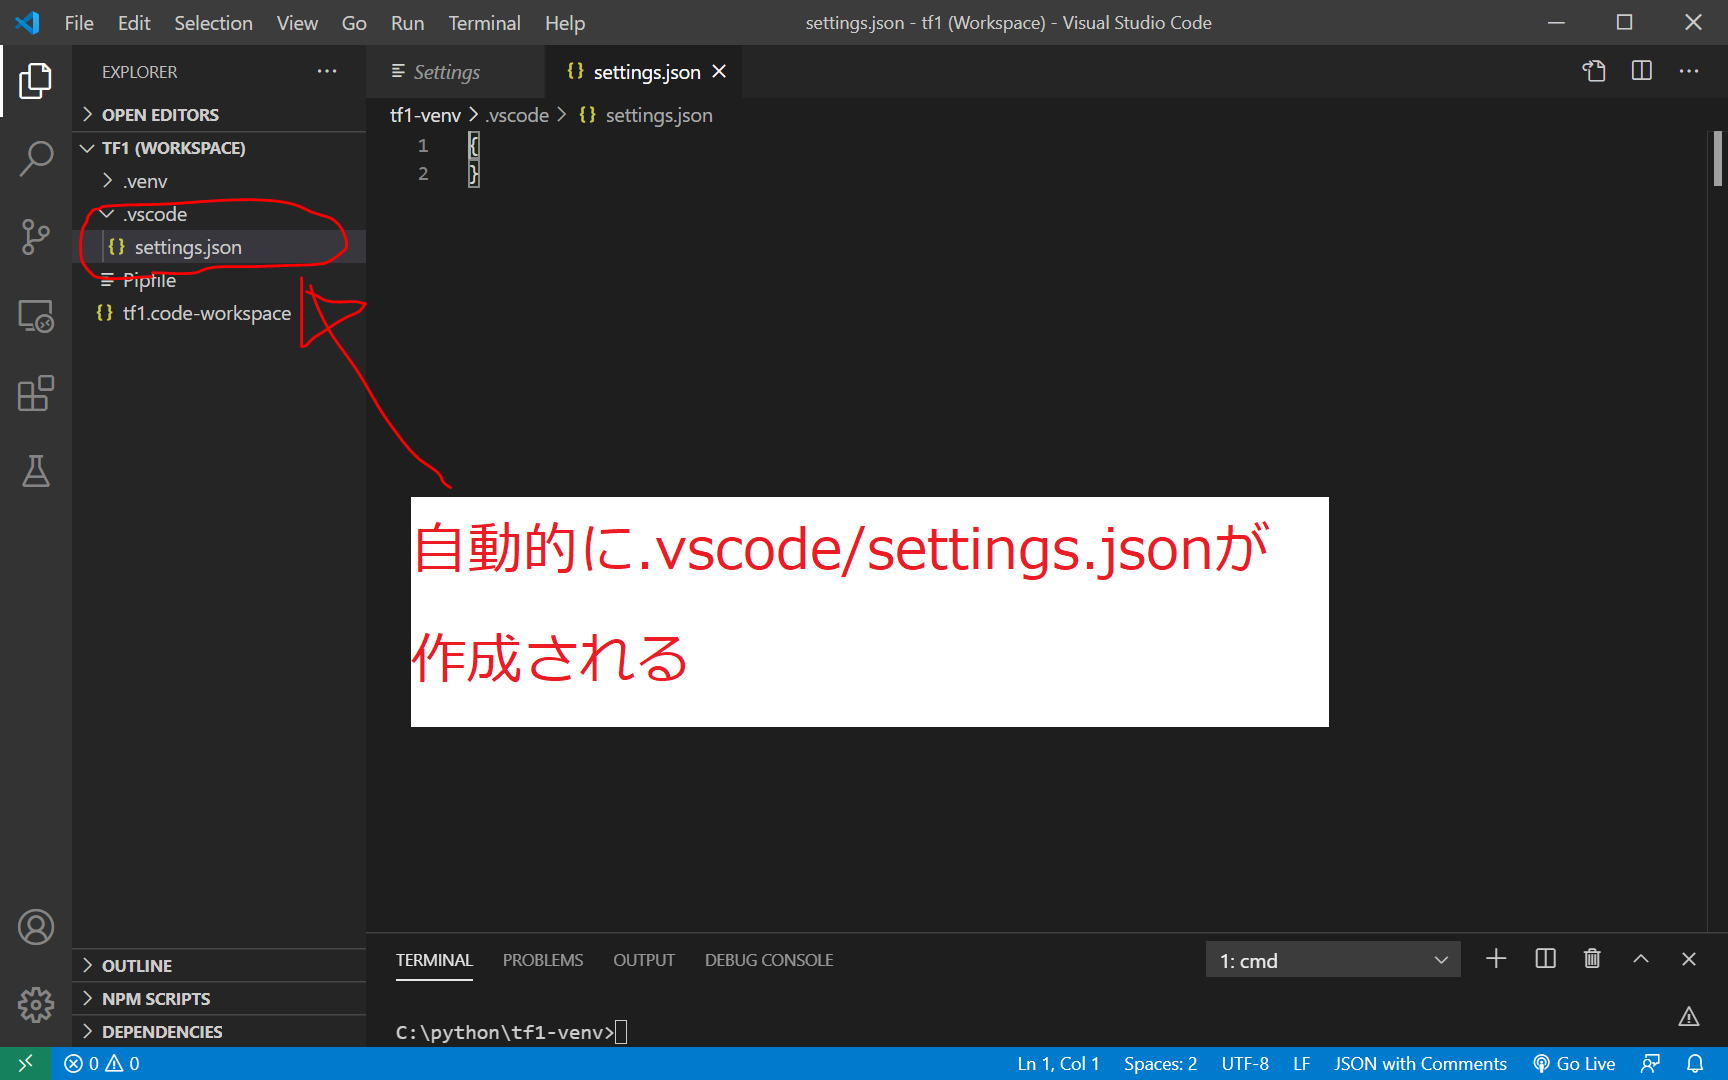
すると、今回の私の環境では、
C:/python/tf1-venev/.code/ フォルダ
C:/python/tf1-venev/.code/settings.json ファイル
が作成され、settings.jsonが開きます。
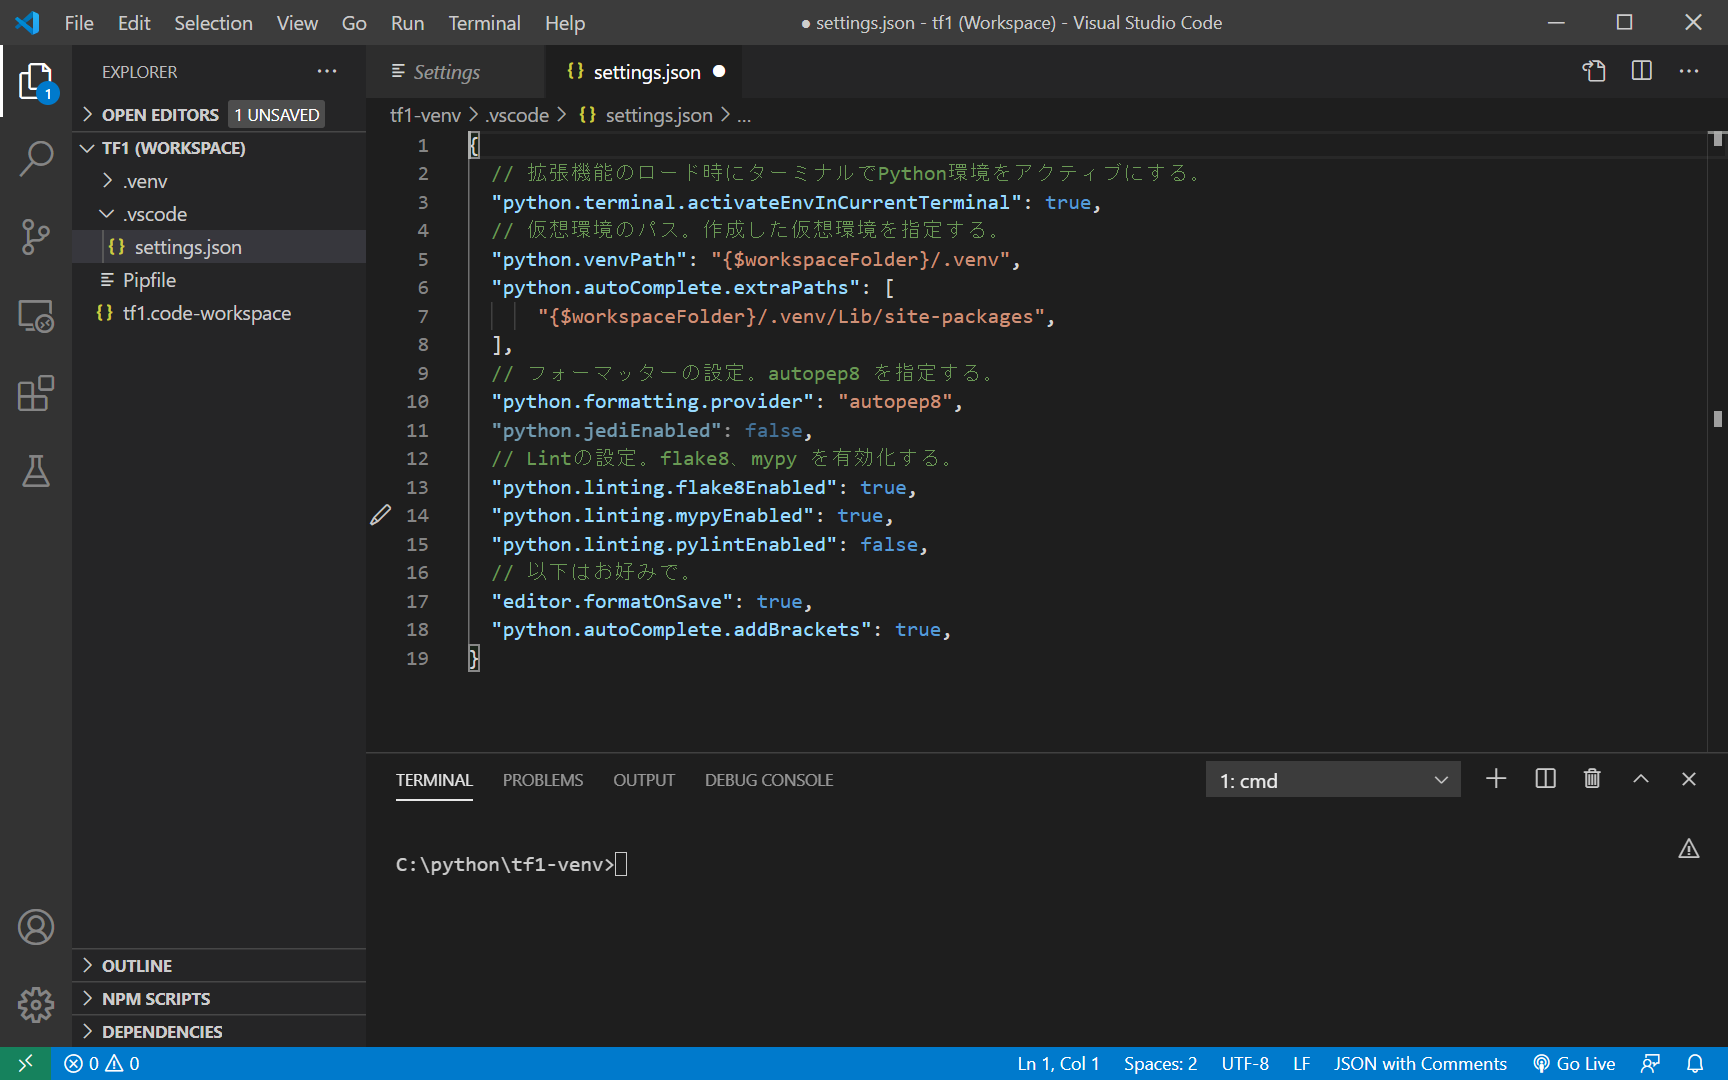
settings.json にこちらのコードをコピペします。
引用元:Windows + Python + PipEnv + Visual Studio Code でPython開発環境(@youkidkk 2020年05月04日に更新 )
{
    // 拡張機能のロード時にターミナルでPython環境をアクティブにする。
    "python.terminal.activateEnvInCurrentTerminal": true,
    // 仮想環境のパス。作成した仮想環境を指定する。
    "python.venvPath": "{$workspaceFolder}/.venv",
    "python.autoComplete.extraPaths": [
        "{$workspaceFolder}/.venv/Lib/site-packages",
    ],
    // フォーマッターの設定。autopep8 を指定する。
    "python.formatting.provider": "autopep8",
    "python.jediEnabled": false,
    // Lintの設定。flake8、mypy を有効化する。
    "python.linting.flake8Enabled": true,
    "python.linting.mypyEnabled": true,
    "python.linting.pylintEnabled": false,
    // 以下はお好みで。
    "editor.formatOnSave": true,
    "python.autoComplete.addBrackets": true,
}
autopep8,flake8,mypyのインストール
コードフォーマット、Lint のため、 pipenvで3つのパッケージをインストールします。
pipenv install autopep8 flake8 mypy --dev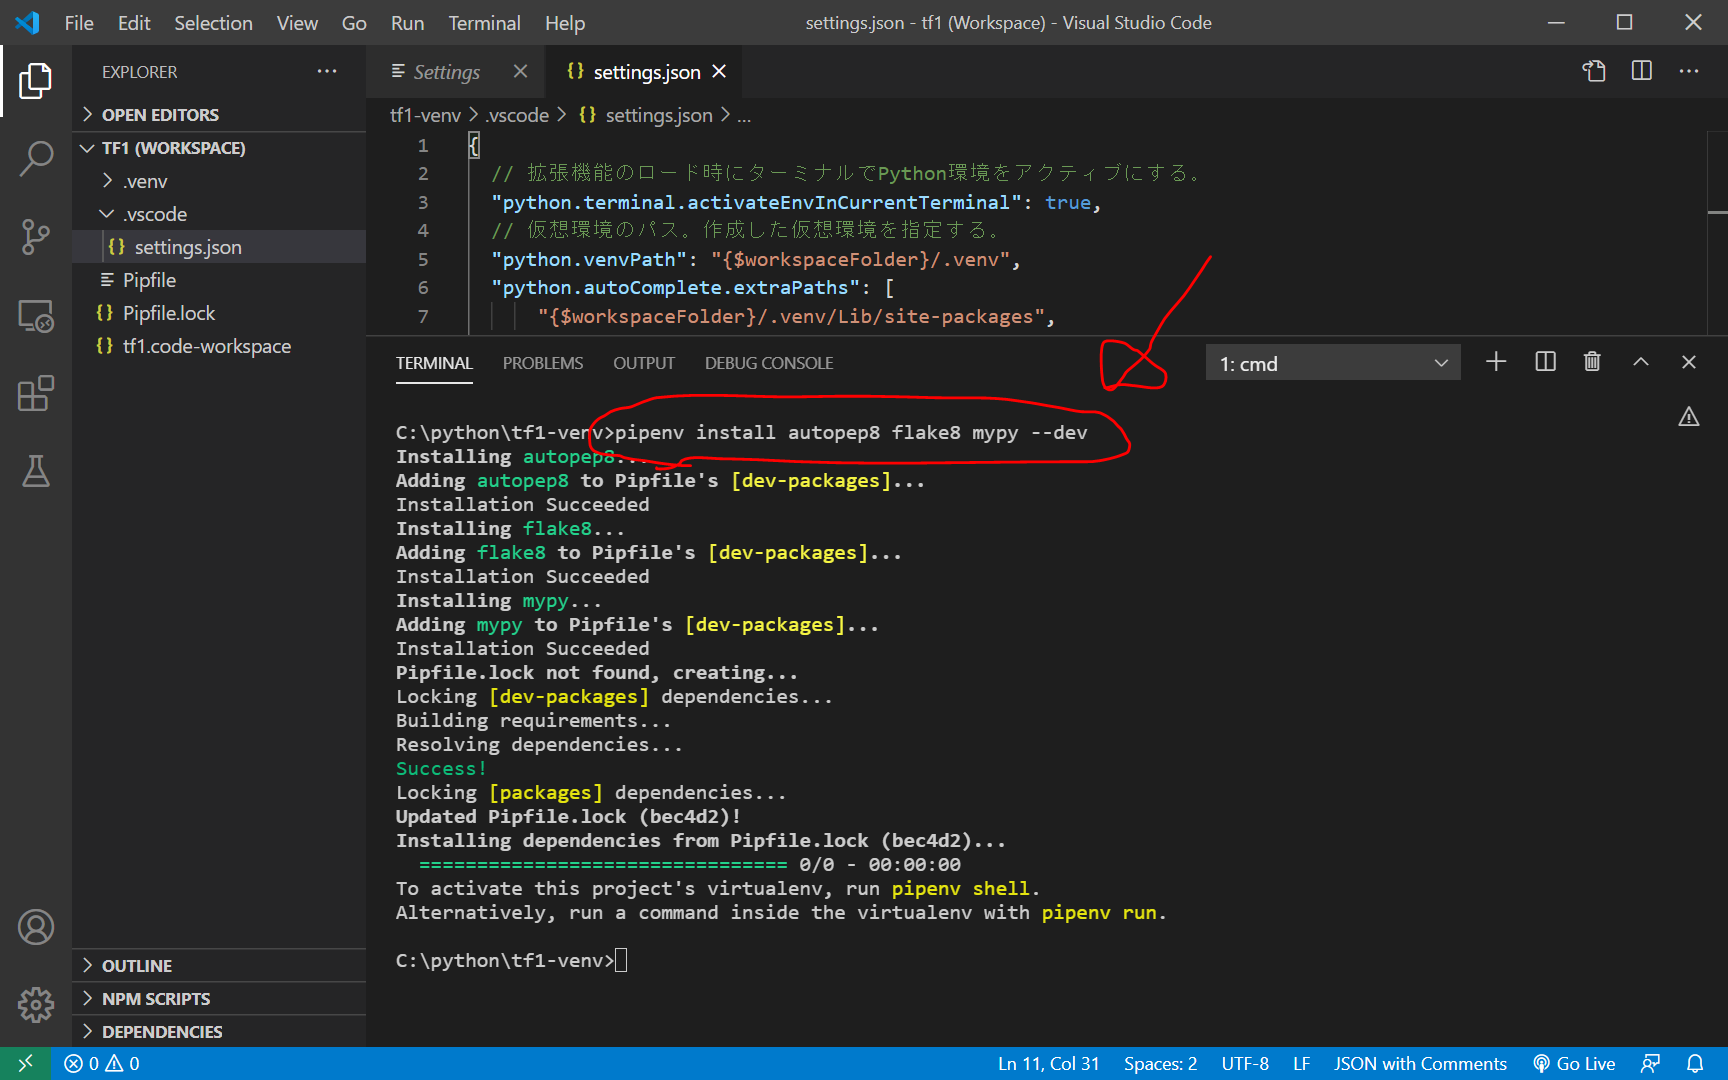
numpyとmatplotlibのインストール
サンプルコード用に、numpyとmatplotlibパッケージをインストールしてみます。
pipenv install numpy matplotlib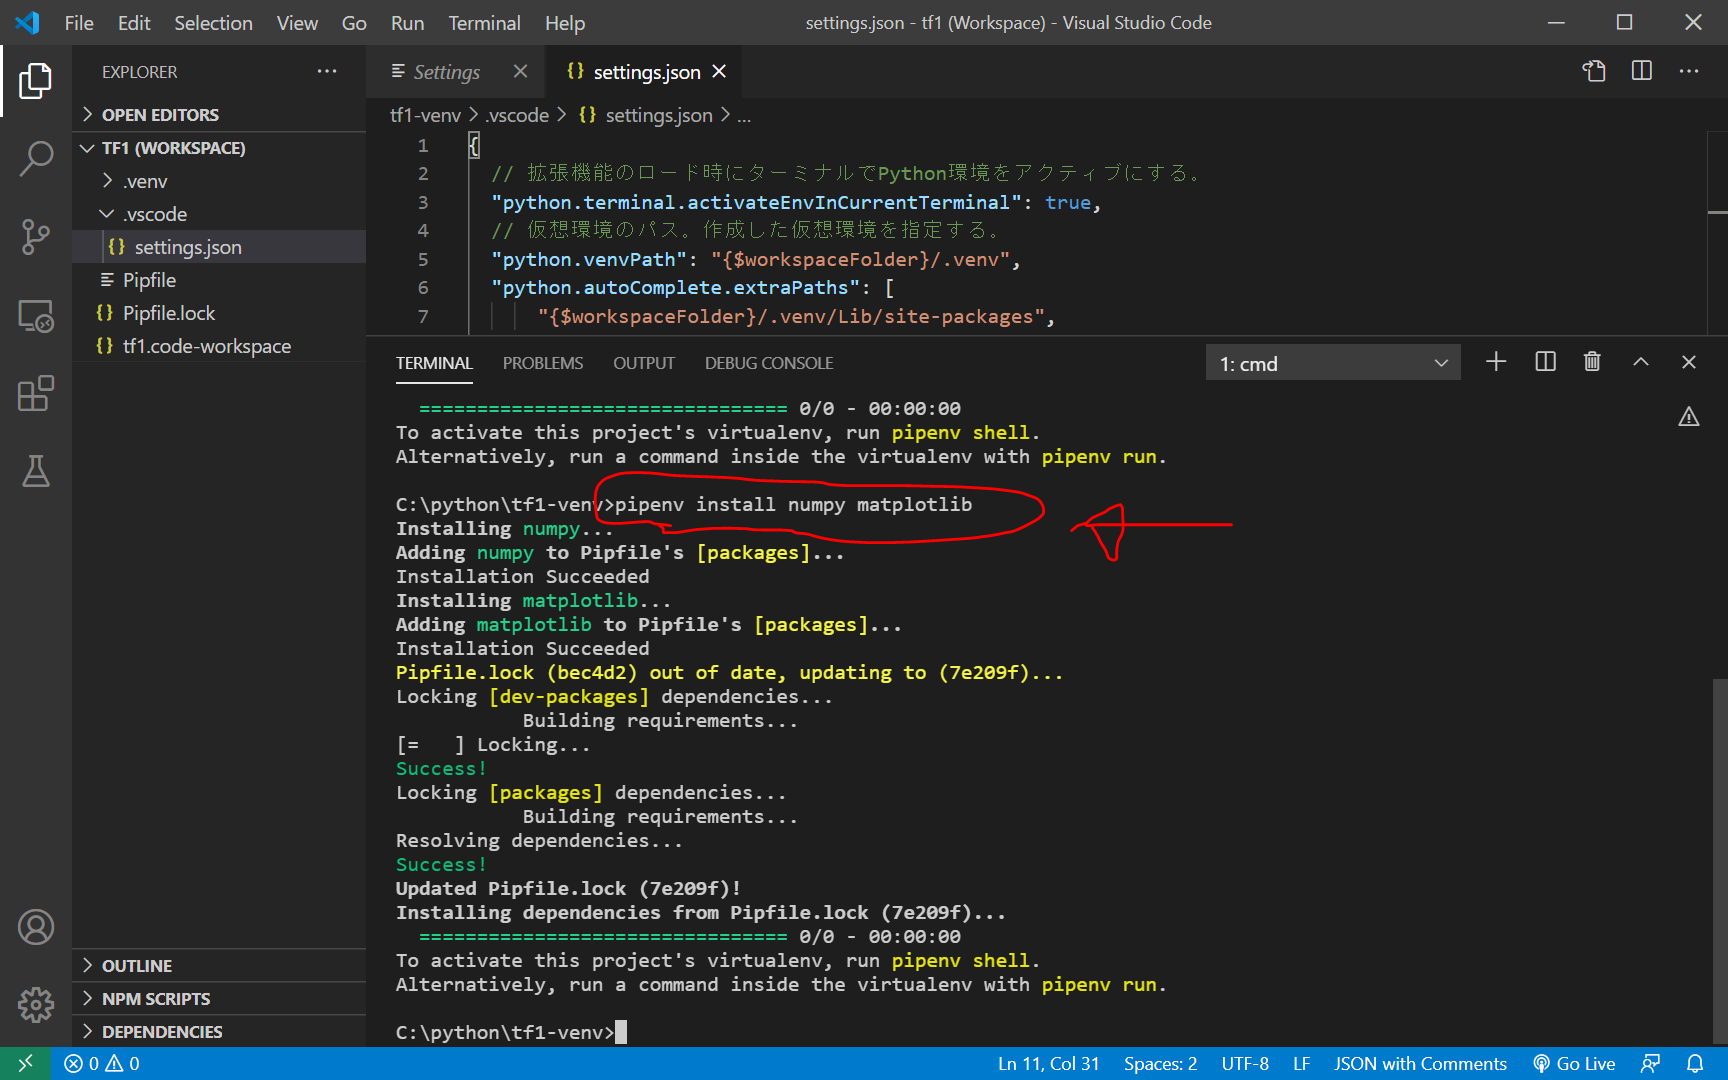
test.pyを作成しpythonが実行できることを確認
test.pyというファイルを作成し、こちらのコードをコピペします。
引用元:Windows + Python + PipEnv + Visual Studio Code でPython開発環境(@youkidkk 2020年05月04日に更新 )
import numpy as np
import matplotlib.pyplot as plt

x = np.linspace(-np.pi, np.pi)
y = np.sin(x)
plt.plot(x, y)
plt.show()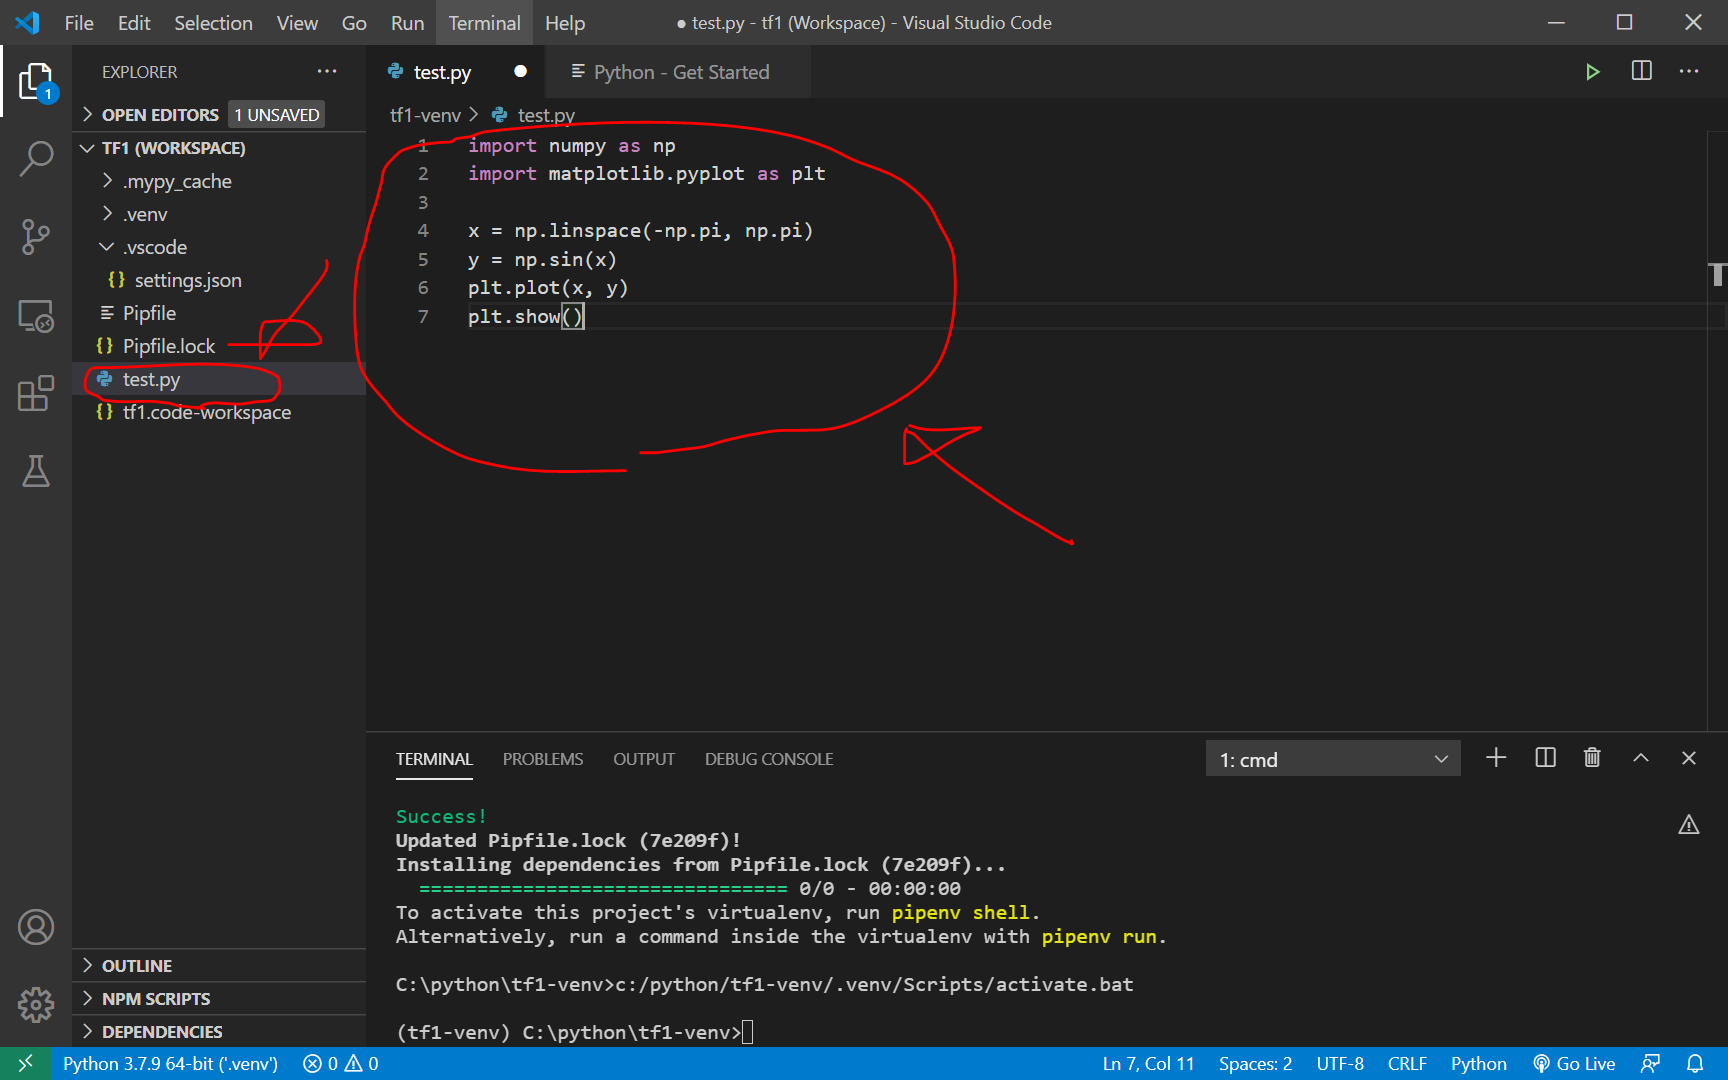
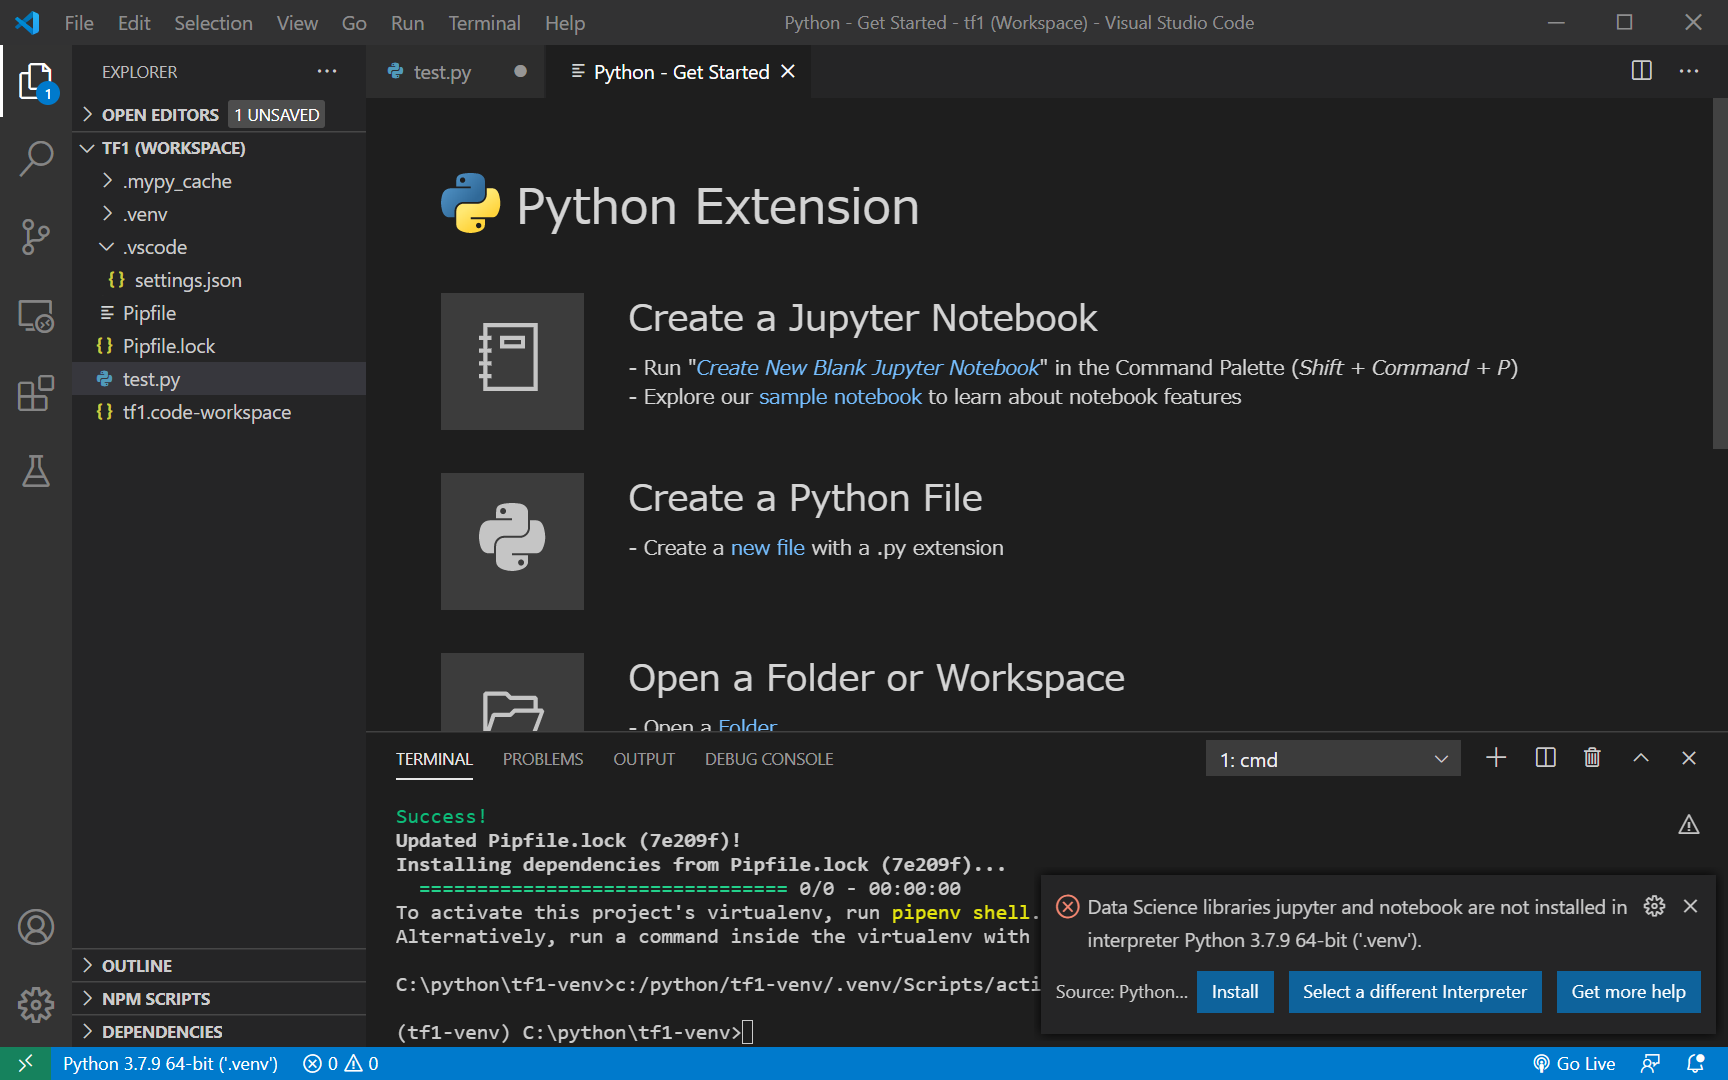
私の環境では、突如、Python -Get Started という以下の画面がいきなり出てきました。Jupyter Notebookが使えるようなことが書いてありますが、今回は置いておきます。
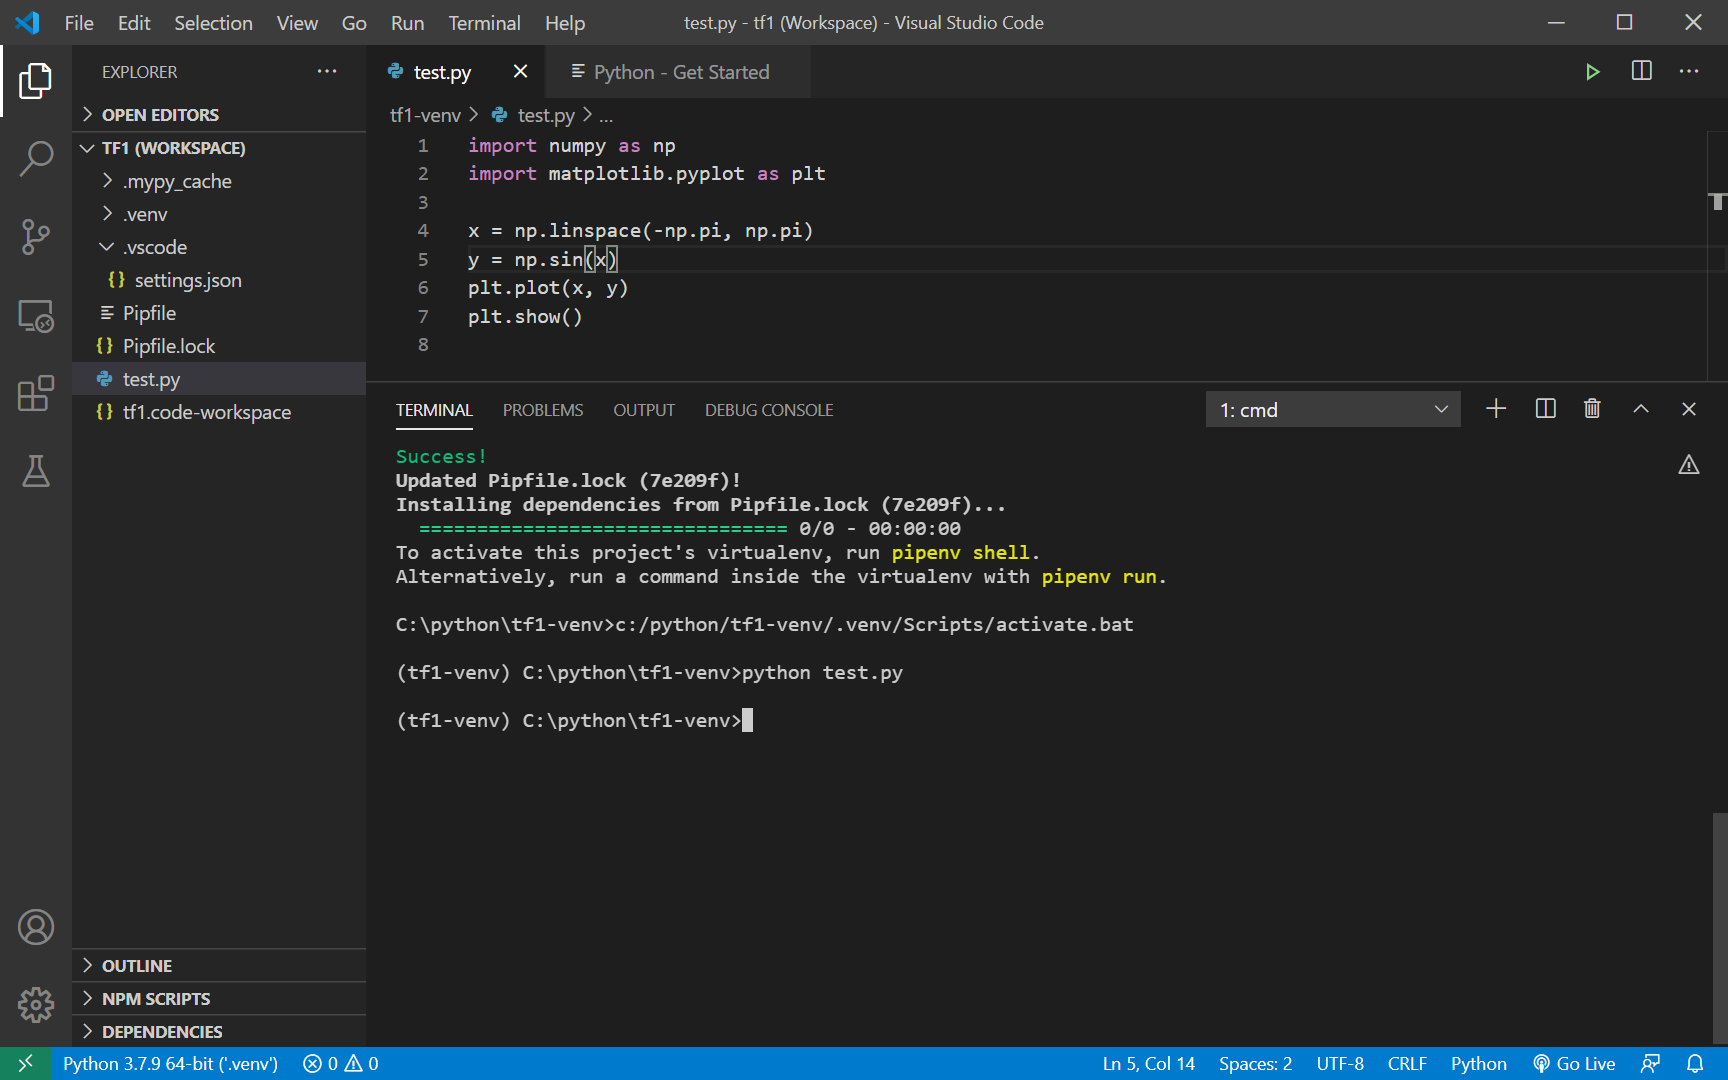
test.pyを保存したのち、ターミナル画面で以下を入力して、test.pyを実行します。
python test.py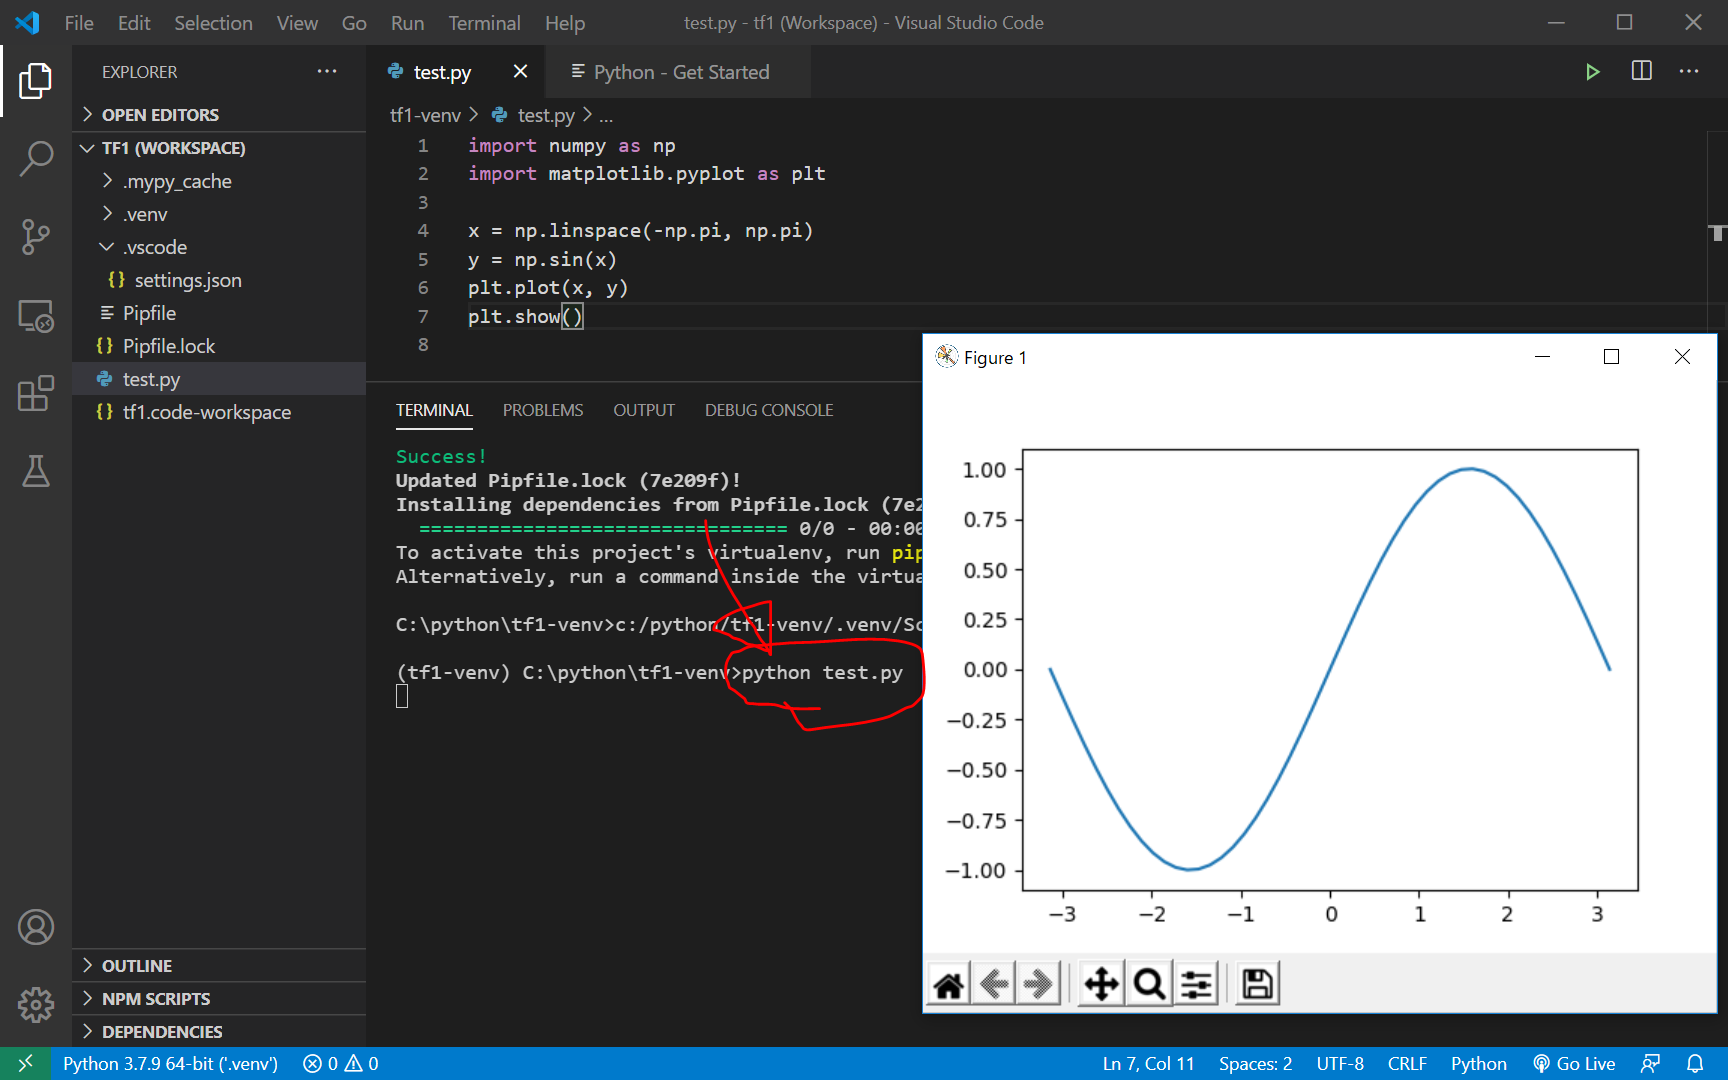
ちゃんとtf1-venv 仮想環境で実行してくれましたが、本当は、 “pipenv shell" してから、上記を実行した方が安全だったかもしれません。
グラフの右上の×ボタンをクリックして、グラフを閉じると、以下のような画面になります。
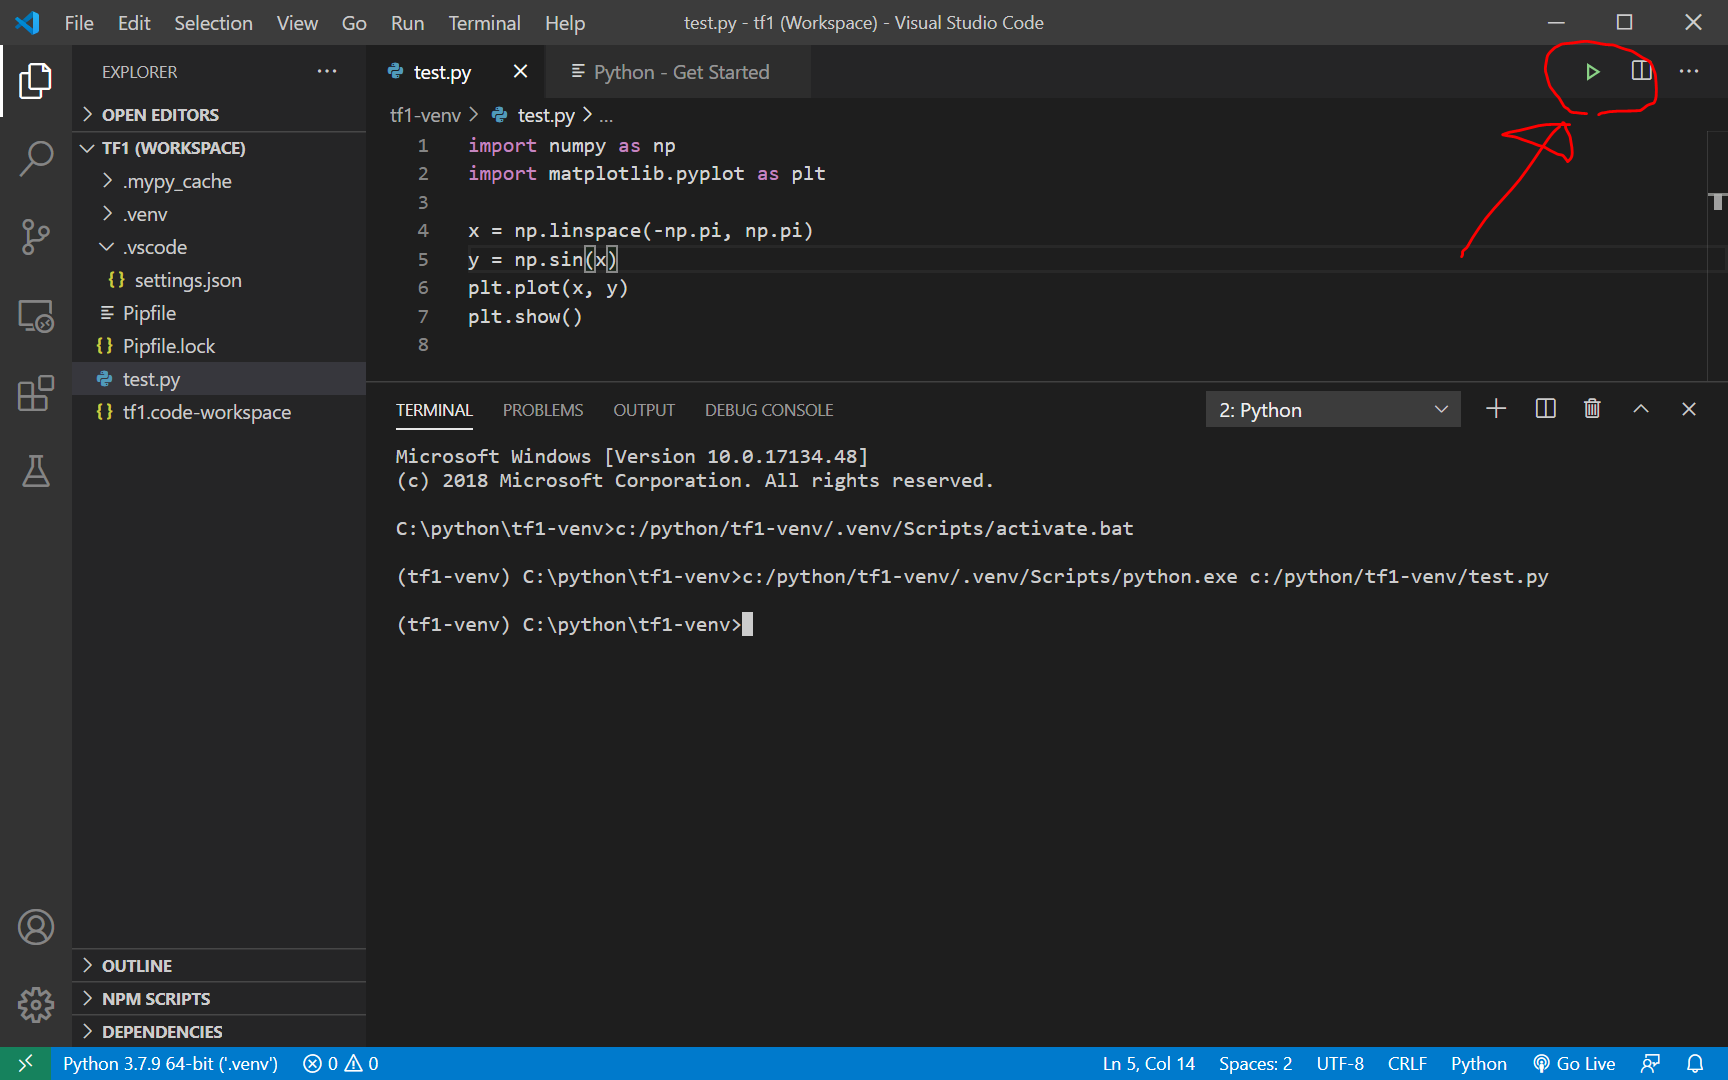
その他、test.pyを実行する方法としては、test.py を開いているときに画面右上に出てくる△ボタンをクリックしても実行されるようです。すごく簡単、、、
TensorFlow1.15のインストール
以下を入力して、TensorFlow1.51をインストールします。
参考:TensorFlow 1.15.3(旧バージョン)のインストール(Windows 上)
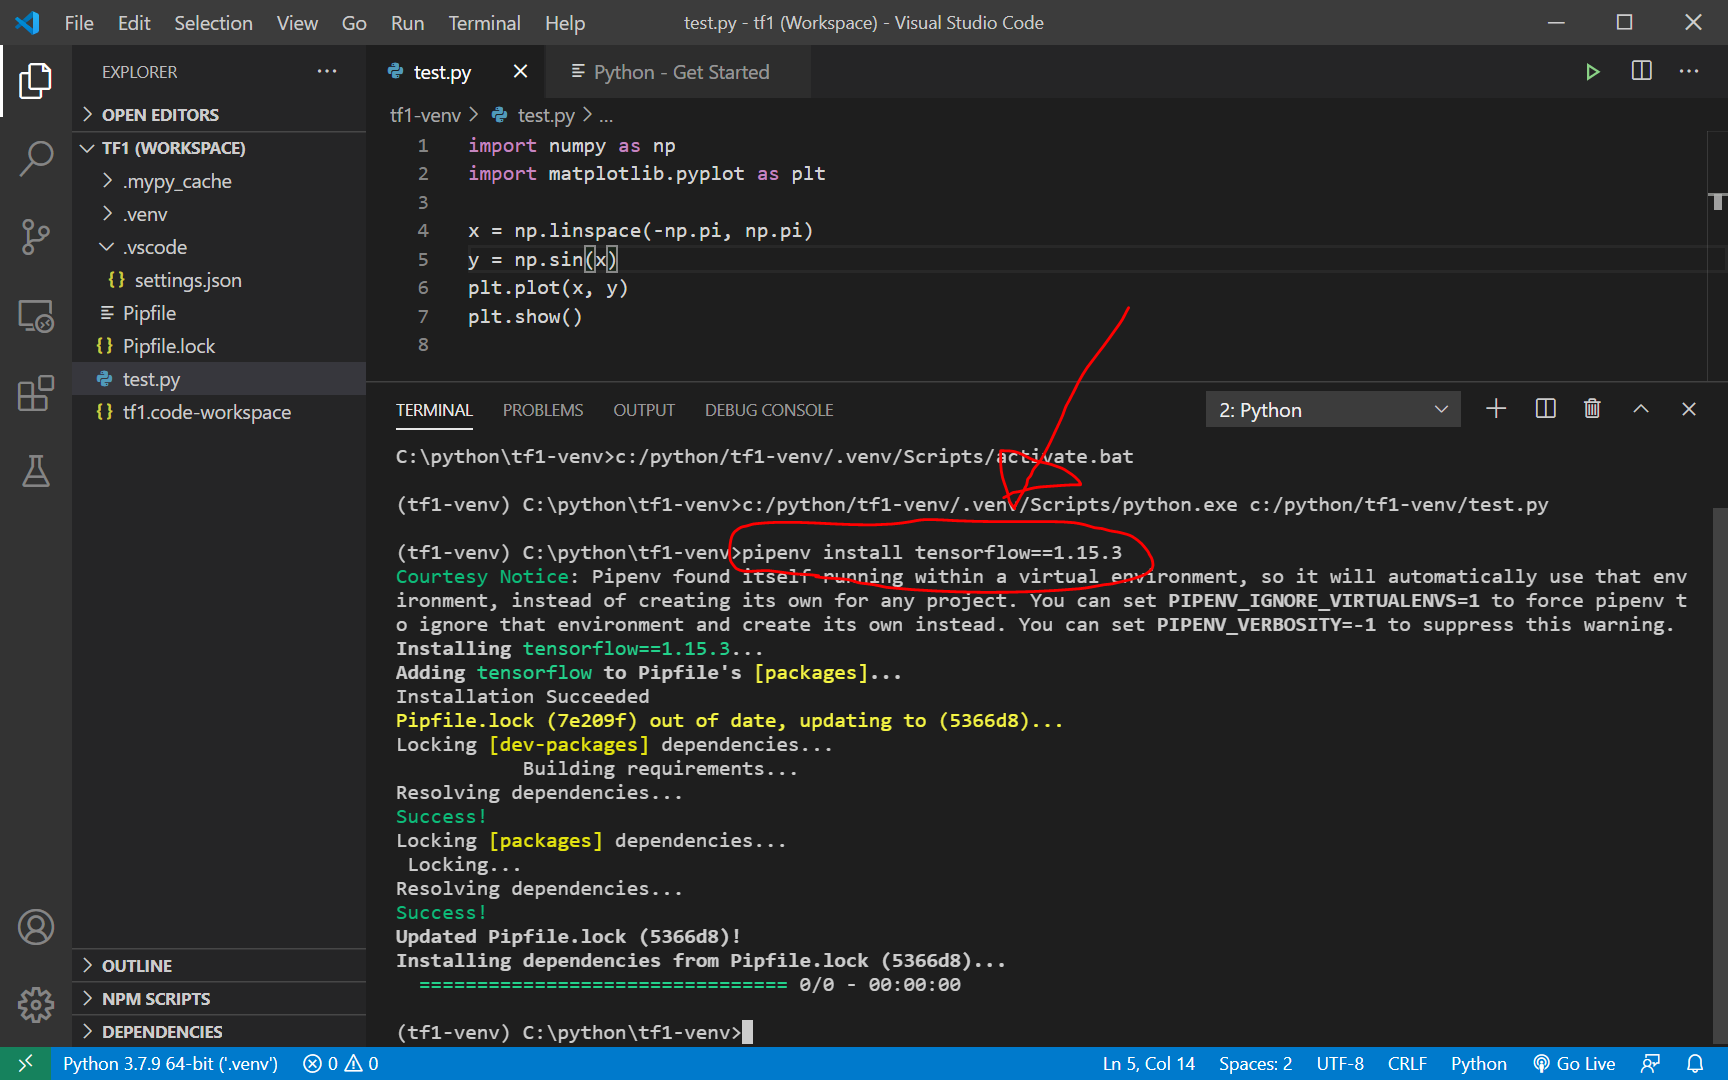
pipenv install tensorflow==1.15.3 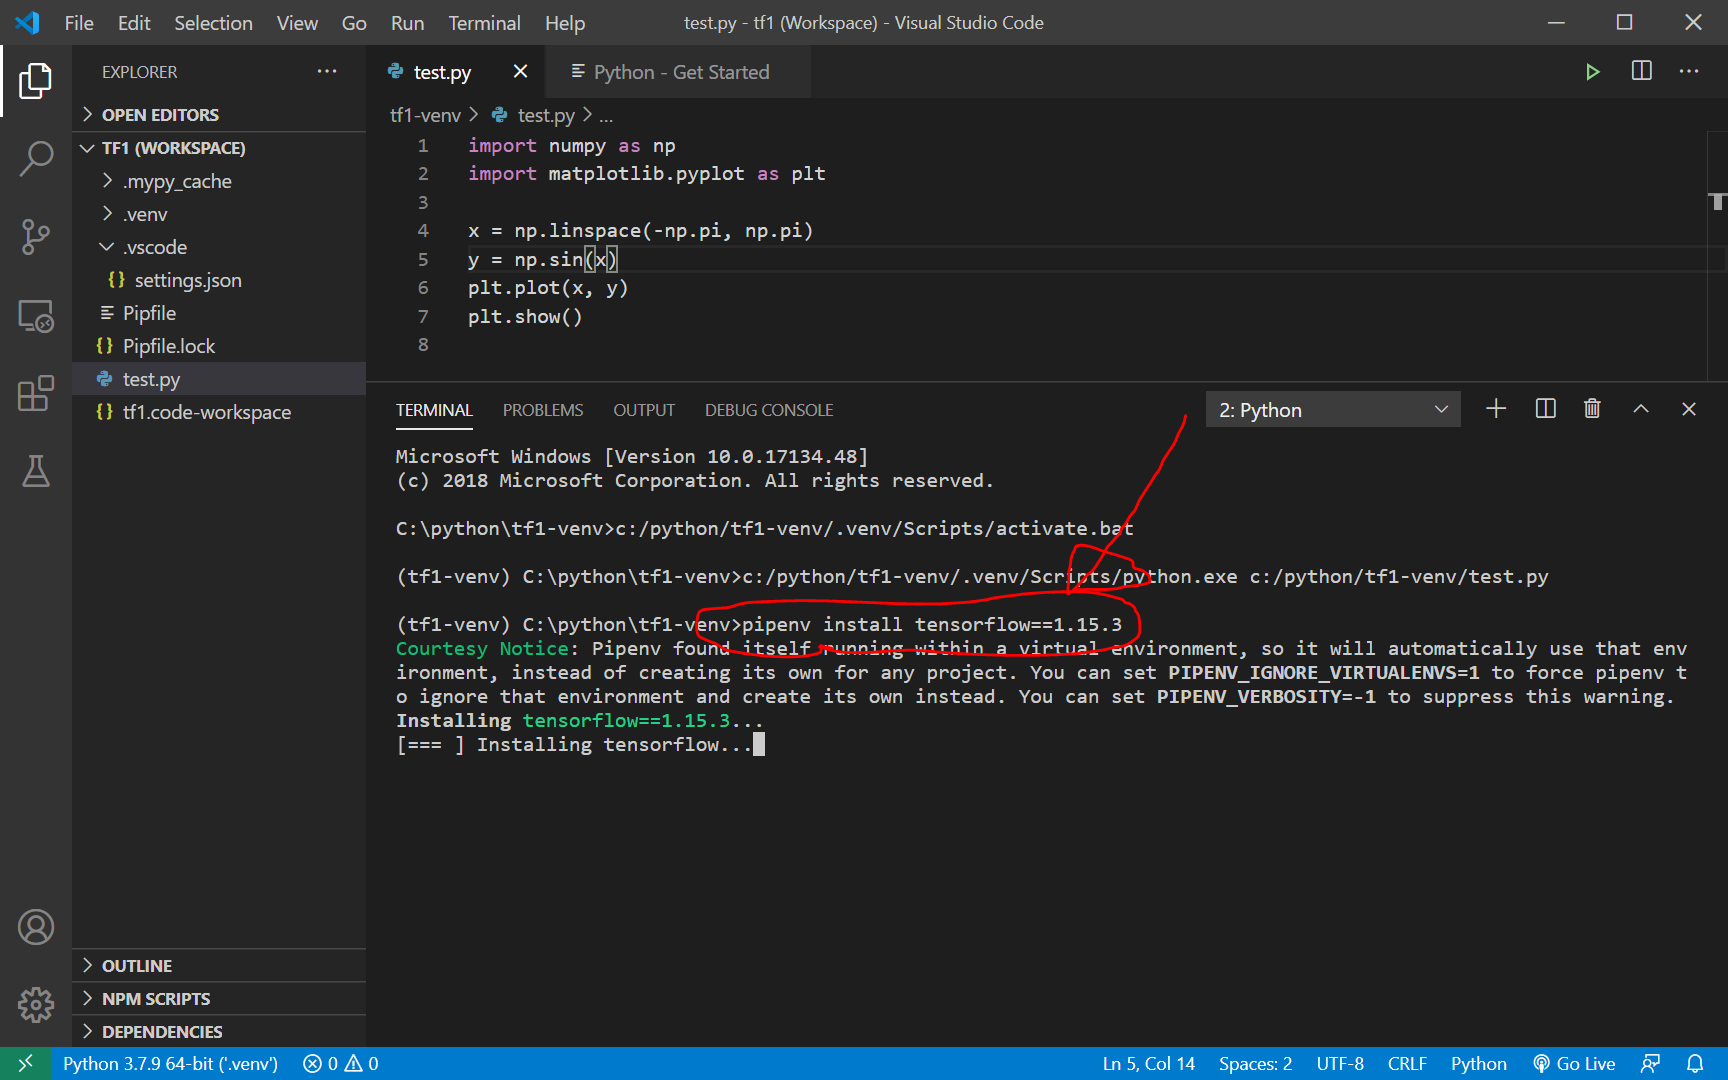
あ、本当は、 仮想環境を無効にする exit をしてから、pipenv install するべきなのかもしれませんが、warningを読むと、おそらく、自動で外からインストールしてくれているようです。インストールも3分くらいで終わりました。
→ VisualStudioCodeでは自動的にpipenv環境に入ってしまうらしく、exitとかせずに、このまま仮想環境の中でpipenv installすると、warning通りにうまいことやってくれるようです。
なお、TensorFlow公式サイトには、インストールのためのいろいろな条件が記載されています。よくわかりません。。。

Keras2.3.1のインストール
TensorFlow 1.15 で動くKerasは2.3.1だそうです。バージョンを指定してインストールします。
pipenv install keras==2.3.1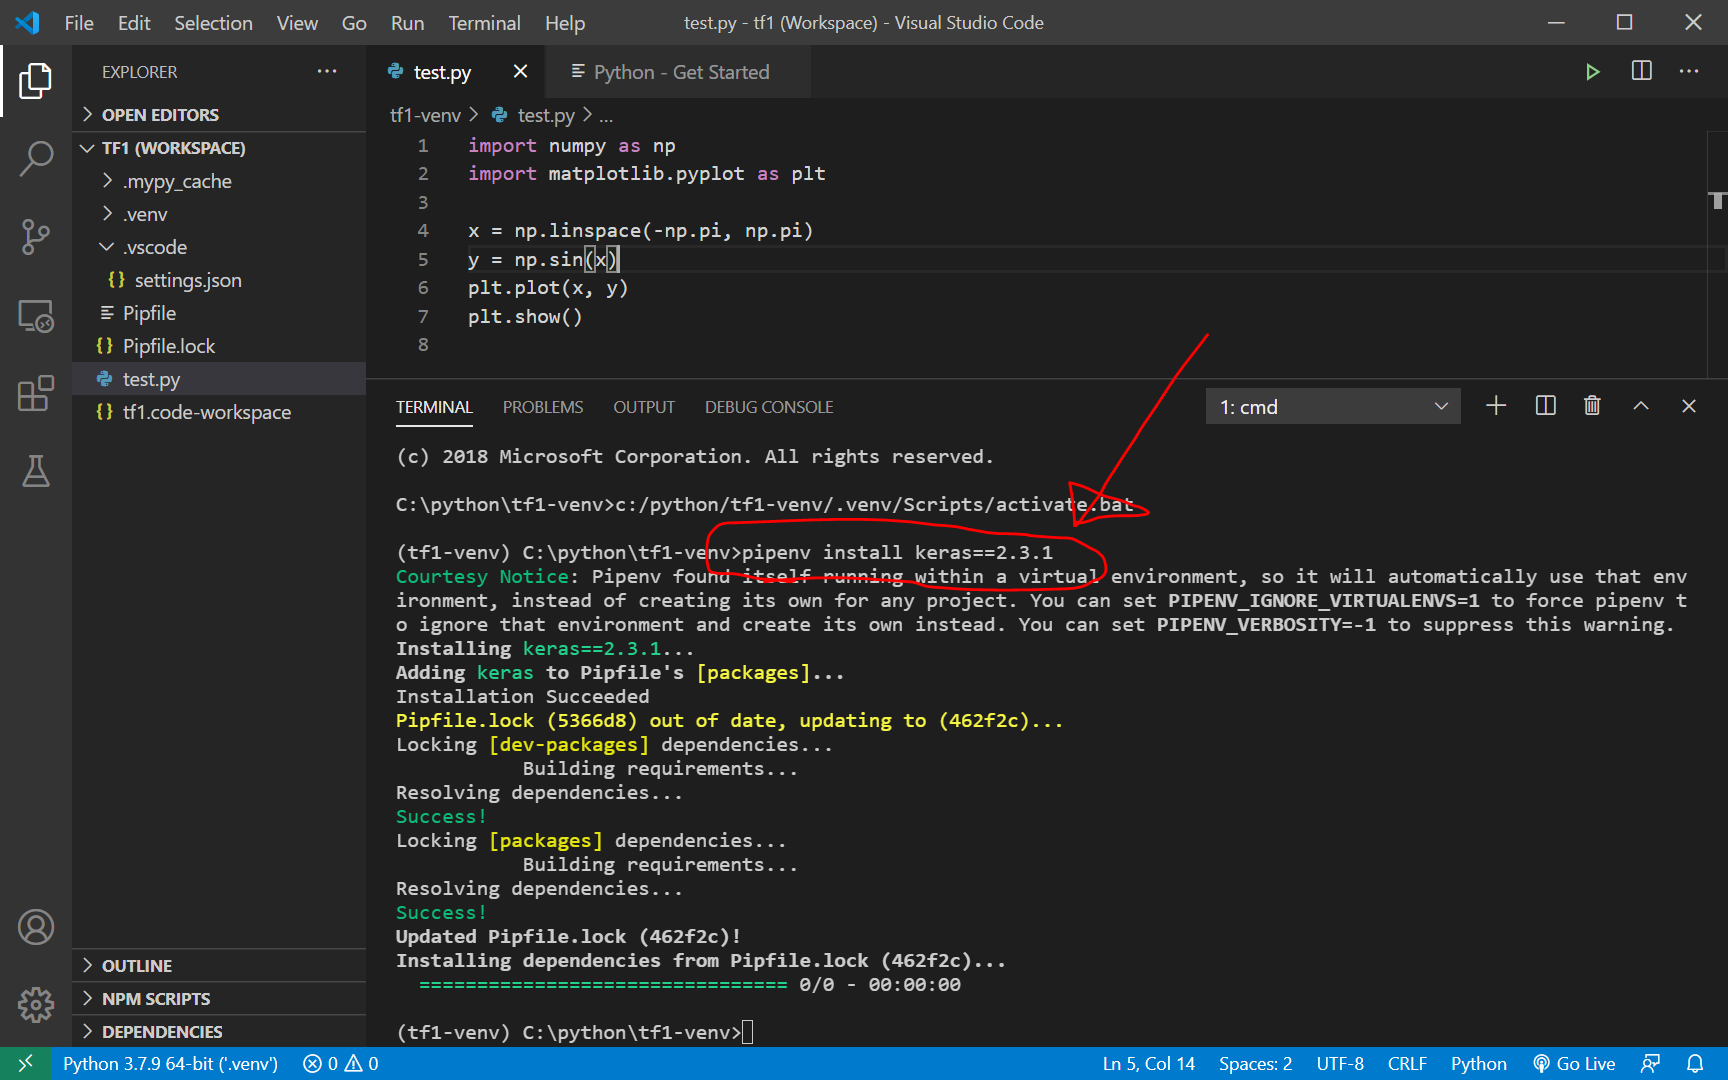
TensorFlowの動作確認
tf1-test.pyファイルを作成し、以下をコピペします。
import tensorflow as tf

print( tf.__version__ )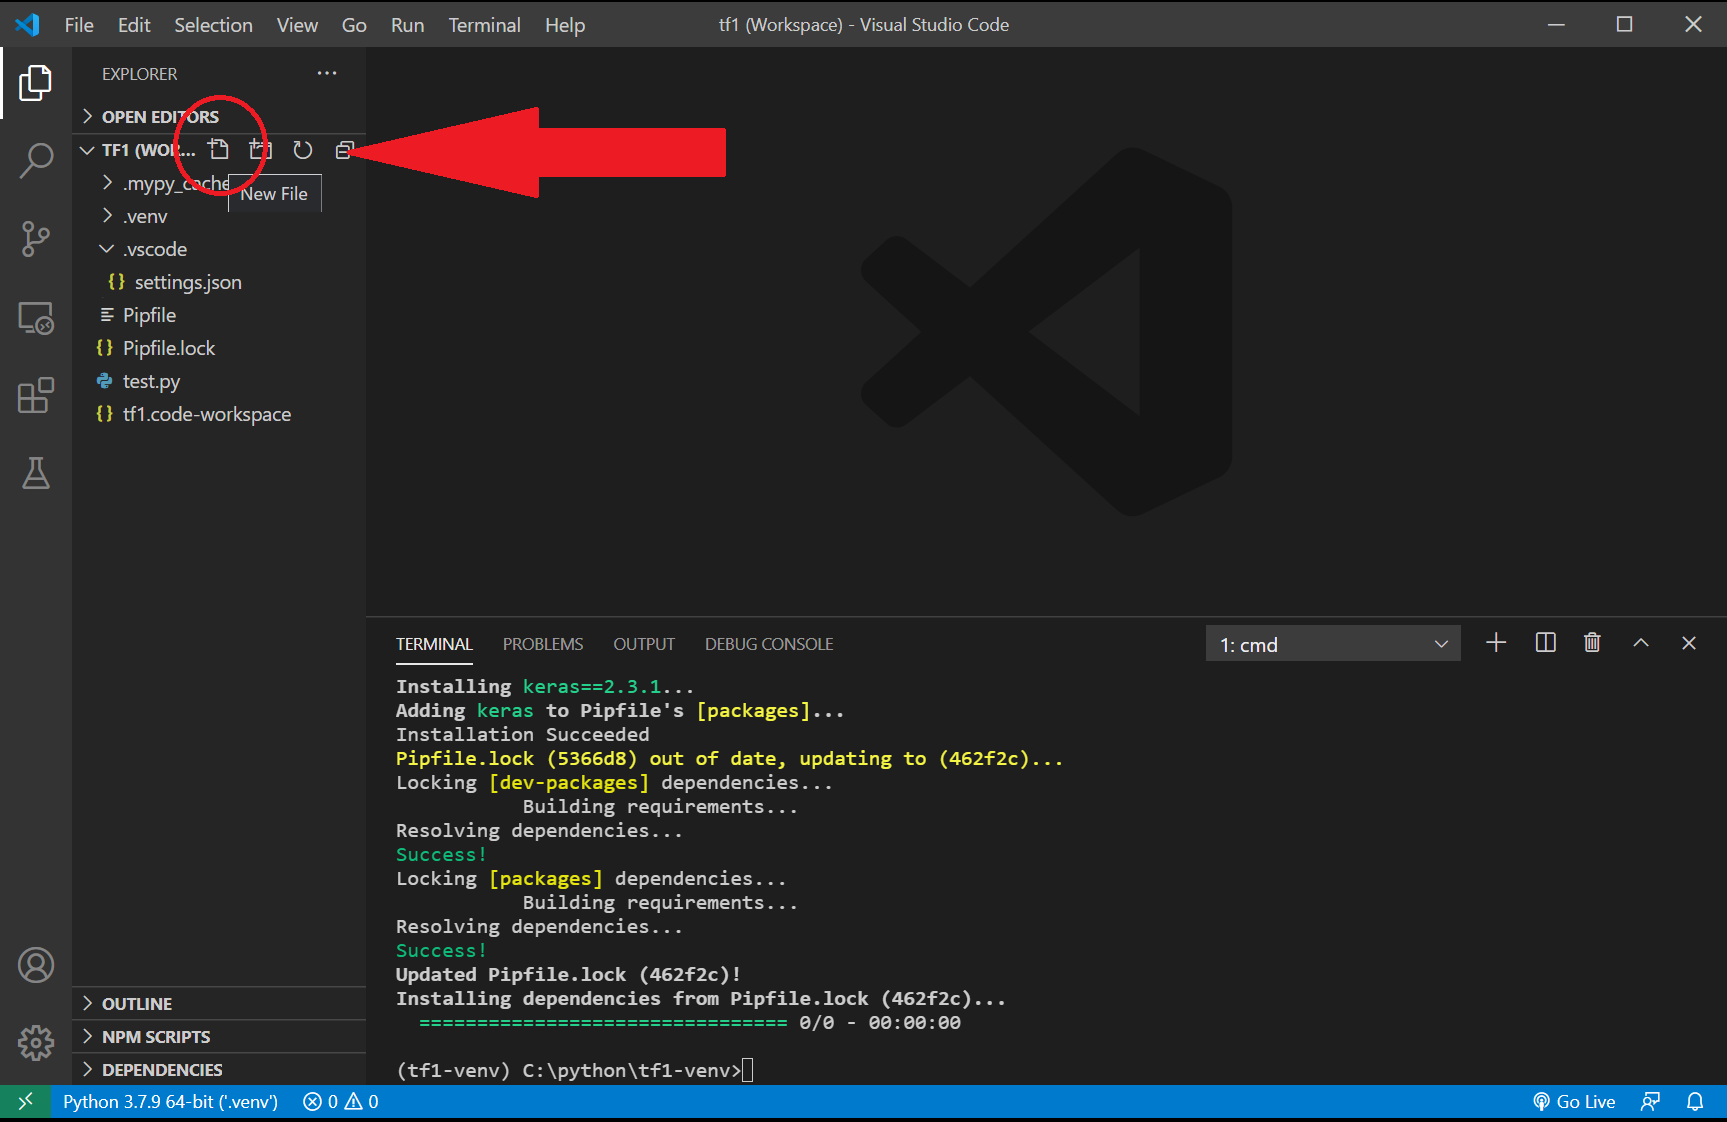
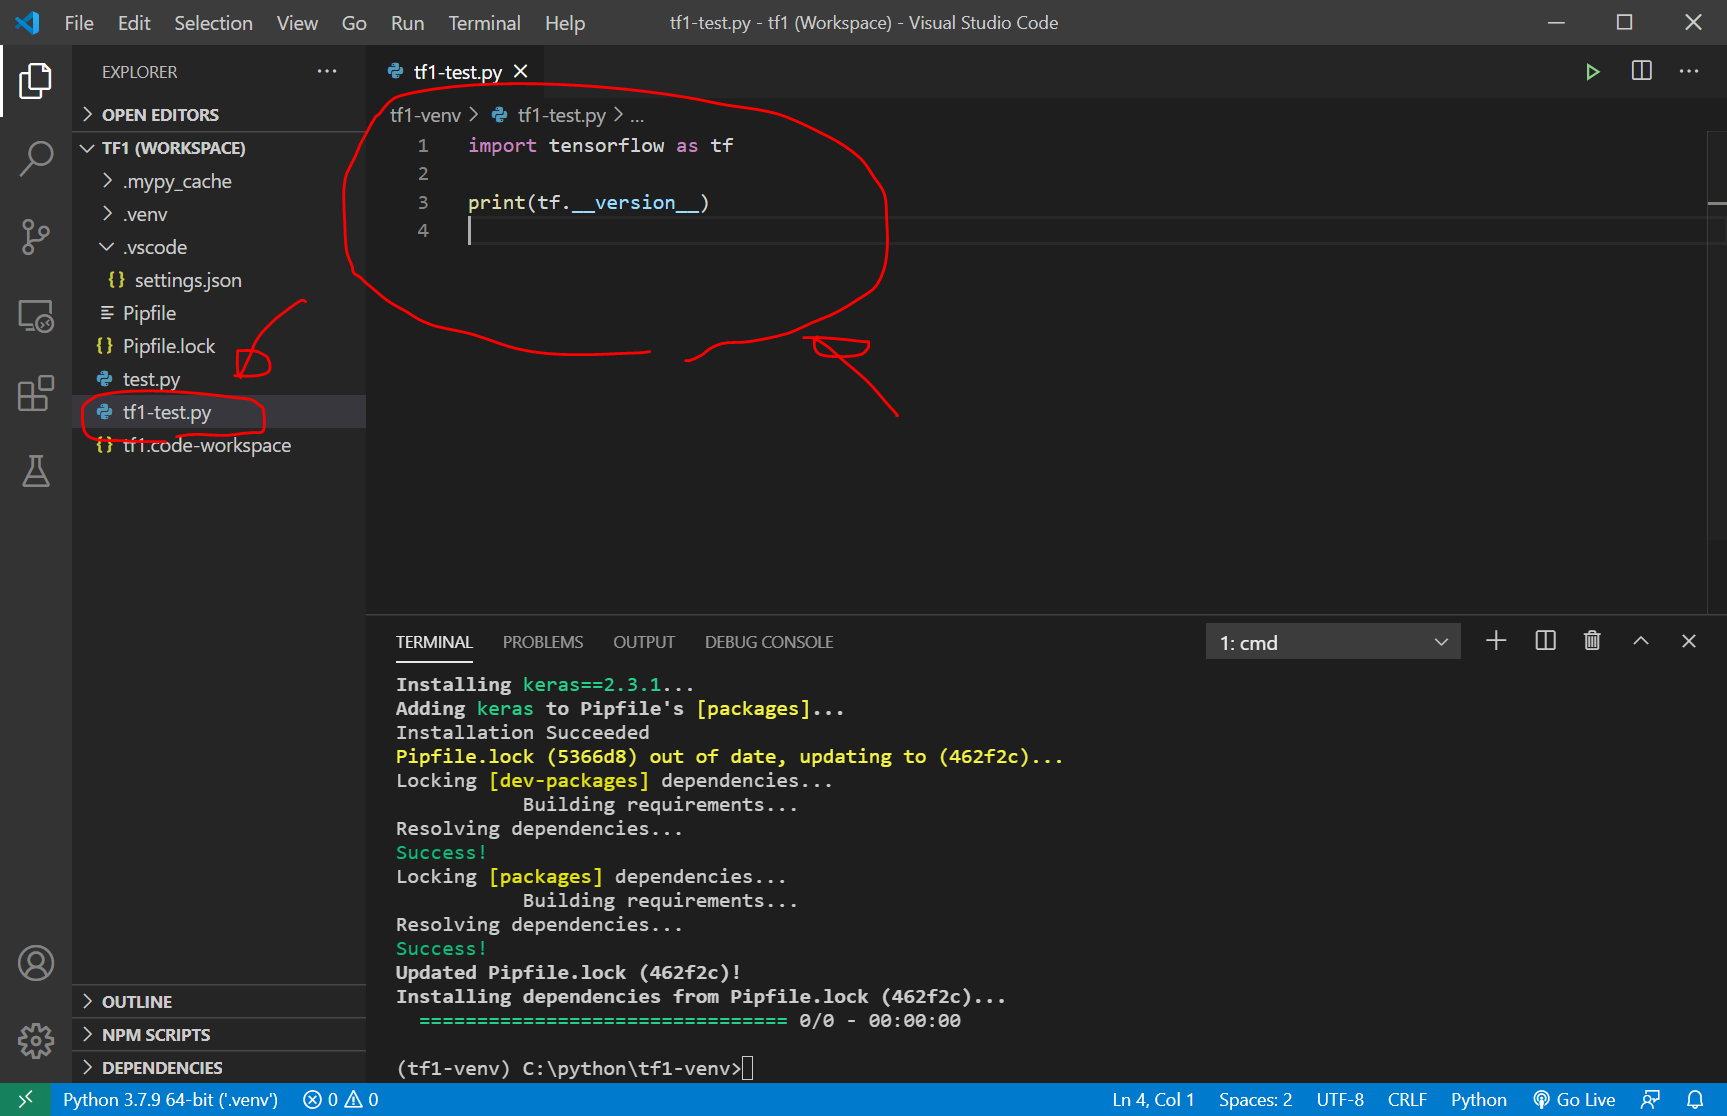
画面右上の△のボタン(実行ボタン)をクリックして、tf1-test.pyを実行します。
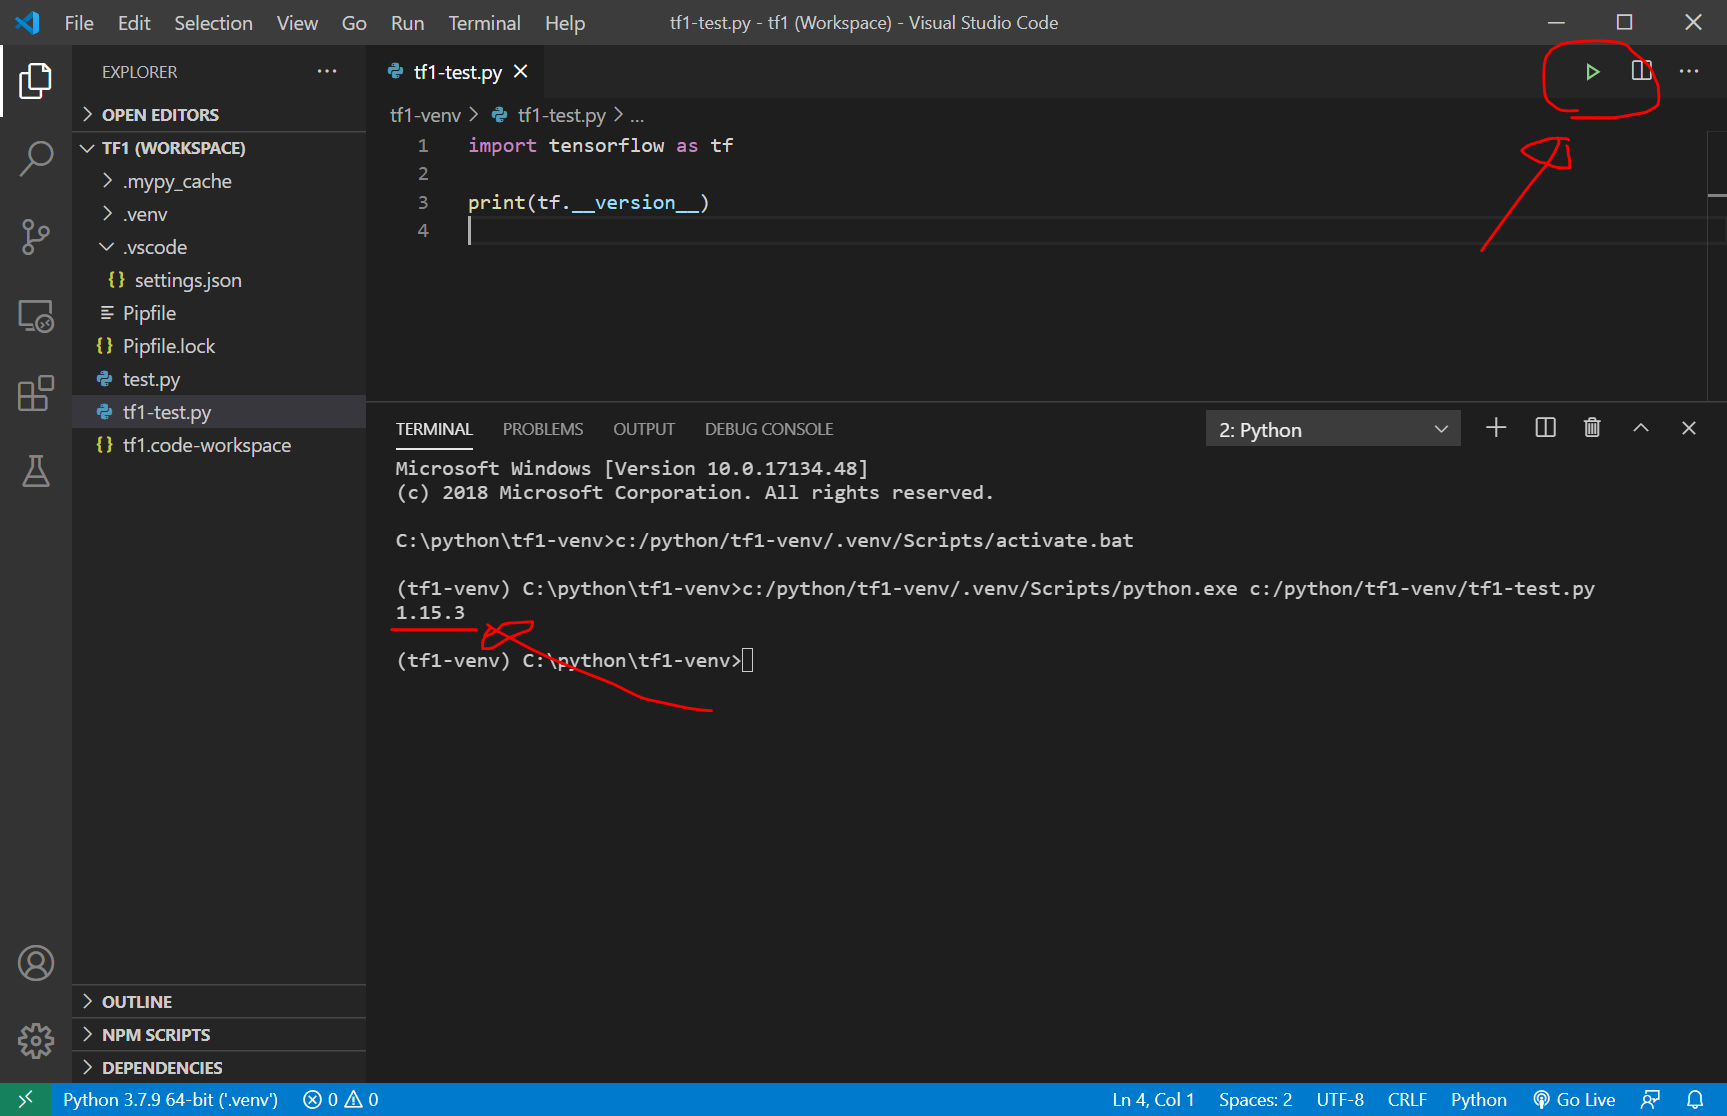
無事、ターミナル画面に、”1.15.3” と表示されました。
次に、keras-test.pyを作成して、以下を入力して、上記と同様に実行します。(kerasをインポートしているのに使っていないよとflake8に指摘されますが、まあ、よしとします。)
import keras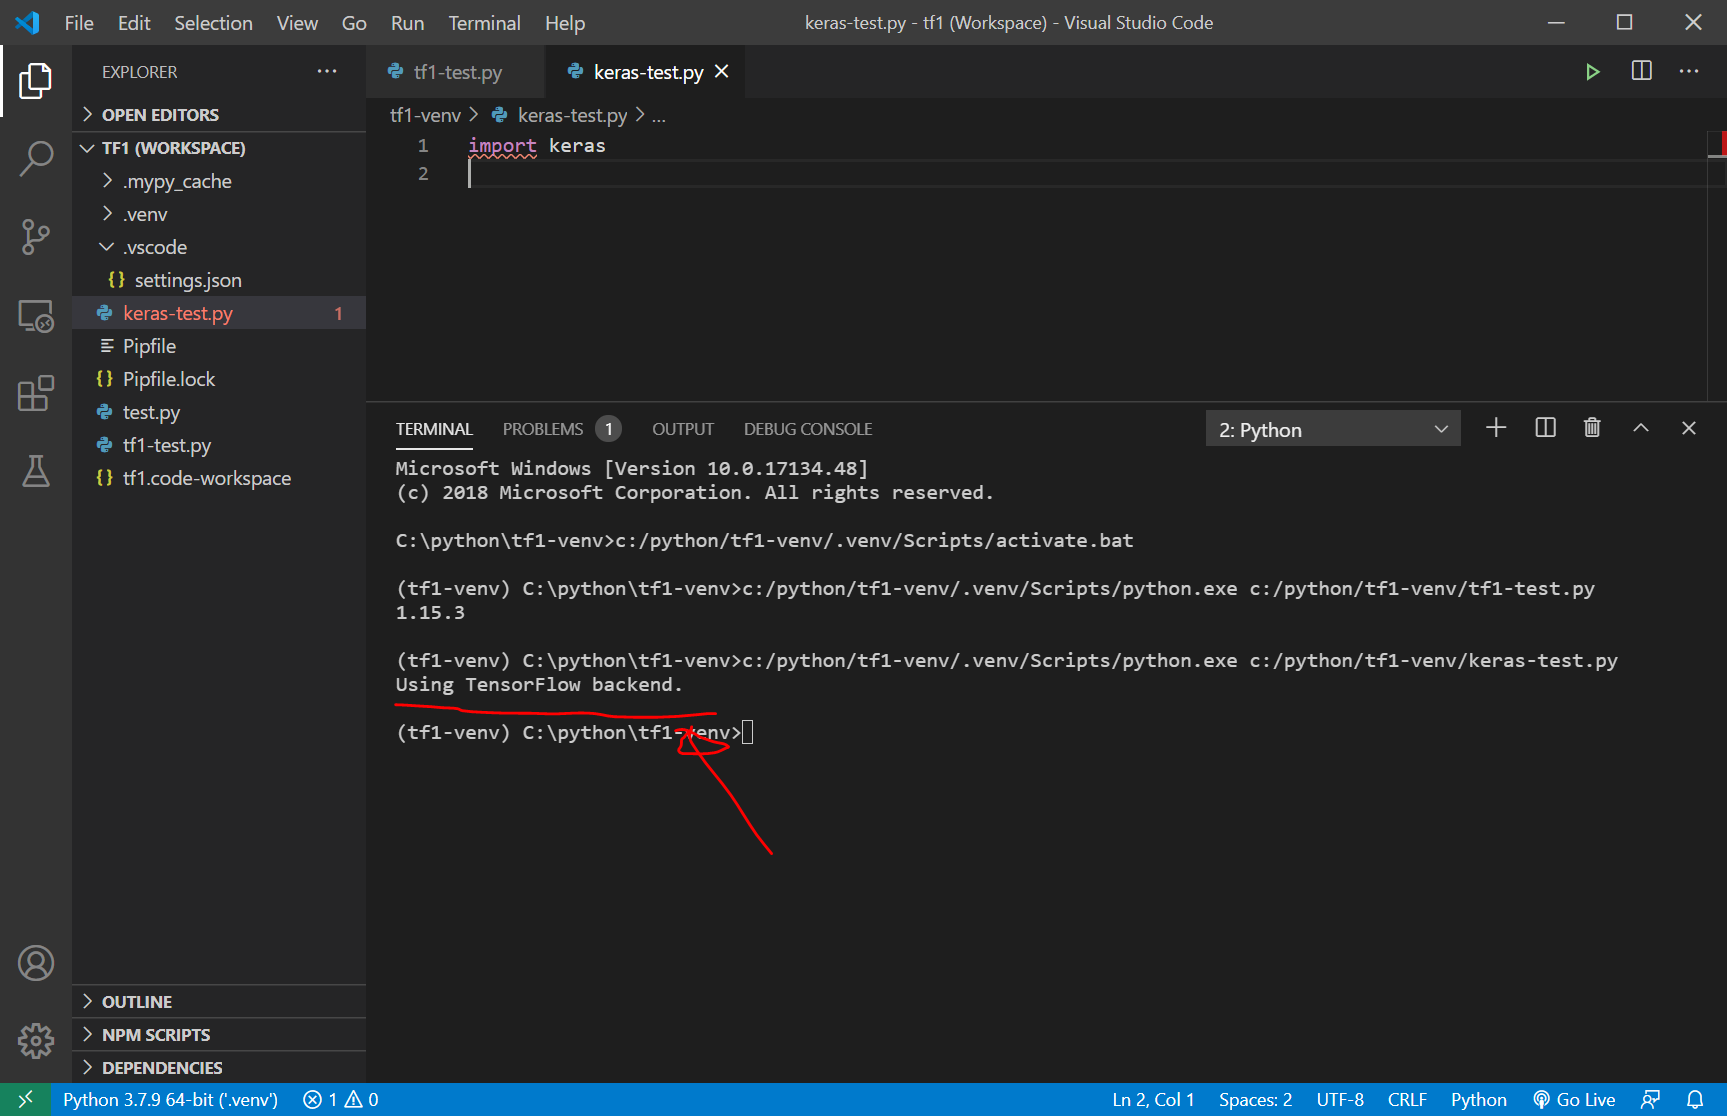
ターミナル画面に、"Using Tensorflow backend."を頂きました。
個人的には3年ぶりにkerasをインストールしました。Anaconda無しでもいけました。2017年頃と比べて、pipenvやflake8, autopep8が良い感じで、個人的にはこちらの方が好きになりそうです。私のプログラミングはお遊びなので、Jupyter Notebookを使用したければ、Google Colabでやれば十分かなといった感じです。
参考:2017年頃のTensorFlow, Kerasのインストール方法
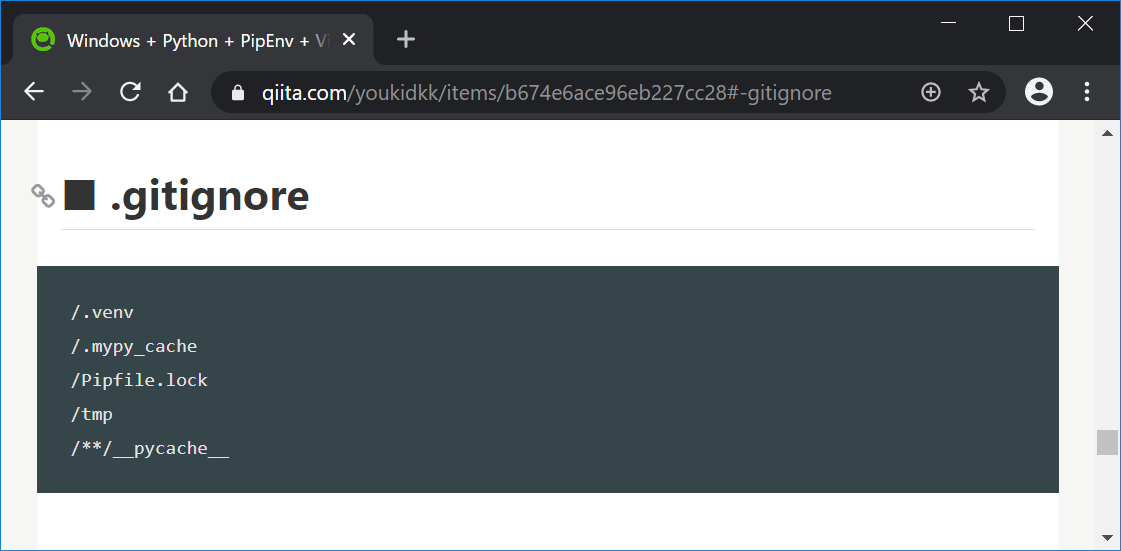
参考:.gitignore
今回のインストールについて参考にしたサイトのリンクのまとめ
ものすごく時間がかかってWindows10にTensorFlow1.15をインストールしました。次は、Flaskを用いて、lobeのモデルを使ったWEBアプリを作成したいと思います。