Microsoftの機械学習アプリLobe(beta版)でリンゴとみかんを分類するWEBアプリ作成を試してみる(4)Windows10ローカル環境でFlaskを用いて画像判定
前回は、Lobeで学習させたモデルをTensorFlow形式でエクスポート(python3.6, TensorFlow 1.15 SavedModel)して、ターミナル画面で付属のtf_example.pyを実行してみました。
今回は、ターミナル画面ではなく、Flaskを用いて、WEBブラウザから画像判定をできるようにしたいと思います。
- 1. Microsoftの機械学習アプリLobe(beta版)でリンゴとみかんを分類するWEBアプリ作成を試してみる 目次(全5回)
- 2. ソースコード
- 3. 開発環境
- 4. 今回構築した仮想環境
- 5. Windows10ローカル環境でLobeからエクスポートしたモデルをFlaskを用いて画像判定の流れ
- 6. LobeでエクスポートしたモデルをC:/python/フォルダに保存
- 7. pipenvでpython3.6の仮想環境を作成
- 8. VSCodeのWorkspaceの作成とsettings.jsonの設定
- 9. .gitignoreの作成
- 10. Flaskアプリ作成の準備
- 11. predict.pyを作成
- 12. Flaskのインストール
- 13. predict.pyの実行
- 14. GitHubにpushする
- 15. ソースコード
- 16. 次の記事
Microsoftの機械学習アプリLobe(beta版)でリンゴとみかんを分類するWEBアプリ作成を試してみる 目次(全5回)
- (1)LobeのインストールからTensorFlowモデルのエクスポートまで
- (2)Windows10でPython3.6+TensorFlow1.15をセットアップ
- (3)Windows10ローカル環境でtf_example.pyを実行
- (4)Windows10ローカル環境でFlaskを用いて画像判定
- (5)FlaskアプリをHerokuにデプロイ
ソースコード
モデルのコード
https://github.com/adash333/lobe-AppleOrange-tf1model/tree/3a9c48ba6128094491d63d135a84c750270adf51
今回作成したFlaskアプリのソースコード
https://github.com/adash333/Lobe-Flask-AppleOrange/tree/8244d2809a2cce031ef516b1ca514ed4a765c1a0
開発環境
Windows10のPython3.6+TensorFlow1.15の環境構築についてはこちらをご覧ください。
Windows10 Pro
VisualStudioCode 1.51.0
Git for Windows v2.29.2
python 3.6
pip 20.2.4
pipenv 2020.11.4
今回構築した仮想環境
python 3.6
TensorFlow 1.15.3
pillow 7.2.0
autopep8
flake8
mypy
VisualstudiocodeのWorkspaceの設定のsettings.json → こちらのコード
Windows10ローカル環境でLobeからエクスポートしたモデルをFlaskを用いて画像判定の流れ
- C:/python/Lobe-Flask-AppleOrange フォルダを作成
- AppleOrangeモデルをダウンロードして中身をLobe-Flask-AppleOrange フォルダに保存
- pipenvでpython3.6仮想環境を作成
pipenv --python 3.6 - TensorFlow1.15とpillow7.2.0をインストール
pipenv install -r example/requirements.txt - VSCodeのWorkspaceの作成とsettings.jsonの設定(外部リンク)
- その他のパッケージ(autopep8,flake8,mypy)のインストール
pipenv install autopep8 flake8 mypy --dev - .gitignoreの作成(外部リンク)
- 以降はFlaskアプリ作成
- result/、static/、templates/フォルダを作成
- templates/ フォルダの中に、index.htmlを作成(外部リンク)
- Lobe-Flask-AppleOrange フォルダにpredict.pyを作成(これは考える必要あり。)(tf_example.py、外部リンク、https://i-doctor.sakura.ne.jp/font/?p=20440 )
- Flaskのインストール
pipenv install flask - python predict.py
- WEBブラウザで、localhost:5000 を開く
- predictしたい画像を用意して、WEBブラウザ上でpredictしてみる
LobeでエクスポートしたモデルをC:/python/フォルダに保存
C:/python/Lobe-Flask-AppleOrange フォルダを作成し、こちらで学習してエクスポートしたLobeのモデル(102MB)の中身を保存します。
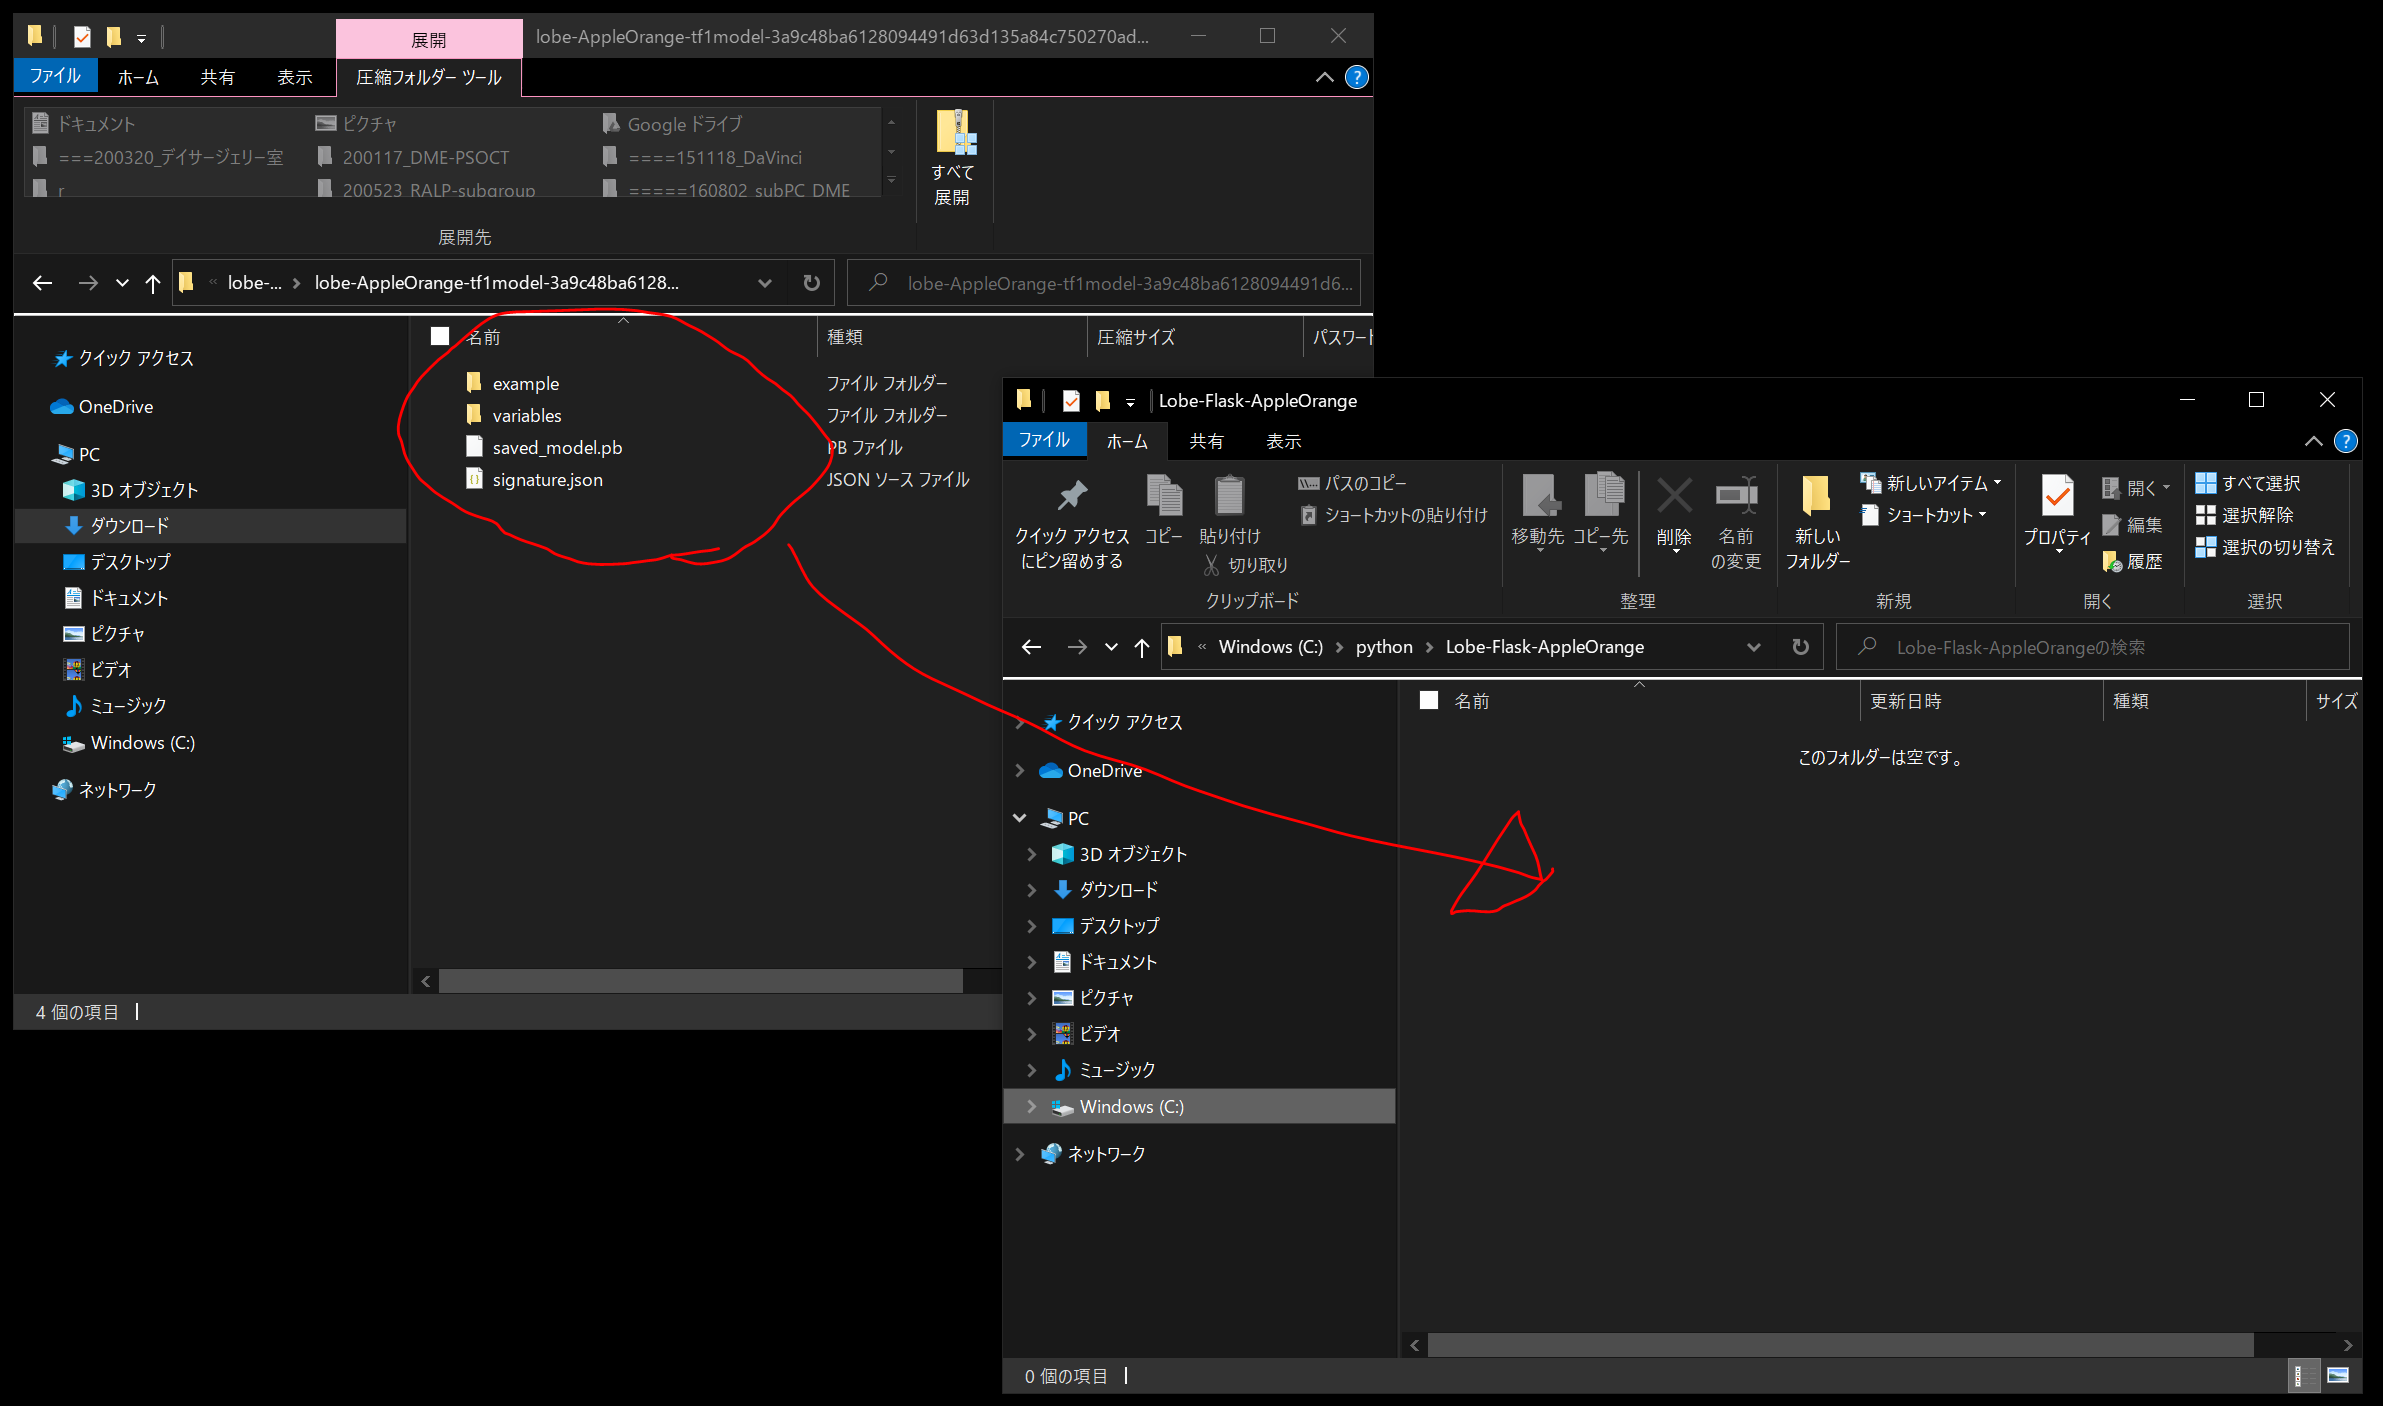
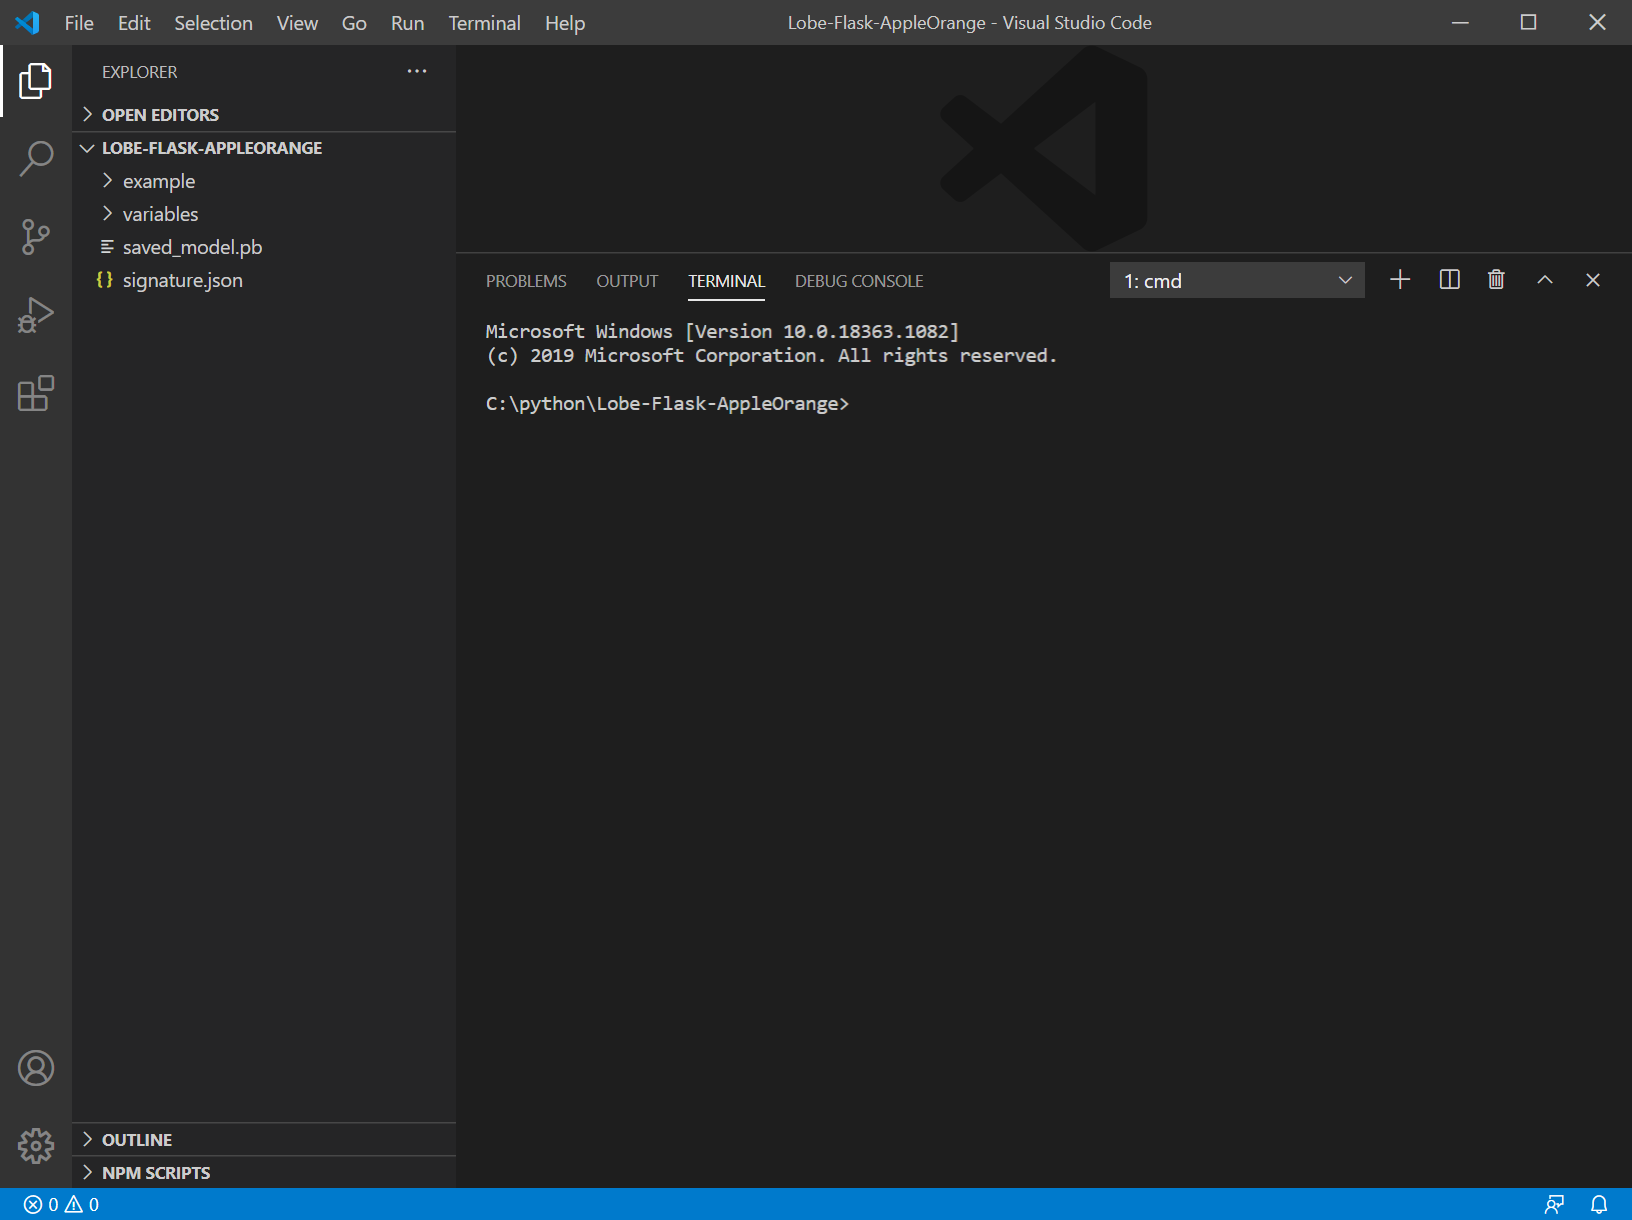
Lobe-Flask-AppleOrange フォルダを VisualStudioCodeで開き、Ctrl+@でターミナル画面を開きます。
pipenvでpython3.6の仮想環境を作成
ターミナル画面に以下を入力します。
pipenv --python 3.6
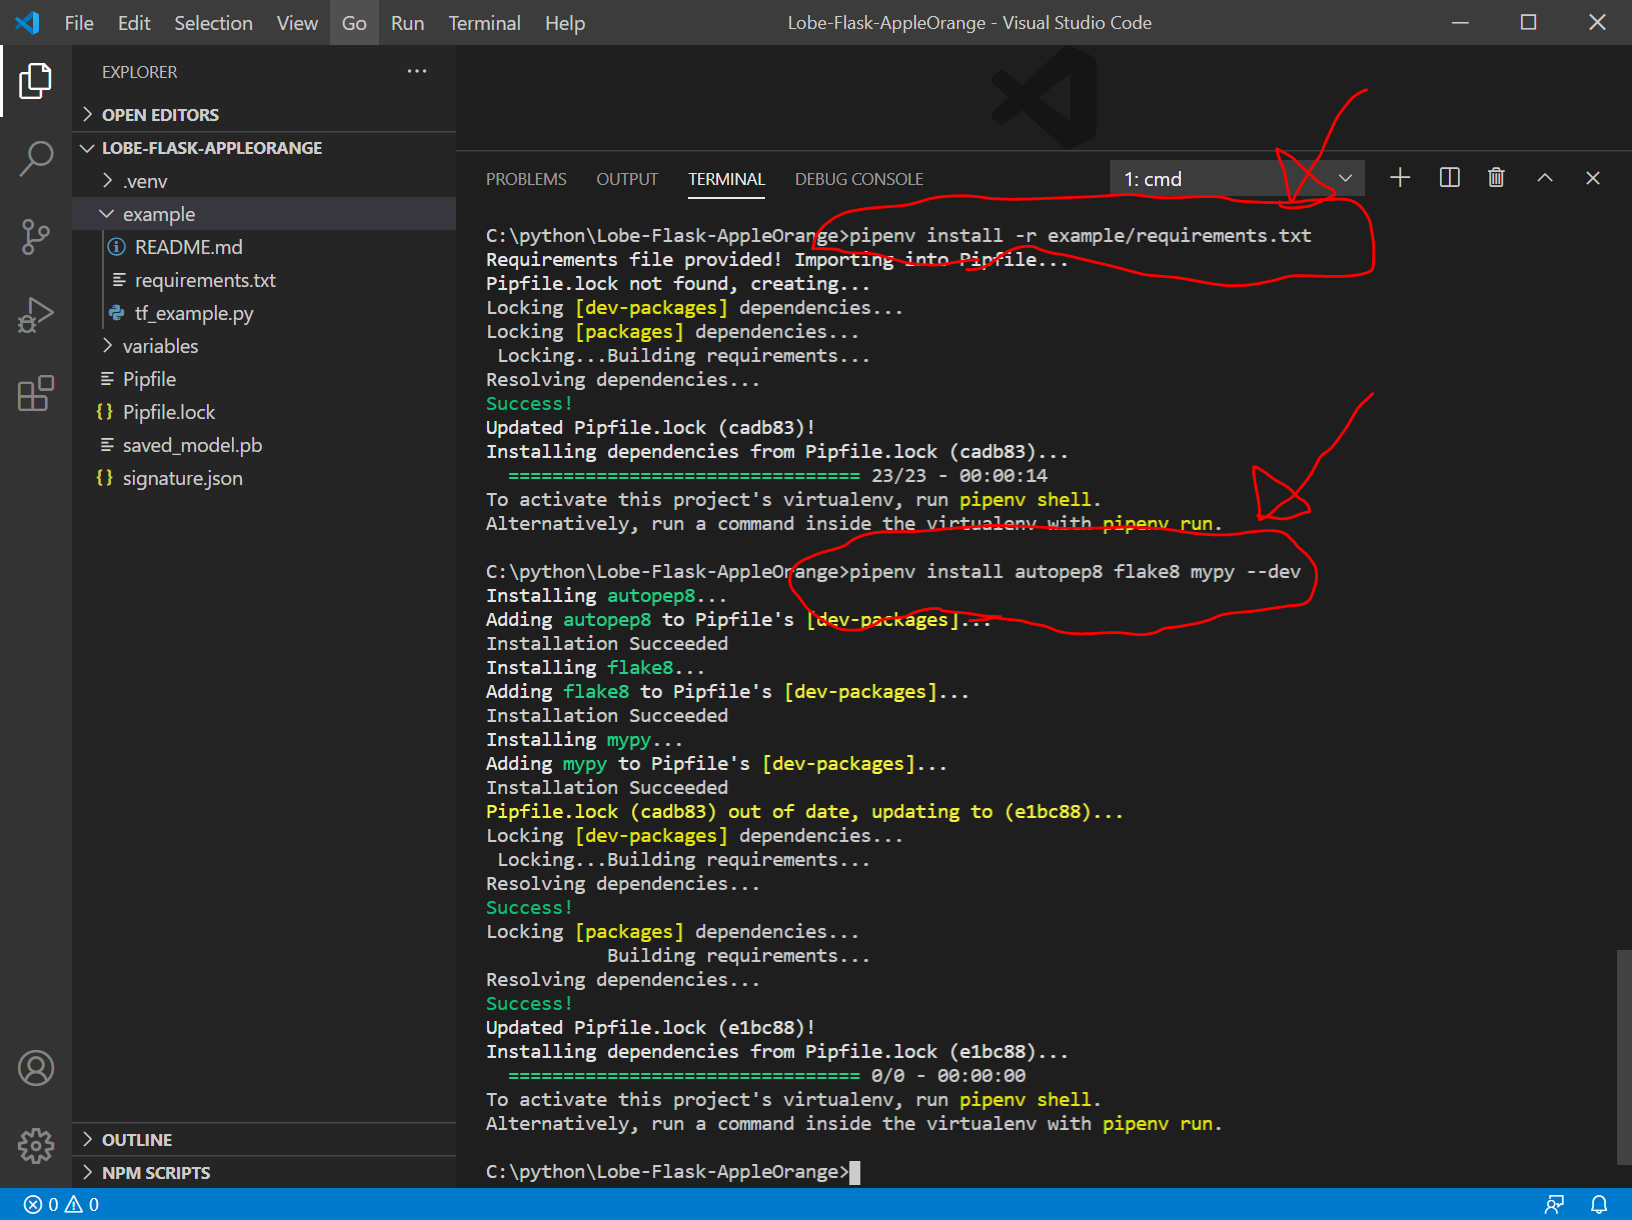
pipenv install -r example/requirements.txt
pipenv install autopep8 flake8 mypy --dev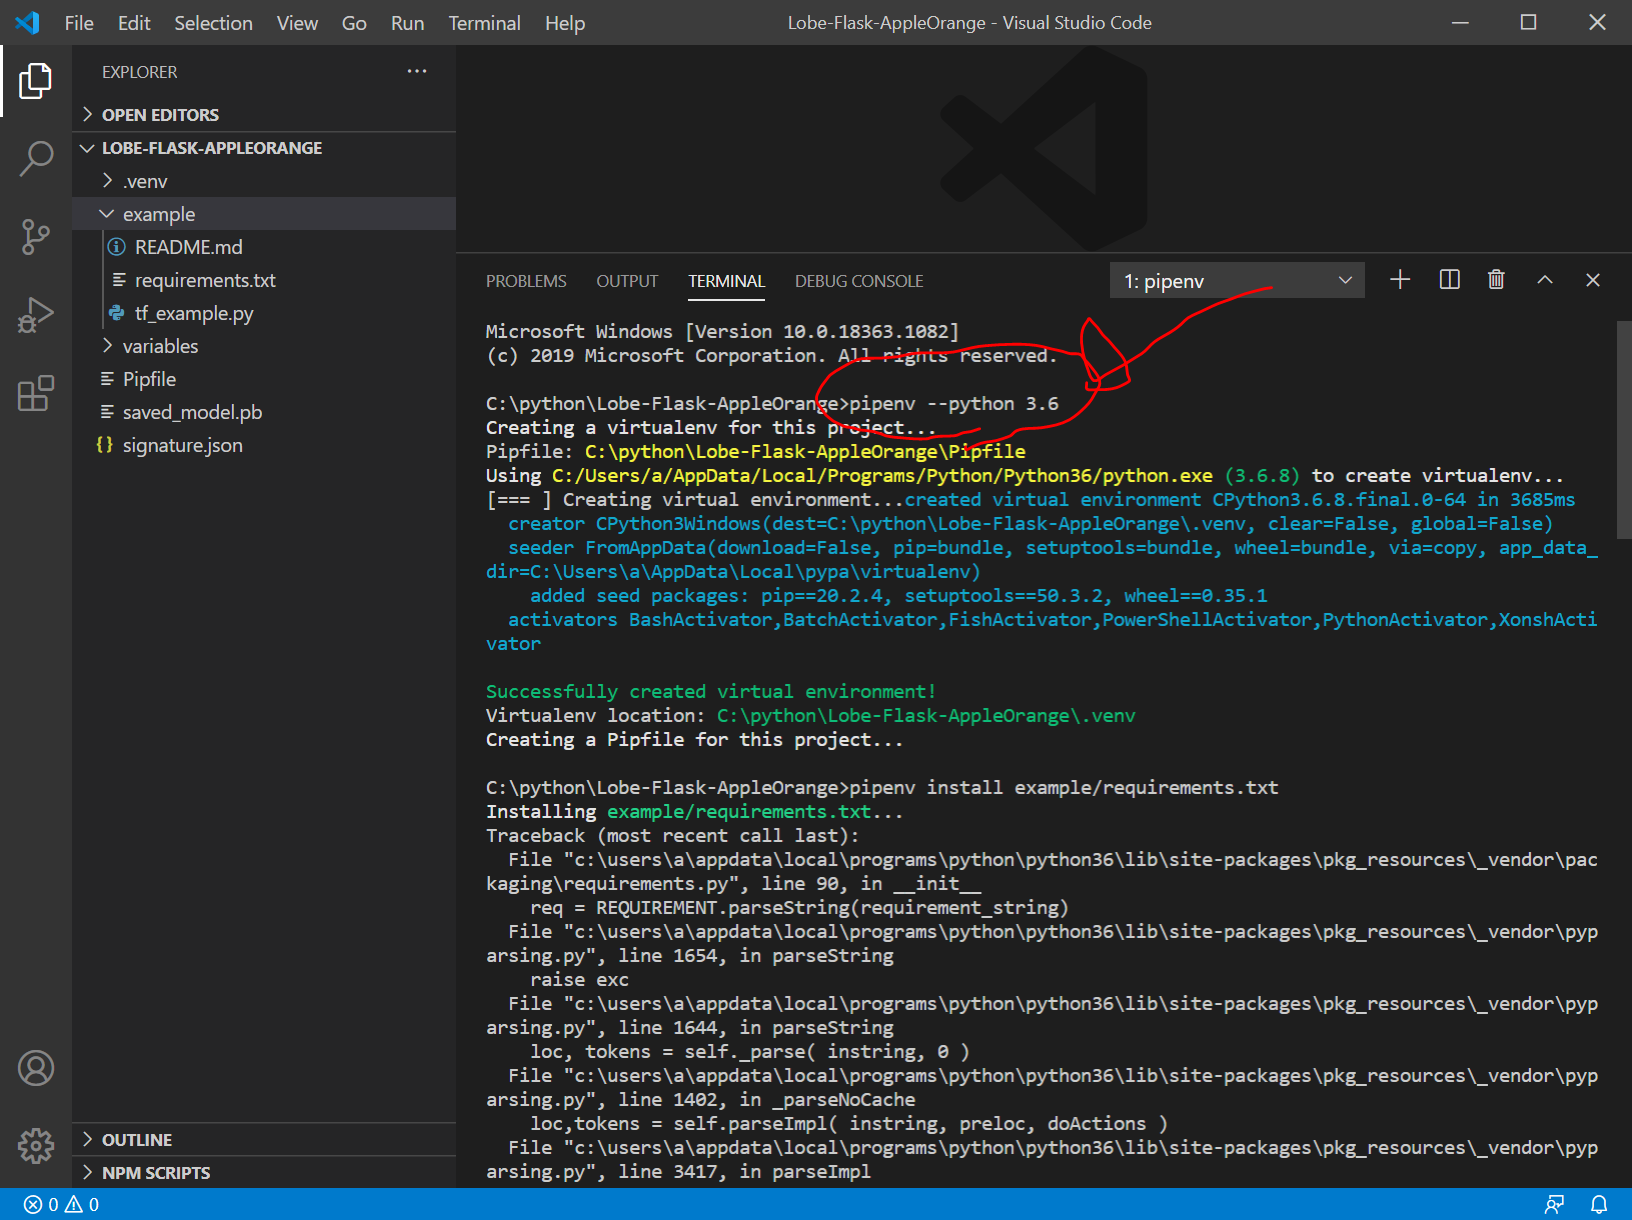
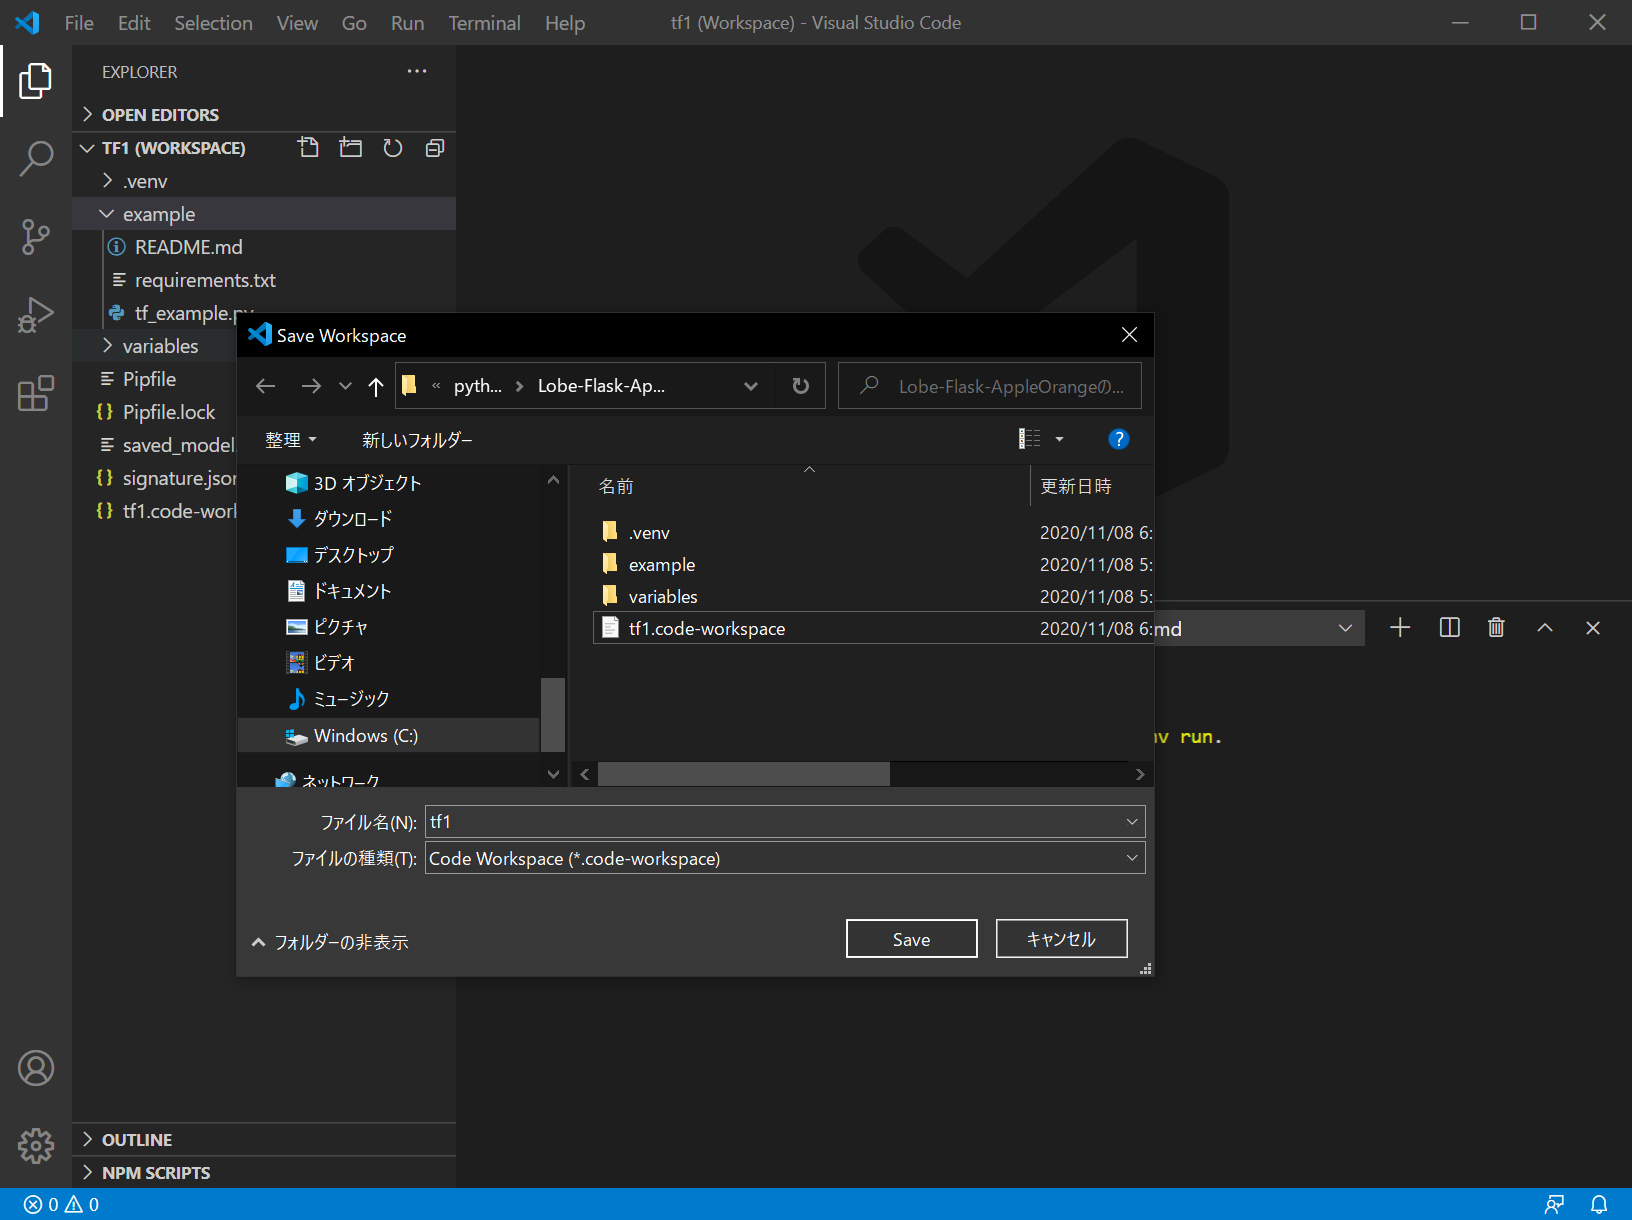
VSCodeのWorkspaceの作成とsettings.jsonの設定
VSCodeの『ワークスペース』についてはこちらをご覧下さい。
File > Save Workspace As… をクリックして、tf1 という名前で保存します。
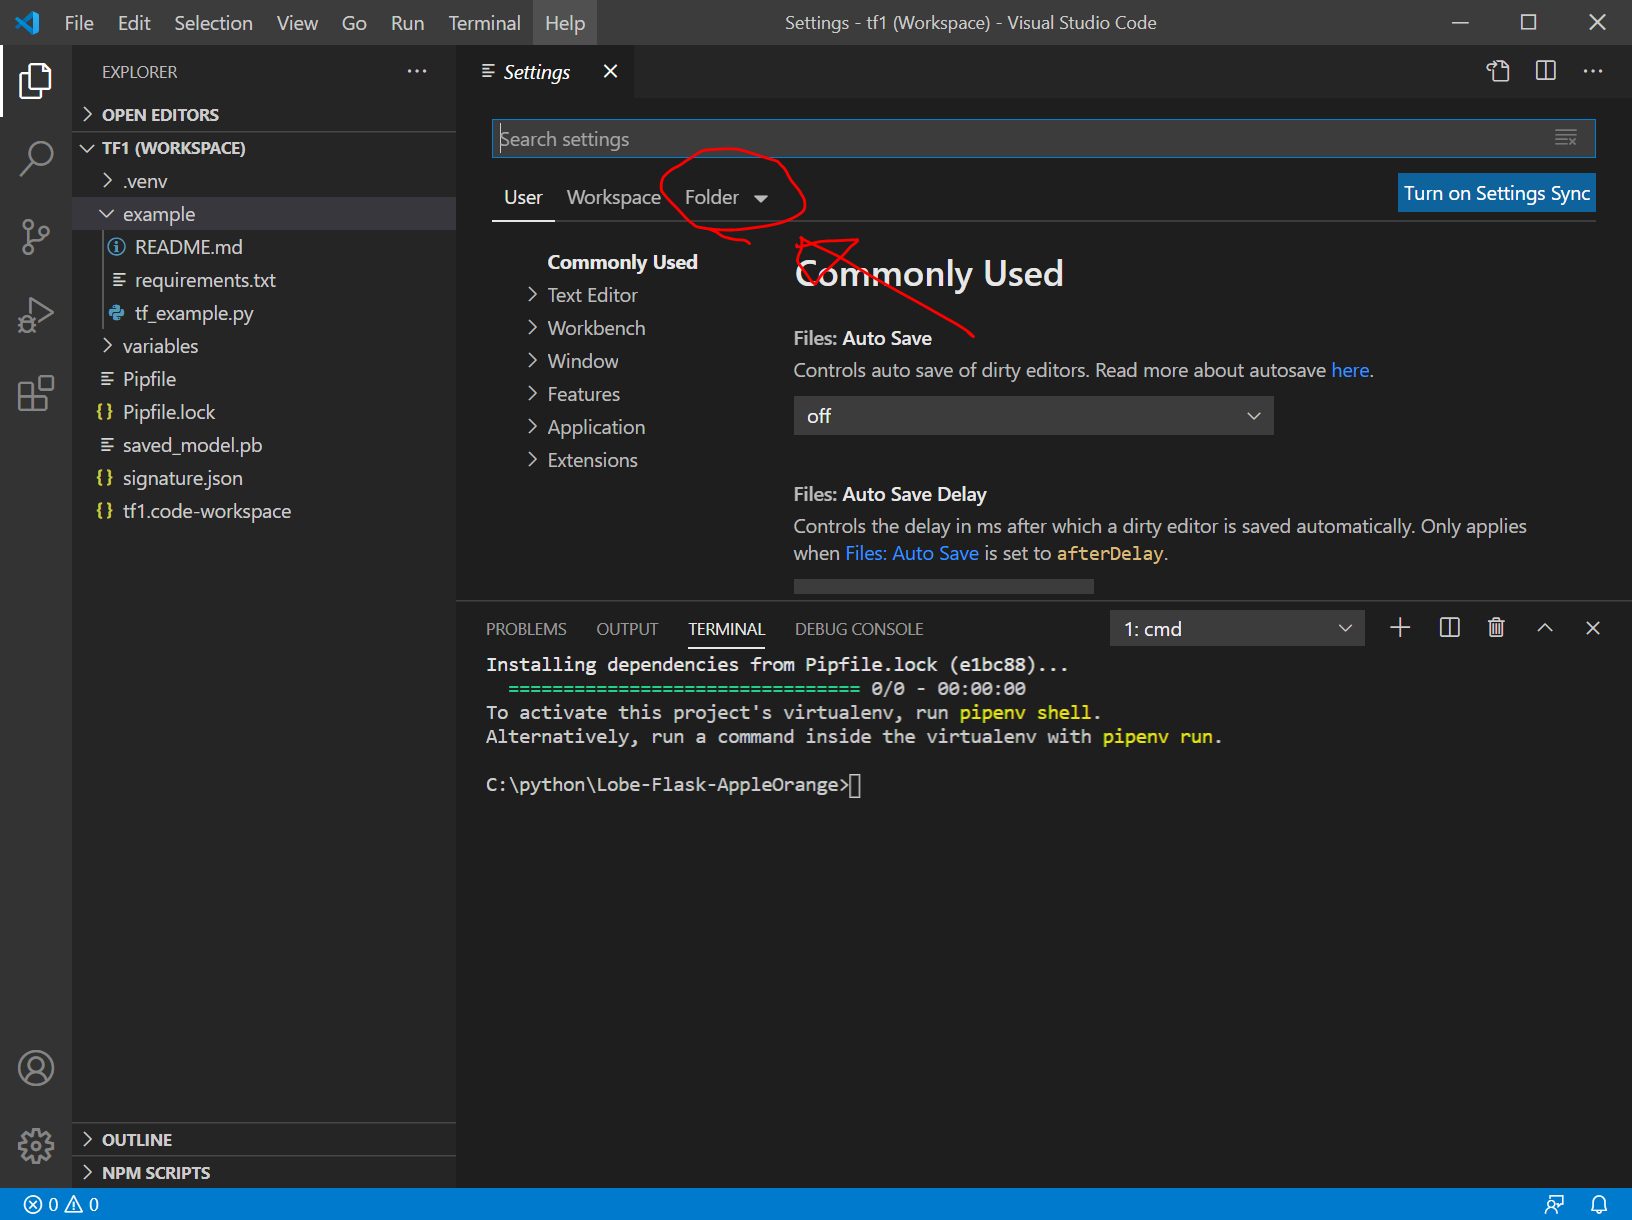
File > Preferences > Settings をクリック (または、"Ctrl + ," ) により、Settings を表示して、以下のように、Folder > Lobe-Flask-AppleOrange の順にクリック
この状態で、画面右上のファイルマークのようなボタンをクリック
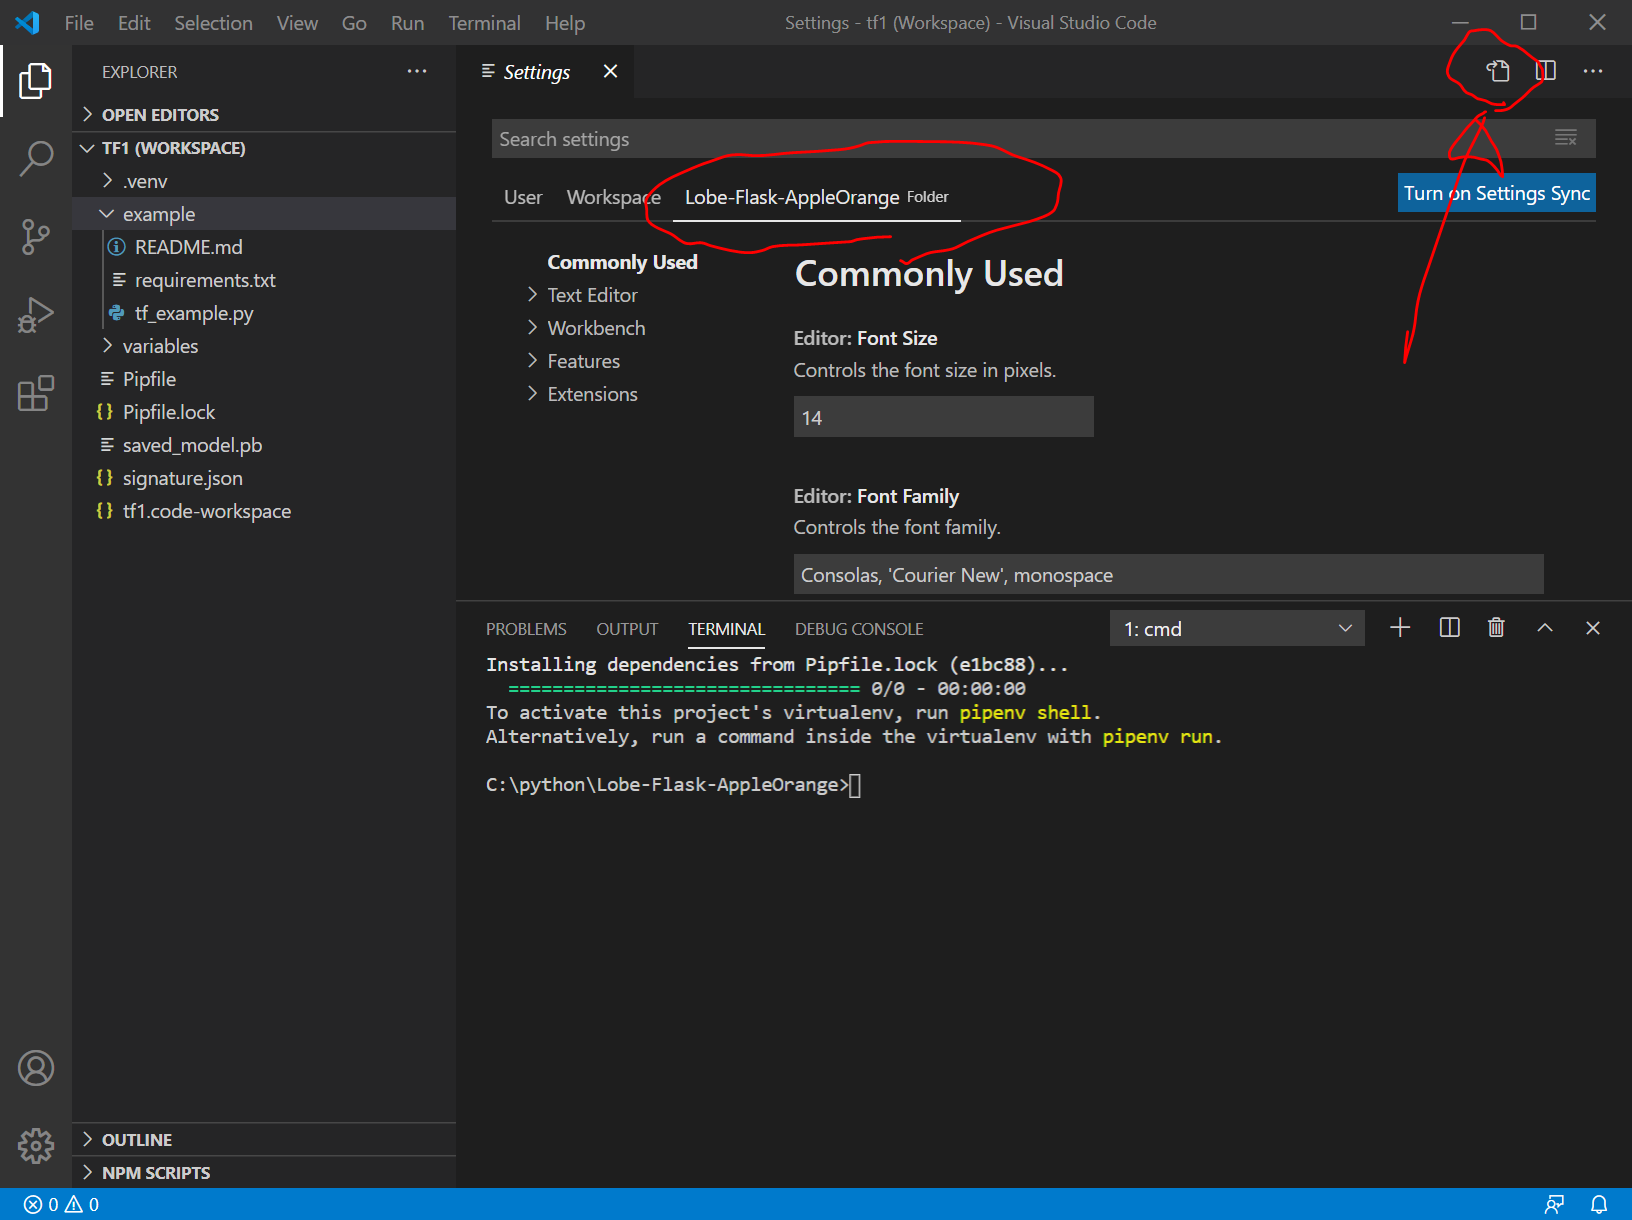
すると、今回の私の環境では、
C:/python/Lobe-Flask-AppleOrange/.vscode/ フォルダ
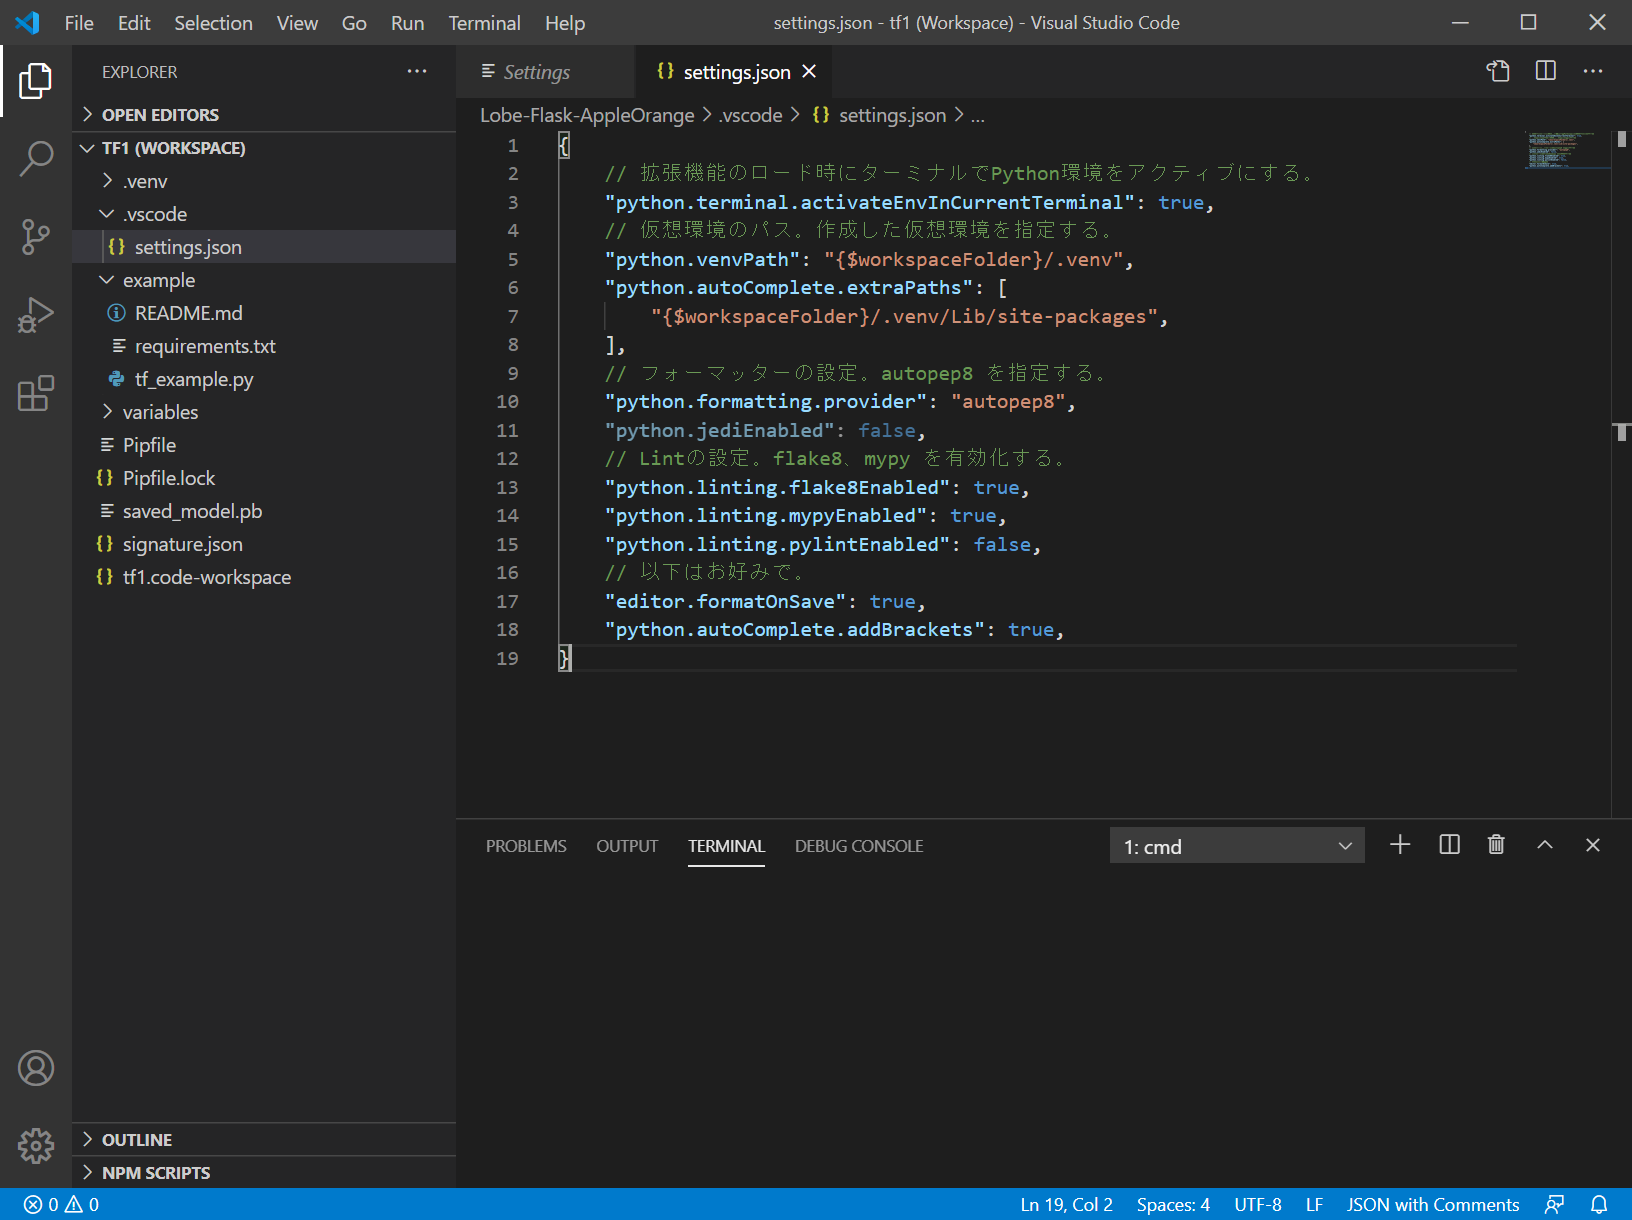
C:/python/Lobe-Flask-AppleOrange/.vscode/settings.json ファイルが作成され、settings.jsonが開きます。
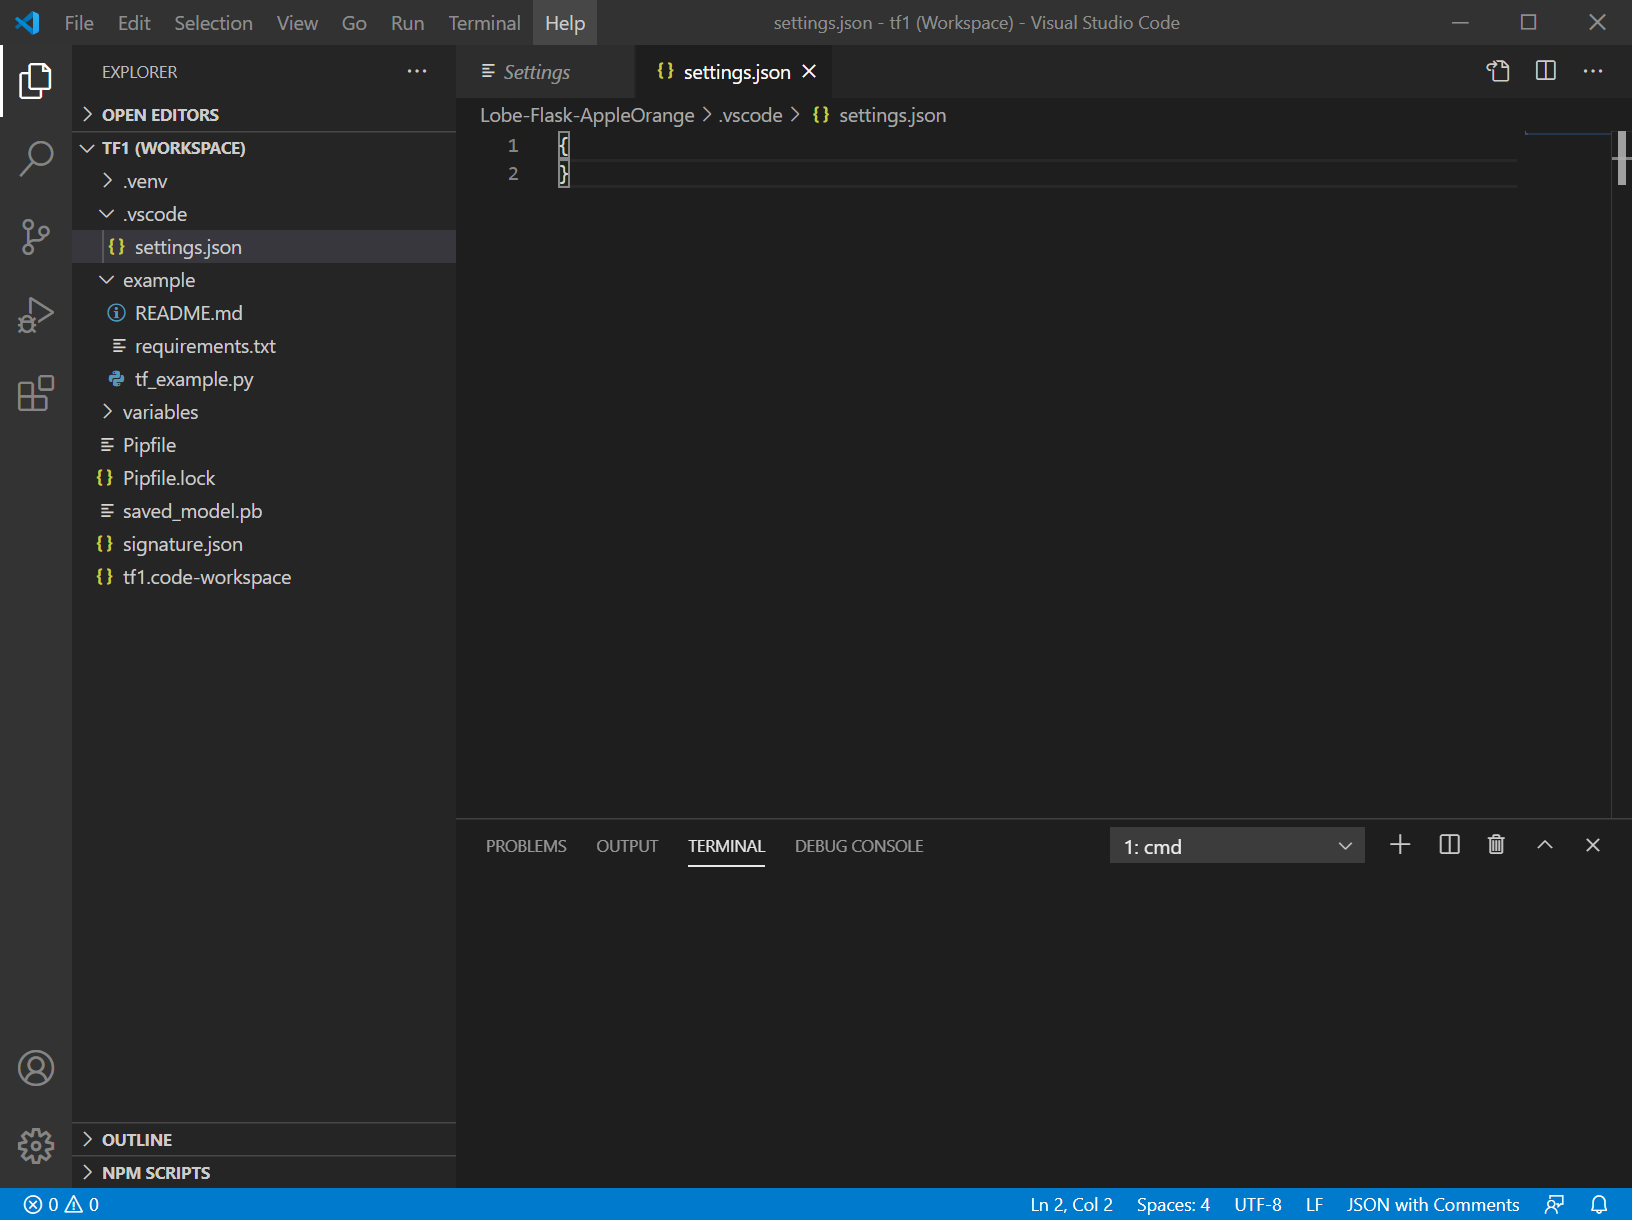
settings.json にこちらのコードをコピペします。
引用元:Windows + Python + PipEnv + Visual Studio Code でPython開発環境(@youkidkk 2020年05月04日に更新 )
{
    // 拡張機能のロード時にターミナルでPython環境をアクティブにする。
    "python.terminal.activateEnvInCurrentTerminal": true,
    // 仮想環境のパス。作成した仮想環境を指定する。
    "python.venvPath": "{$workspaceFolder}/.venv",
    "python.autoComplete.extraPaths": [
        "{$workspaceFolder}/.venv/Lib/site-packages",
    ],
    // フォーマッターの設定。autopep8 を指定する。
    "python.formatting.provider": "autopep8",
    "python.jediEnabled": false,
    // Lintの設定。flake8、mypy を有効化する。
    "python.linting.flake8Enabled": true,
    "python.linting.mypyEnabled": true,
    "python.linting.pylintEnabled": false,
    // 以下はお好みで。
    "editor.formatOnSave": true,
    "python.autoComplete.addBrackets": true,
}
.gitignoreの作成
gitignoreの作成(外部リンク)
/.venv
/.mypy_cache
/Pipfile.lock
/tmp
/**/__pycache__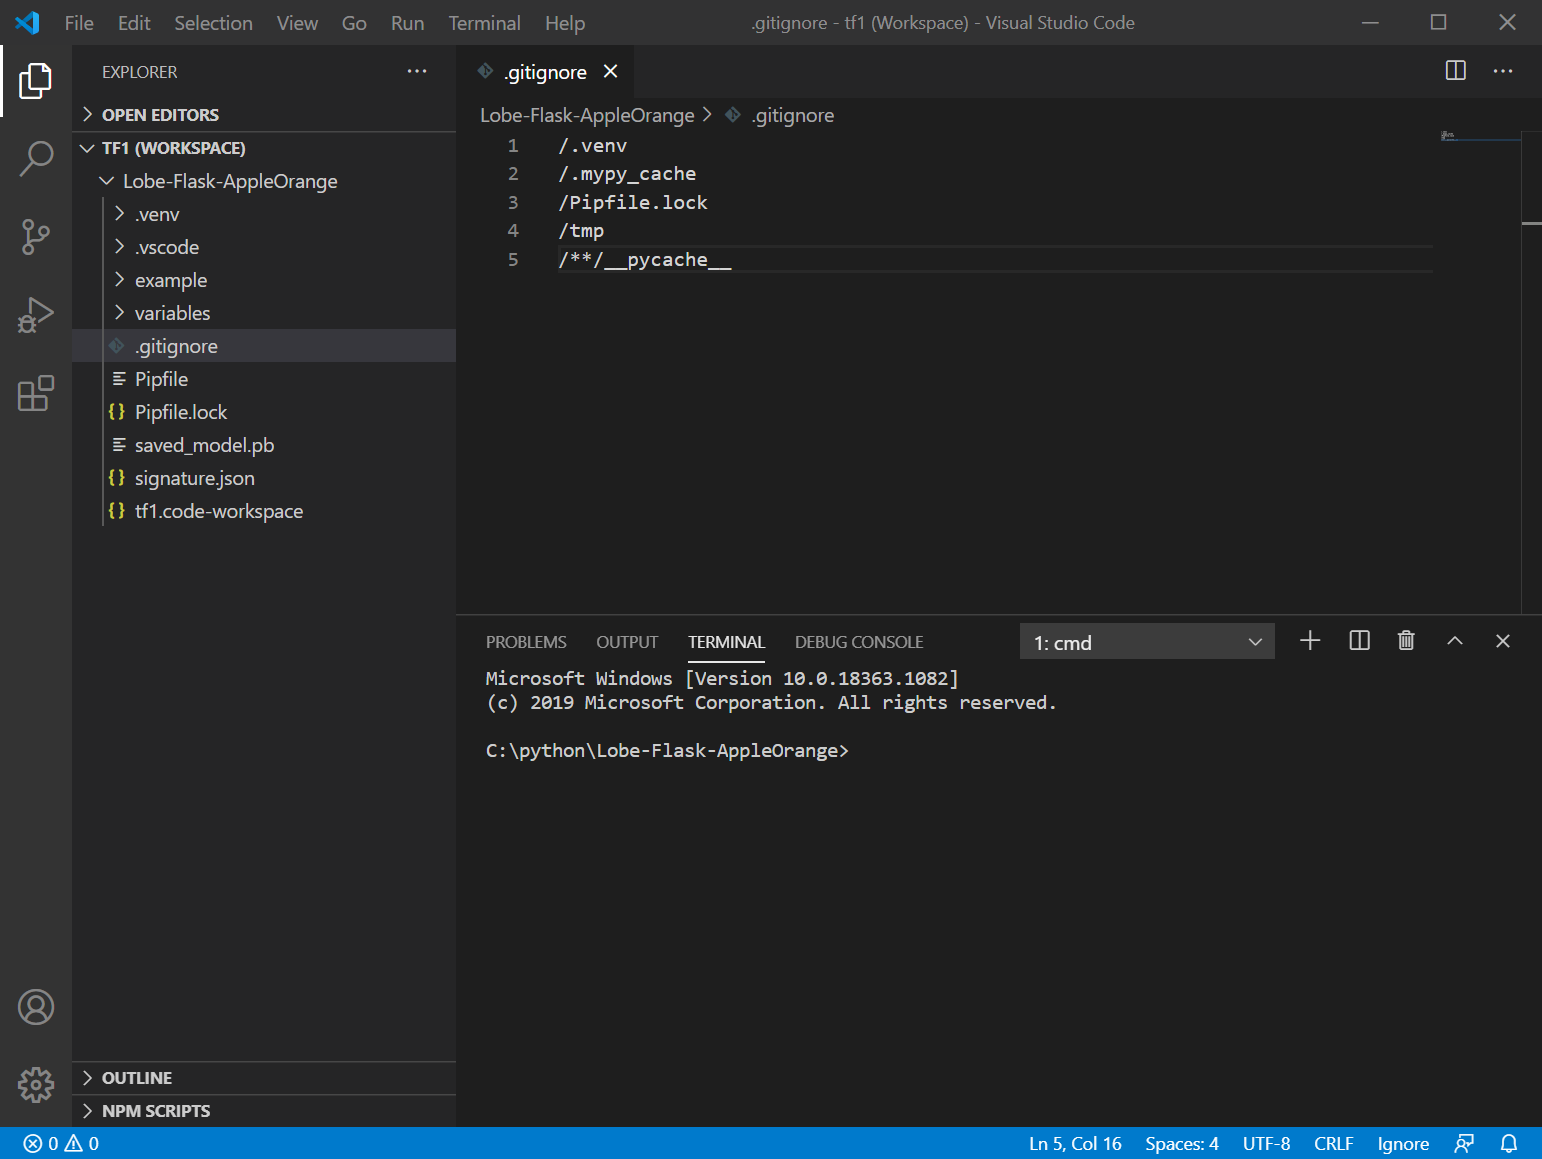
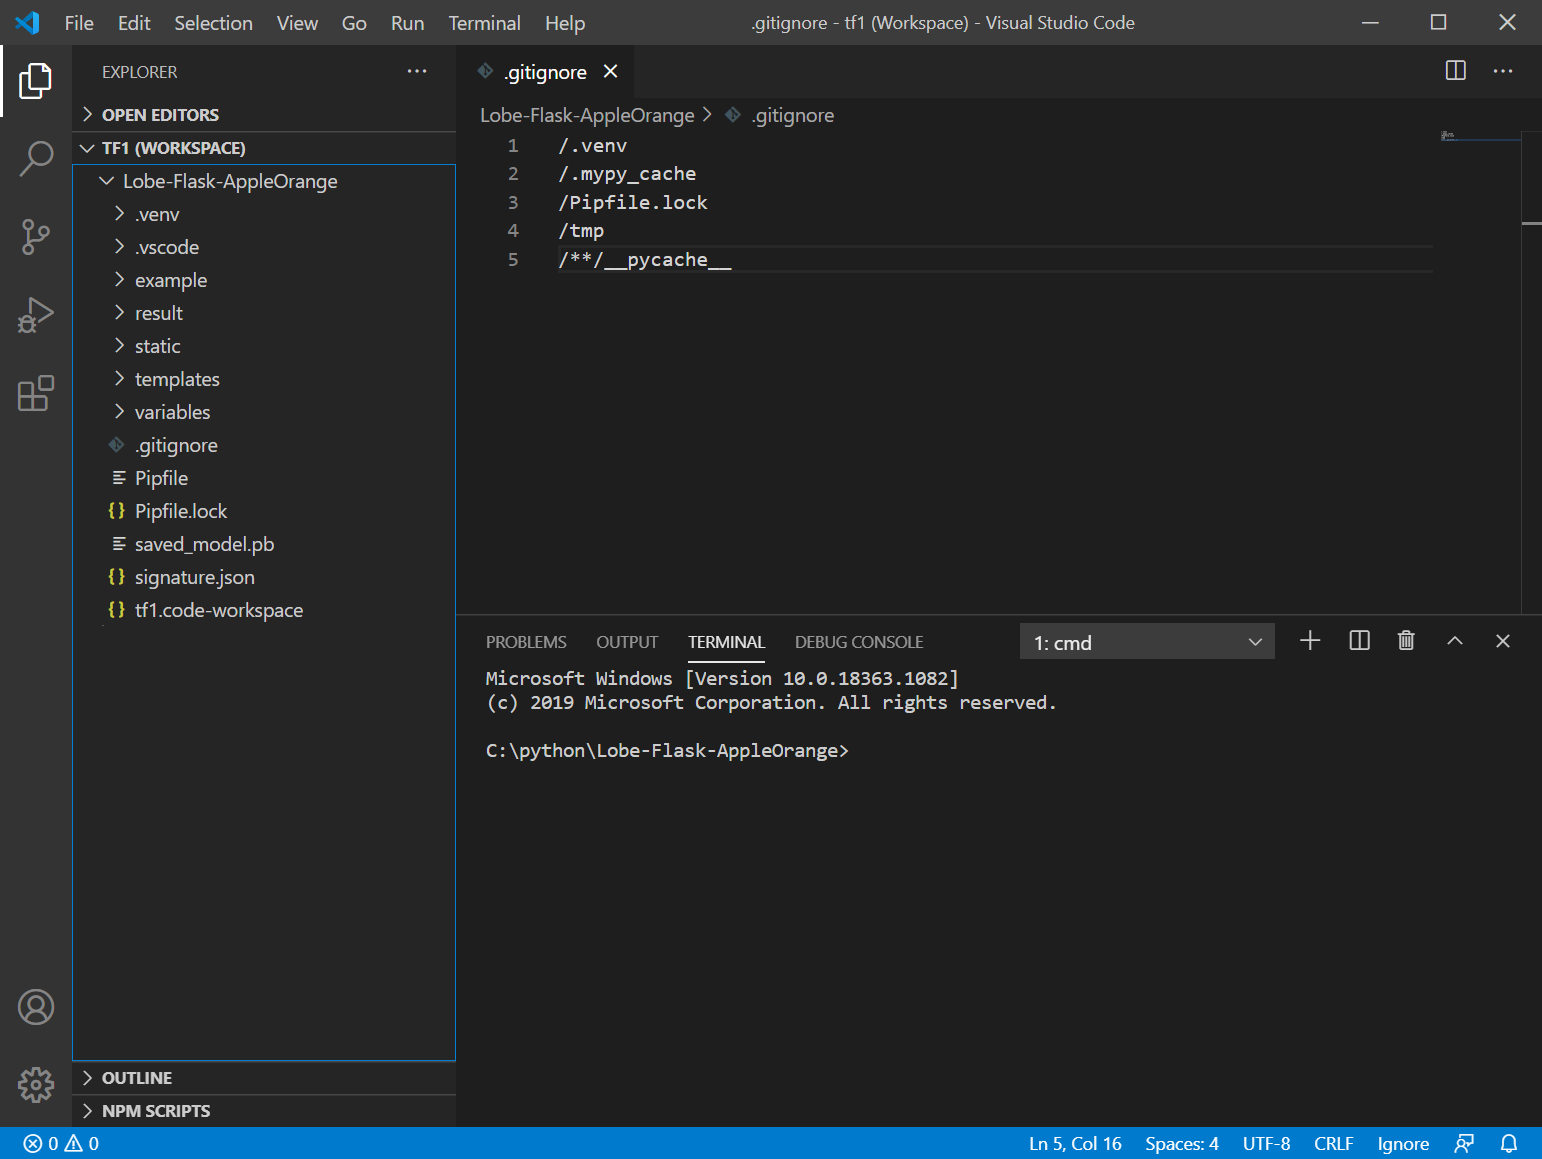
Flaskアプリ作成の準備
result/、static/、templates/フォルダを作成
templates/ フォルダの中に、index.htmlを作成(外部リンク)
<html>

<body>
    {% if predict %}
    <img src="{{filepath}}" border="1">
    <p>predict: {{predict}}</p>
    {% endif %}
    <br>
    <p>ファイルを選択して送信してください</p>
    <form action="./" method="POST" enctype="multipart/form-data">
        <input type="file" name="file" />
        <input type="submit" />
    </form>
</body>

</html>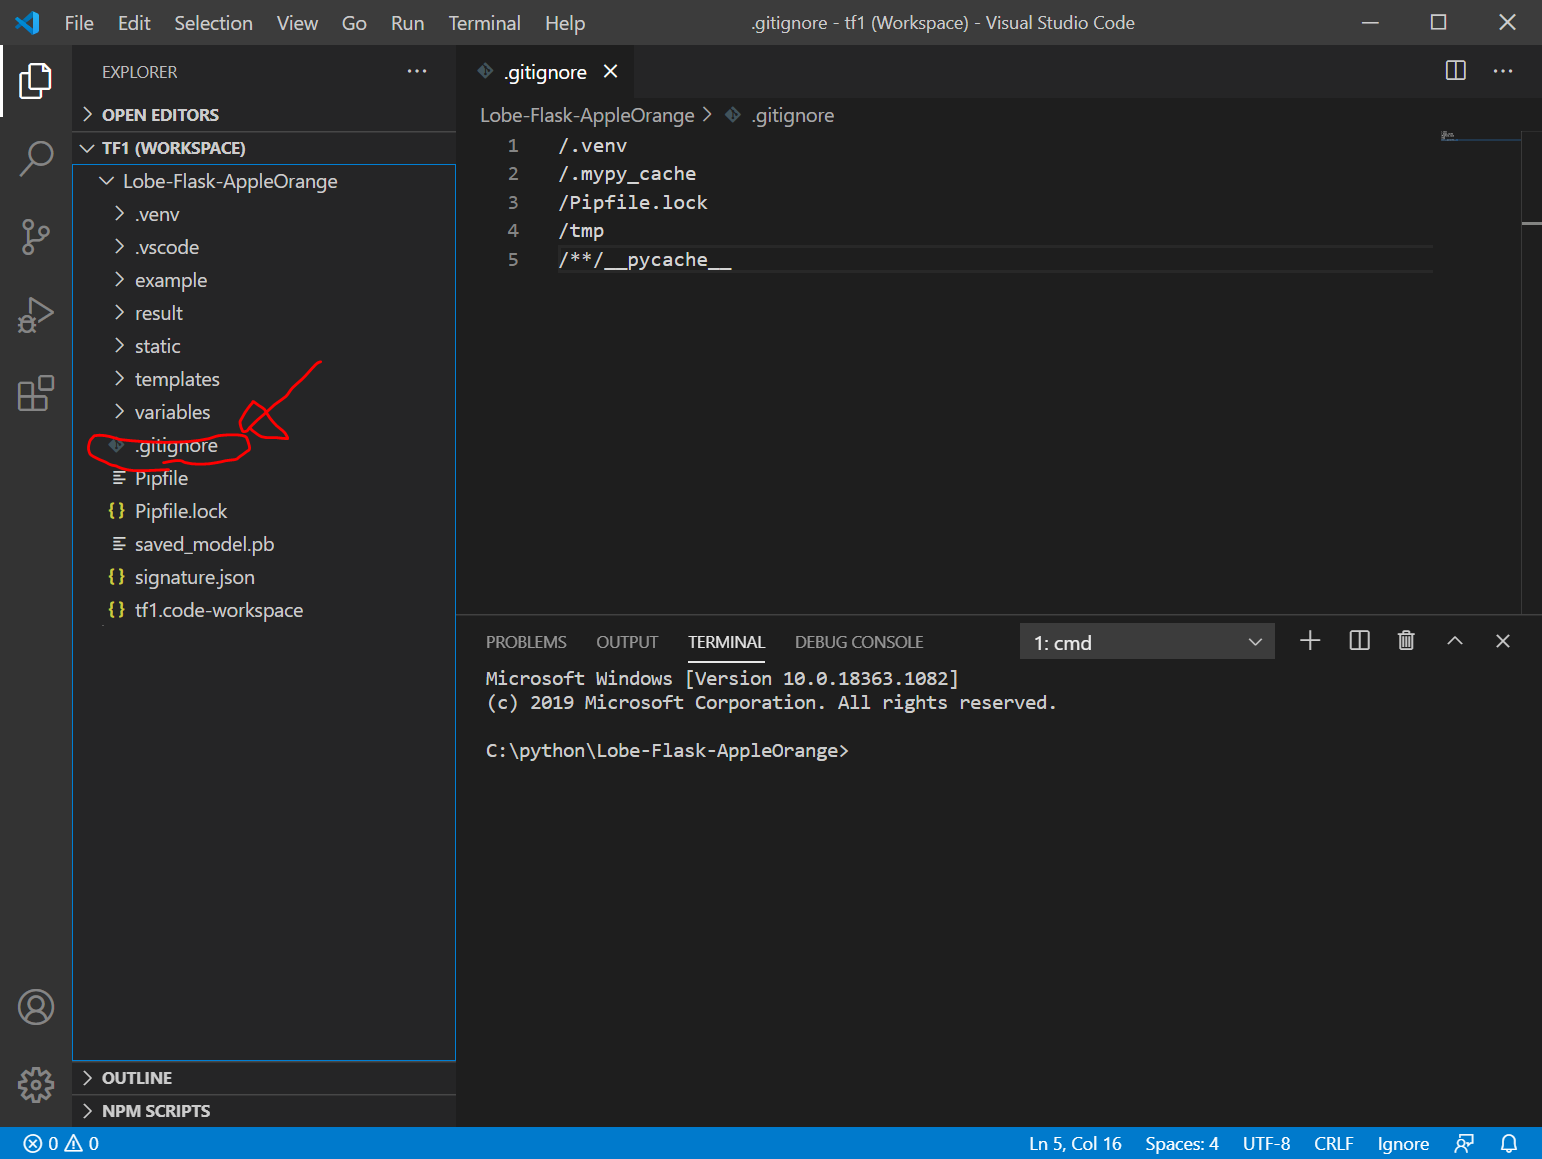
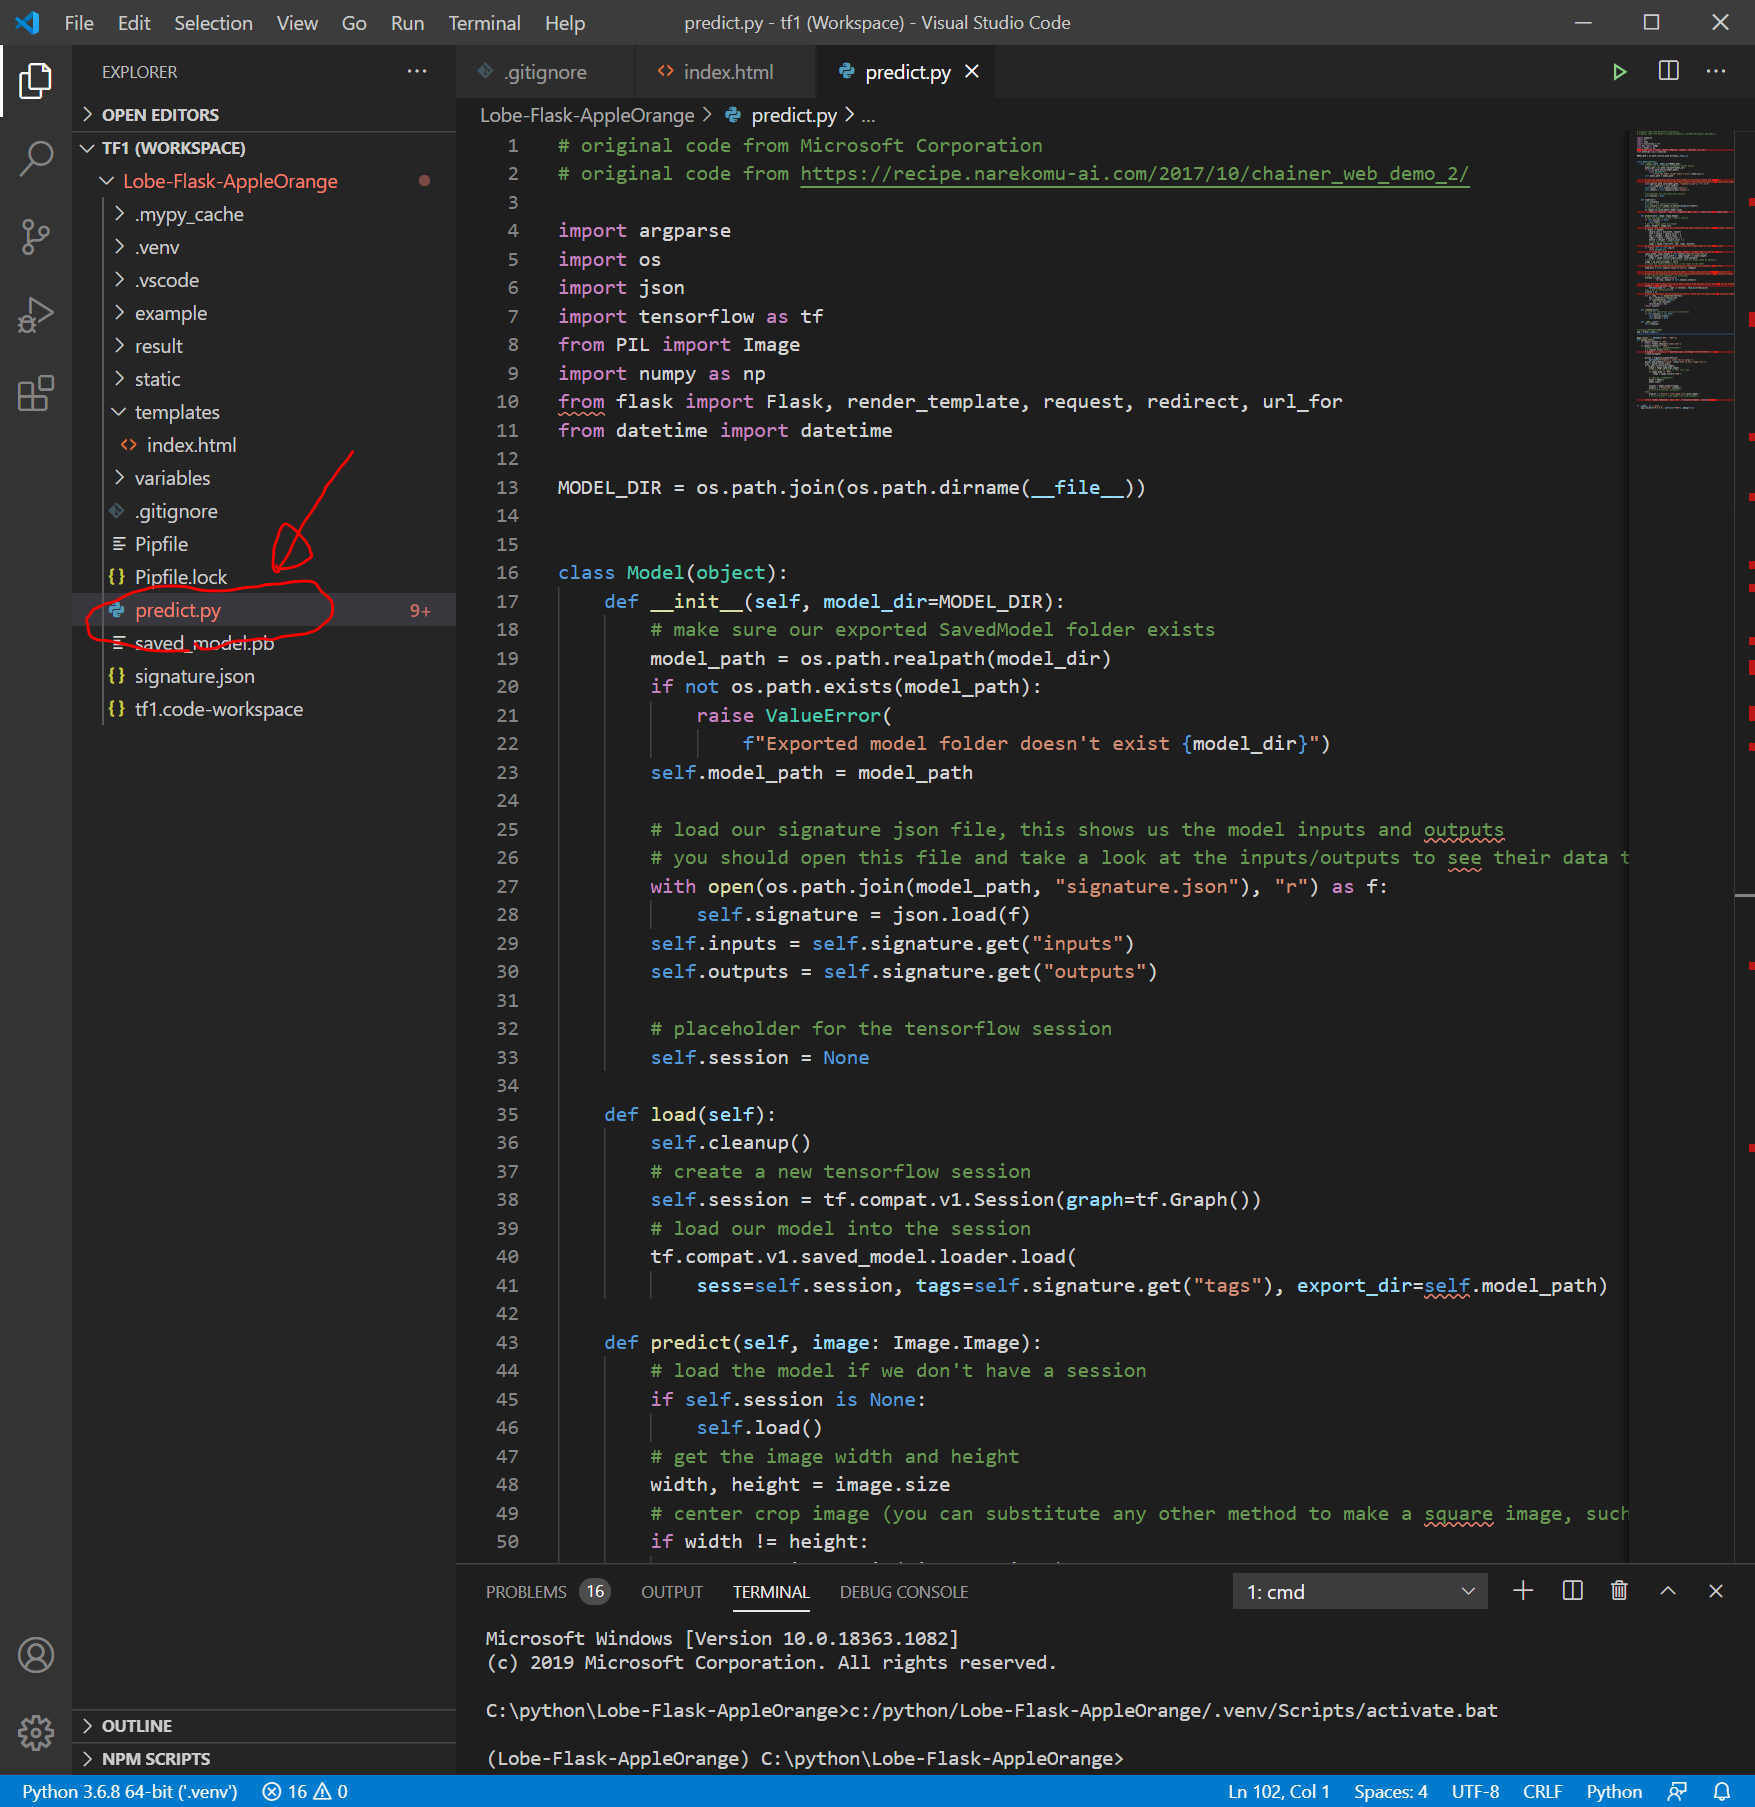
predict.pyを作成
Lobe-Flask-AppleOrange フォルダにpredict.pyを作成します。以下を参考にしました。できるかな、、、
(以下のコードは誤り)
# original code from Microsoft Corporation
# original code from https://recipe.narekomu-ai.com/2017/10/chainer_web_demo_2/

import argparse
import os
import json
import tensorflow as tf
from PIL import Image
import numpy as np
from flask import Flask, render_template, request, redirect, url_for
from datetime import datetime

MODEL_DIR = os.path.join(os.path.dirname(__file__))


class Model(object):
    def __init__(self, model_dir=MODEL_DIR):
        # make sure our exported SavedModel folder exists
        model_path = os.path.realpath(model_dir)
        if not os.path.exists(model_path):
            raise ValueError(
                f"Exported model folder doesn't exist {model_dir}")
        self.model_path = model_path

        # load our signature json file, this shows us the model inputs and outputs
        # you should open this file and take a look at the inputs/outputs to see their data types, shapes, and names
        with open(os.path.join(model_path, "signature.json"), "r") as f:
            self.signature = json.load(f)
        self.inputs = self.signature.get("inputs")
        self.outputs = self.signature.get("outputs")

        # placeholder for the tensorflow session
        self.session = None

    def load(self):
        self.cleanup()
        # create a new tensorflow session
        self.session = tf.compat.v1.Session(graph=tf.Graph())
        # load our model into the session
        tf.compat.v1.saved_model.loader.load(
            sess=self.session, tags=self.signature.get("tags"), export_dir=self.model_path)

    def predict(self, image: Image.Image):
        # load the model if we don't have a session
        if self.session is None:
            self.load()
        # get the image width and height
        width, height = image.size
        # center crop image (you can substitute any other method to make a square image, such as just resizing or padding edges with 0)
        if width != height:
            square_size = min(width, height)
            left = (width - square_size) / 2
            top = (height - square_size) / 2
            right = (width + square_size) / 2
            bottom = (height + square_size) / 2
            # Crop the center of the image
            image = image.crop((left, top, right, bottom))
        # now the image is square, resize it to be the right shape for the model input
        if "Image" not in self.inputs:
            raise ValueError(
                "Couldn't find Image in model inputs - please report issue to Lobe!")
        input_width, input_height = self.inputs["Image"]["shape"][1:3]
        if image.width != input_width or image.height != input_height:
            image = image.resize((input_width, input_height))
        # make 0-1 float instead of 0-255 int (that PIL Image loads by default)
        image = np.asarray(image) / 255.0
        # create the feed dictionary that is the input to the model
        # first, add our image to the dictionary (comes from our signature.json file)
        feed_dict = {self.inputs["Image"]["name"]: [image]}

        # list the outputs we want from the model -- these come from our signature.json file
        # since we are using dictionaries that could have different orders, make tuples of (key, name) to keep track for putting
        # the results back together in a dictionary
        fetches = [(key, output["name"])
                   for key, output in self.outputs.items()]

        # run the model! there will be as many outputs from session.run as you have in the fetches list
        outputs = self.session.run(
            fetches=[name for _, name in fetches], feed_dict=feed_dict)
        # do a bit of postprocessing
        results = {}
        # since we actually ran on a batch of size 1, index out the items from the returned numpy arrays
        for i, (key, _) in enumerate(fetches):
            val = outputs[i].tolist()[0]
            if isinstance(val, bytes):
                val = val.decode()
            results[key] = val
        return results

    def cleanup(self):
        # close our tensorflow session if one exists
        if self.session is not None:
            self.session.close()
            self.session = None

    def __del__(self):
        self.cleanup()


# Flaskオブジェクトの生成
app = Flask(__name__)


@app.route('/', methods=['GET', 'POST'])
def upload_file():
    if request.method == 'GET':
        return render_template('index.html')
    if request.method == 'POST':
        # アプロードされたファイルを保存する
        f = request.files['file']
        filepath = "./static/" + datetime.now().strftime("%Y%m%d%H%M%S") + ".jpg"
        f.save(filepath)

        parser = argparse.ArgumentParser(
            description="Predict a label for an image.")
        parser.add_argument("image", help="Path to your image file.")
        args = parser.parse_args()
        if os.path.isfile(args.image):
            image = Image.open(args.image)
            # convert to rgb image if this isn't one
            if image.mode != "RGB":
                image = image.convert("RGB")

            # モデルを使って判定する
            model = Model()
            model.load()

            outputs = model.predict(image)
            predict = f"Predicted: {outputs}"
            # print(f"Predicted: {outputs}")
        else:
            predict = f"Couldn't find image file {args.image}"
            # print(f"Couldn't find image file {args.image}")

        return render_template('index.html', filepath=filepath, predict=predict)


if __name__ == '__main__':
    app.run(host="0.0.0.0", port=int("5000"), debug=True)
Flaskのインストール
ターミナル画面で以下を入力して、Flaskをインストールします。
pipenv install flask
predict.pyの実行
以下を実行します。
python predict.py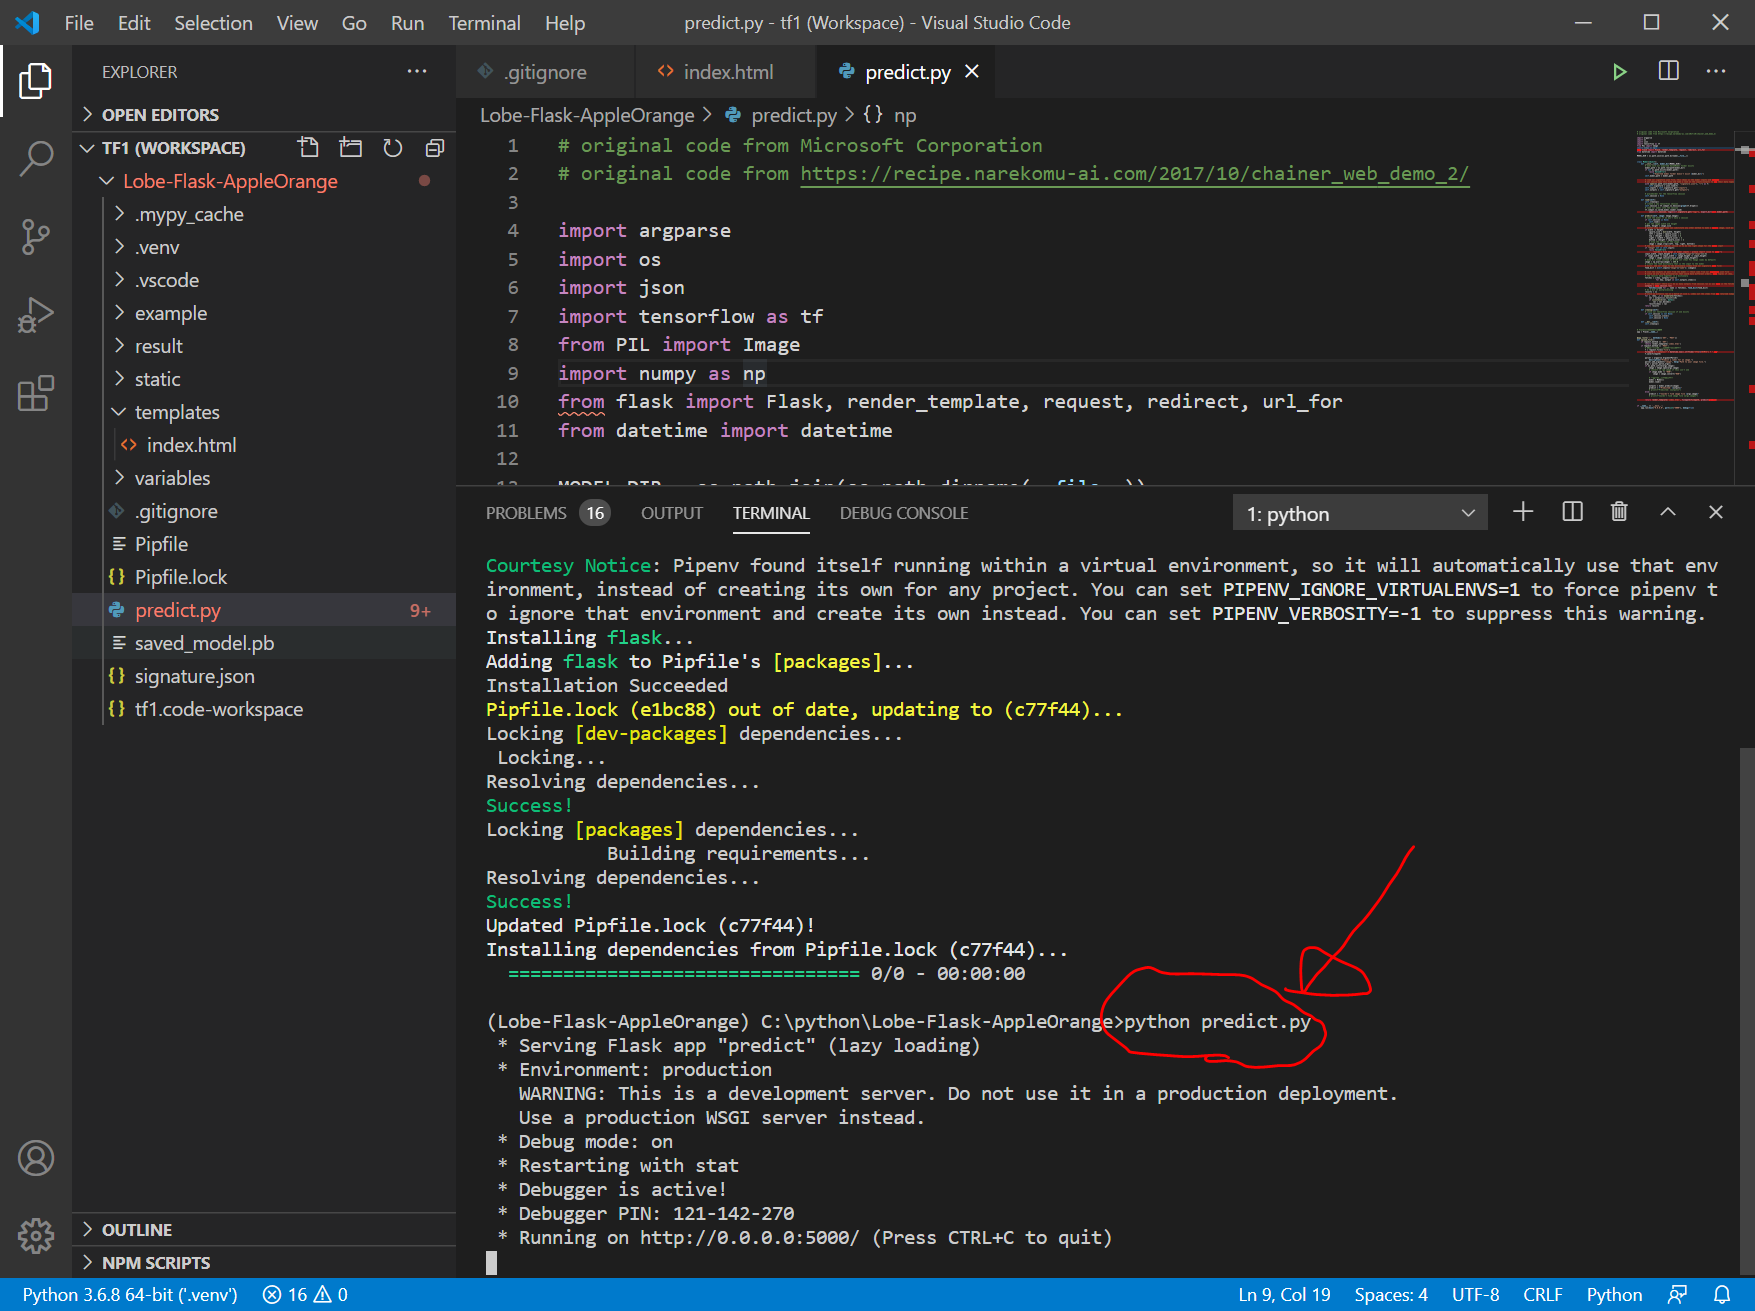
WEBブラウザで、 localhost:5000 を開きます。
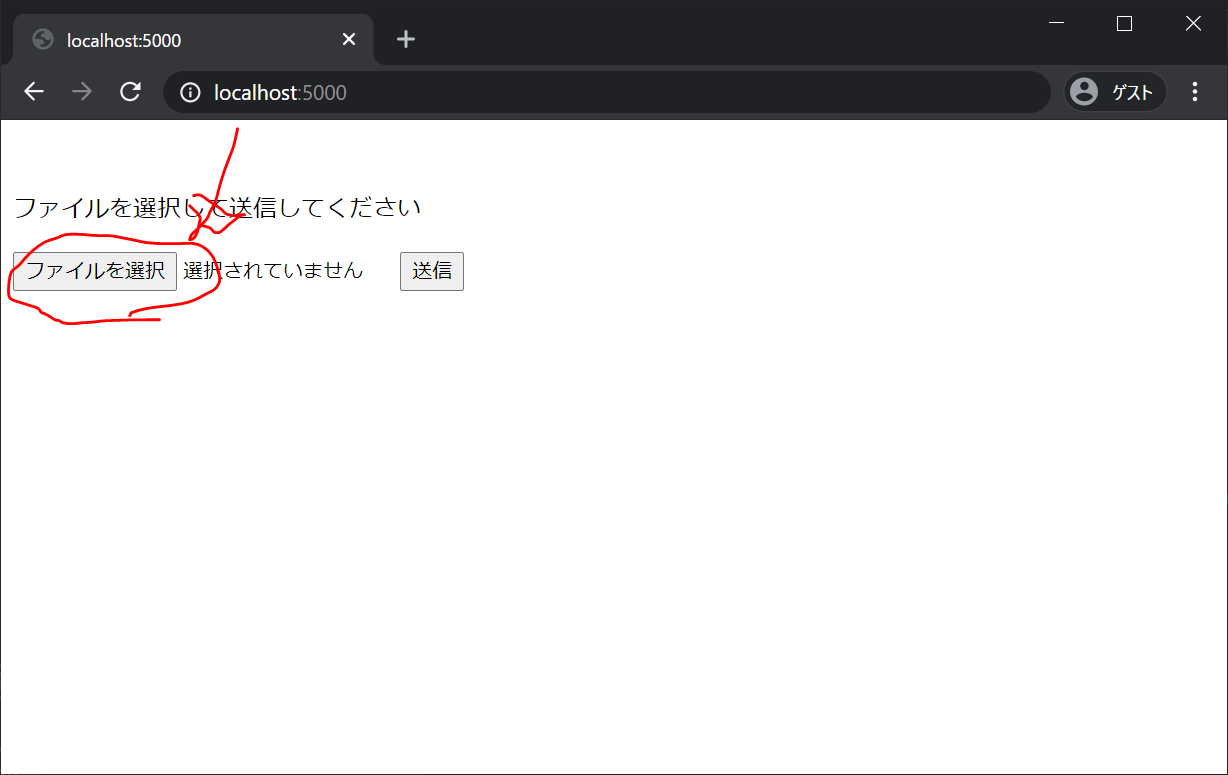

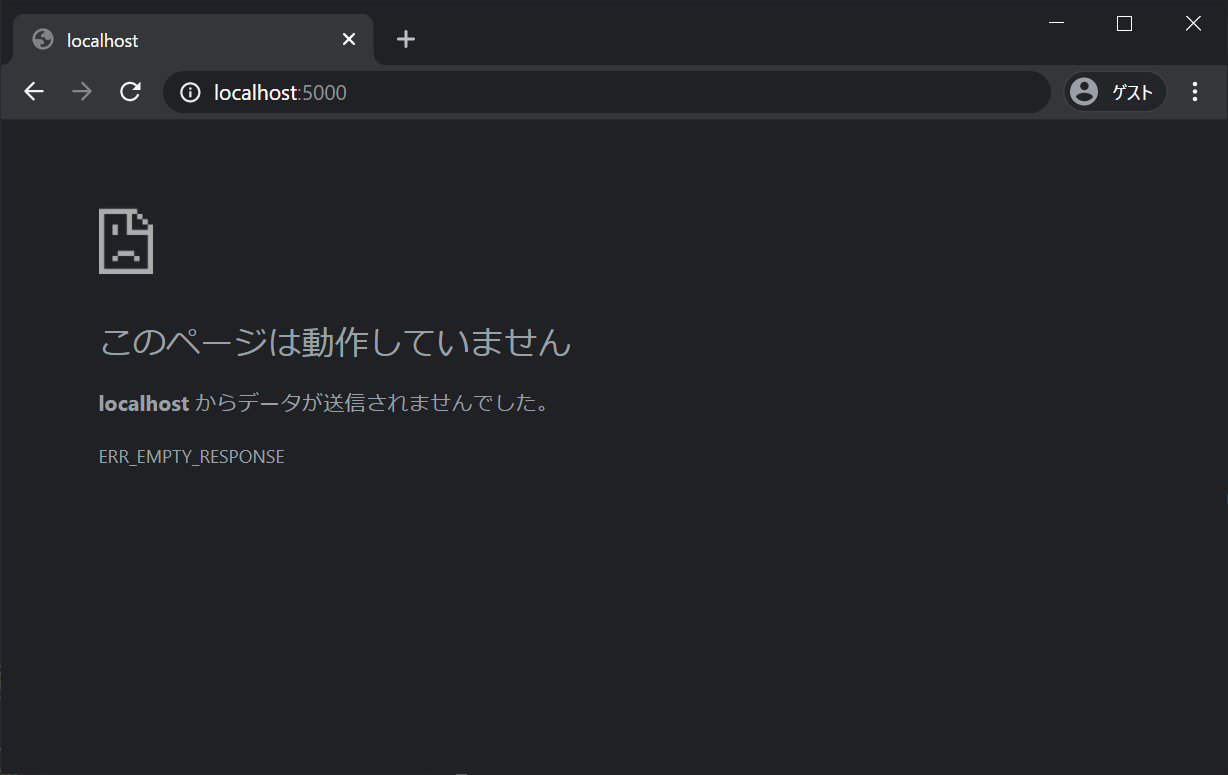
うまくいかず。。。なお、サーバは、”Ctrl+C” で停止させます。
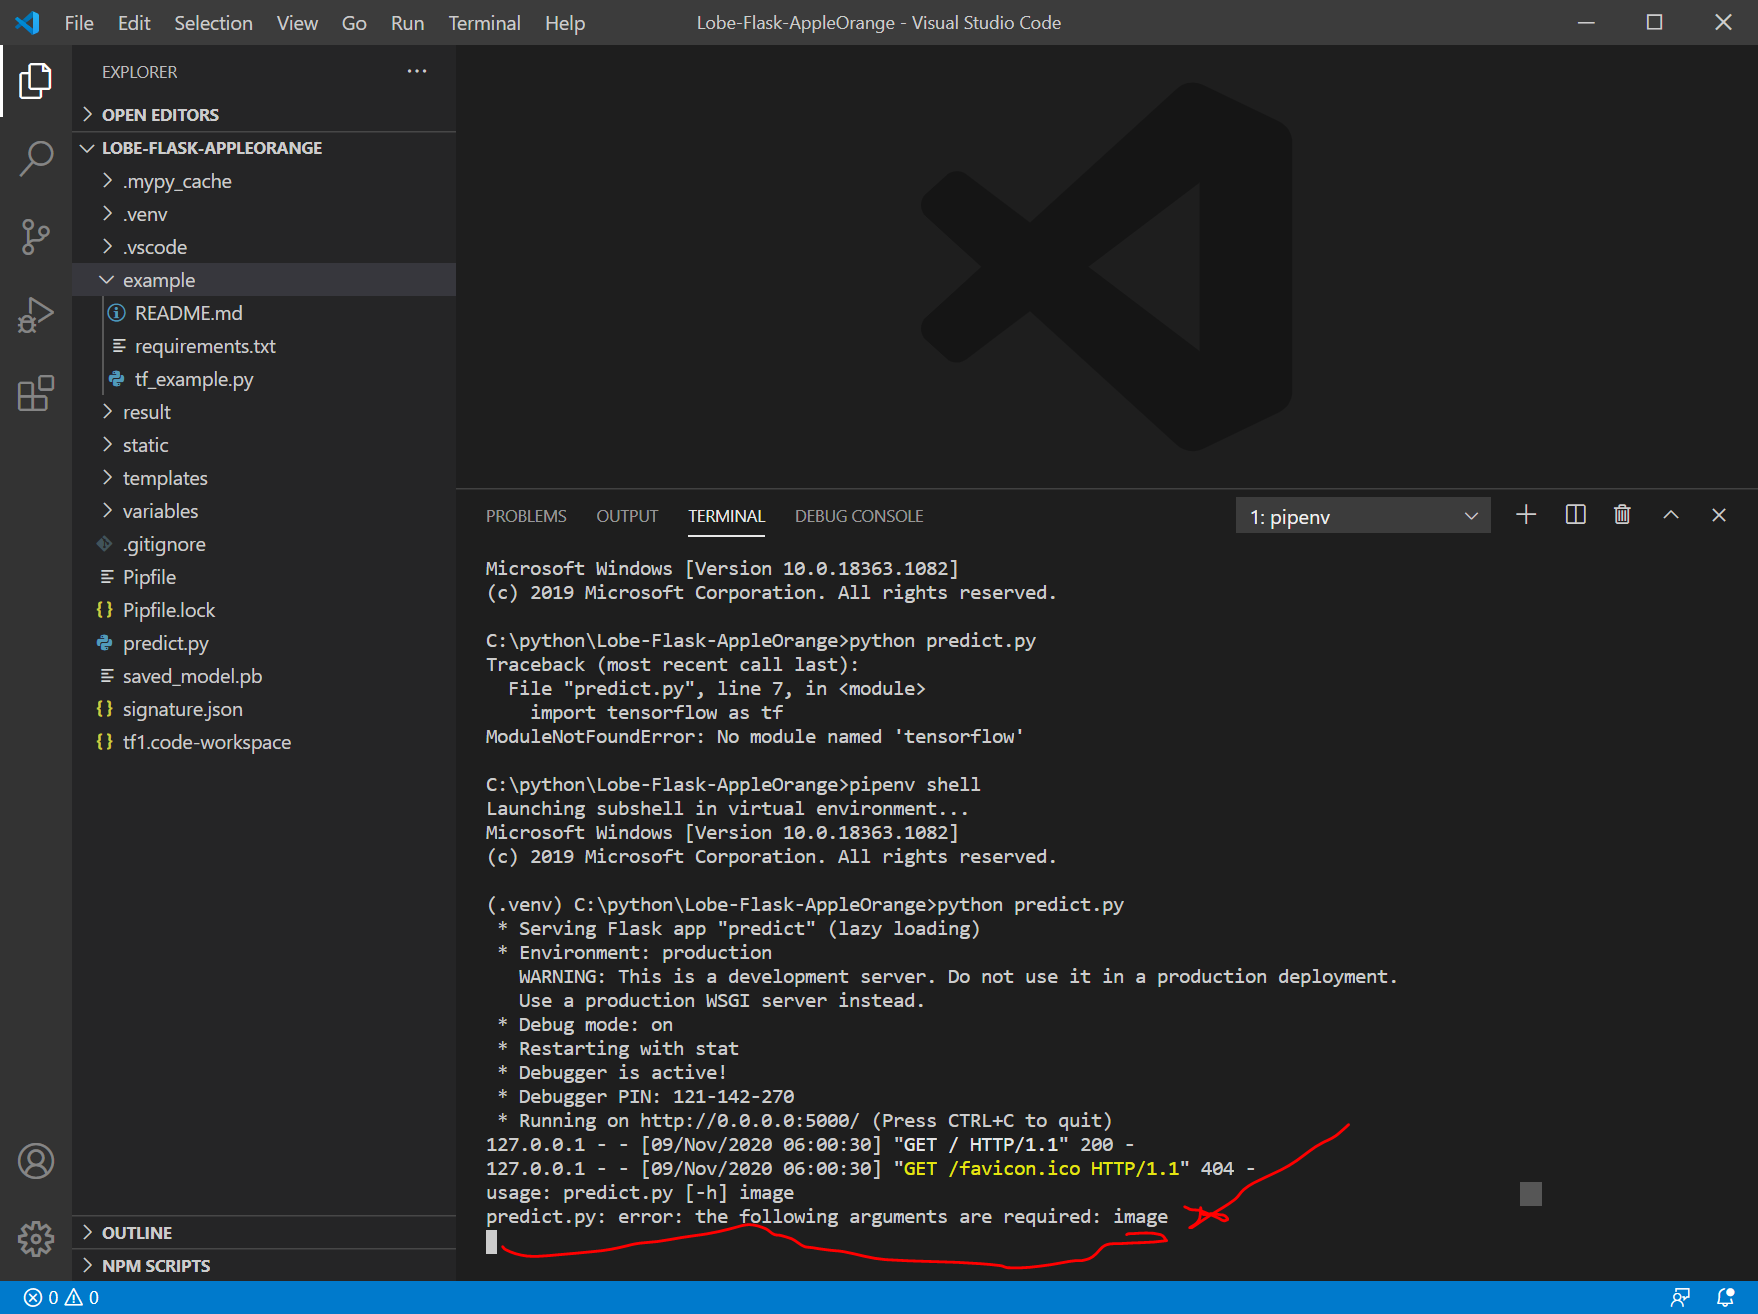
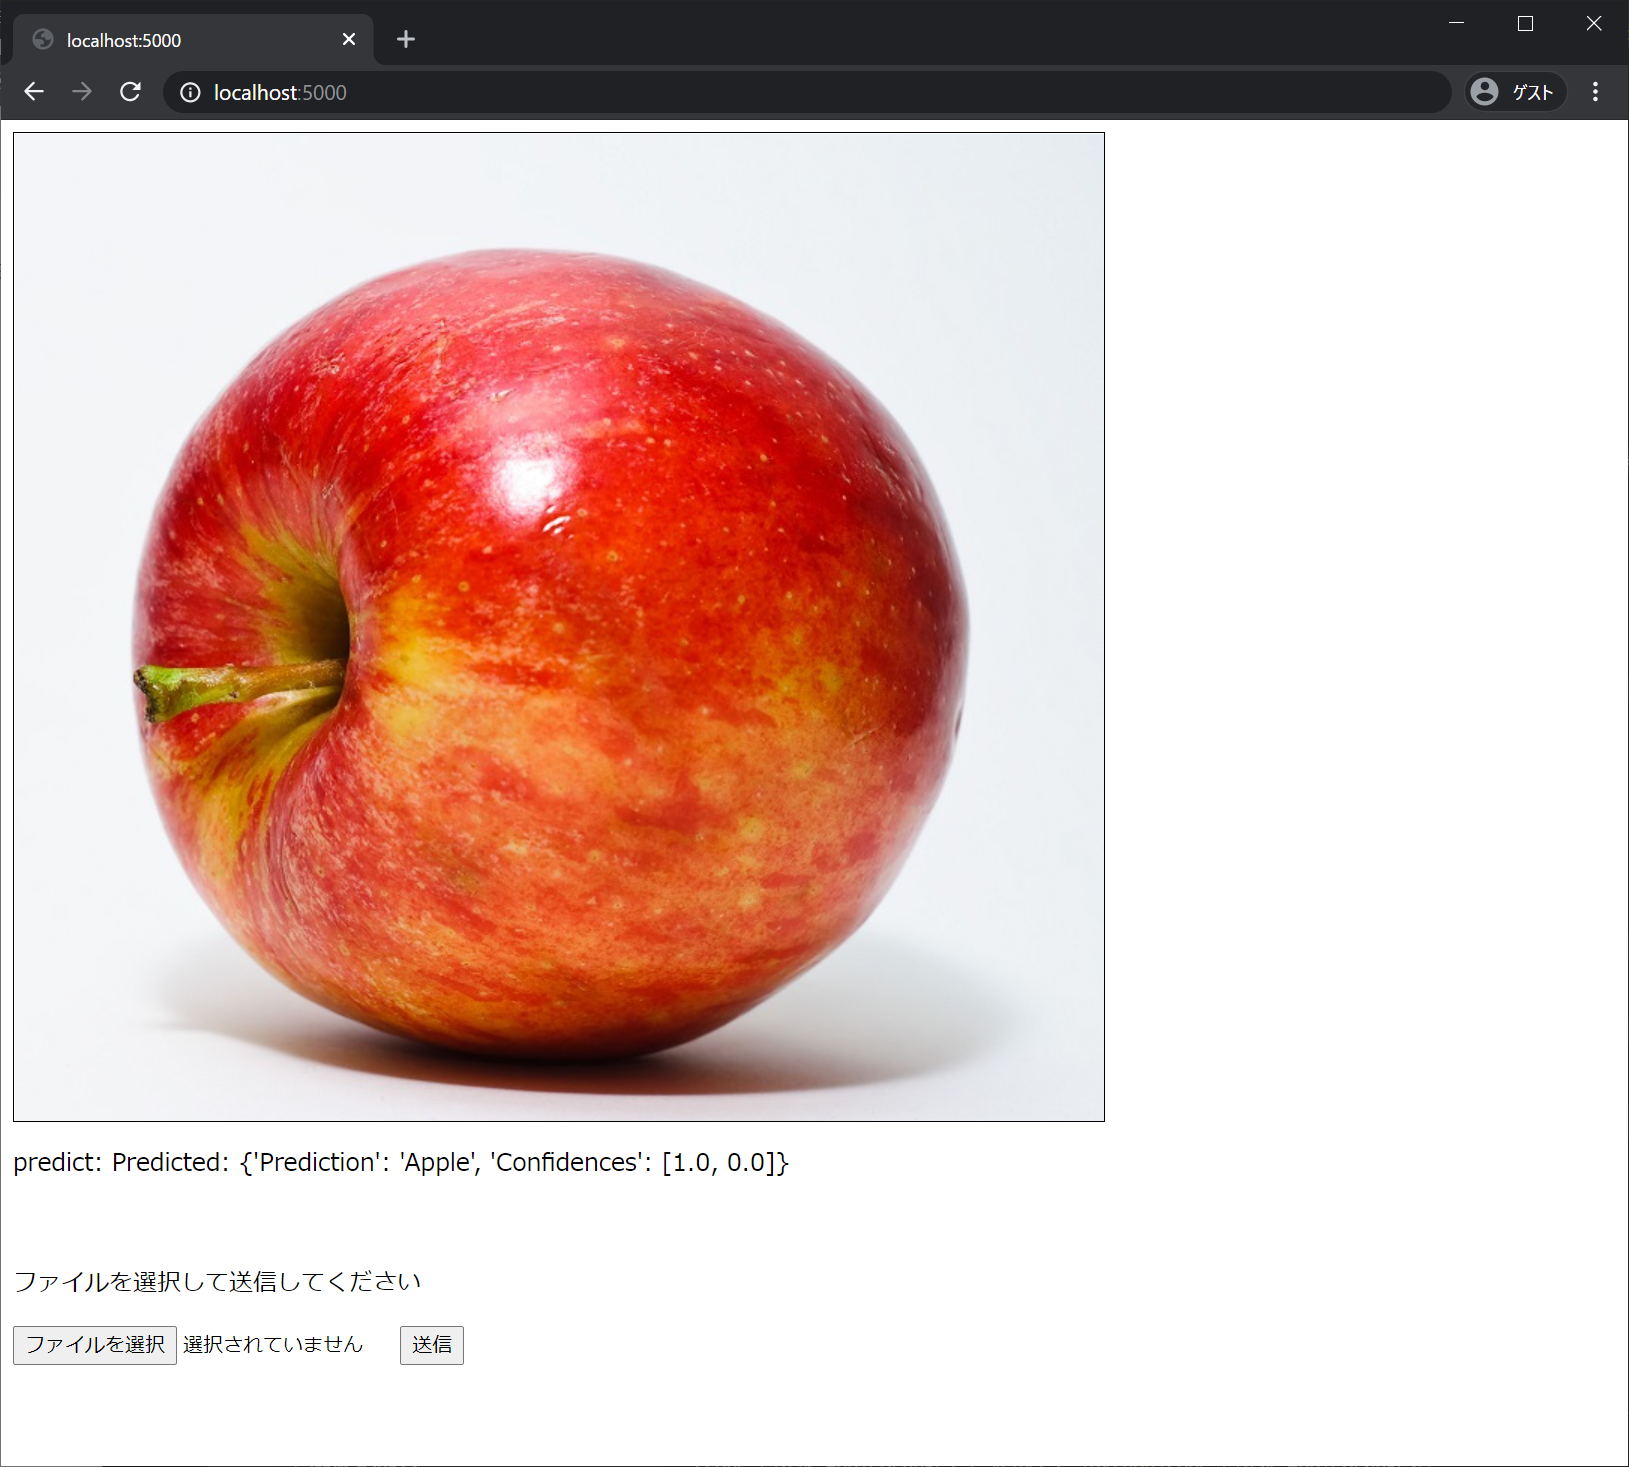
argsparseはコマンドラインの引数を扱いやすくしてくれる関数ということで、今回は不要そうなので、その周囲を削除し、複数の "args.image" を "filepath" に変更したところ、うまくいきました。(蛇足ですが、私には公式ドキュメントのargparseの説明は何を言っているのかさっぱりわかりませんでした。)
# original code from Microsoft Corporation
# original code from https://recipe.narekomu-ai.com/2017/10/chainer_web_demo_2/

import argparse
import os
import json
import tensorflow as tf
from PIL import Image
import numpy as np
from flask import Flask, render_template, request, redirect, url_for
from datetime import datetime

MODEL_DIR = os.path.join(os.path.dirname(__file__))


class Model(object):
    def __init__(self, model_dir=MODEL_DIR):
        # make sure our exported SavedModel folder exists
        model_path = os.path.realpath(model_dir)
        if not os.path.exists(model_path):
            raise ValueError(
                f"Exported model folder doesn't exist {model_dir}")
        self.model_path = model_path

        # load our signature json file, this shows us the model inputs and outputs
        # you should open this file and take a look at the inputs/outputs to see their data types, shapes, and names
        with open(os.path.join(model_path, "signature.json"), "r") as f:
            self.signature = json.load(f)
        self.inputs = self.signature.get("inputs")
        self.outputs = self.signature.get("outputs")

        # placeholder for the tensorflow session
        self.session = None

    def load(self):
        self.cleanup()
        # create a new tensorflow session
        self.session = tf.compat.v1.Session(graph=tf.Graph())
        # load our model into the session
        tf.compat.v1.saved_model.loader.load(
            sess=self.session, tags=self.signature.get("tags"), export_dir=self.model_path)

    def predict(self, image: Image.Image):
        # load the model if we don't have a session
        if self.session is None:
            self.load()
        # get the image width and height
        width, height = image.size
        # center crop image (you can substitute any other method to make a square image, such as just resizing or padding edges with 0)
        if width != height:
            square_size = min(width, height)
            left = (width - square_size) / 2
            top = (height - square_size) / 2
            right = (width + square_size) / 2
            bottom = (height + square_size) / 2
            # Crop the center of the image
            image = image.crop((left, top, right, bottom))
        # now the image is square, resize it to be the right shape for the model input
        if "Image" not in self.inputs:
            raise ValueError(
                "Couldn't find Image in model inputs - please report issue to Lobe!")
        input_width, input_height = self.inputs["Image"]["shape"][1:3]
        if image.width != input_width or image.height != input_height:
            image = image.resize((input_width, input_height))
        # make 0-1 float instead of 0-255 int (that PIL Image loads by default)
        image = np.asarray(image) / 255.0
        # create the feed dictionary that is the input to the model
        # first, add our image to the dictionary (comes from our signature.json file)
        feed_dict = {self.inputs["Image"]["name"]: [image]}

        # list the outputs we want from the model -- these come from our signature.json file
        # since we are using dictionaries that could have different orders, make tuples of (key, name) to keep track for putting
        # the results back together in a dictionary
        fetches = [(key, output["name"])
                   for key, output in self.outputs.items()]

        # run the model! there will be as many outputs from session.run as you have in the fetches list
        outputs = self.session.run(
            fetches=[name for _, name in fetches], feed_dict=feed_dict)
        # do a bit of postprocessing
        results = {}
        # since we actually ran on a batch of size 1, index out the items from the returned numpy arrays
        for i, (key, _) in enumerate(fetches):
            val = outputs[i].tolist()[0]
            if isinstance(val, bytes):
                val = val.decode()
            results[key] = val
        return results

    def cleanup(self):
        # close our tensorflow session if one exists
        if self.session is not None:
            self.session.close()
            self.session = None

    def __del__(self):
        self.cleanup()


# Flaskオブジェクトの生成
app = Flask(__name__)


@app.route('/', methods=['GET', 'POST'])
def upload_file():
    if request.method == 'GET':
        return render_template('index.html')
    if request.method == 'POST':
        # アプロードされたファイルを保存する
        f = request.files['file']
        filepath = "./static/" + datetime.now().strftime("%Y%m%d%H%M%S") + ".jpg"
        f.save(filepath)

        if os.path.isfile(filepath):
            image = Image.open(filepath)
            # convert to rgb image if this isn't one
            if image.mode != "RGB":
                image = image.convert("RGB")

            # モデルを使って判定する
            model = Model()
            model.load()

            outputs = model.predict(image)
            predict = f"Predicted: {outputs}"
            # print(f"Predicted: {outputs}")
        else:
            predict = f"Couldn't find image file {filepath}"
            # print(f"Couldn't find image file {args.image}")

        return render_template('index.html', filepath=filepath, predict=predict)


if __name__ == '__main__':
    app.run(host="0.0.0.0", port=int("5000"), debug=True)
Ctrl+C でサーバを停止します。
GitHubにpushする
https://github.com/ にログインして、新規リポジトリを作成します。今回は、Lobe-Flask-AppleOrange という名前にしました。
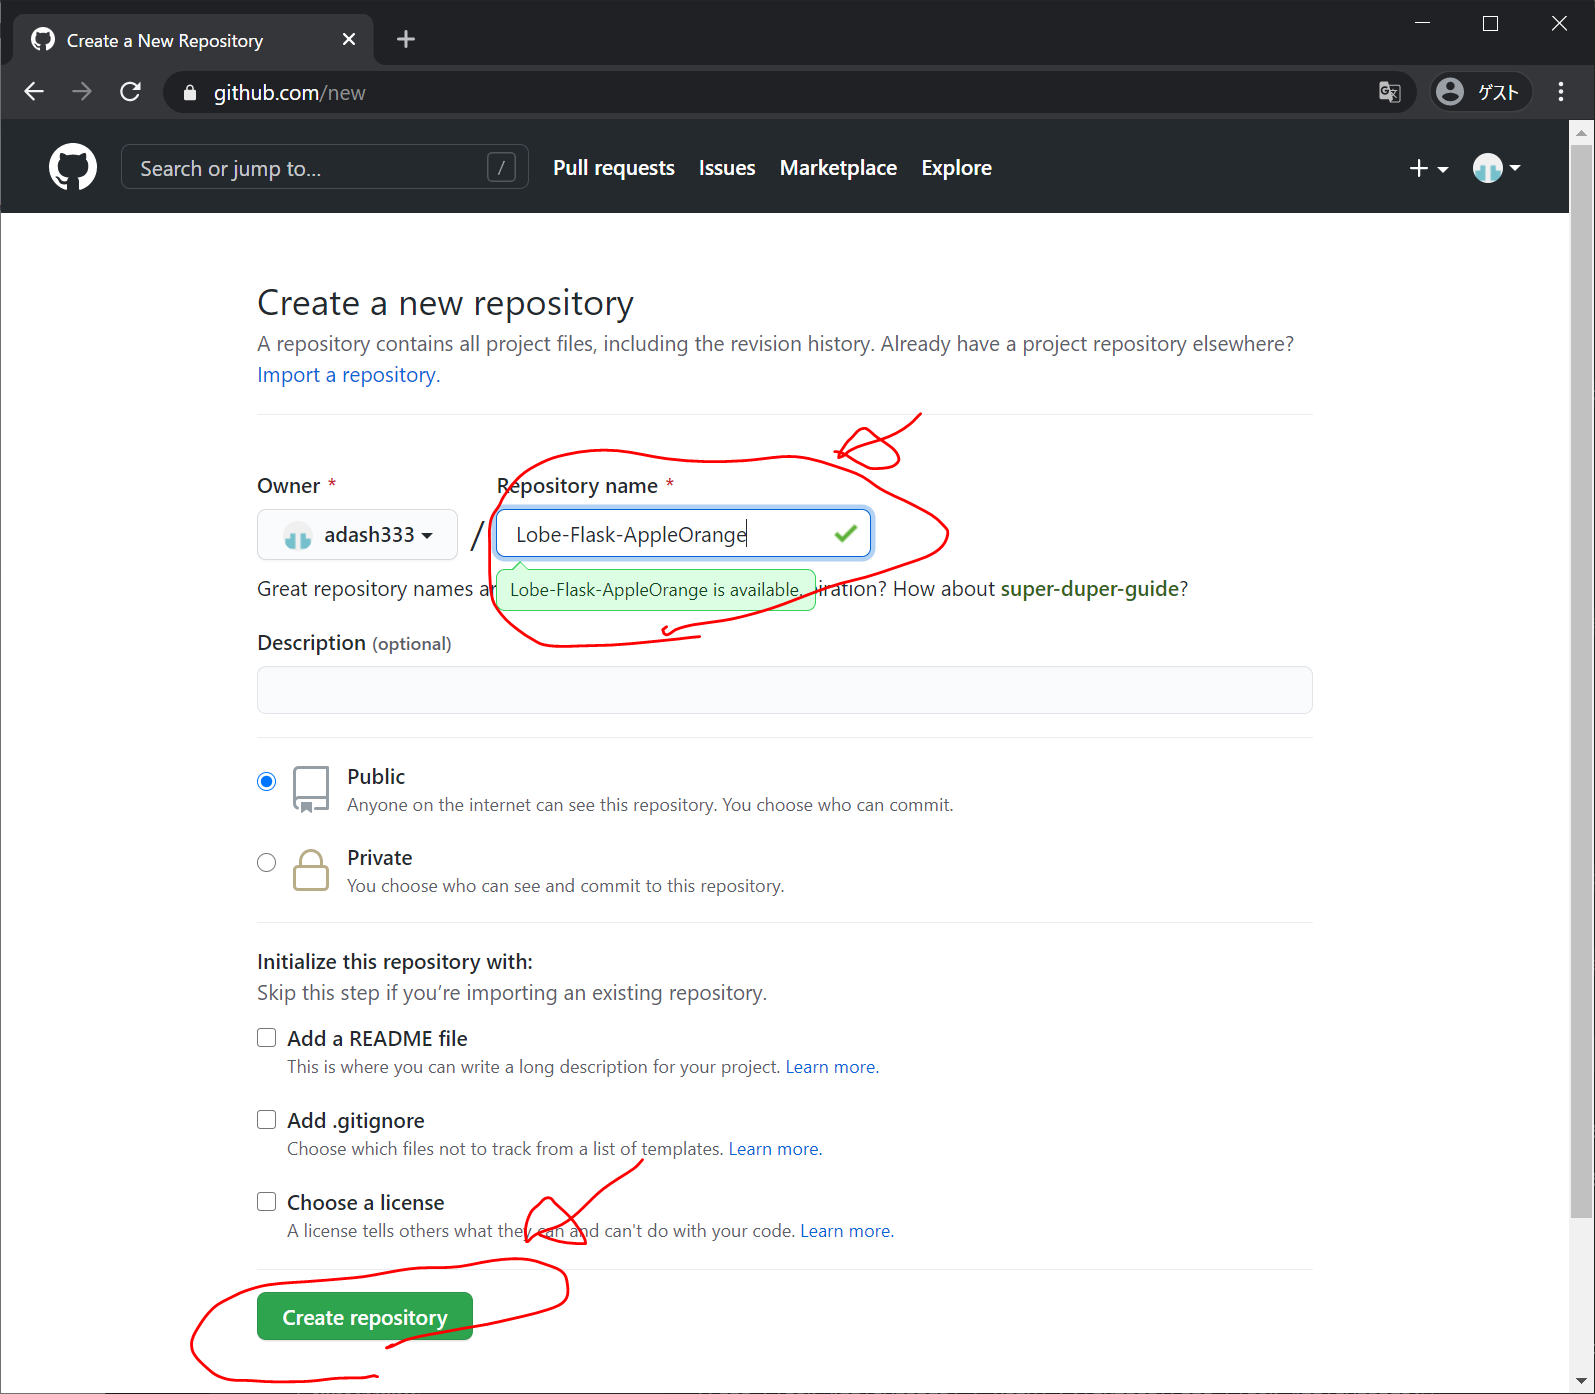
以下のような画面になります。
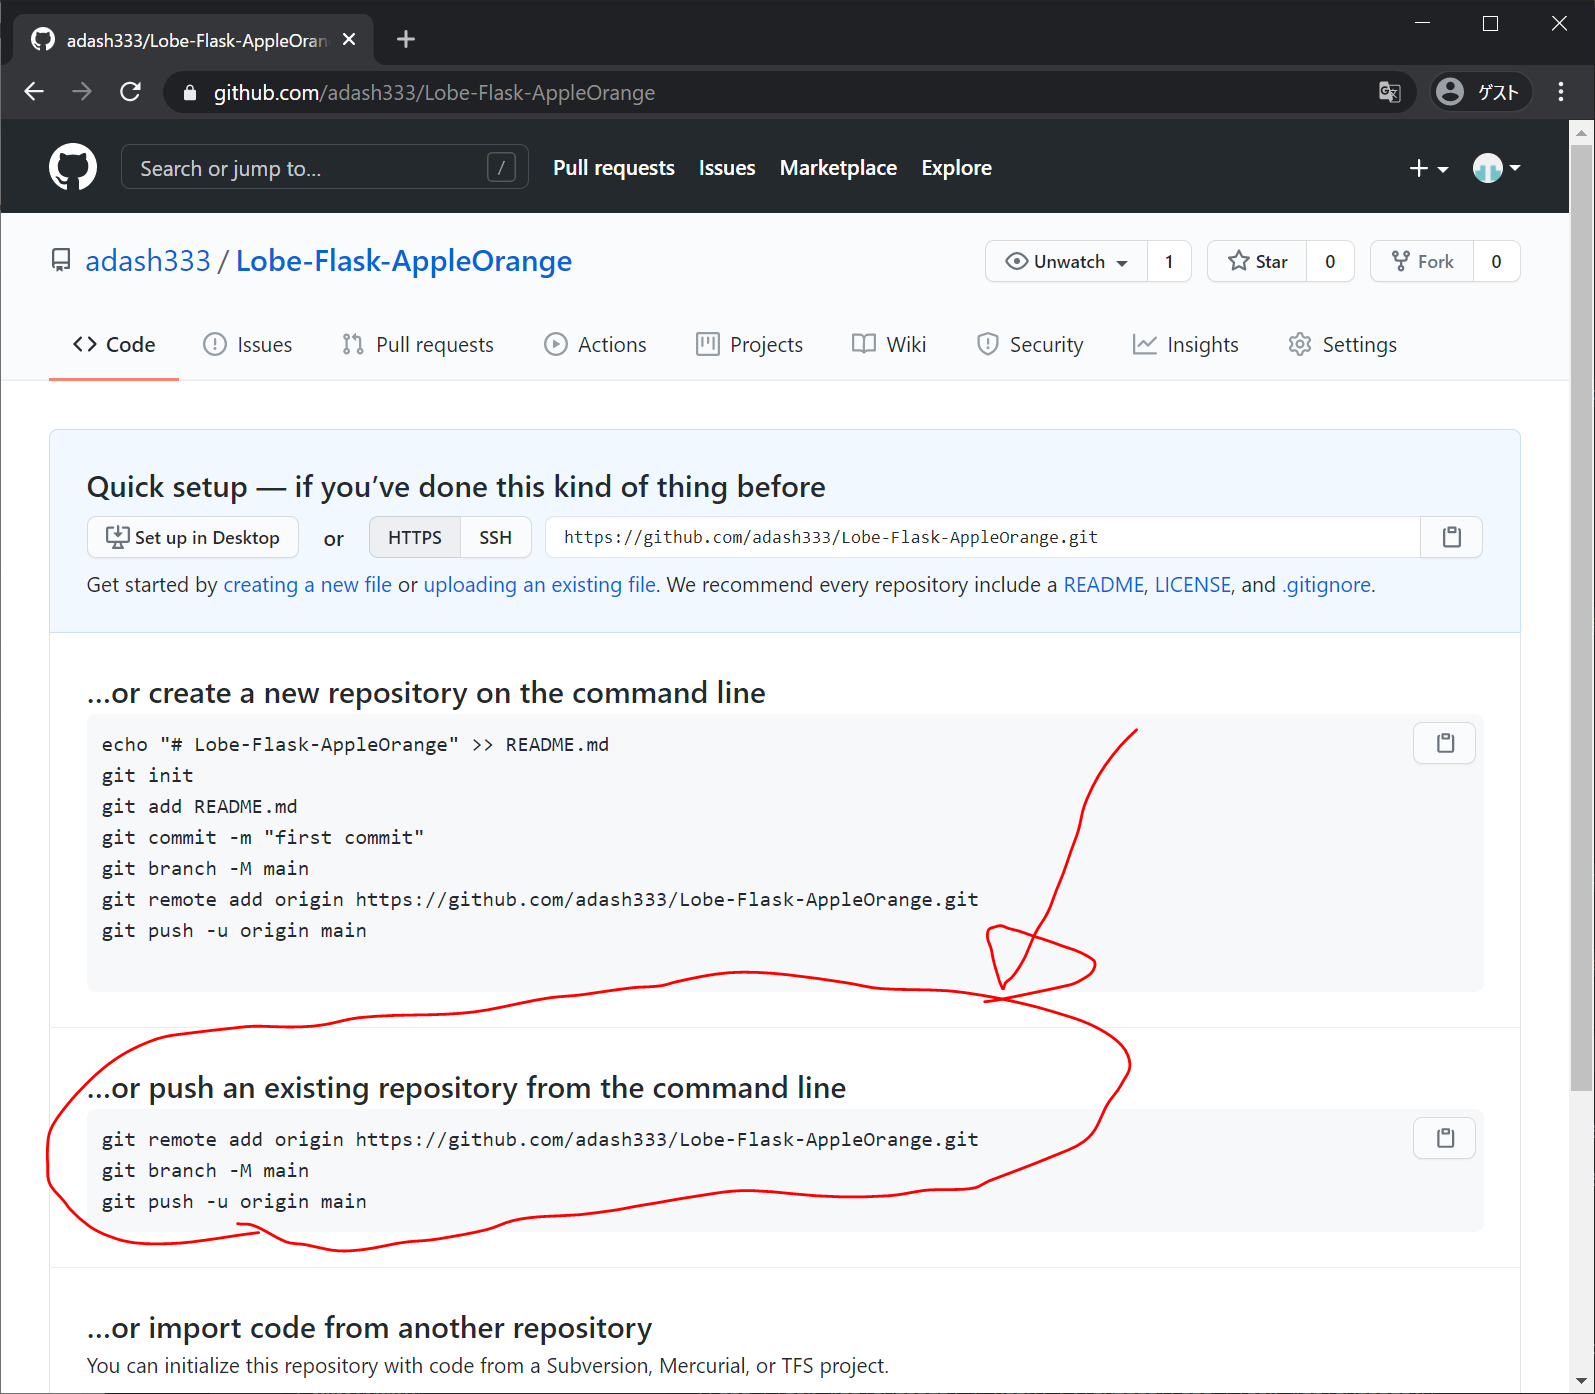
上記を参考に、VisualStudioCodeのターミナル画面で以下を入力します。
exit
git init
git add .
git commit -m "first commit"
git remote add origin https://github.com/adash333/Lobe-Flask-AppleOrange.git
git branch -M main
git push -u origin main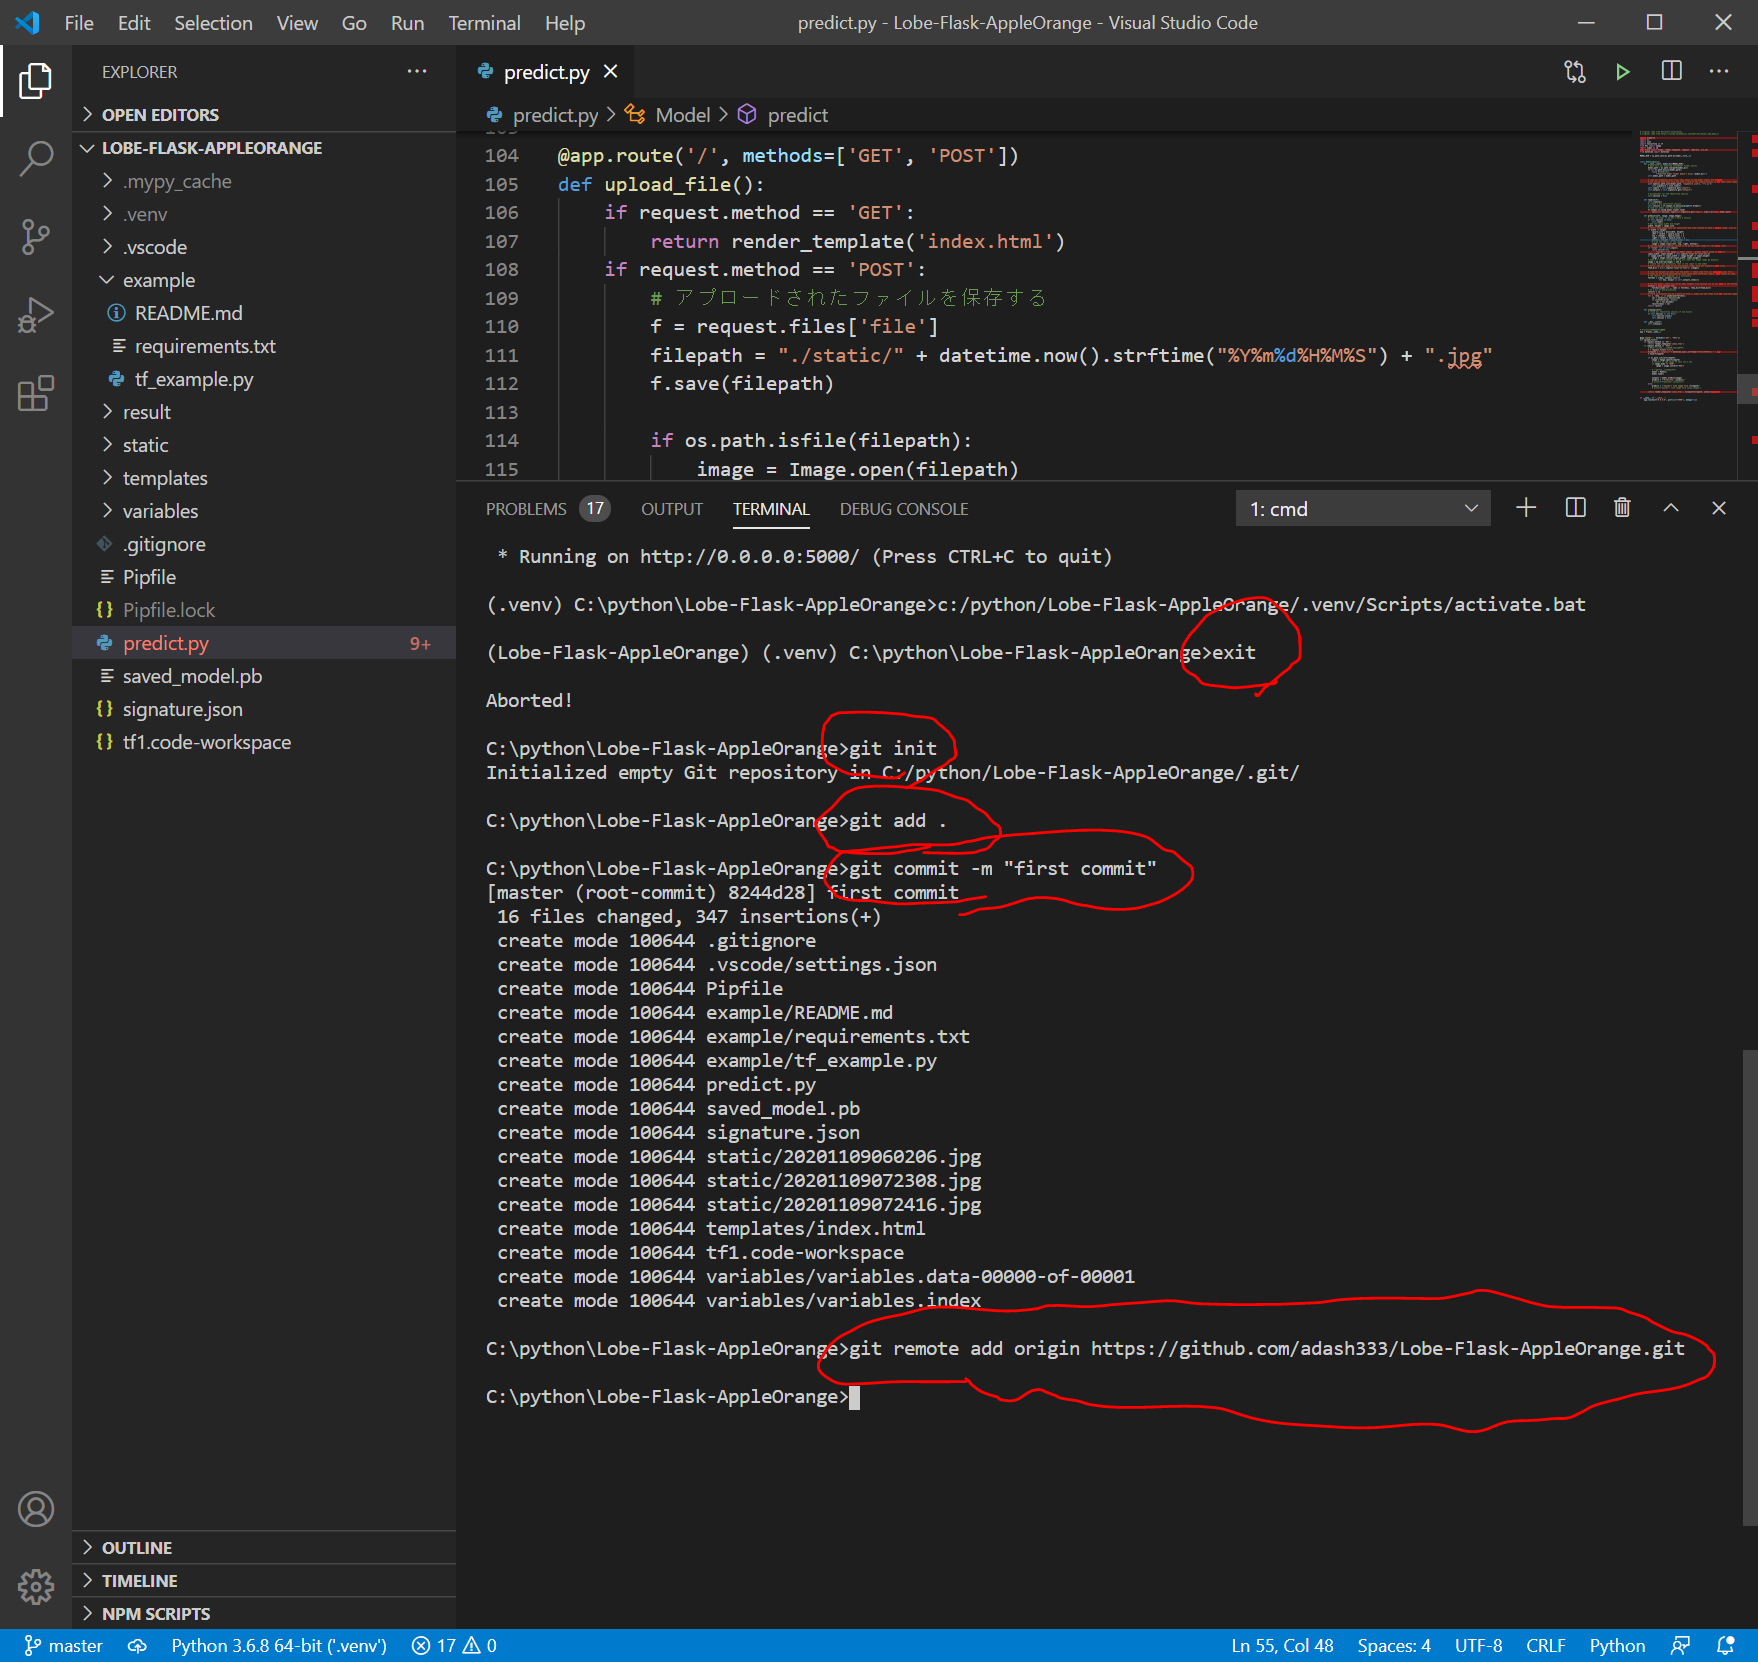
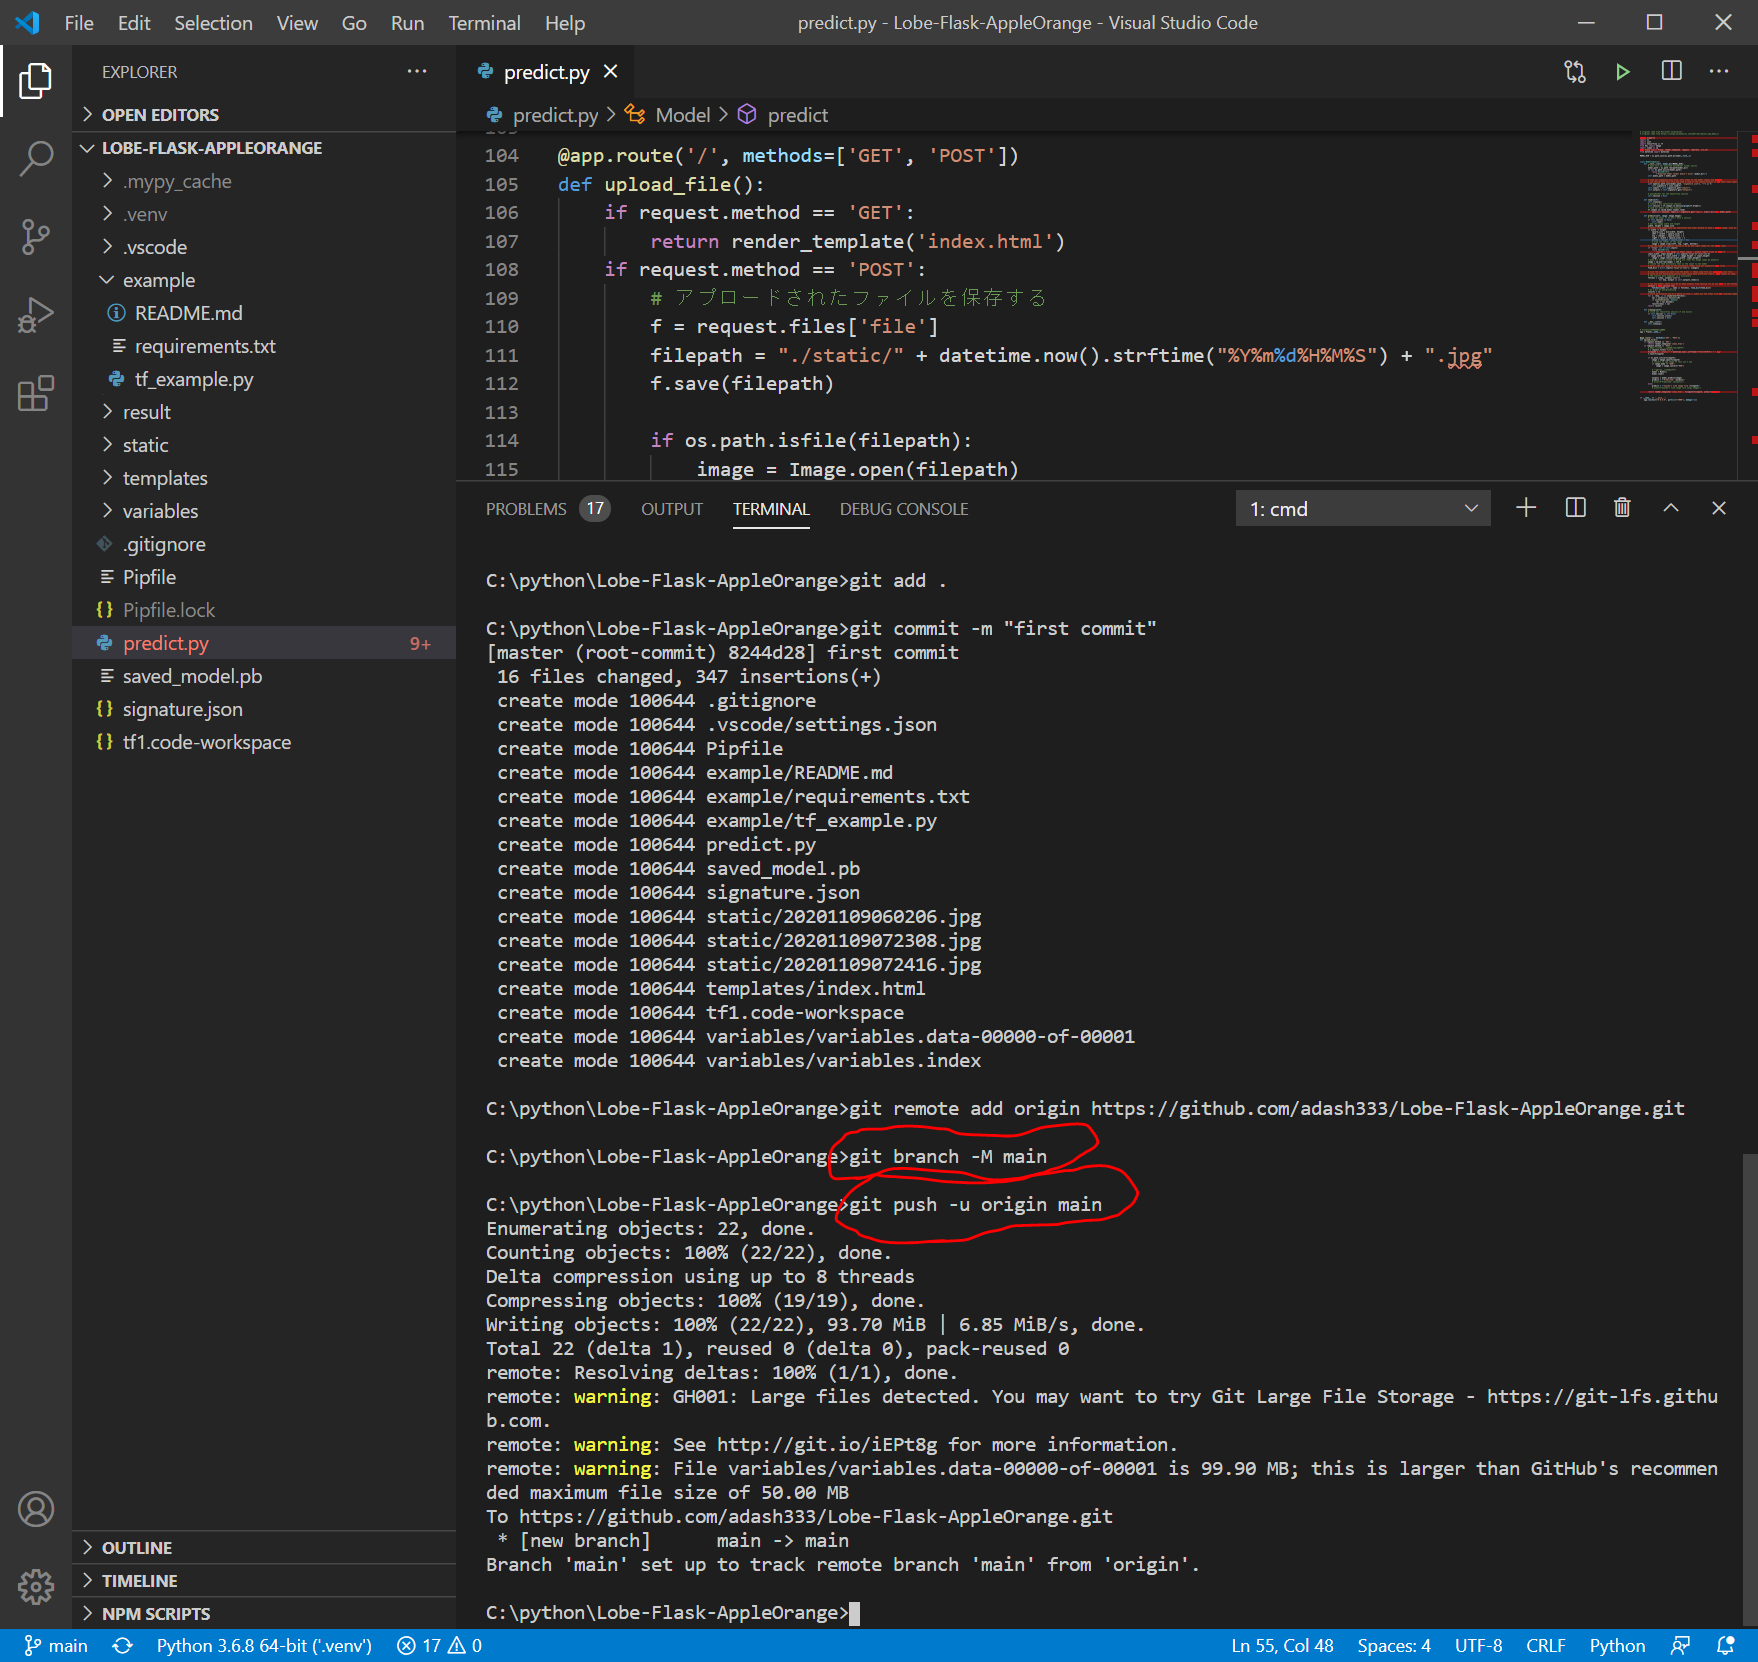
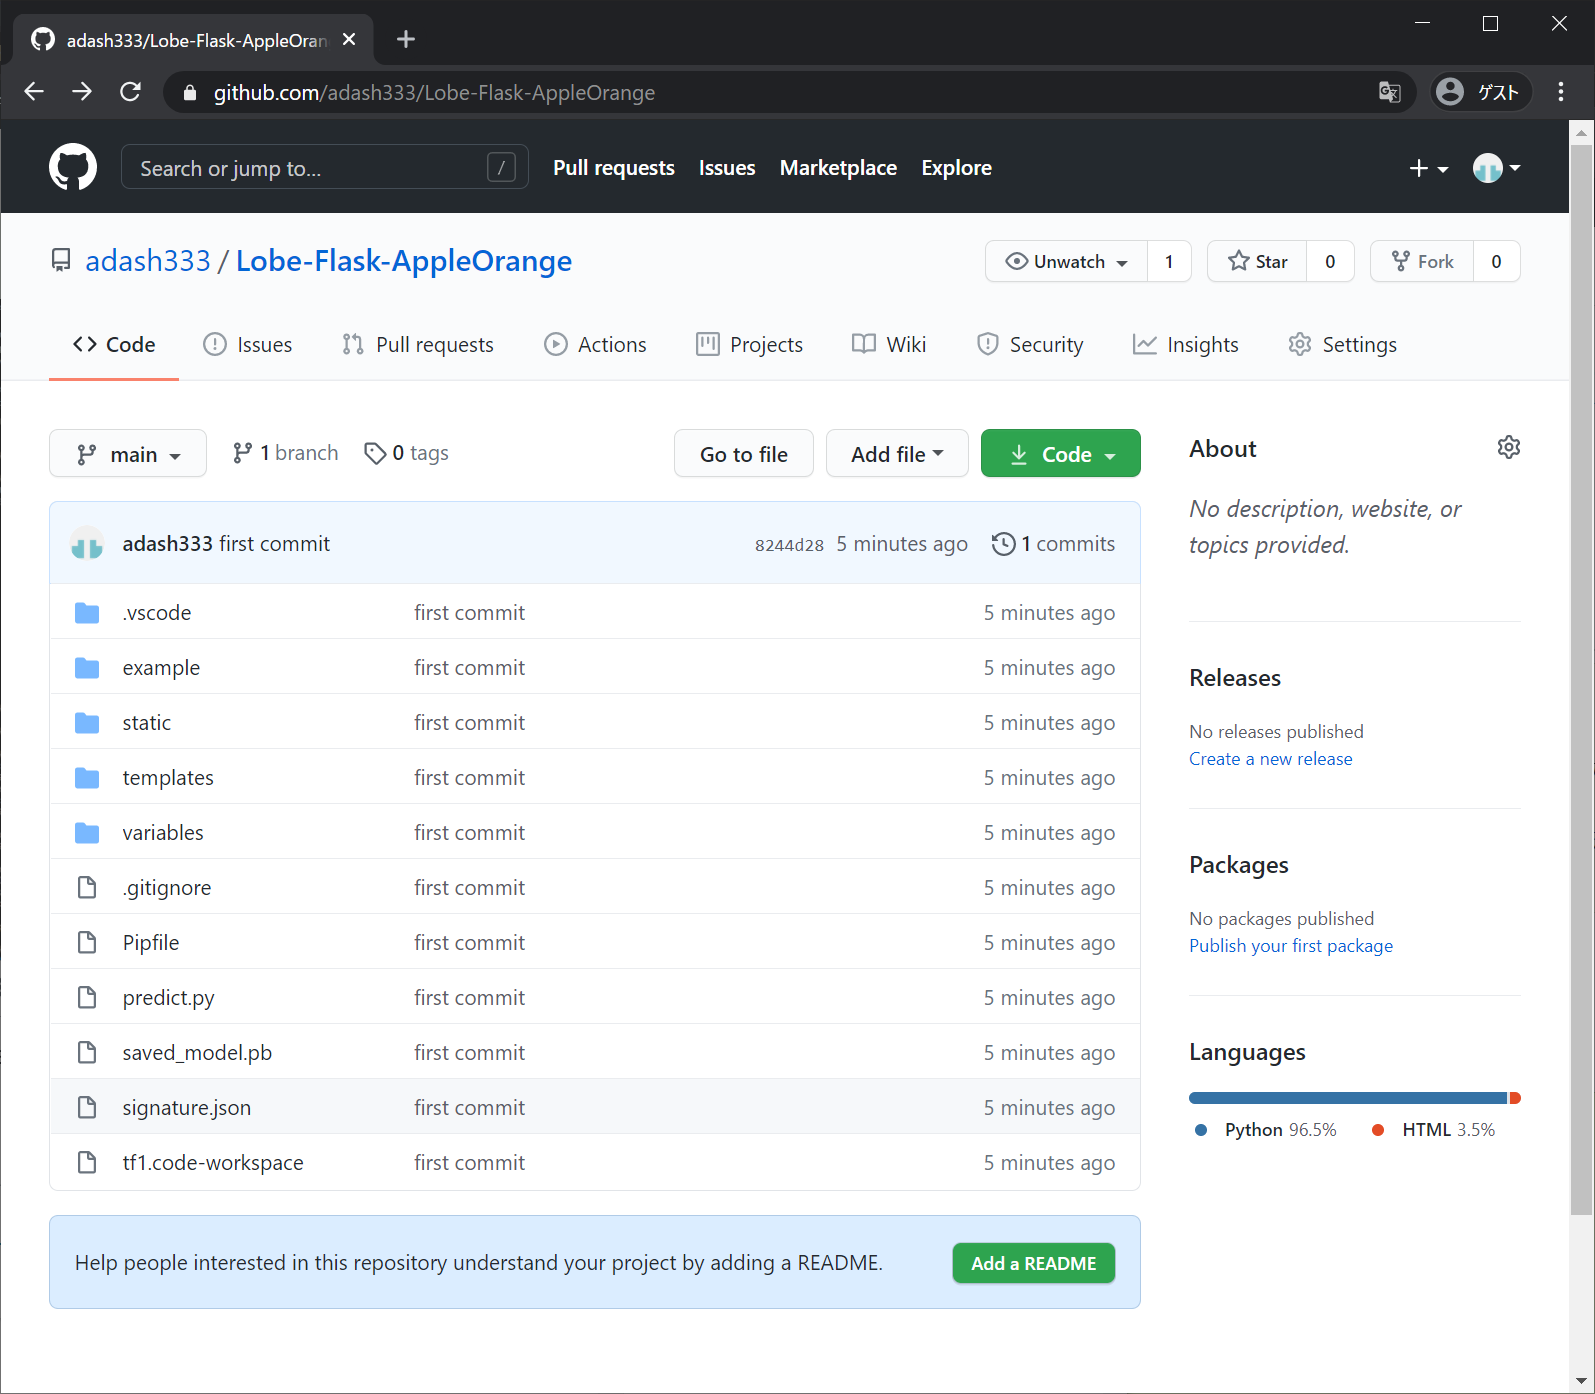
git pushのところで、variables.data-00000-of-00001 が99.90MBであり、GitHubの推奨最大容量である50MBを超えているというアラームが出ますが、一応pushできたようです。
https://github.com/adash333/Lobe-Flask-AppleOrange
ソースコード
モデルのコード
https://github.com/adash333/lobe-AppleOrange-tf1model/tree/3a9c48ba6128094491d63d135a84c750270adf51
今回作成したFlaskアプリのソースコード
https://github.com/adash333/Lobe-Flask-AppleOrange/tree/8244d2809a2cce031ef516b1ca514ed4a765c1a0
とりあえず、ローカル環境でFlaskを用いてりんごとみかんを分類するアプリを実行できました。
次は、Herokuにデプロイしたいと思います。
次の記事
途中、、、