TypeScriptとSassを用いたWEBサイトをWebpackを用いて構築する
前回は、TypeScriptを用いたWEBサイトを作成しました。
今回は、 以下のサイトを写経して、 TypeScriptに加えてCSS(SCSS)が使えるようにしたいと思います。
https://blog.ouvill.net/blog/2019-04-17–webpack-sass-typescript/webpack-sass-typescript/
ソースコードとDEMOサイト
ソースコード
https://github.com/adash333/typescript-sass-webpack
DEMOサイト
https://elegant-sinoussi-b3cdcd.netlify.app/
開発環境
Windows10でのNode.jsの環境構築(nvm-windows, node, yarnのインストール)についてはこちらをご覧ください。
Windows10 Pro
Lobe 0.8.1208.4
VisualStudioCode 1.51.0
Git for Windows v2.29.2

nvm-windows 1.1.7
node v14.15.0
npm 6.14.8
yarn 1.22.10
今回構築した環境
typescript 4.1.3新規yarnプロジェクト(npmプロジェクト)の作成
C:/js/ts-sass/ フォルダを作成し、VisualStudioCodeで開き、Ctrl+@でターミナル画面を開きます
yarnがインストールされていない場合は、以下を入力して、yarnをインストールします。
npm install -g yarn以下を入力して、新規yarnプロジェクトを作成します。
yarn init -y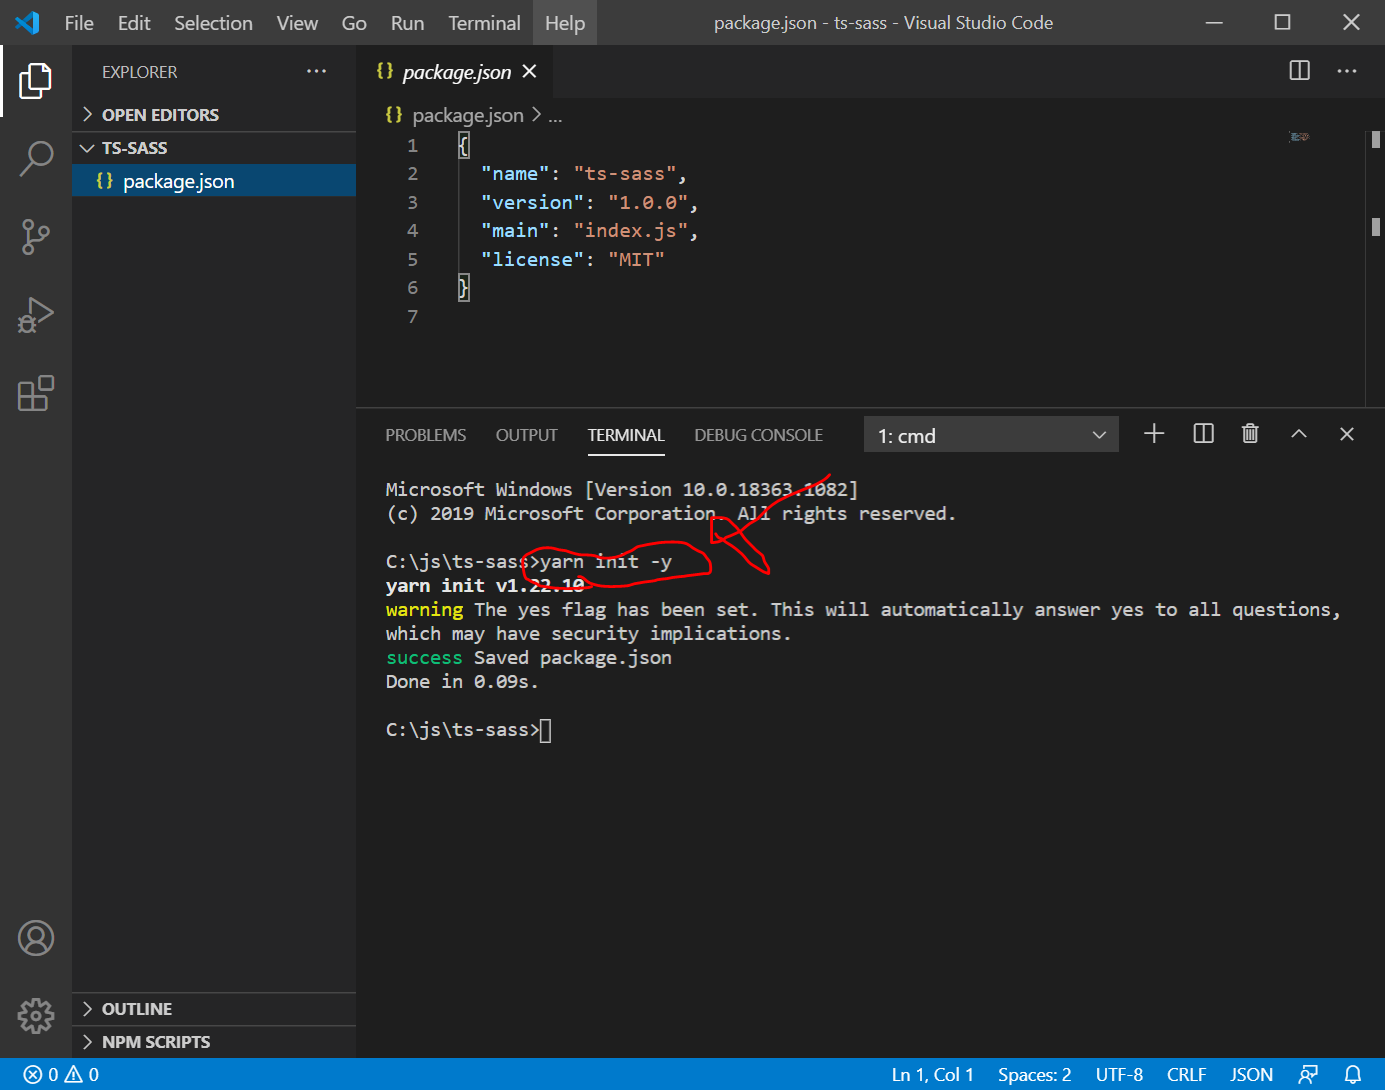
srcフォルダの作成とindex.html, index.ts, index.scssの新規作成
srcフォルダを作成し、その直下にindex.html, index.ts, index.scss を新規作成し、それぞれ以下のように入力します。
src/index.html
<!DOCTYPE html>
<html lang="en">
<head>
    <meta charset="UTF-8">
    <meta name="viewport" content="width=device-width, initial-scale=1.0">
    <title>TypeScript Sass Webpack Template</title>
</head>
<body>
    <h1>Hello TypeScript and Sass!</h1>
    <div>
        <p>How are you?</p>
    </div>
</body>
</html>
src/index.ts
import "./index.scss";src/index.sass
div {
  p {
    color: red;
  }
}
TypeScriptとWebpack関連のインストール
引き続き、以下を入力します。
yarn add -D webpack webpack-cli ts-loader typescript
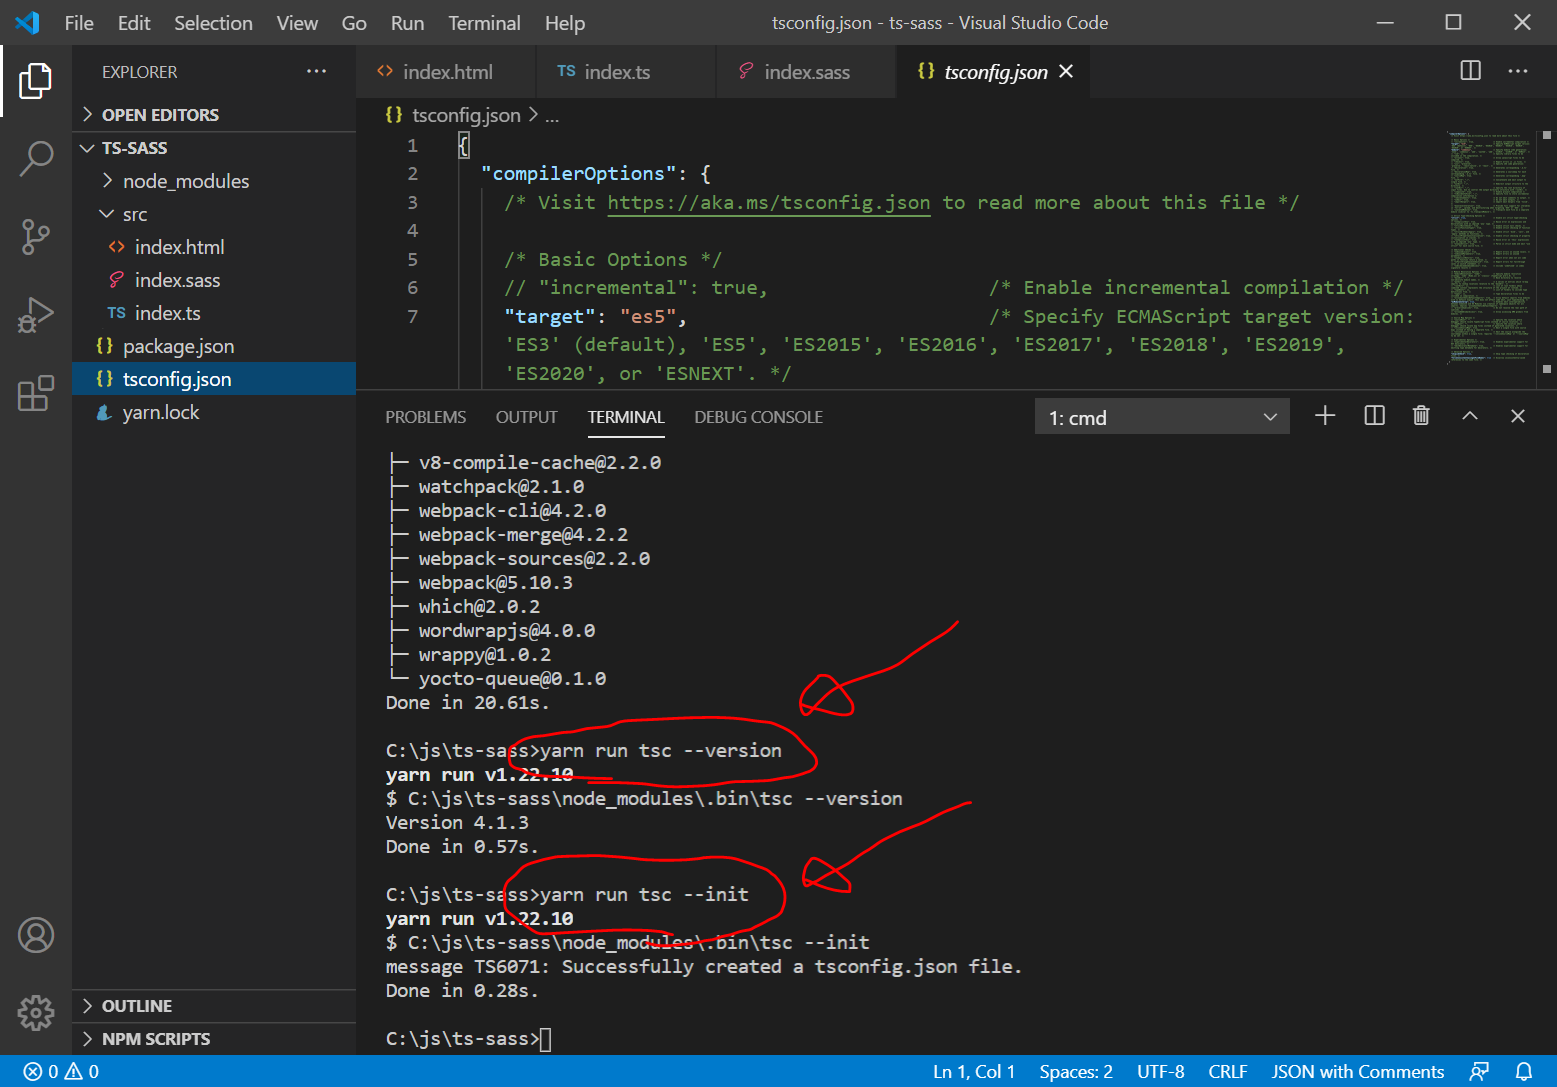
yarn run tsc --version
yarn run tsc --init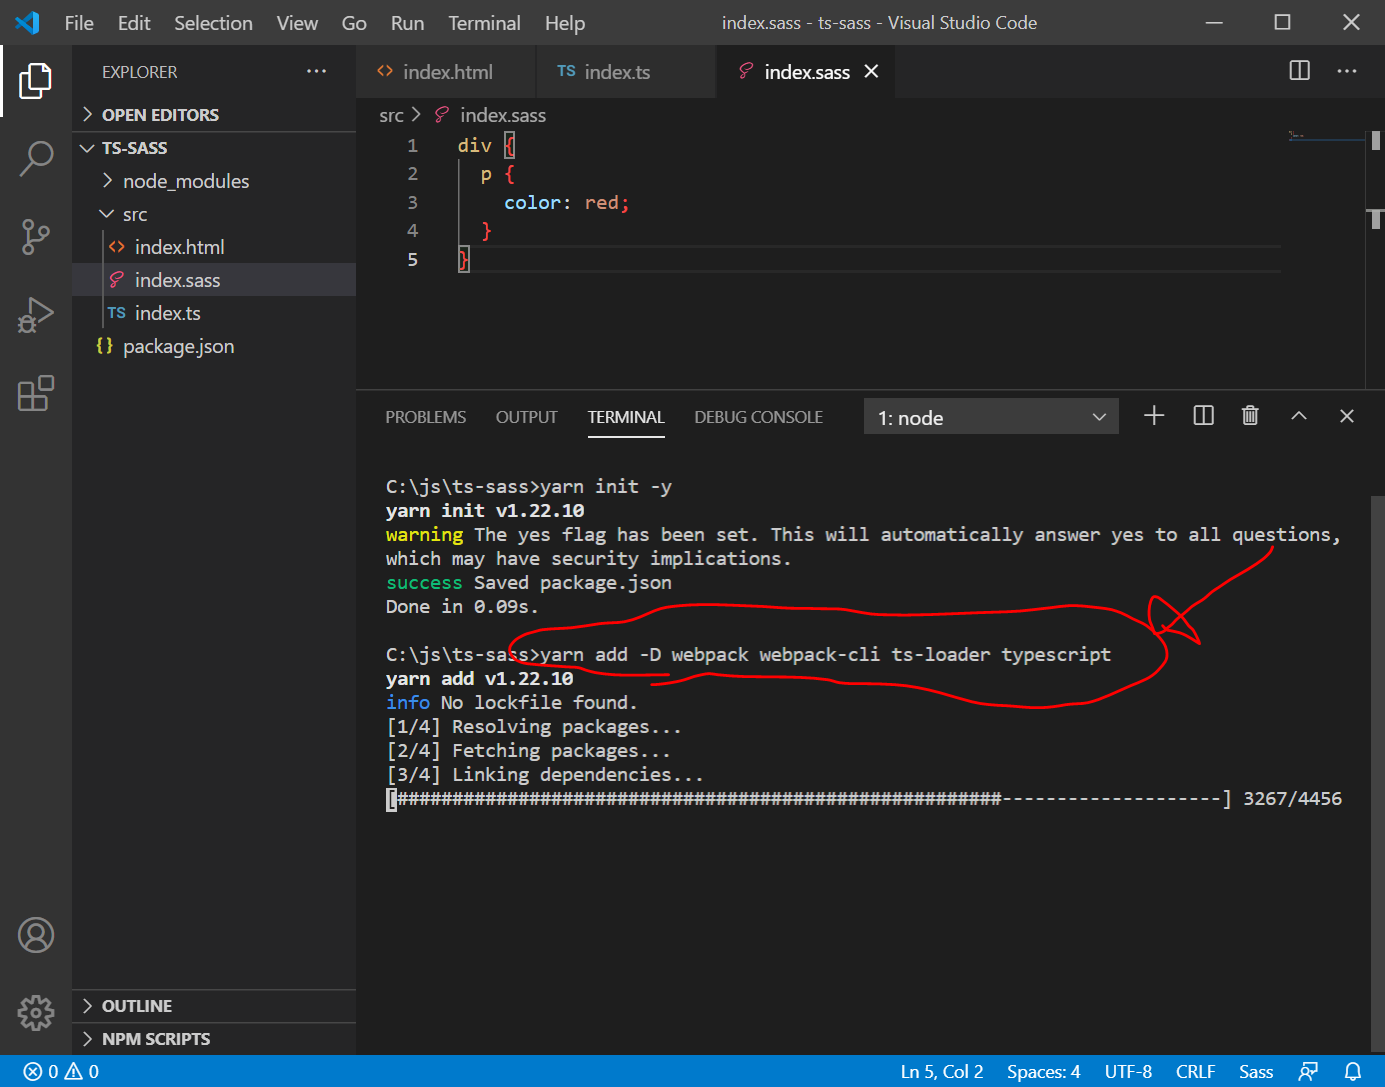
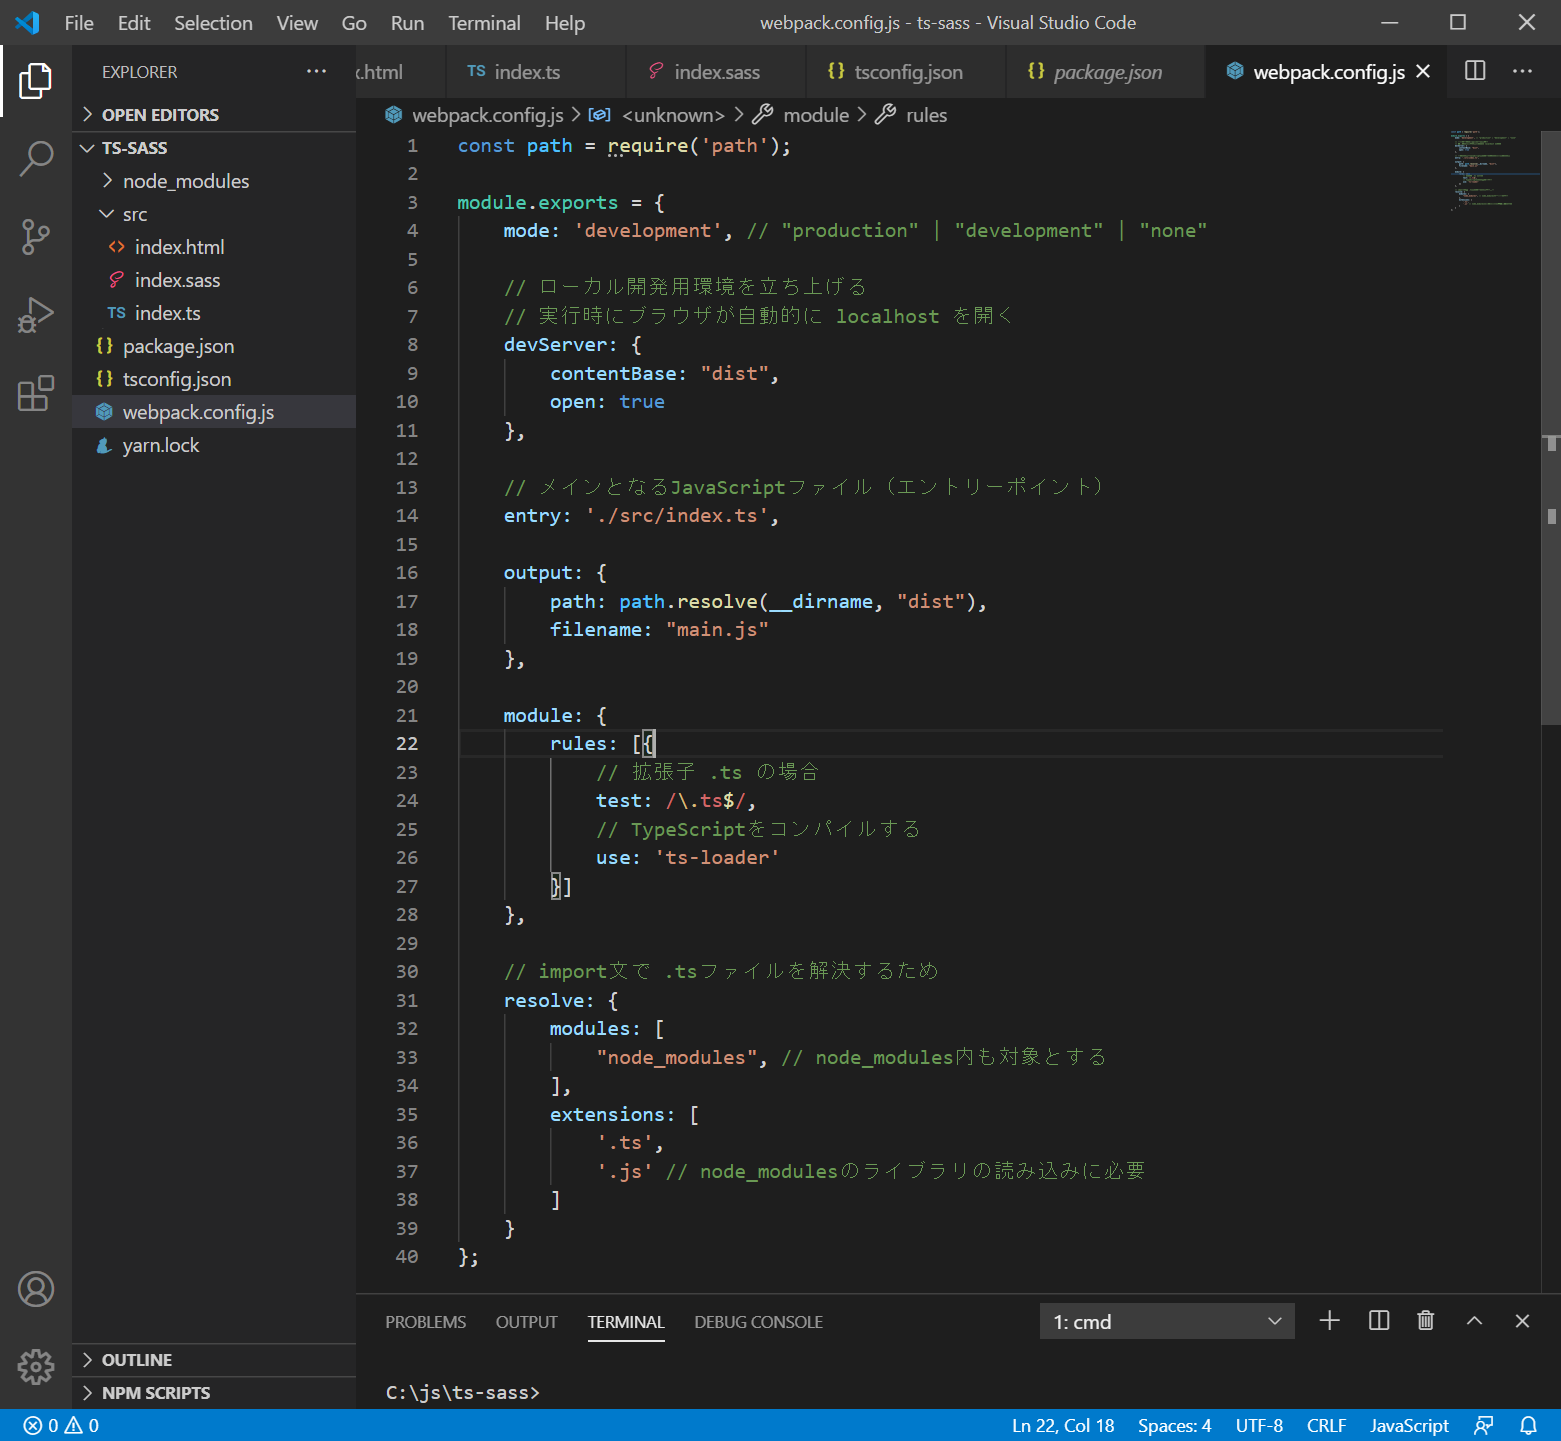
webpack.config.jsを新規作成し、package.jsonとtsconfig.jsonを修正します。それぞれ、以下のように入力します。
webpack.config.js
const path = require('path');

module.exports = {
    mode: 'development', // "production" | "development" | "none"

    // ローカル開発用環境を立ち上げる
    // 実行時にブラウザが自動的に localhost を開く
    devServer: {
        contentBase: "dist",
        open: true
    },

    // メインとなるJavaScriptファイル(エントリーポイント)
    entry: './src/index.ts',

    output: {
        path: path.resolve(__dirname, "dist"),
        filename: "main.js"
    },

    module: {
        rules: [{
            // 拡張子 .ts の場合
            test: /\.ts$/,
            // TypeScriptをコンパイルする
            use: 'ts-loader'
        }]
    },

    // import文で .tsファイルを解決するため
    resolve: {
        modules: [
            "node_modules", // node_modules内も対象とする
        ],
        extensions: [
            '.ts',
            '.js' // node_modulesのライブラリの読み込みに必要
        ]
    }
};
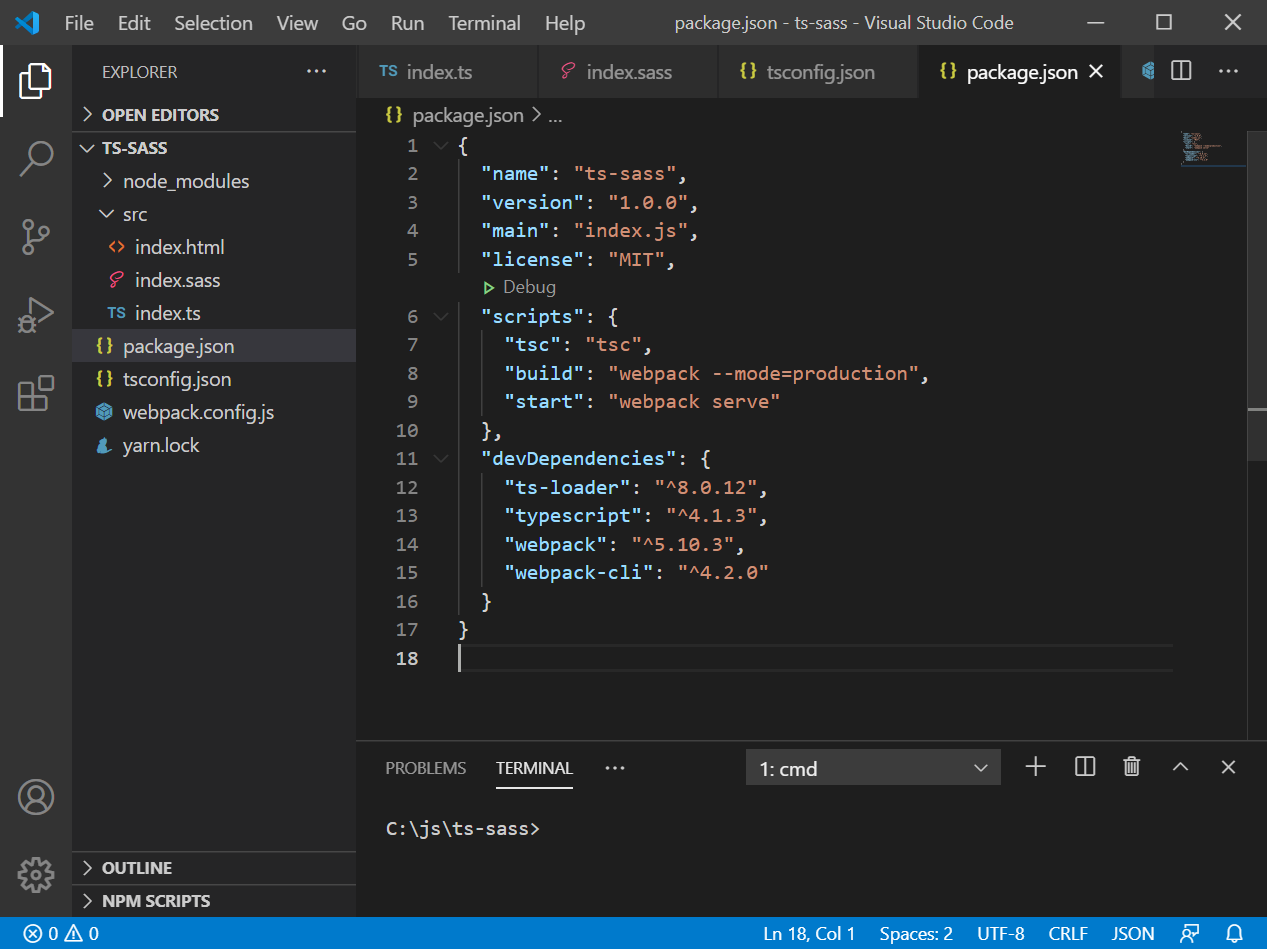
package.json
{
  "name": "ts-sass",
  "version": "1.0.0",
  "main": "index.js",
  "license": "MIT",
  "scripts": {
    "tsc": "tsc",
    "build": "webpack --mode=production",
    "start": "webpack serve"
  },
  "devDependencies": {
    "ts-loader": "^8.0.12",
    "typescript": "^4.1.3",
    "webpack": "^5.10.3",
    "webpack-cli": "^4.2.0"
  }
}
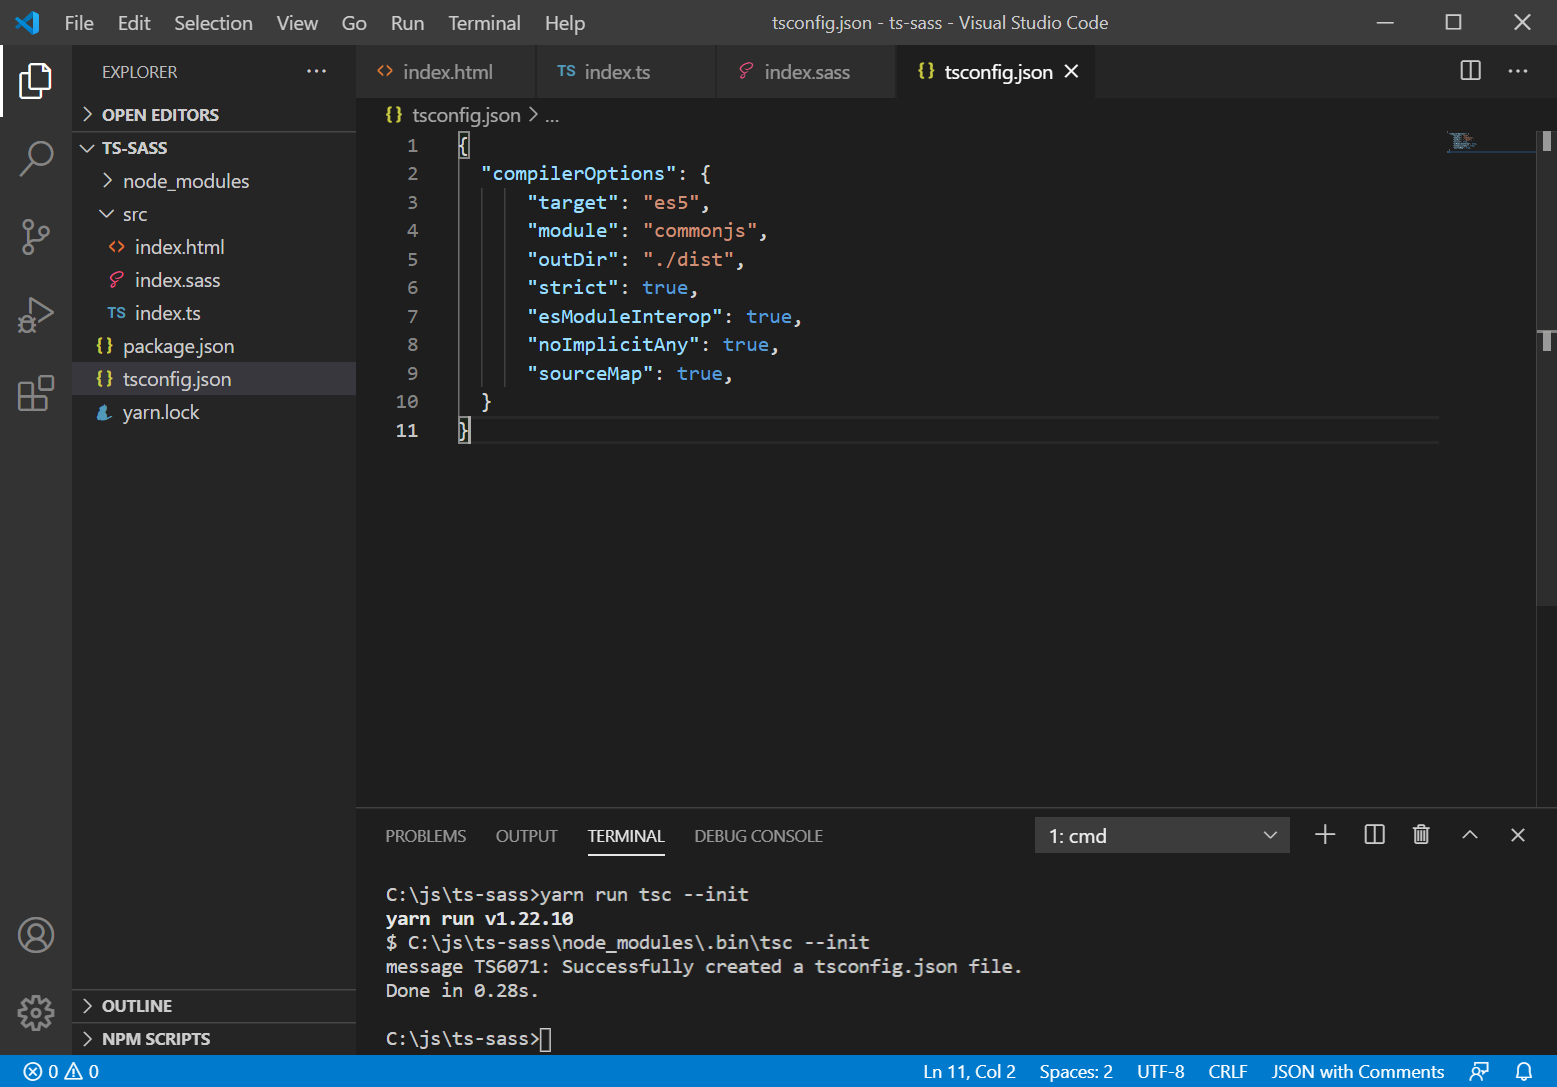
tsconfig.json
{
  "compilerOptions": {
      "target": "es5",
      "module": "commonjs",
      "outDir": "./dist",
      "strict": true,
      "esModuleInterop": true,
      "noImplicitAny": true,
      "sourceMap": true,
  }
}
html-webpack-plugin, style-loader, css-loader, sass-loaderのインストール
ターミナル画面で以下を入力します。
yarn add -D html-webpack-plugin style-loader css-loader sass-loader node-sass postcss-loader autoprefixer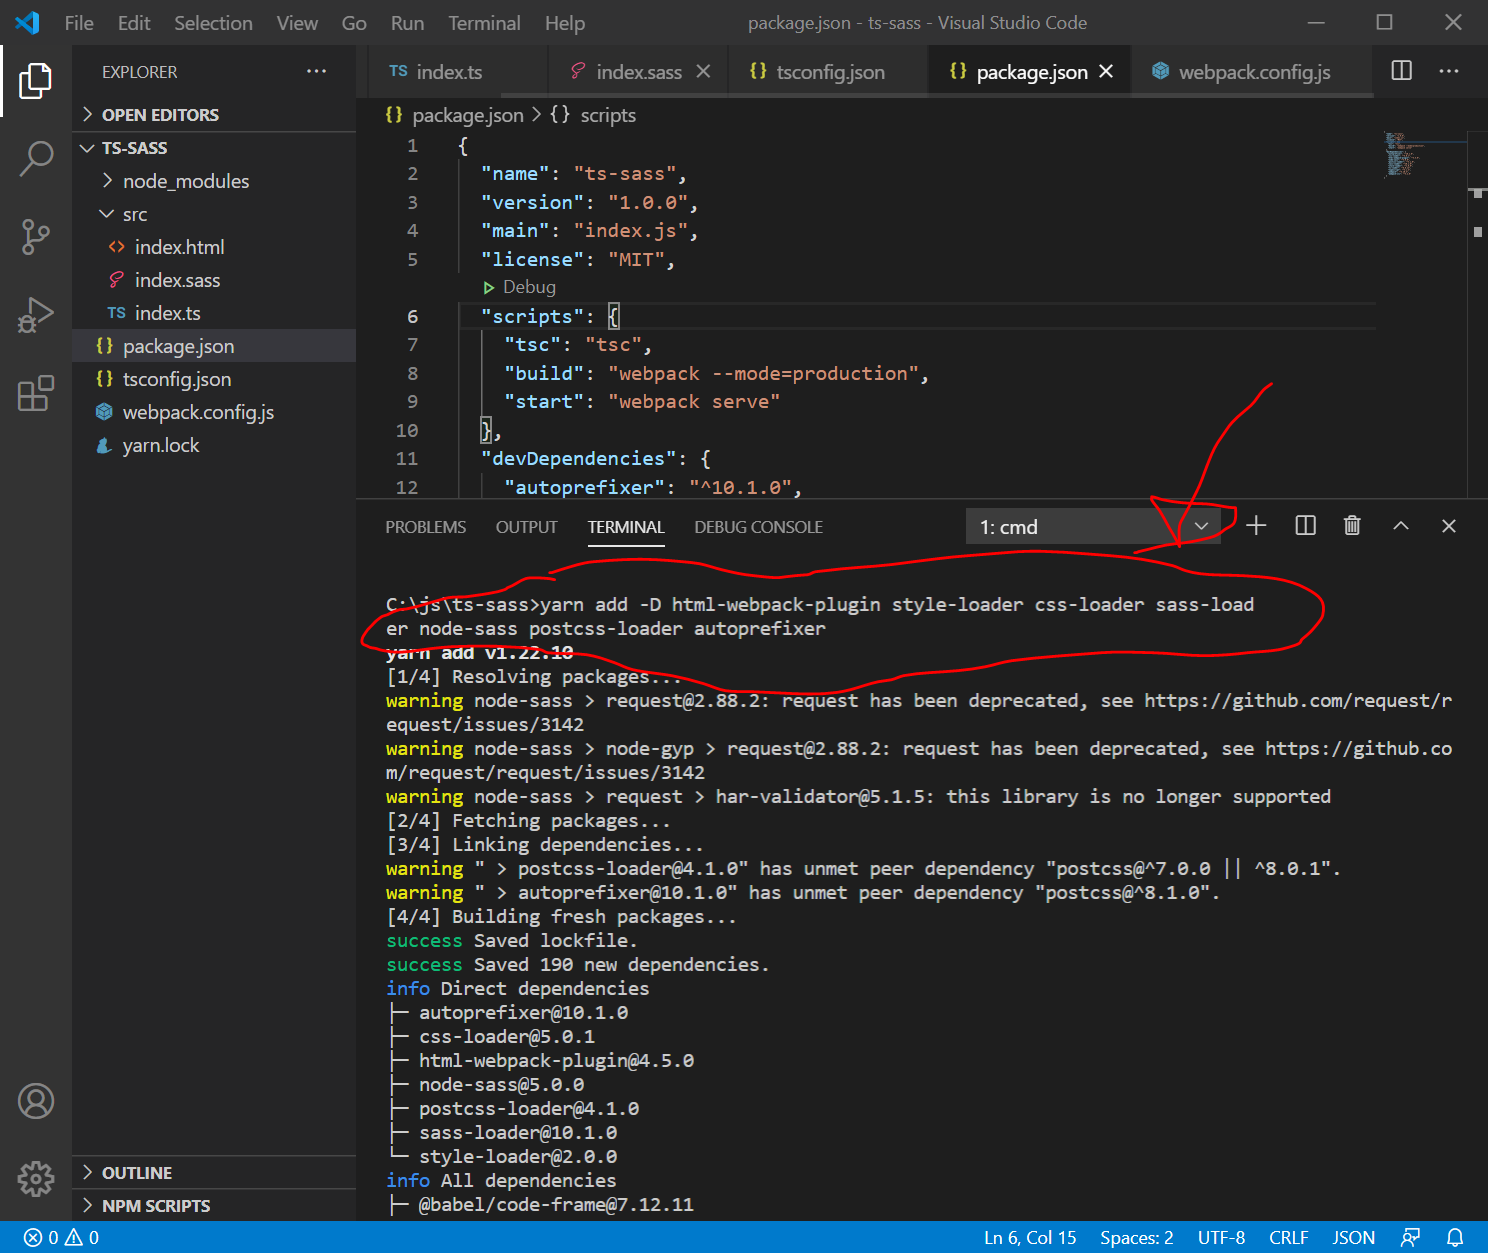
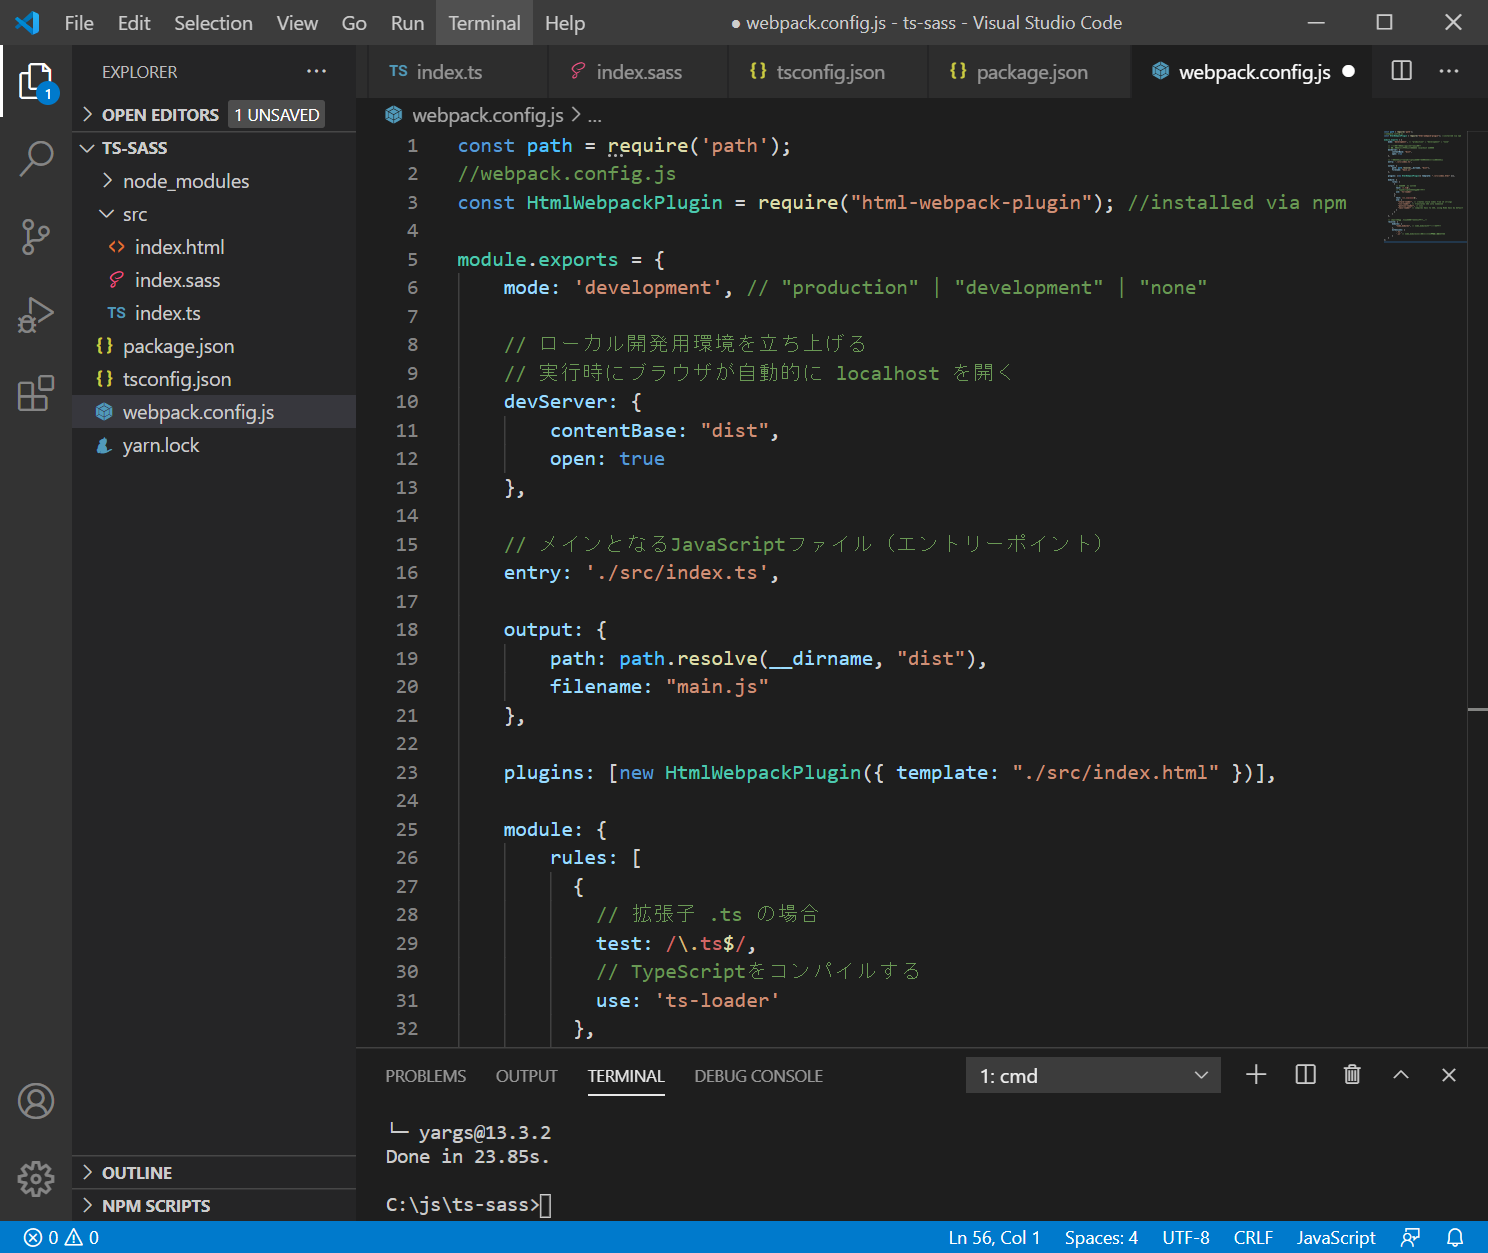
webpack.config.jsの編集
const path = require('path');
//webpack.config.js
const HtmlWebpackPlugin = require("html-webpack-plugin"); //installed via npm

module.exports = {
    mode: 'development', // "production" | "development" | "none"

    // ローカル開発用環境を立ち上げる
    // 実行時にブラウザが自動的に localhost を開く
    devServer: {
        contentBase: "dist",
        open: true
    },

    // メインとなるJavaScriptファイル(エントリーポイント)
    entry: './src/index.ts',

    output: {
        path: path.resolve(__dirname, "dist"),
        filename: "main.js"
    },

    plugins: [new HtmlWebpackPlugin({ template: "./src/index.html" })],

    module: {
        rules: [
          {
            // 拡張子 .ts の場合
            test: /\.ts$/,
            // TypeScriptをコンパイルする
            use: 'ts-loader'
          },
          {
            test: /(\.s[ac]ss)$/,
            use: [
              "style-loader", // creates style nodes from JS strings
              "css-loader", // translates CSS into CommonJS
              "postcss-loader", // 追記
              "sass-loader" // compiles Sass to CSS, using Node Sass by default
            ]
          }
        ]
    },

    // import文で .tsファイルを解決するため
    resolve: {
        modules: [
            "node_modules", // node_modules内も対象とする
        ],
        extensions: [
            '.ts',
            '.js' // node_modulesのライブラリの読み込みに必要
        ]
    }
};
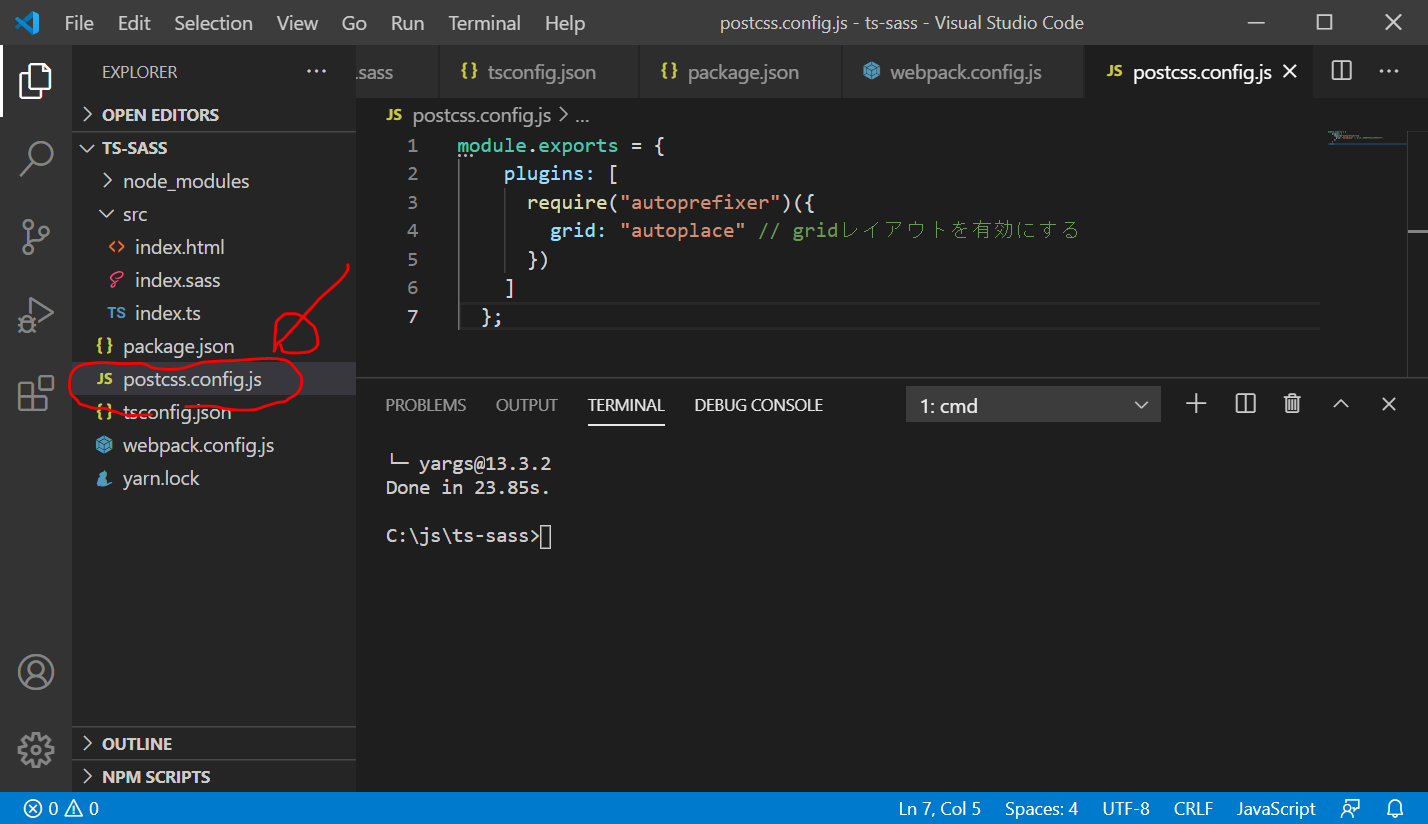
postcss.config.js の新規作成
module.exports = {
  plugins: [
    require("autoprefixer")({
      grid: "autoplace" // gridレイアウトを有効にする
    })
  ]
};
ターミナル画面で以下を入力します。
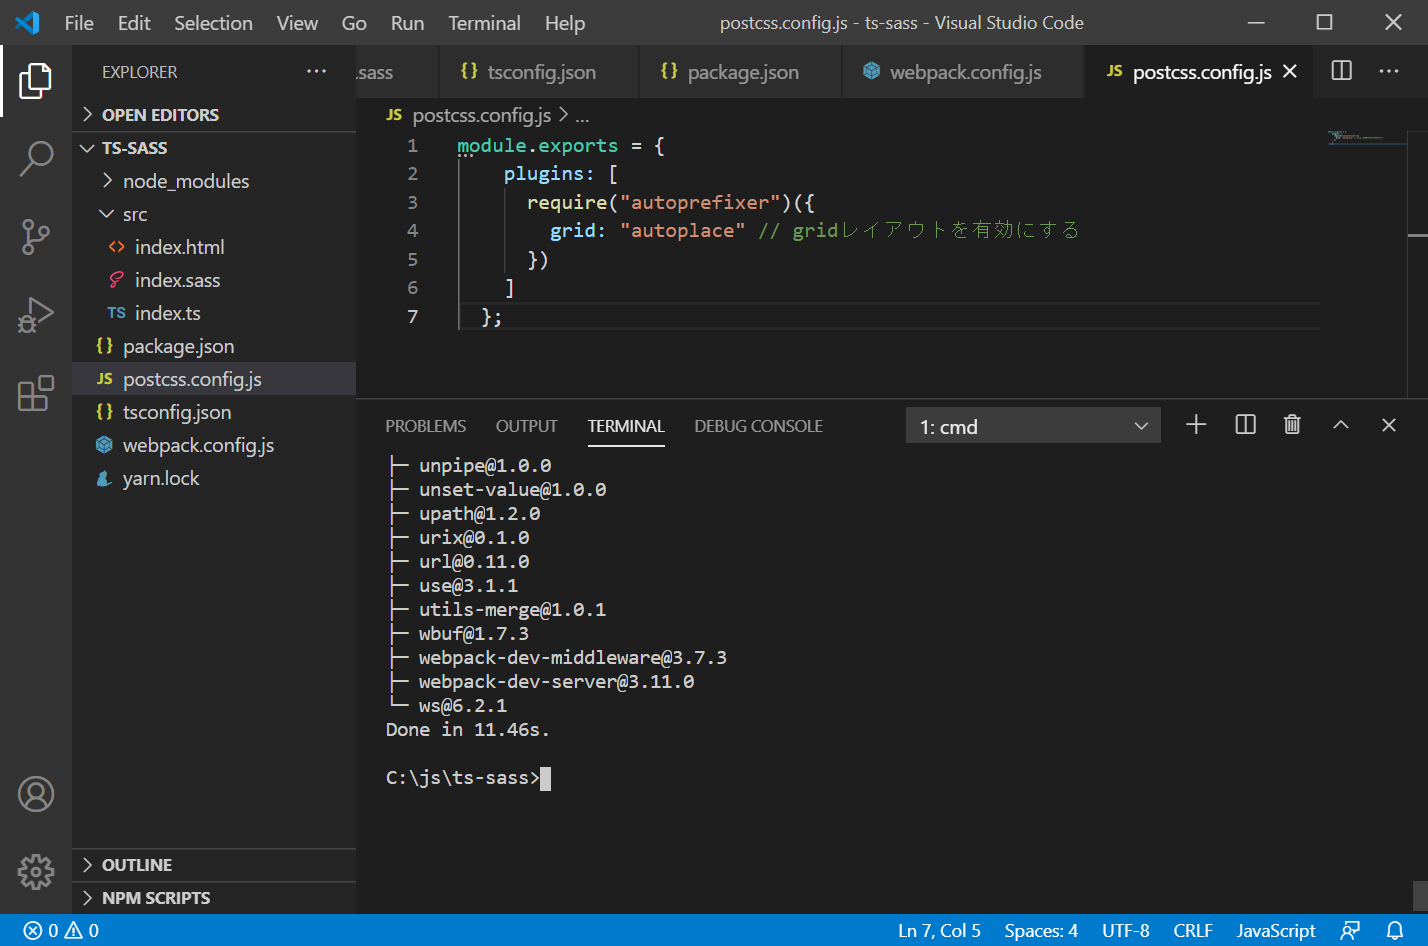
yarn add webpack-dev-server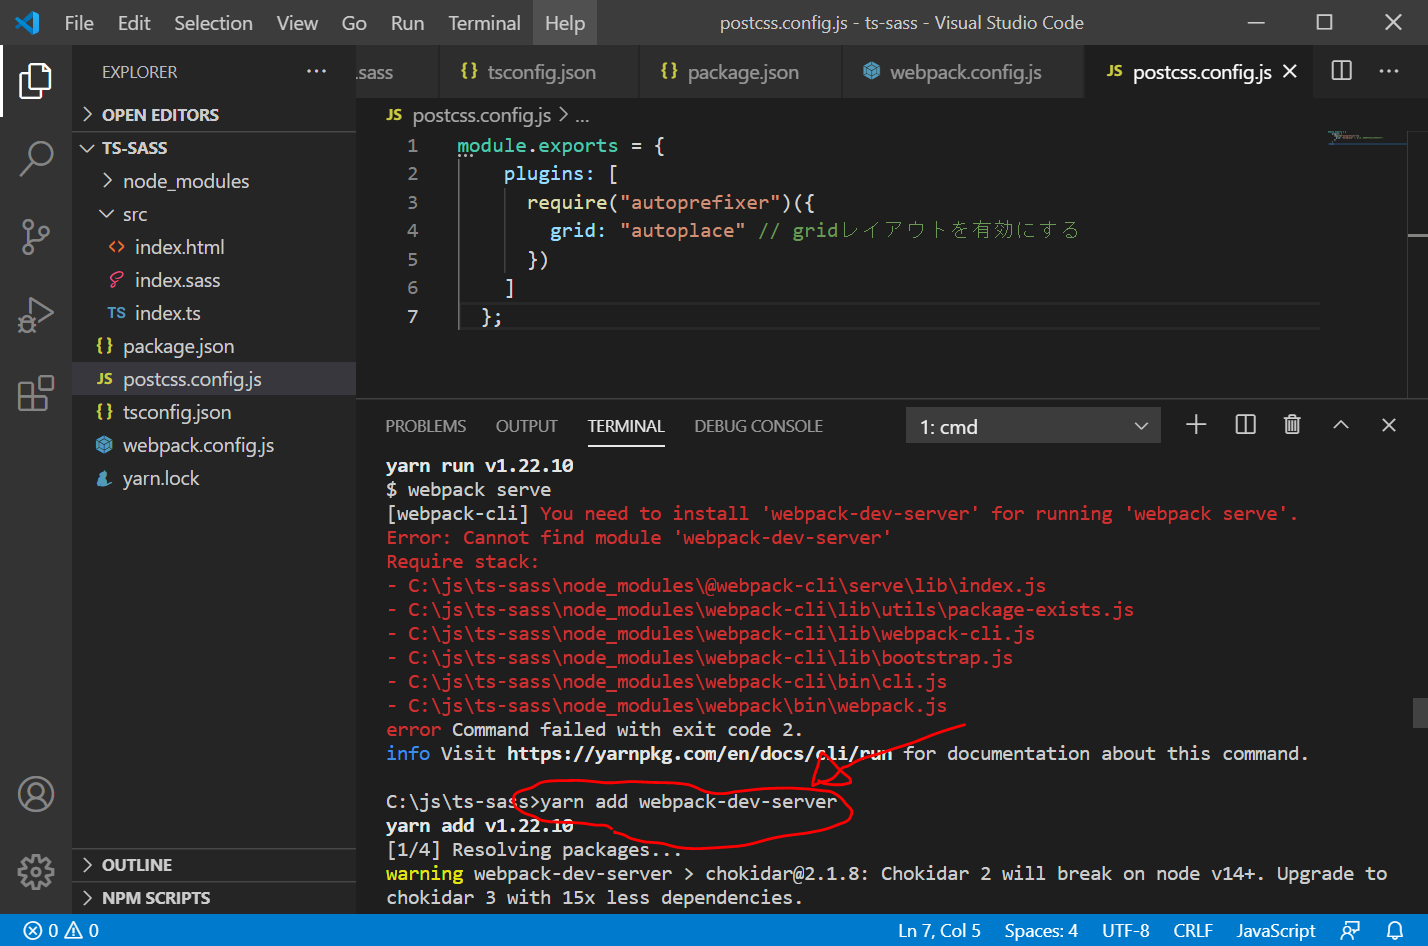
ローカルサーバで起動してみる
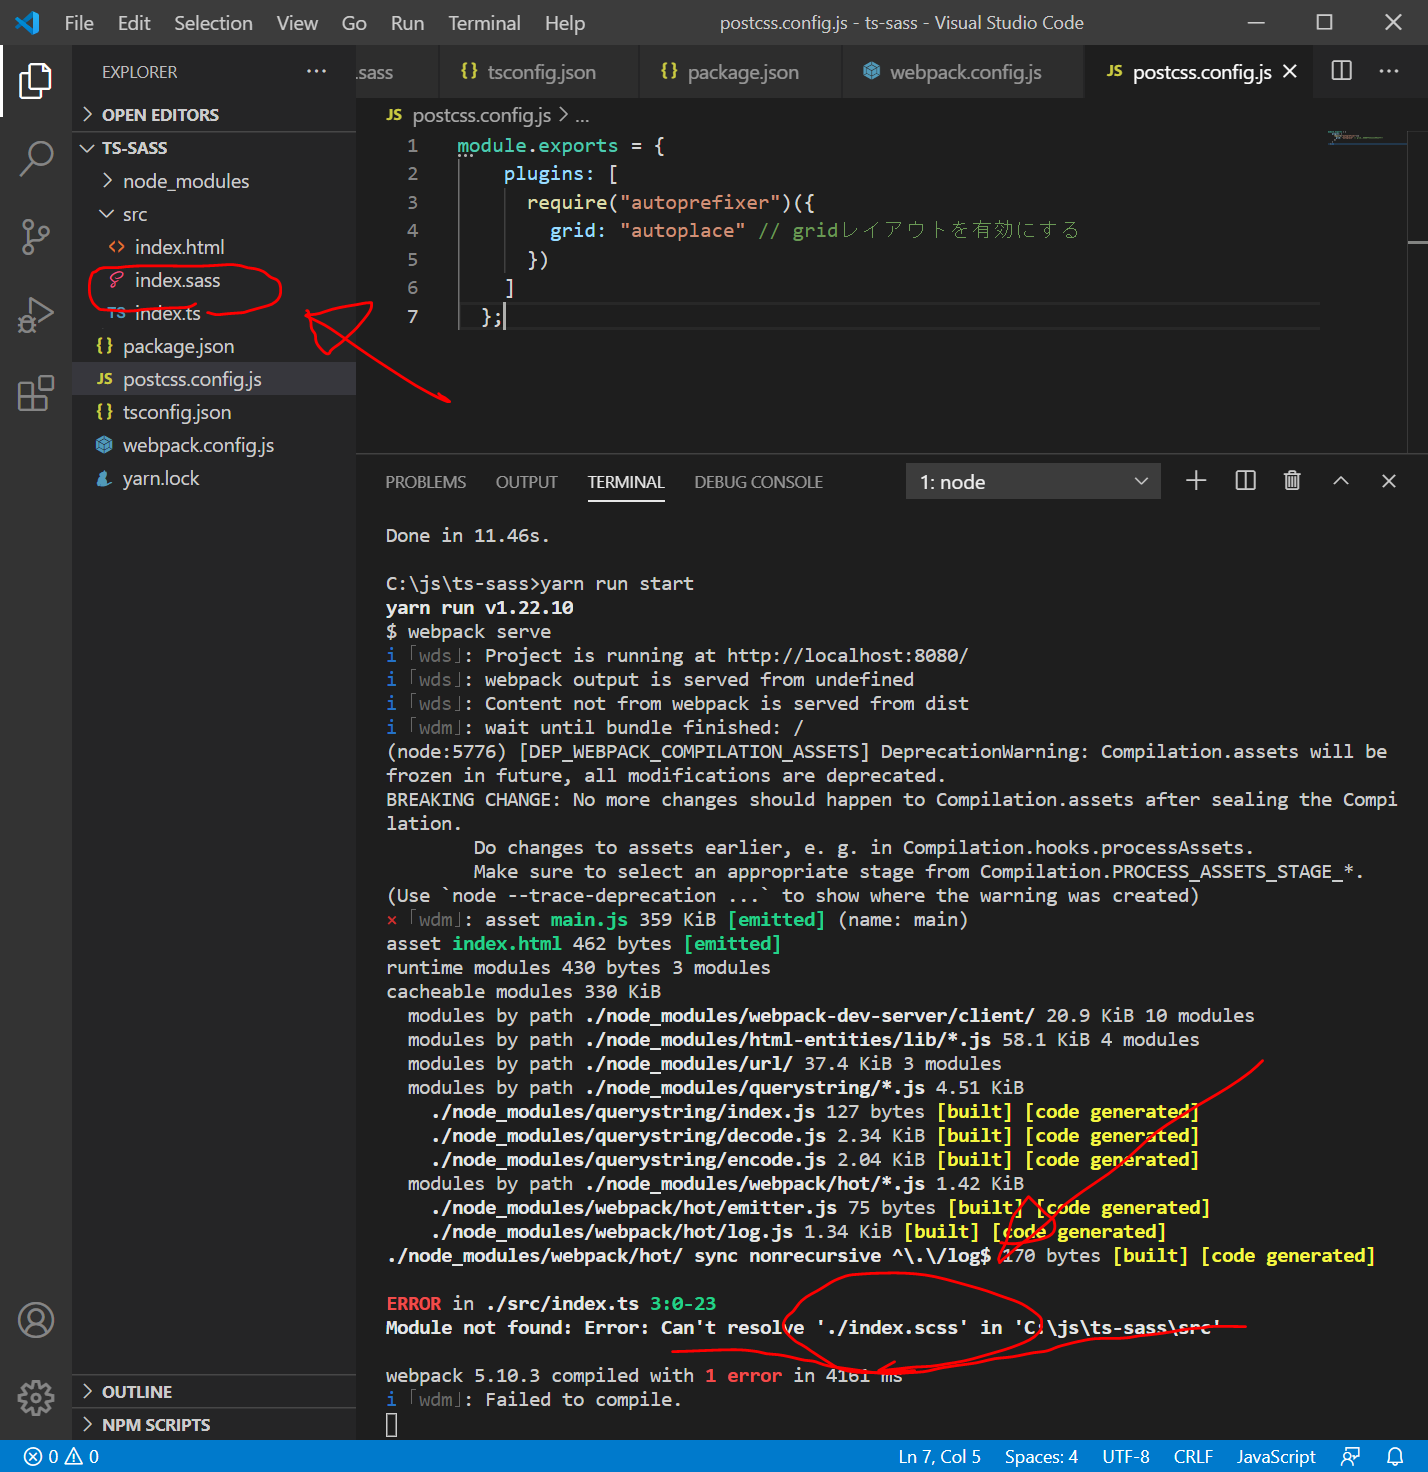
ターミナル画面で以下を入力してみます
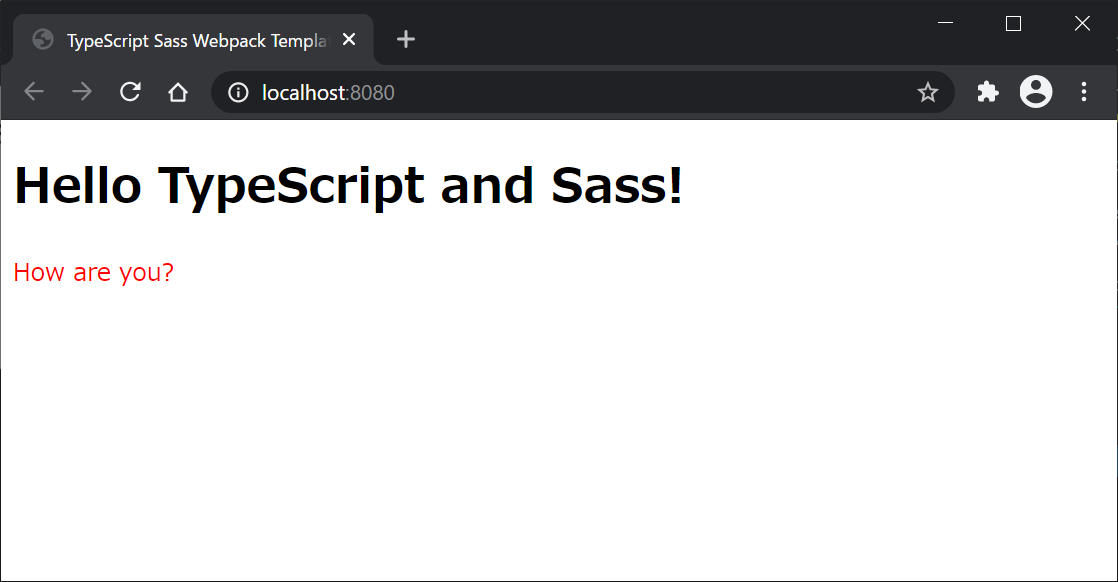
yarn run startindex.scssがないというエラーが出ました。
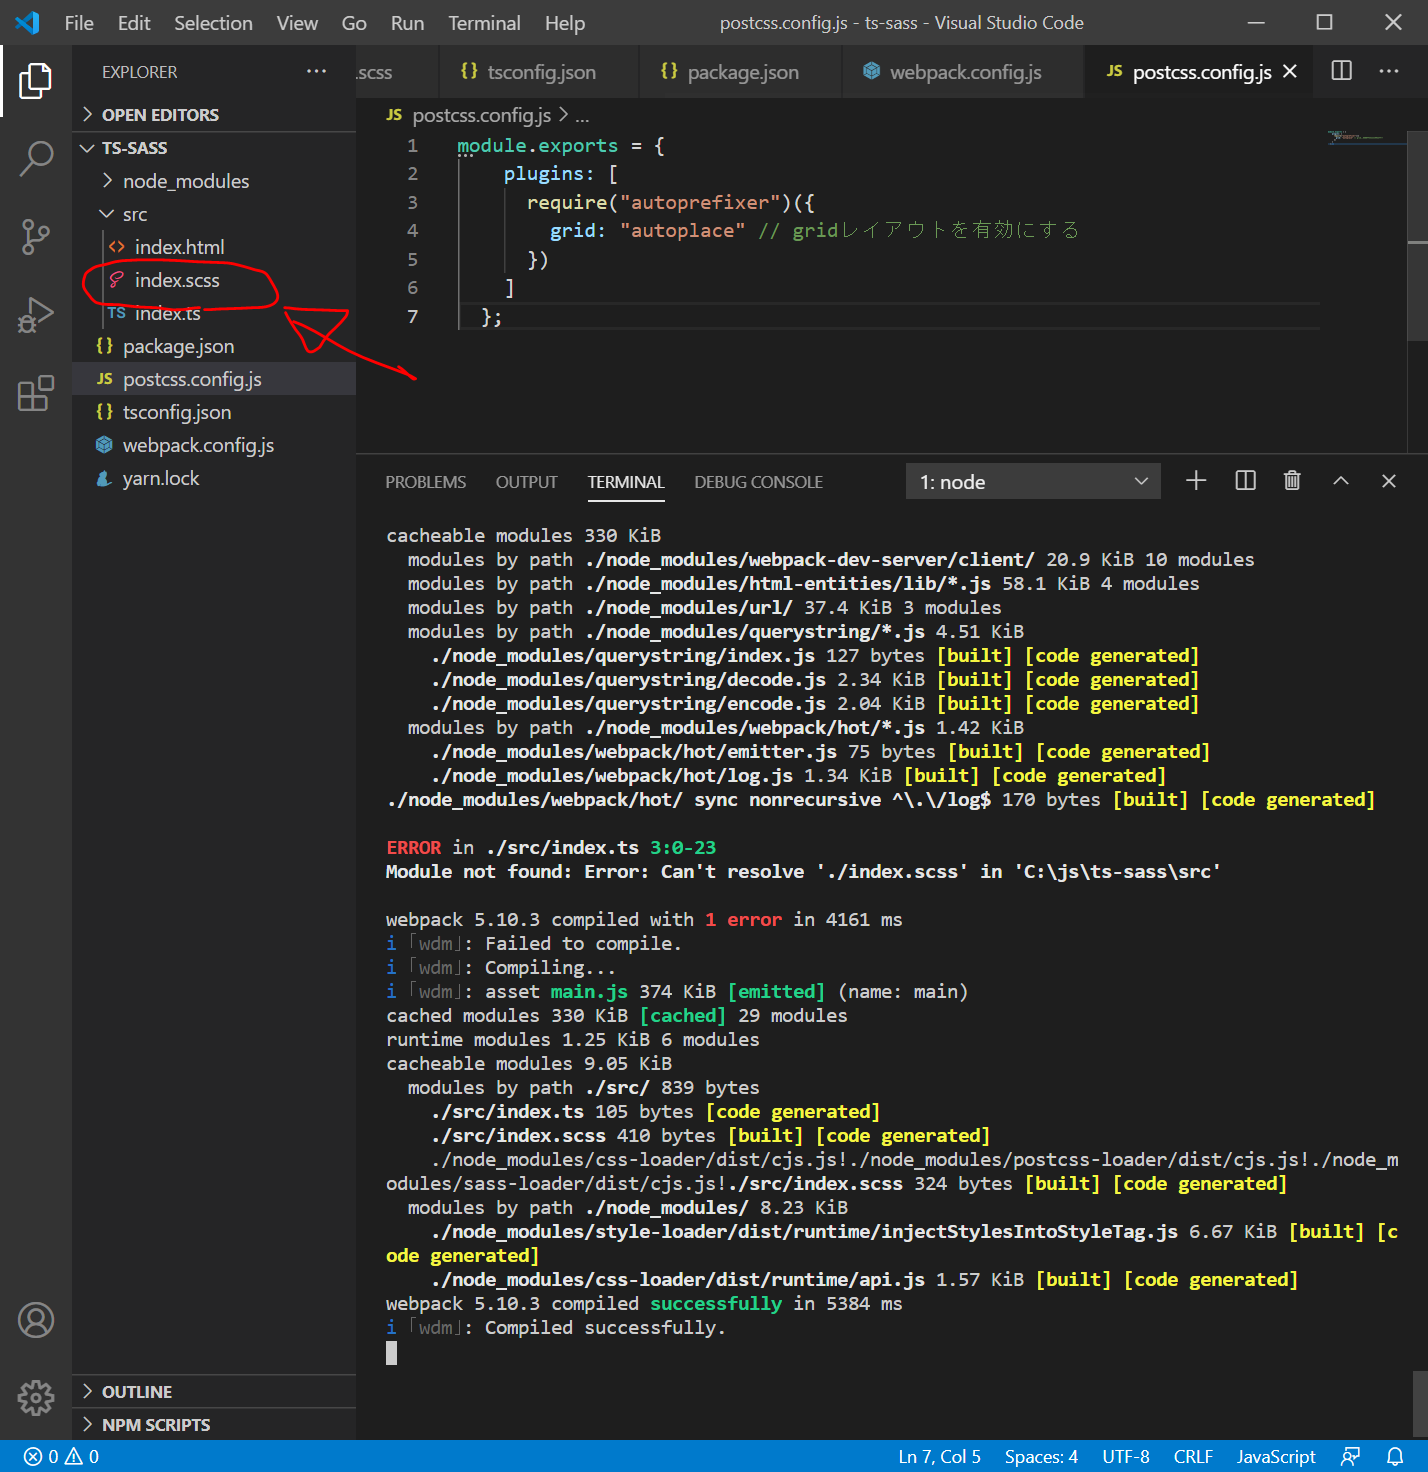
間違えて、index.sassとしていたことが分かったので、index.sass をindex.scssに名前を変更したところ、自動でcompileされ、以下のように、ちゃんと表示されました。
これだけで相当疲れました。。。
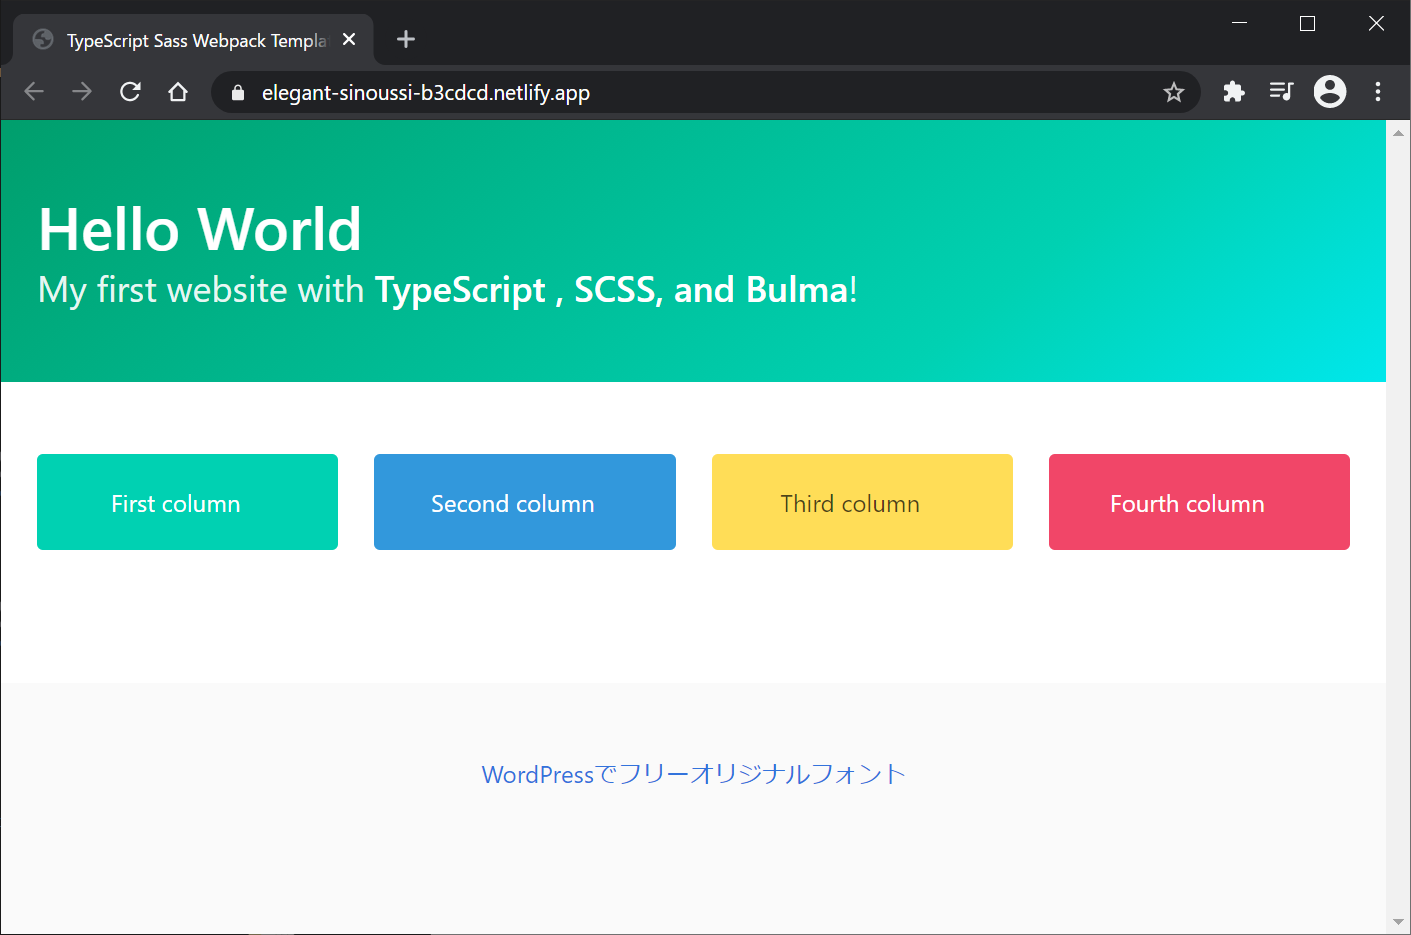
bulmaを試してみる
cssフレームワークbulmaを試してみます。index.htmlを以下のように変更します。
<!DOCTYPE html>
<html lang="en">
<head>
    <meta charset="UTF-8">
    <meta name="viewport" content="width=device-width, initial-scale=1.0">
    <title>TypeScript Sass Webpack Template</title>
    <link rel="stylesheet" href="https://cdn.jsdelivr.net/npm/bulma@0.9.1/css/bulma.min.css">
</head>
<body class="main">
  <section class="hero is-primary is-bold">
    <div class="hero-body">
      <h1 class="title is-size-2">
         Hello World
      </h1>
      <h2 class="subtitle is-size-4">
        My first website with <strong>TypeScript , SCSS, and Bulma</strong>!
      </h2>
    </div>
  </section>
  <section class="section">
    <div class="container">
      <div class="columns">
        <div class="column">
          <p class="notification is-primary has-text-centered">First column</p>
        </div>
        <div class="column">
          <p class="notification is-info has-text-centered">Second column</p>
        </div>
        <div class="column">
          <p class="notification is-warning has-text-centered">Third column</p>
        </div>
        <div class="column">
          <p class="notification is-danger has-text-centered">Fourth column</p>
        </div>
      </div>
    </div>
  </section>
  <footer class="footer">
    <p class="has-text-centered"><a href="https://i-doctor.sakura.ne.jp/font/?p=45828">WordPressでフリーオリジナルフォント</p>
  </footer>
</body>
</html>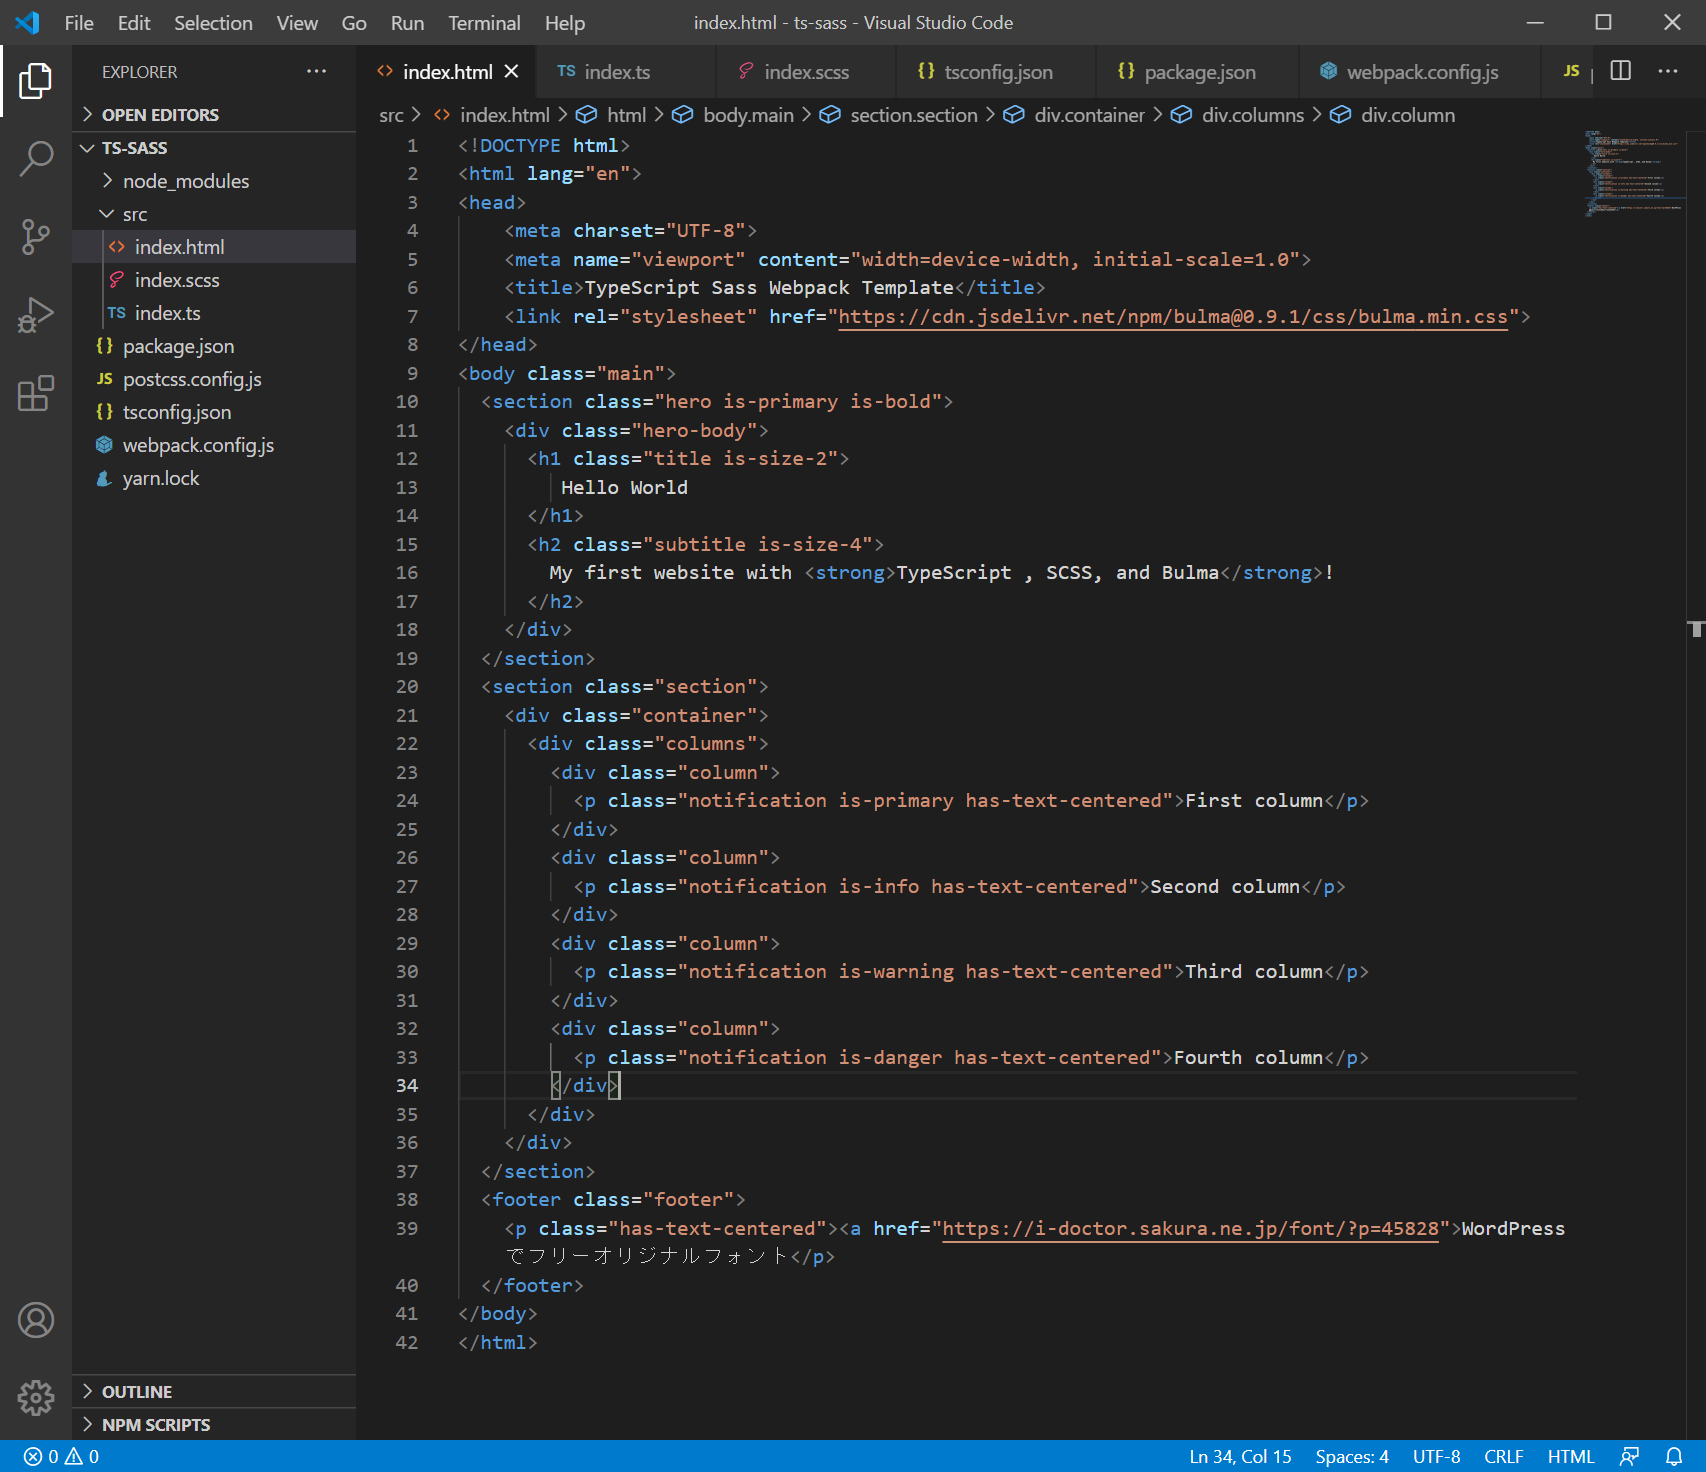
すると、以下のようになります。
ソースコードとDEMOサイト
ソースコード
https://github.com/adash333/typescript-sass-webpack
DEMOサイト
https://elegant-sinoussi-b3cdcd.netlify.app/
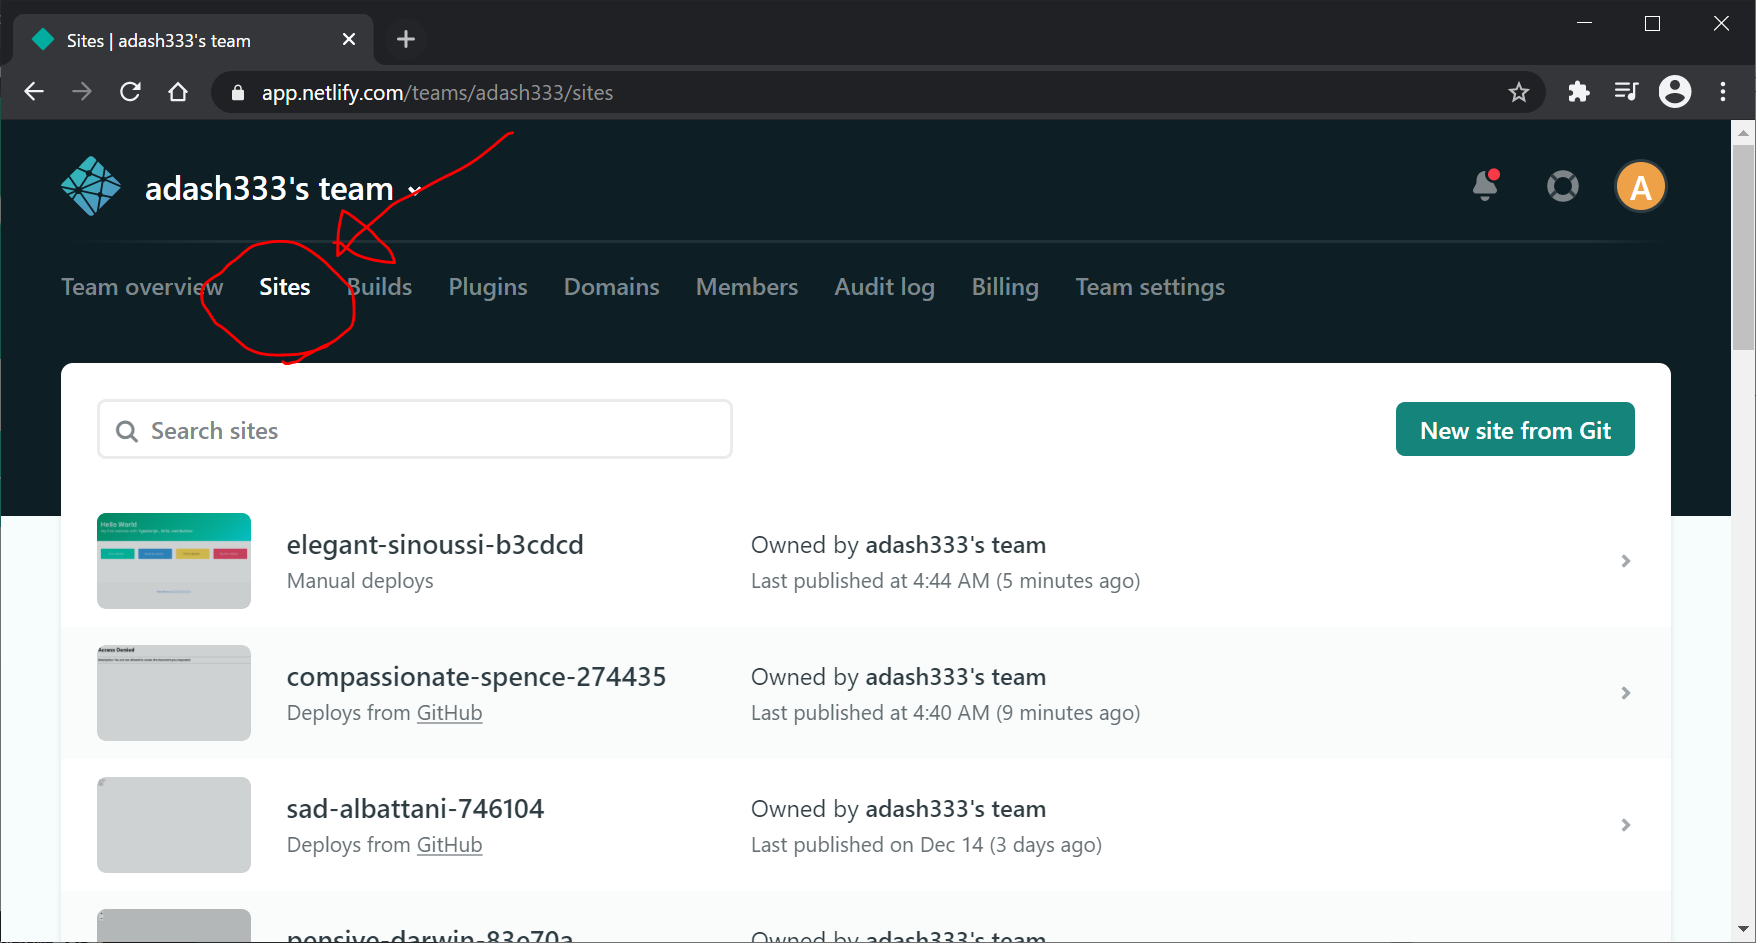
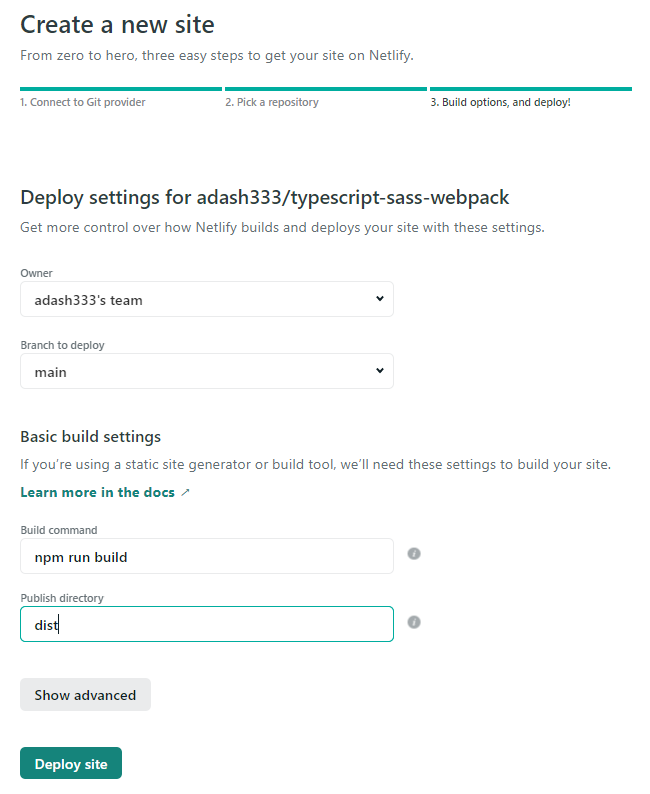
Netlifyにデプロイのときの設定
以下のようになります。
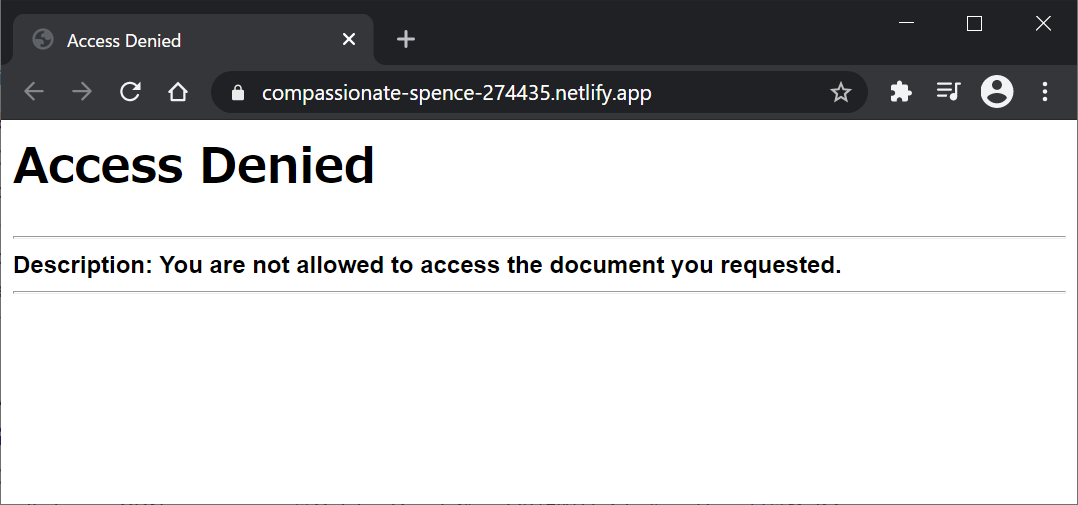
https://compassionate-spence-274435.netlify.app/
なぜか、Accedd Deniedになってしまってみることができない。原因はわからず。
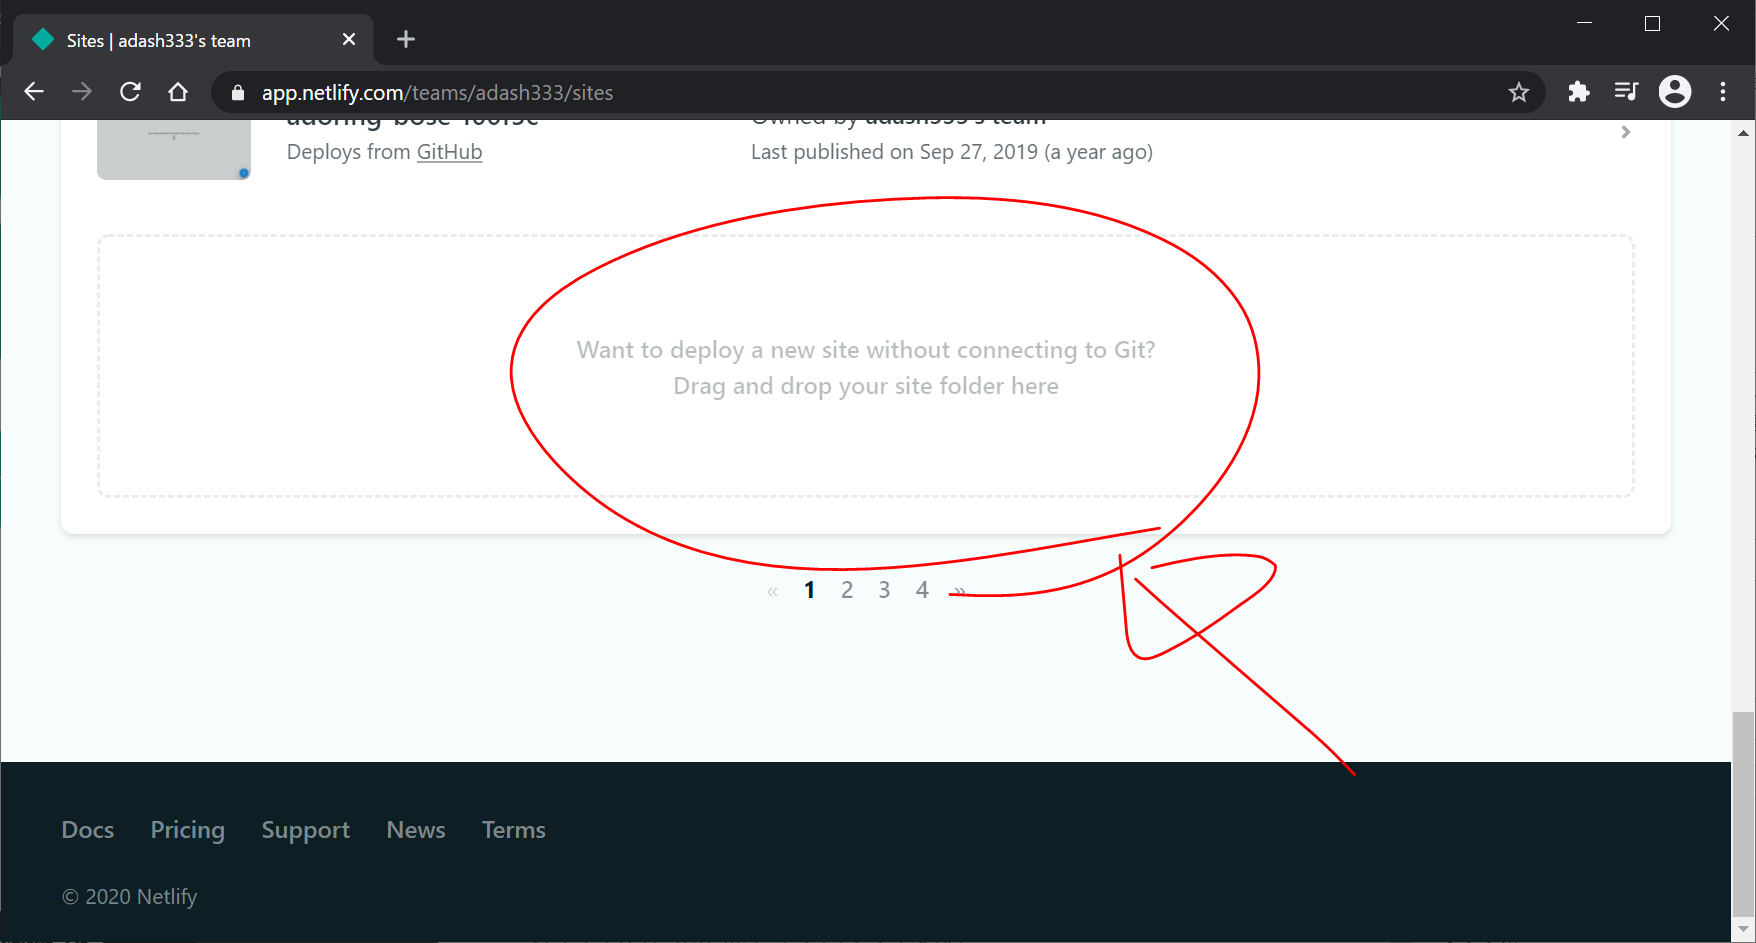
ので、あきらめて、ローカルサーバで、 “yarn run build"してできたdist/フォルダを、Netlify の sites タブの一番下の方にドラッグ&ドロップしてデプロイしました。(なんというかっこ悪い、、、)