201106_TensorFlow
目次
リンク
https://i-doctor.sakura.ne.jp/font/?p=45117
Microsoftの機械学習アプリLobe(beta版)でリンゴとみかんを分類するWEBアプリ作成を試してみる(6)Windows10にTensorFlow.jsの環境構築とDEMOアプリのNetlifyへのデプロイ
2020年11月12日
モデルの保存
TensorFlowで保存できるモデルの形式は2つ
- SavedModel
- HDF5
Loabでエクスポートされるモデルの形式は
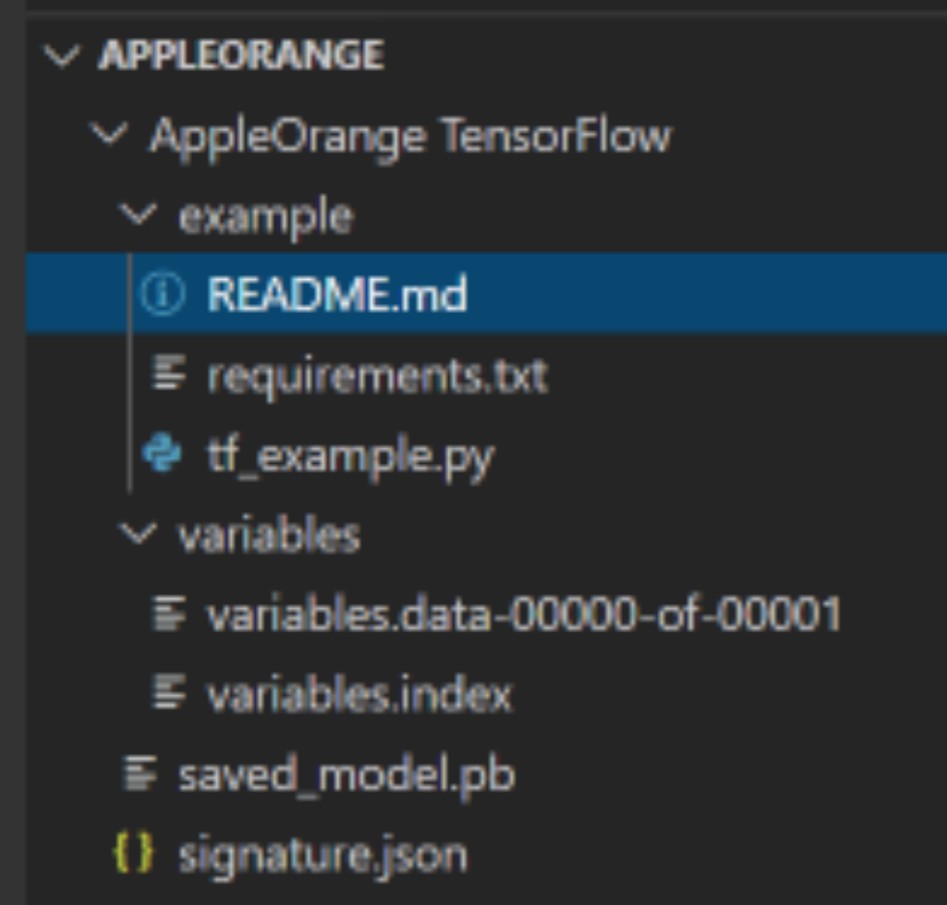
TensorFlow 1.15 SavedModel
SavedModelは、以下のような構成である。
- assets
- saved_model.pb
- variables
https://www.tensorflow.org/tutorials/keras/save_and_load?hl=ja
公式マニュアル
モデルの保存と復元
https://www.tensorflow.org/guide/saved_model?hl=ja
SavedModel形式の使用
https://www.tensorflow.org/js/tutorials/conversion/import_saved_model?hl=ja
TensorFlow SavedModelから、
TensorFlow.jsが読み込める形式への変換
TensorFlow.jsのDemoをローカル環境で試してみる
- nvm-windowsのインストール。zipファイルをダウンロードしてインストール
- Node.js
nvm list available, nvm install 14.15.0, nvm use 14.15.0 - yarn
npm install -g yarn - C:/python/フォルダに、https://github.com/tensorflow/tfjs/tree/master/tfjs-converter/demo/mobilenet のtfjs-converter/以下をダウンロードする
- tfjs-converter/ フォルダをVSCodeで開く
- cd demo # If not already in the demo directory.
- yarn # Installs dependencies.
- yarn mobilenet # Starts a web server and opens a page. Also watches for changes.
- Chromeで開く
- サーバを停止(Ctrl+Cかな?)
- npm i -D webpack webpack-cli
- package.jsonの変更 “scripts”: { “build”: “webpack” },→これで、npm run build を使用できるようになる
- webpack.config.jsをカスタマイズする
- npm i -D webpack webpack-cli webpack-dev-server
- package.jsonのscriptsのところに、“start”: “webpack serve” を追加
- webpack.config.jsにdevServerを追加
- npm run startでサーバを立ち上げる
- GitHubにpush
- Netlifyにデプロイ(npm run build, dist)
module.exports = {
  // メインとなるJavaScriptファイル(エントリーポイント)
  entry: `./demo/index.js`,

  // ファイルの出力設定
  output: {
    //  出力ファイルのディレクトリ名
    path: `${__dirname}/dist`,
    // 出力ファイル名
    filename: "main.js"
  },
  // モード値を production に設定すると最適化された状態で、
  // development に設定するとソースマップ有効でJSファイルが出力される
  mode: "development"


  // ローカル開発用環境を立ち上げる
  // 実行時にブラウザが自動的に localhost を開く
  devServer: {
    contentBase: "dist",
    open: true
  }
};
Node.js
nvm-windows
https://github.com/coreybutler/nvm-windows/releases/tag/1.1.7
https://qiita.com/akuden/items/a88630de9624039c4135
@akuden
2018年10月15日
nvm-windowsでNode.jsバージョン管理
https://qiita.com/rapando/items/6e9d891789b9a652c318
@rapando
2020年09月12日に更新
nvm-windows 導入
https://i-doctor.sakura.ne.jp/font/?p=38104
nvm-windowsでnodejsのバージョンを上げる(Windows10)
2019年5月12日
npm install -g yarn
Webpack
https://ics.media/entry/12140/
最新版で学ぶwebpack 5入門
JavaScriptのモジュールバンドラ
2020年10月12日 メンテナンス済み / 株式会社ICS 池田 泰延
https://qiita.com/soarflat/items/3e43368b2d767c730781
@soarflat
2020年10月27日に更新
Parcel 入門 ~Parcelはwebpackの代わりになるのか~
TensorFlow.js
ステップ1.既存のTensorFlowモデルをTensorFlow.jsウェブ形式に変換する
pipenv install tensorflowjs
pipenv shell

tensorflowjs_wizard
# 対話的にtf_saved_modelからtfjs_graph_modelへのconversionを実行、または以下を入力

tensorflowjs_converter \
    --input_format=tf_saved_model \
    --output_format=tfjs_graph_model \
    --signature_name=serving_default \
    --saved_model_tags=serve \
    /mobilenet/saved_model \
    /mobilenet/web_model
コンバーターが生成したファイル
上記の変換スクリプトは、2種類のファイルを生成します。
- model.json (データフローグラフとウェイトマニフェスト)
- group1-shard\*of\* (バイナリウェイトファイルのコレクション)
ステップ2:ブラウザーでのロードと実行
Windowsであれば、
- nvm-windowsのインストール
- Node.jsをインストール
- 使用するNode.jsを指定
- yarnをインストール
の後、
yarn add @tensorflow/tfjs
または npm install @tensorflow/tfjs
モデルを読み込み、推論するコード
import * as tf from '@tensorflow/tfjs';
import {loadGraphModel} from '@tensorflow/tfjs-converter';

const MODEL_URL = 'model_directory/model.json';

const model = await loadGraphModel(MODEL_URL);
const cat = document.getElementById('cat');
model.execute(tf.browser.fromPixels(cat));
https://github.com/tensorflow/tfjs/tree/master/tfjs-converter/demo/mobilenet
MobileNet デモ
https://github.com/tensorflow/tfjs/tree/master/tfjs-converter
tf_saved_model 変換前
tfjs_graph_model 変換後
Convert a TensorFlow SavedModel to TensorFlow.js graph model format. Use tf.loadGraphModel() to load the converted model in JavaScript.
tf.loadGraphModel()
https://js.tensorflow.org/api/1.0.0/#loadGraphModel
https://www.tensorflow.org/js/tutorials/conversion/import_saved_model
TensorFlow GraphDefベースのモデルをTensorFlow.jsにインポートする
https://qiita.com/kwashi/items/12d2dfe653699ccfe3f4
@kwashi
2020年02月19日
【tensorflowjs_converter】TensorflowのモデルをTensorflow.jsの形式へ変換する方法
http://developers.goalist.co.jp/entry/keras-to-production
2019-5-16
kerasのモデルをデプロイする手順
https://note.com/npaka/n/nc3f24021c6e9
TensorFlow GraphDefモデルをTensorFlow.jsにインポートする
npaka
2020/04/26 20:17
https://qiita.com/iwatake2222/items/0092b4b95ed2bc50c9ce
@iwatake2222
2020年01月25日
Deep Learningアプリケーション開発 (8) TensorFlow.js

https://note.com/npaka/n/ndb93d6d41210#wXEM8
TensorFlow.js 入門 / 画像分類
npaka
2020/05/11 18:50
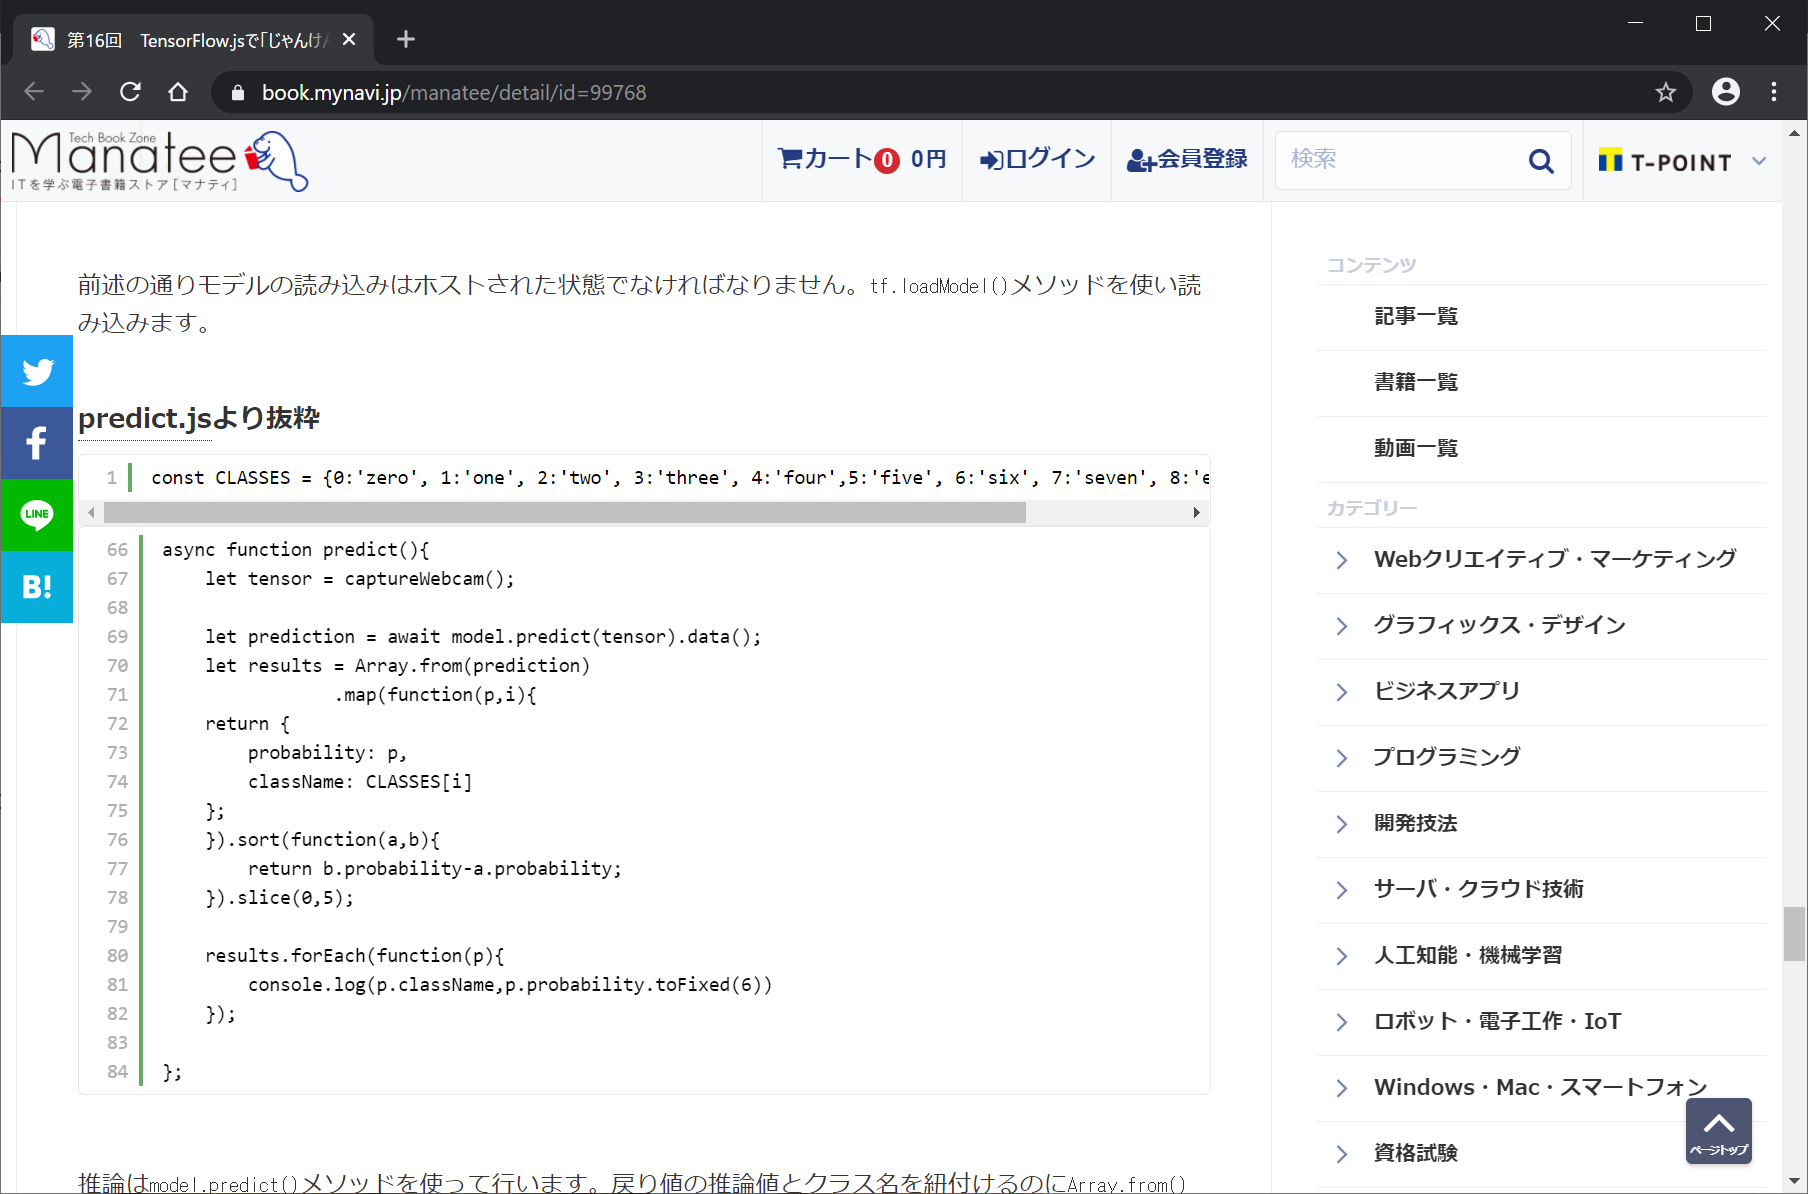
https://book.mynavi.jp/manatee/detail/id=99768
2018.11.05
機械学習で遊ぼう! APIサービスやTensorFlowを使ったサンプルレシピ集
第16回 TensorFlow.jsで「じゃんけん」を判別してみよう
ポンダッド(著者)
https://github.com/PonDad/manatee/tree/master/1_sign_language_digits_classification-master
TensorFlow.jsで「じゃんけん」を判別してみよう
(ソースコード)
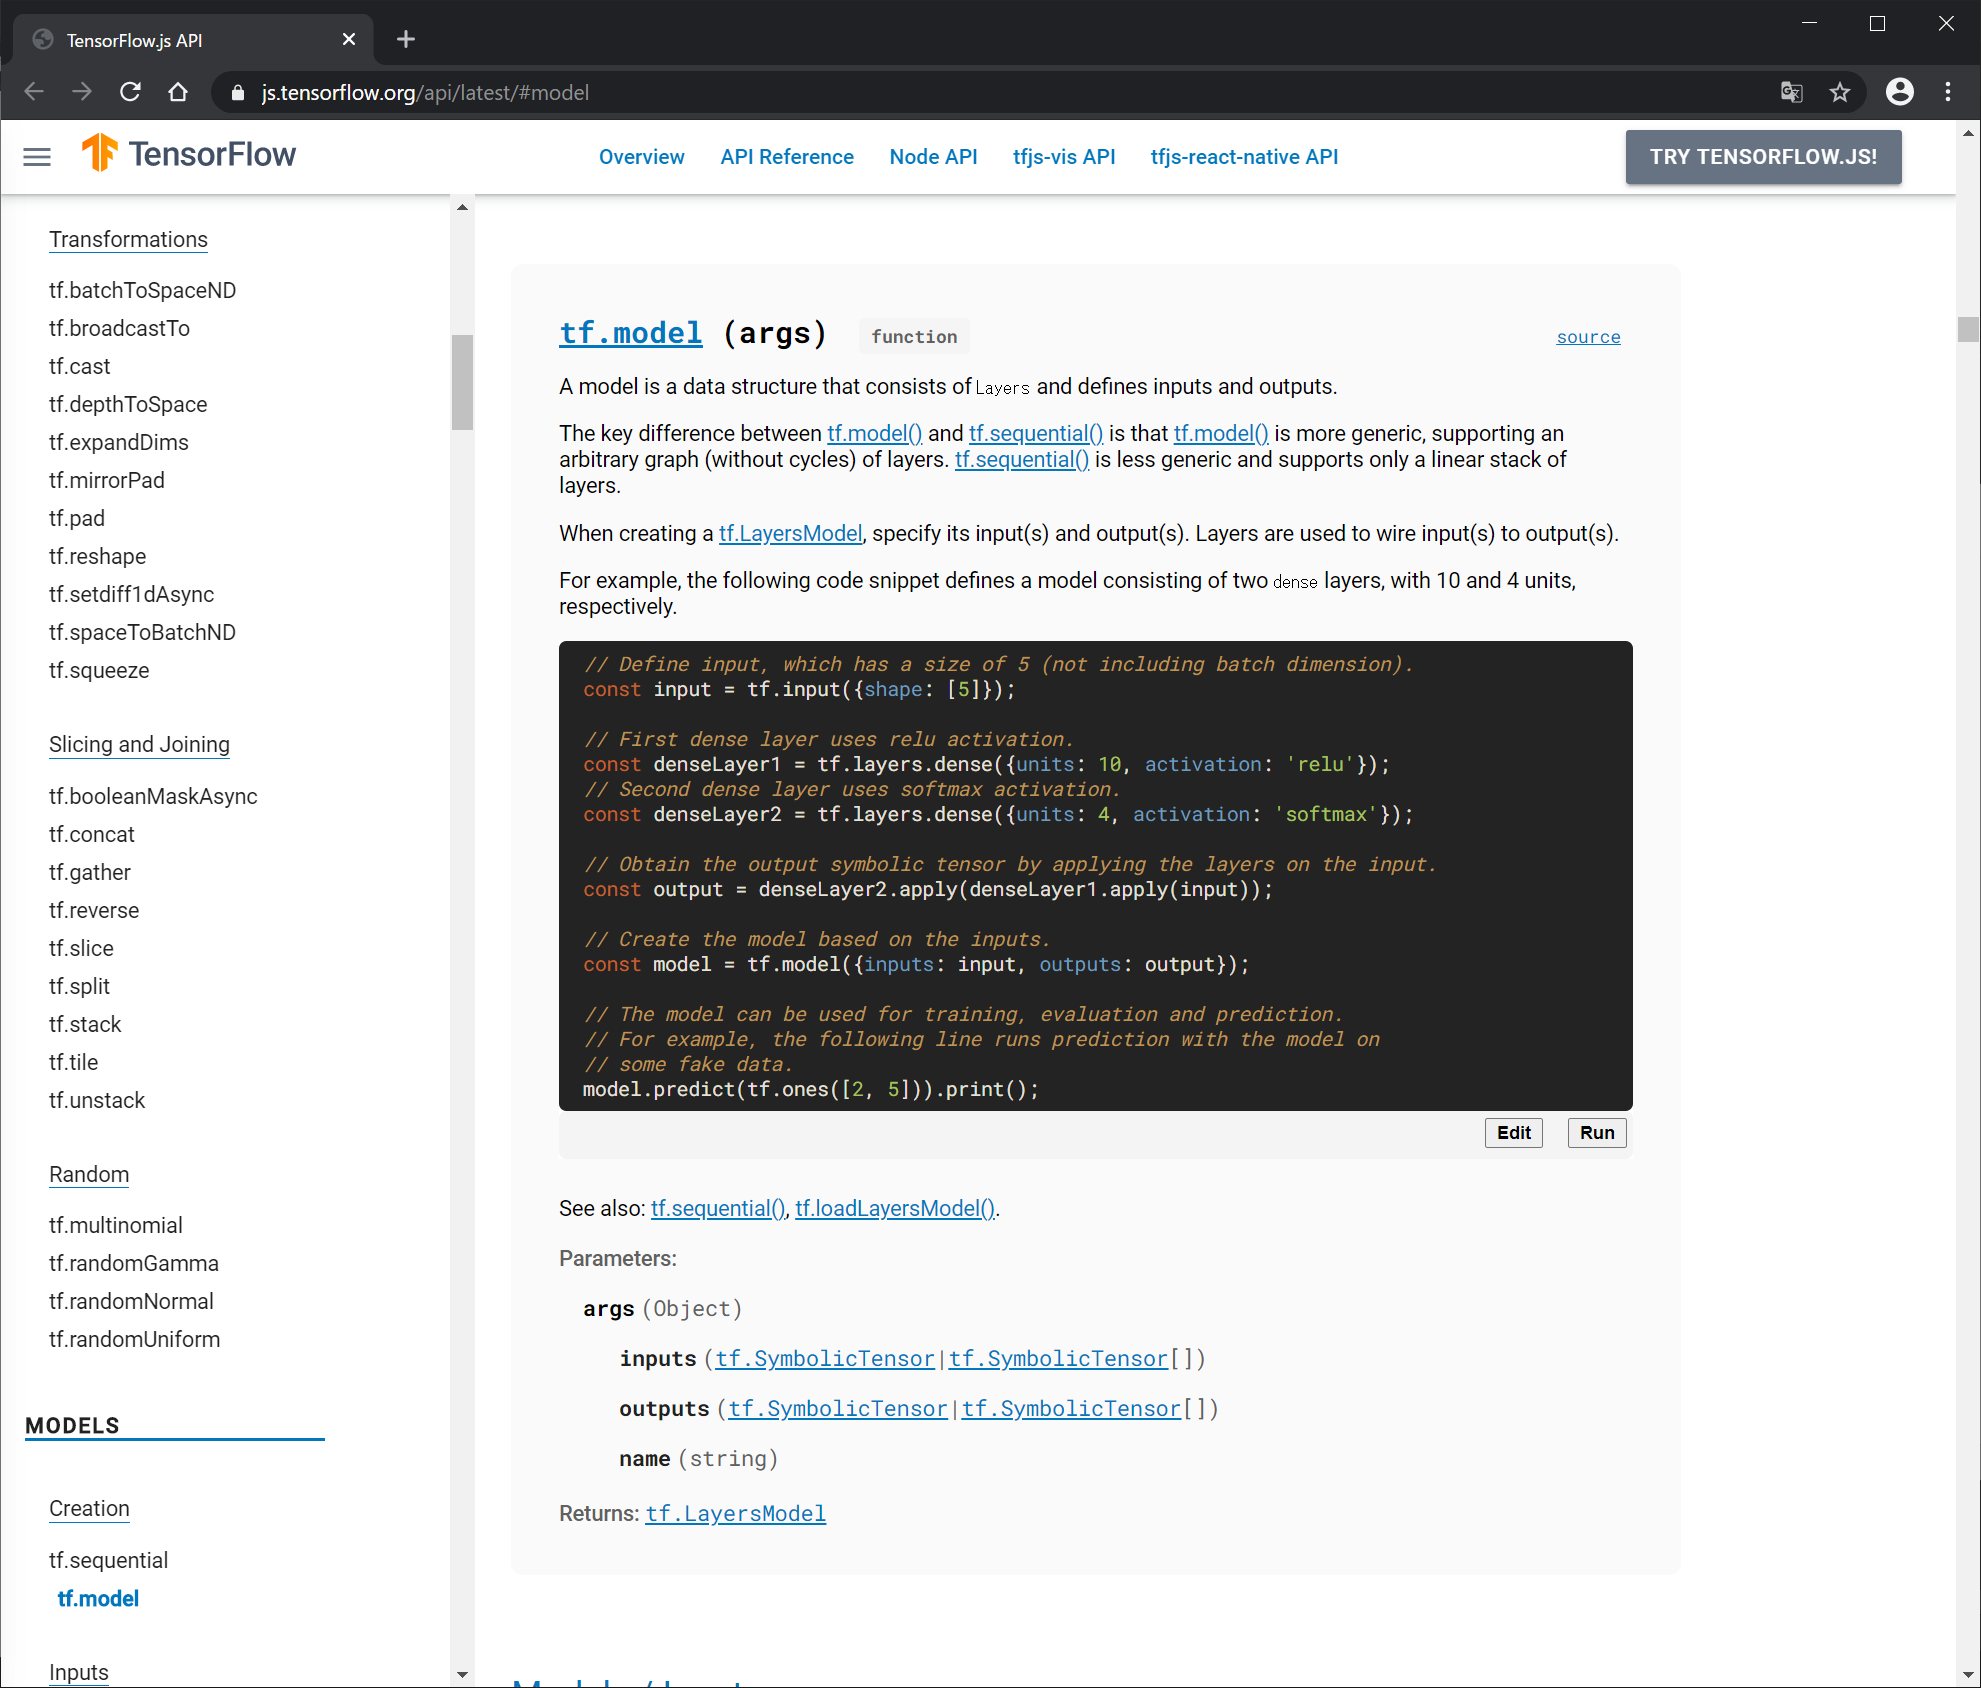
https://js.tensorflow.org/api/latest/#model

https://book.mynavi.jp/manatee/detail/id=99768

https://www.petitmonte.com/python/tensorflow_js_hello_world.html
TensorFlow.jsのHello World [WebでAIモデルを実行する]
20180824
→model.execute をalertで表示している。tf.tidy()関数はメモリリーク対策なので気にせずコピペでよさそう。
     // tf.tidyはメモリリークを回避する為に使用する定型メソッドです。
     z = tf.tidy(function(){
       // モデルの推論
       return model.execute({"X/Placeholder": tf.scalar(5, 'int32')}).dataSync();
     })

     alert(z)
https://stackoverflow.com/questions/63985396/what-do-i-use-instead-of-tensor-datasync-to-get-the-predicted-value-in-tensorf
tf.dataSync()
jQuery
https://webllica.com/jquery-innerhtml-edit-get-add-del/
ボタンクリックでテキスト書き換え
document.getElementById(“”)
innerHTML()
ローカルでTensorFlow.jsを動かして特定の画像001.jpgを推定する流れ
- pipenv install tensorflowjs でtensorflowjsをインストール
- pipenv shell
- LoabでエクスポートされたモデルTensorFlow 1.15 SavedModelをtfjs_graph_model 形式に変換する
- tfjs_graph_model 形式のモデルのファイル群を/tfjs_model/ フォルダに保存する
- 具体的には、tensorflowjs_wizard により、対話的に、tf_saved_modelからtfjs_graph_modelへのconversionを実行
- nvm-windowsのインストールとnpmのインストール
- yarnのインストール
- yarn add @tensorflow/tfjs
- VisualStudioCodeの以下のextensionをインストール, Debugger for Chrome, Live Server, 必要に応じてESLint, HTMLHint, IntelliSense for CSS class name in HTML
- test.htmlの作成
- リンゴの画像を001.jpgという名前で保存
test.html 訂正中
<!DOCTYPE html>
<html lang="en">
  <head>
    <title>Test TensorFlow.js</title>
  </head>

  <body>
    <img id="img" src="001.jpg"></img>
    <p id="result" style="font-size: 20pt;"></p>

    <script src="https://cdn.jsdelivr.net/npm/@tensorflow/tfjs/dist/tf.min.js"></script>

    <script>
      "use strict";
      console.log(tf.version)
      tf.loadLayersModel("./tfjs_model/model.json").then(model => {
      // tf.loadLayersModel("tfjs_model/model.json").then(model => {
        console.log(model.input.shape);
        const MODEL_HEIGHT  = model.input.shape[1];
        const MODEL_WIDTH   = model.input.shape[2];
        const MODEL_CHANNEL = model.input.shape[3];

        /* Read image and convert into tensor */
        const img_org = document.getElementById('img');
        let inputTensor = tf.browser.fromPixels(img_org, 3);  // get rgb (without alpha)

        /* Resize to model input size (28x28) */
        inputTensor = inputTensor.resizeBilinear([MODEL_HEIGHT, MODEL_WIDTH])

        /* Convert to grayscale (keep dimension(HWC))*/
        inputTensor = inputTensor.mean(2, true);

        /* Reverse black and white */
        inputTensor = tf.sub(255, inputTensor);

        /* 0.0 - 1.0 */
        inputTensor = inputTensor.cast("float32").div(tf.scalar(255));

        /* expand dimension (HWC ->  NHWC) */
        inputTensor = inputTensor.expandDims();

        /* Inference */
        // scores = model.execute(inputTensor, "output_scores");
        const scores = model.predict(inputTensor).dataSync();

        /* Post process */
        const maxScoreIndex = tf.argMax(scores).arraySync();

        /* Display result */
        console.log(scores);
        document.getElementById("result").innerHTML = "Number: " + maxScoreIndex + " (" + scores[maxScoreIndex].toFixed(3) + ")";

      });
    </script>
  </body>
</html>
https://codeaid.jp/vscode-js-debug/
Visual Studio CodeでJavaScriptのデバッグ方法
2020年3月5日
Vscodeの拡張機能で
- Debugger for Chrome
- Live Server
をインストール
webpack
https://ics.media/entry/12140/
最新版で学ぶwebpack 5入門
JavaScriptのモジュールバンドラ
2020年10月12日 メンテナンス済み / 株式会社ICS 池田 泰延
index.html 変更中
original code from https://qiita.com/iwatake2222/items/0092b4b95ed2bc50c9ce
<!DOCTYPE html>
<html lang="en">
<!-- original code from https://qiita.com/iwatake2222/items/0092b4b95ed2bc50c9ce -->
  <head>
    <title>Test TensorFlow.js</title>
  </head>

  <body>
    <video id="video"></video>
    <canvas id="canvas"></canvas>
    <span id="result" style="font-size: 48pt;"></span>
    <p id="time"></p>

    <script src="https://cdn.jsdelivr.net/npm/@tensorflow/tfjs/dist/tf.min.js"></script>

    <script>
      "use strict";
      console.log(tf.version)

      // Parameters
      const CANVAS_SIZE = [300, 300];
      const TARGET_AREA = [0.25, 0.25, 0.75, 0.75]; // y1, x1, y2, x2
      const WEBCAM_CONFIG = {

      // Parameters
      const CANVAS_SIZE = [300, 300];
      const TARGET_AREA = [0.25, 0.25, 0.75, 0.75]; // y1, x1, y2, x2
      const WEBCAM_CONFIG = {facingMode: "environment"};
      let   MODEL_SIZE = [-1, -1, -1, -1]; // NHWC. get from model

      async function initCam() {
        // const videoElement = document.createElement("video");
        try {
          const videoElement = document.getElementById("video")
          videoElement.width = CANVAS_SIZE[0];
          videoElement.height = CANVAS_SIZE[1];
          const cam = await tf.data.webcam(videoElement, WEBCAM_CONFIG);
          return cam;
        } catch (e) {
          alert("[initCam] failed");
          alert(e.message);
          return null;
        }
      }

      async function initModel() {
        try {
          let model = await tf.loadLayersModel("./conv_mnist_tfjs/model.json");
          MODEL_SIZE = model.input.shape;
          return model;
        } catch (e) {
          try {
            alert("[initModel] failed to open local model. try to load from server");
            let model = await tf.loadLayersModel("https://iwatake2222.github.io/tfjs_study/mnist/conv_mnist_tfjs/model.json");
            MODEL_SIZE = model.input.shape;
            return model;
          } catch (e) {
            alert("[initModel] failed");
            alert(e.message);
            return null;
          }
        }
      }

      async function getImage(cam) {
        const imgCam = await cam.capture(); /* [300x300x3] tensor */

        const processedImg = tf.tidy(() => {
          /* Crop center and Resize to model input size (28x28) */
          /* need expandDims and squeeze to ficropAndResize */
          let img = tf.image.cropAndResize(imgCam.expandDims(), [TARGET_AREA], [0], [MODEL_SIZE[1], MODEL_SIZE[2]]).squeeze()

          /* Convert to grayscale (keep dimension(HWC))*/
          img = img.mean(2, true);

          /* Reverse black and white */
          img = tf.sub(tf.scalar(255), img);

          // /* 0.0 - 1.0 */
          // img = img.cast("float32").div(tf.scalar(255));
          /* Rough binarization */
          img = img.cast("float32").div(tf.scalar(128));  /* 0.0 - 2.0 */
          img = img.clipByValue(0.5, 1.5).sub(0.5); /* 0.5 - 1.5 -> 0.0 - 1.0 */

          return img;
        });
        imgCam.dispose();

        tf.browser.toPixels(processedImg.resizeBilinear([128, 128]), document.getElementById("canvas"));

        /* expand dimension (HWC ->  NHWC) */
        return processedImg.expandDims();
      }

      (async function() {
        const cam = await initCam();
        const model = await initModel();
        if (cam == null || model == null) {
          document.getElementById("result").innerHTML = "init failed"
          return;
        }

        while(1) {
          /* Get image and pre process */
          const t0 = performance.now();
          const inputTensor = await getImage(cam);

          /* Inference */
          const t1 = performance.now();
          const scores = await model.predict(inputTensor).data();
          inputTensor.dispose();

          /* Post process */
          const t2 = performance.now();
          const maxScoreIndex = await tf.argMax(scores).array();

          /* Display result */
          const t3 = performance.now();
          console.log(scores);
          document.getElementById("result").innerHTML = "Num: " + maxScoreIndex + " (" + scores[maxScoreIndex].toFixed(3) + ")";

          const t4 = performance.now();
          document.getElementById("time").innerHTML = `Time[ms]: Total = ${(t4 - t0).toFixed(3)},
          PreProcess = ${(t1 - t0).toFixed(3)},
          Inference = ${(t2 - t1).toFixed(3)},
          PostProcess = ${(t3 - t2).toFixed(3)}`;
        }
      }());

    </script>
  </body>
</html>
Lobeで出力したモデルをTensorFlow.js形式に変換してNetlifyにデプロイする流れ
開発環境
Windows10 Pro
VisualStudioCode 1.51.0
Git for Windows v2.29.2
python 3.6
pip 20.2.4
pipenv 2020.11.4

(仮想環境)
python 3.6
TensorFlow 1.15.3
pillow 7.2.0
autopep8
flake8
mypy

nvm-windows
Node.js
yarn
- pipenv install tensorflowjs でtensorflowjsをインストール
- pipenv shell
- Loabでエクスポートされたモデル
- TensorFlow 1.15 SavedModelをtfjs_graph_model 形式に変換する
- 具体的には、tensorflowjs_wizard により、対話的に、tf_saved_modelからtfjs_graph_modelへのconversionを実行
Express
https://prog-8.com/docs/nodejs-new-application
Node.jsの新規アプリケーションを作ろう!
Glitch
https://qiita.com/yonedaco/items/569bcc442872a1f9a03d
@yonedaco
2020年03月18日に更新
[Node.js] 無料で簡単にウェブアプリを公開できるサービス「Glitch」を使ってみた!
リンク

